 Notch
- Difficulty
- Intermediate
- Time
- 6.5–12.5 hours
- Cost
- $$$
About this build
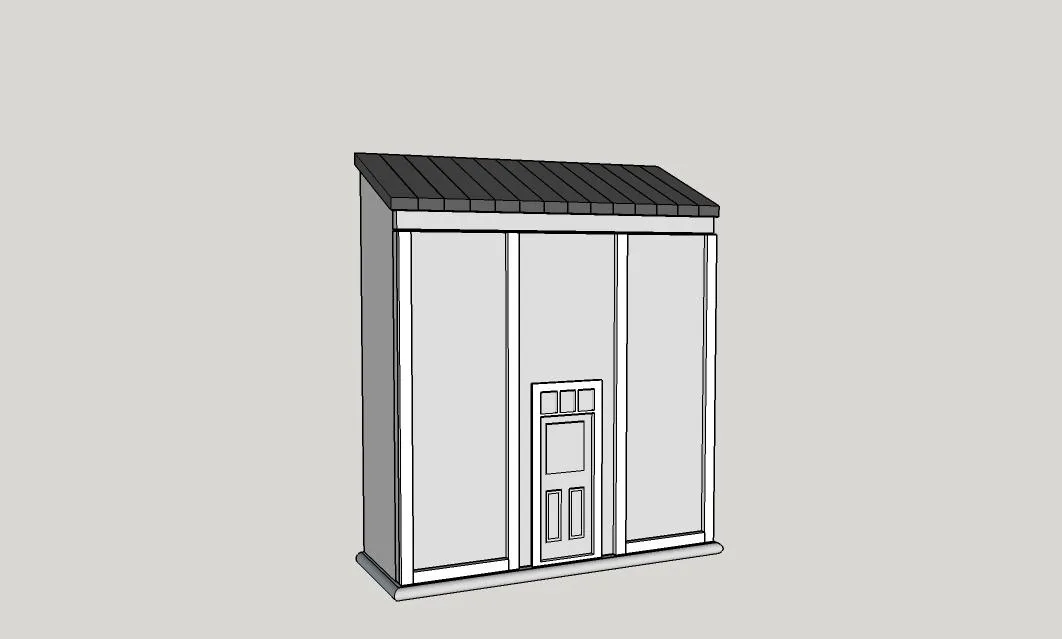
We all know how much little girls love to play dress up and have tea parties, but she needs a place to store all her most precious jewels when she has to take them off! This dollhouse jewelry cabinet is the perfect place to store her jewelry and looks so cute too!
Tools
Essential
- Brad Nailer
- Circular Saw
- Drill / Driver
- Jigsaw
- Miter Saw
- Pocket Hole Jig
- Random Orbit Sander
Optional / nice to have
- Bar / Pipe Clamps
- Tape Measure
Materials
| Item | Qty |
|---|---|
| Plywood, 1/2" Thick Quarter Sheet | 1 board |
| Poplar project board 6" wide, 1/2" Thick 48" | 1 board |
| Poplar project board - 6" wide, 1/4" Thick 36" | 1 board |
| Molding of your choice, 1/4" Thick 96" | 1 board |
| Package Kreg screws 1" | 1 each |
| Pkgs of small hinges | 2 each |
| 3/4" brad nails | 1 each |
| Dollhouse windows pre-made | 5 each |
| Dollhouse door pre-made | 1 each |
| Wooden pegs pre-made | 8 each |
| Fabric of your choice | 1 each |
| Door knobs pre-made | 2 each |
| Magnet and nail to keep door closed | 1 each |
| Sets of 1" utility hinges | 2 each |
Overall cost: $$$. Lumber prices vary by region, species, and season, so we give a band rather than a figure we would only be pretending to know.
Cut list
| Part | Qty | T × W × L |
|---|---|---|
| Sides | 3 | 1/2" × 4" × 17" |
| Bottom | 1 | 1/2" × 5" × 15" |
| Top, right roof support | 1 | 1/2" × 4" × 9" |
| Top, left roof support | 1 | 1/2" × 4" × 4" |
| Shelves | 2 | 1/2" × 4" × 4" |
| Back right | 1 | 1/2" × 9" × 17" |
| Back Left | 1 | 1/2" × 4" × 17" |
| Roof Slats | 15 | 1/2" × 1" × 6" |
| Left door | 1 | 1/2" × 5" × 14" |
| Right Door | 1 | 1/2" × 10" × 14" |
| Bottom molding | 2 | 1/4" × 1/2" × 5" |
| Bottom front molding | 1 | 1/4" × 1/2" × 15" |
| Top rail | 1 | 1/2" × 3/4" × 15" |
What to buy
Buy 7 boards at 8 ft.
1/2" × 10"
1 board
1/2" × 9"
1 board
1/2" × 5"
1 board
1/2" × 4"
1 board
1/2" × 1"
1 board
1/2" × 3/4"
1 board
1/4" × 1/2"
1 board
Assumes 8 ft stock, a 1/8" saw kerf, and buying each part at its own width. Change the board size or kerf on the full board plan →
Instructions
1Step 1
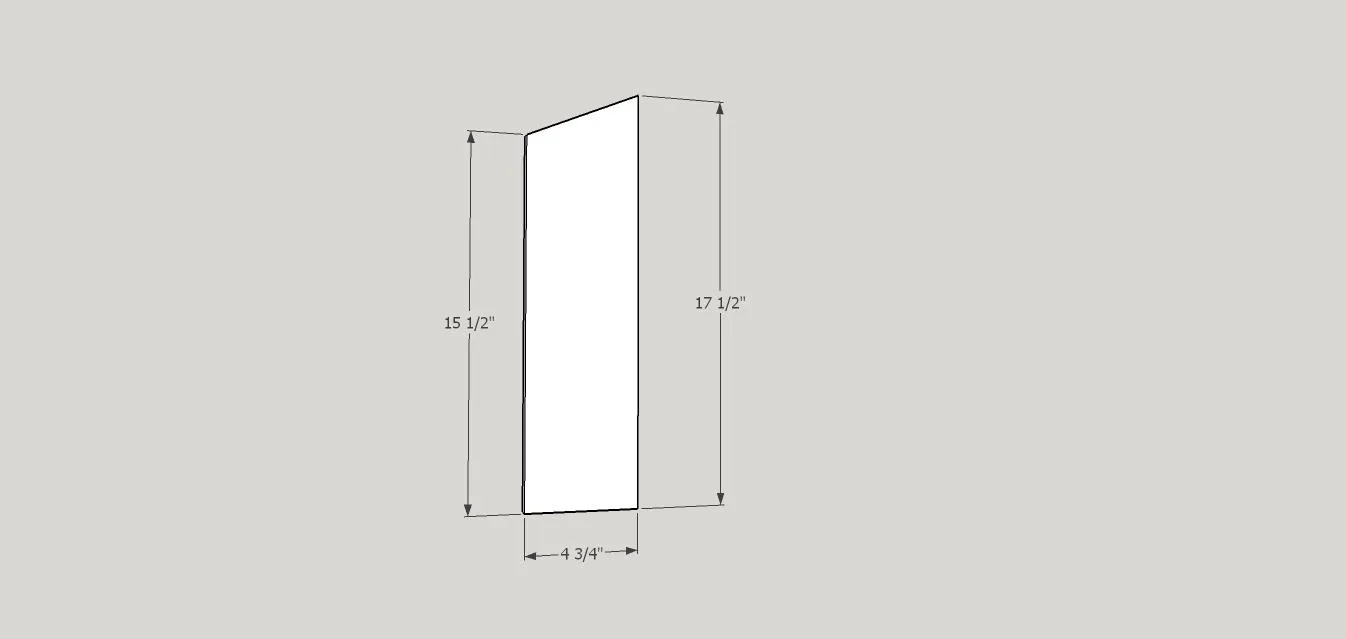
Start by cutting the sides and middle divider, they will all three be the same size, cut out of 1/2" plywood or mdf. I ripped 2 strips down the 4' side of the plywood to 4 3/4" with my Kreg Rip Cut, which happens to be more accurate than my table saw...don't even ask, it's a sensitive subject! Lol! Anyway, they are mitered at the top, 24 degrees off square. I used my miter saw to make the cuts like I would on a normal board once it was ripped down! Pocket holes will need to be drilled along the bottom of each of these boards at a depth of 1/2"! That will have them prepared to be attached a few steps from now!
2Step 2
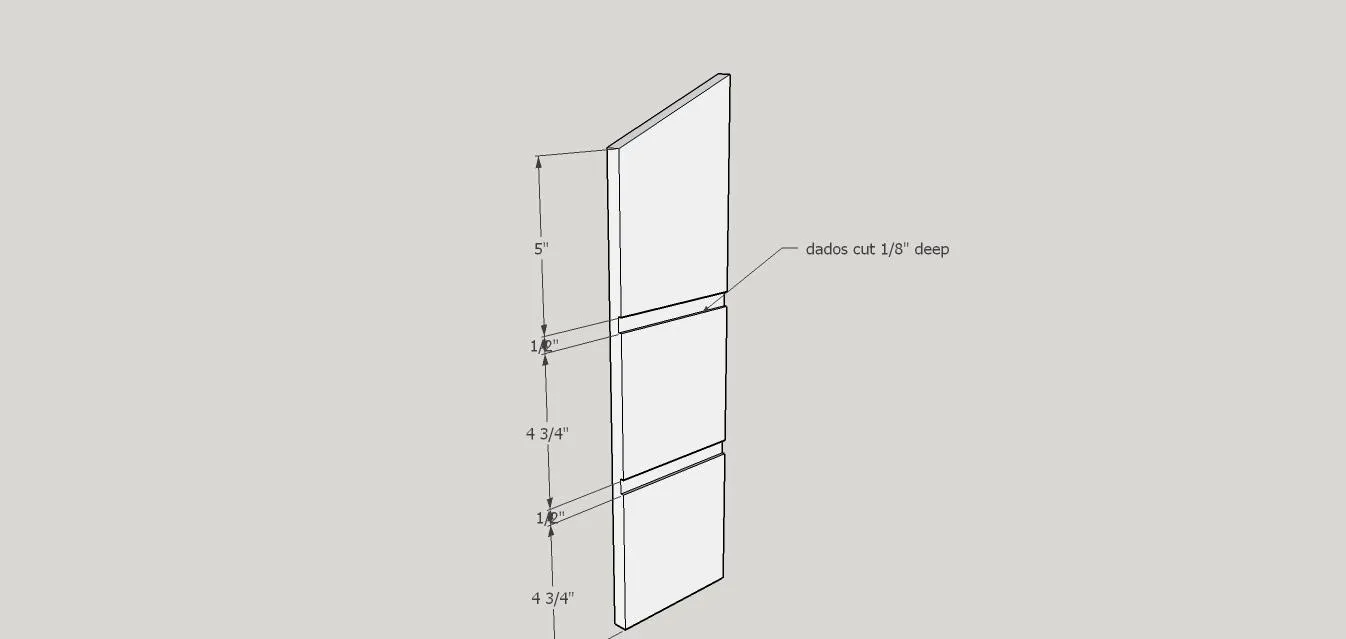
Two of the boards you cut in Step 1 will need dados cut into them! The jewelry cabinet has little shelves that are too small to attach with pocket holes so I cut dados to slide them into and keep them sturdy. I was able to use my Kreg Accucut to do this, so even if you don't have a table saw, this is easily and inexpensively possible! See my blog for pictures of the little trick that I did that made it so easy to do! You could also just brad nail the shelves in, it will be fine as long as you use plenty of glue.
3Step 3
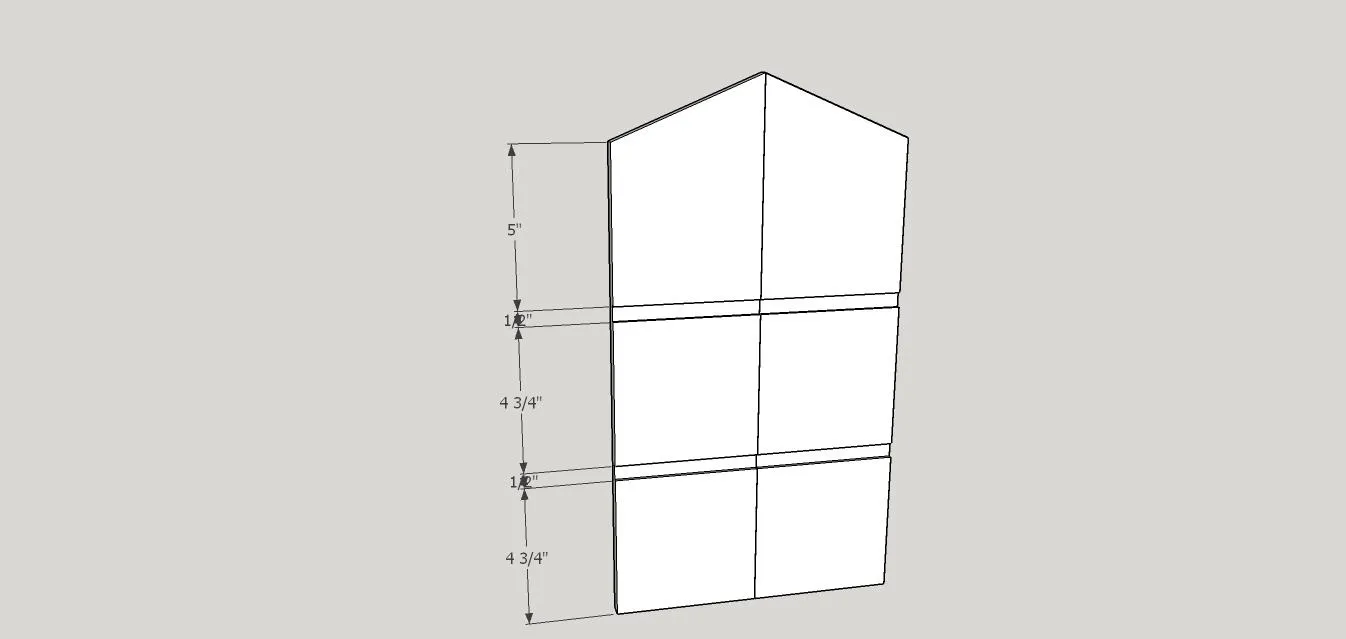
If you cut the boards at the same time back to back like this it definitely helps keep them lined up properly!
4Step 4
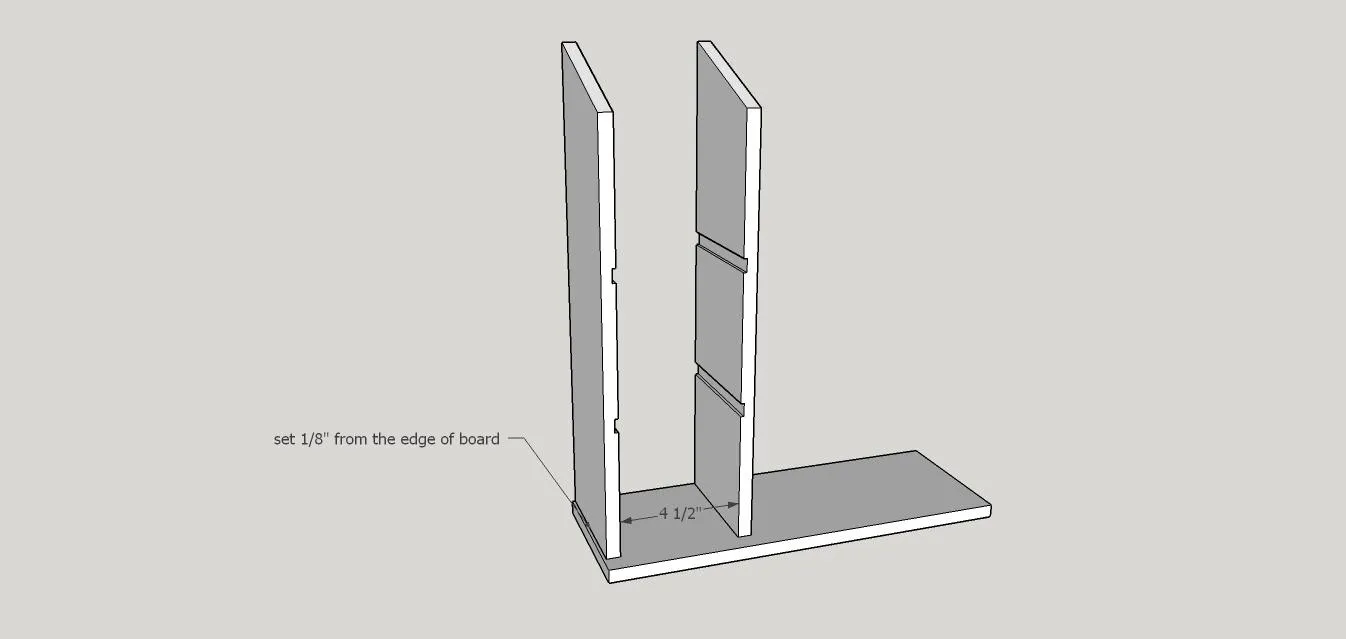
Attach the side boards to the bottom board. Using the pocket holes you drilled in step 1, you will use wood glue and 1" screws to attach! I moved the outside board in by 1/8" as shown in the picture! And just out of learning from my mistakes, place the pocket holes on the middle divider on the opposite side that you made the dados on, so you can easily get your drill in there to screw in the screws! I placed mine to the inside(the same side as my dados and had a really rough time getting them in even with my 90 degree drill head!
5Step 5
Attach the other side board that you didn't cut dados into now. Again I inset the board by an 1/8 of an inch!
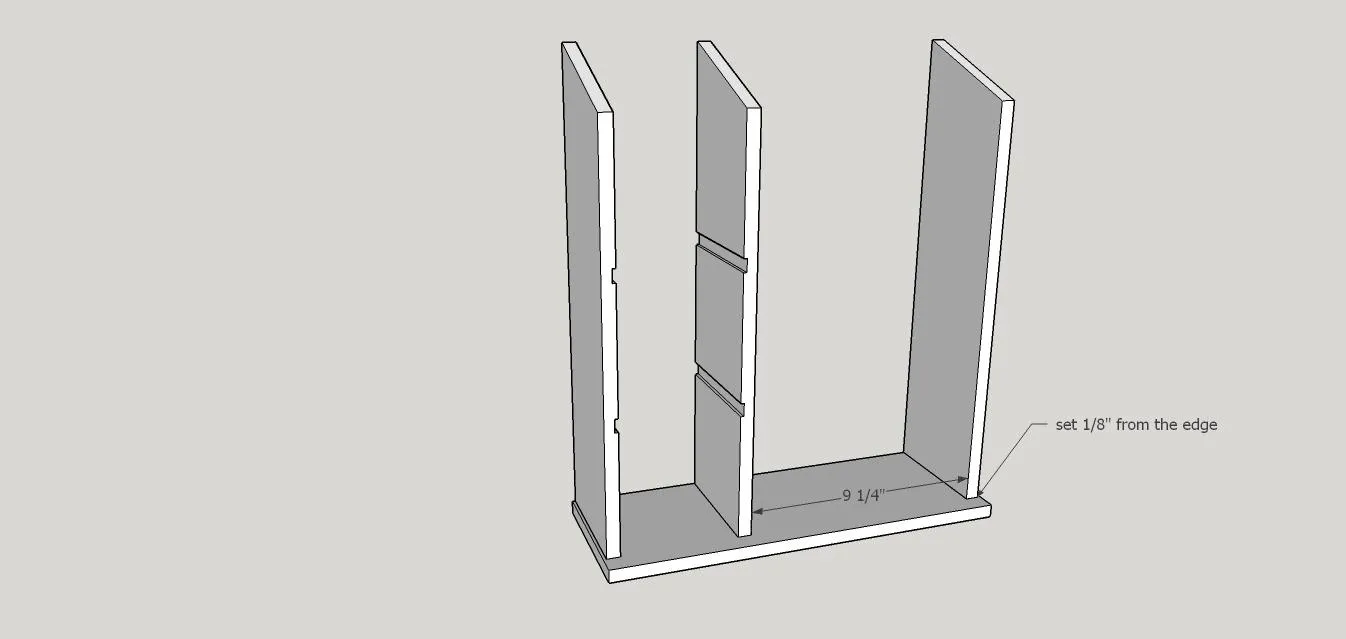
6Step 6
Next, you will need to cut the boards for the roof supports. Using the remaining pieces from the 'board' you ripped in step 1, I just cut it down to size with my miter saw. They are pocket holed at 1/2" with 1" screws as well and make sure to use wood glue.
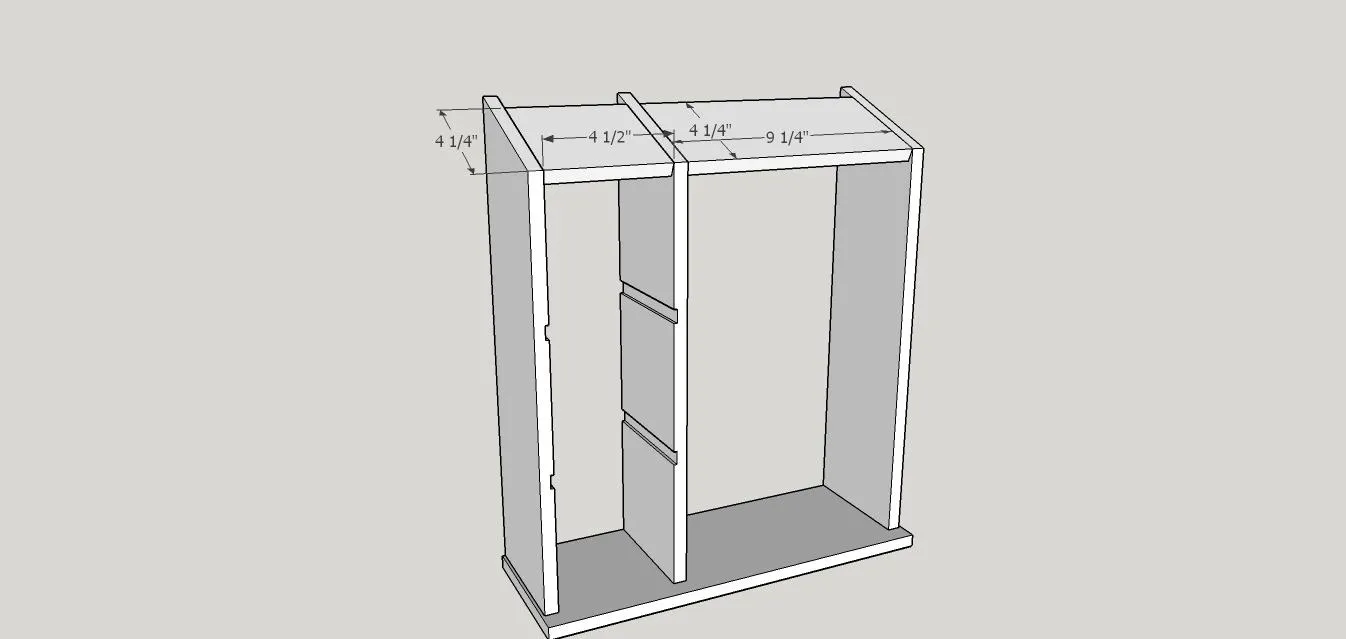
7Step 7
Cut shelves to fit the dados you cut in step 2! Use glue to secure them, if they aren't a really tight fit, you can brad nail them just for extra security! NOTE: The measurement in the picture is wrong! The shelves are not 4" deep, they will be 4 1/4" deep, the cut list is correct, the picture here just isn't! Sorry about that! :)
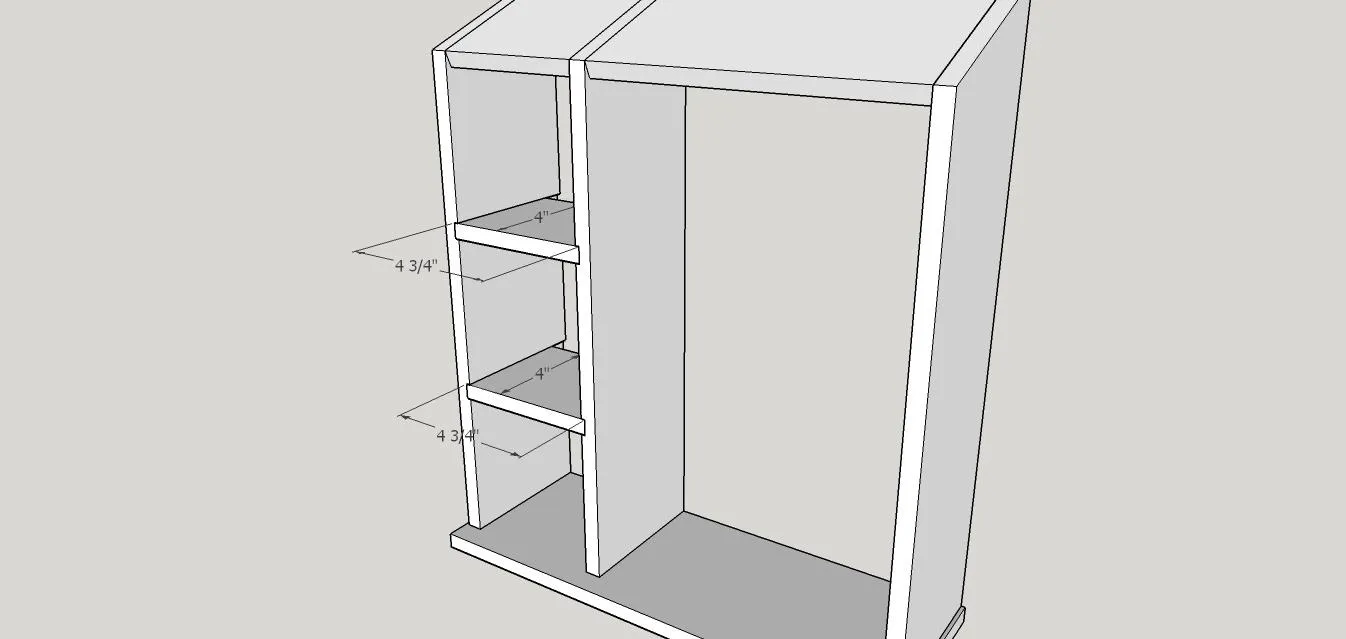
8Step 8
Cut the pieces to fit in the back of the cabinet. They fit inside...flush with the sides! I drilled the holes for my pegs at this time and I covered these boards in fabric before screwing them in, head to my blog to see more of that in depth! Use 1/2" pocket holes and 1" screws with ample glue to attach them. NOTE: I didn't screw these in until after I painted the main part of the dollhouse, it was easier to keep from painting them!
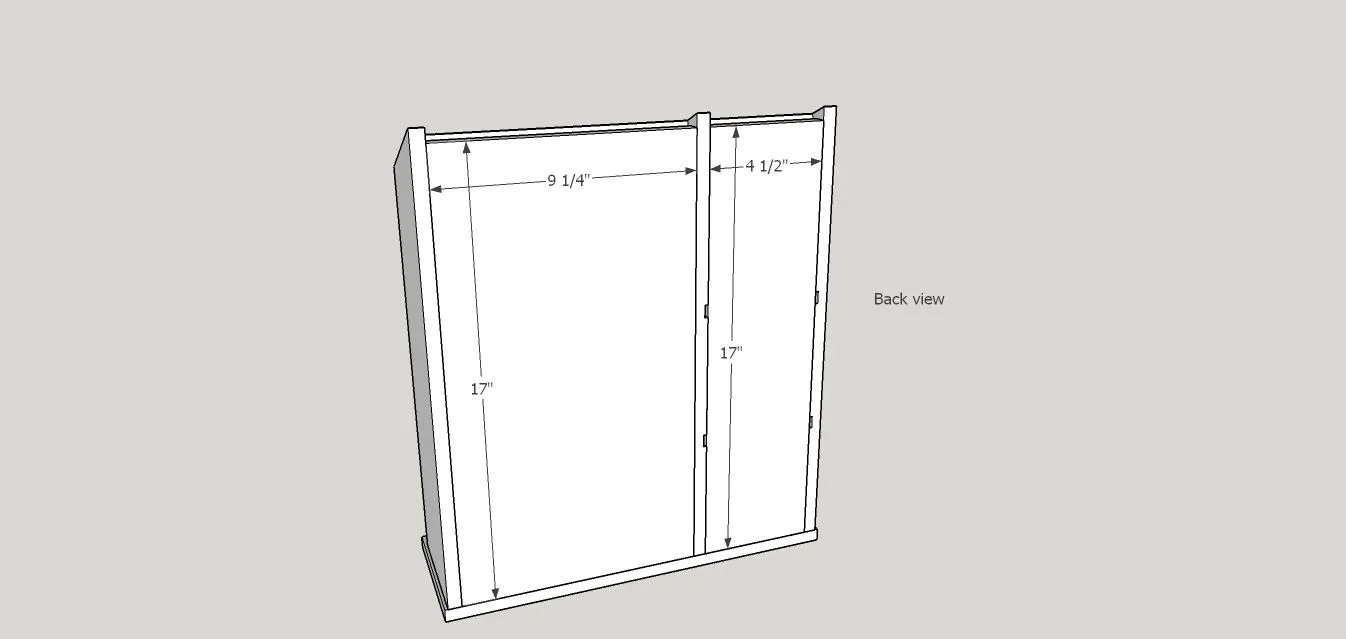
9Step 10
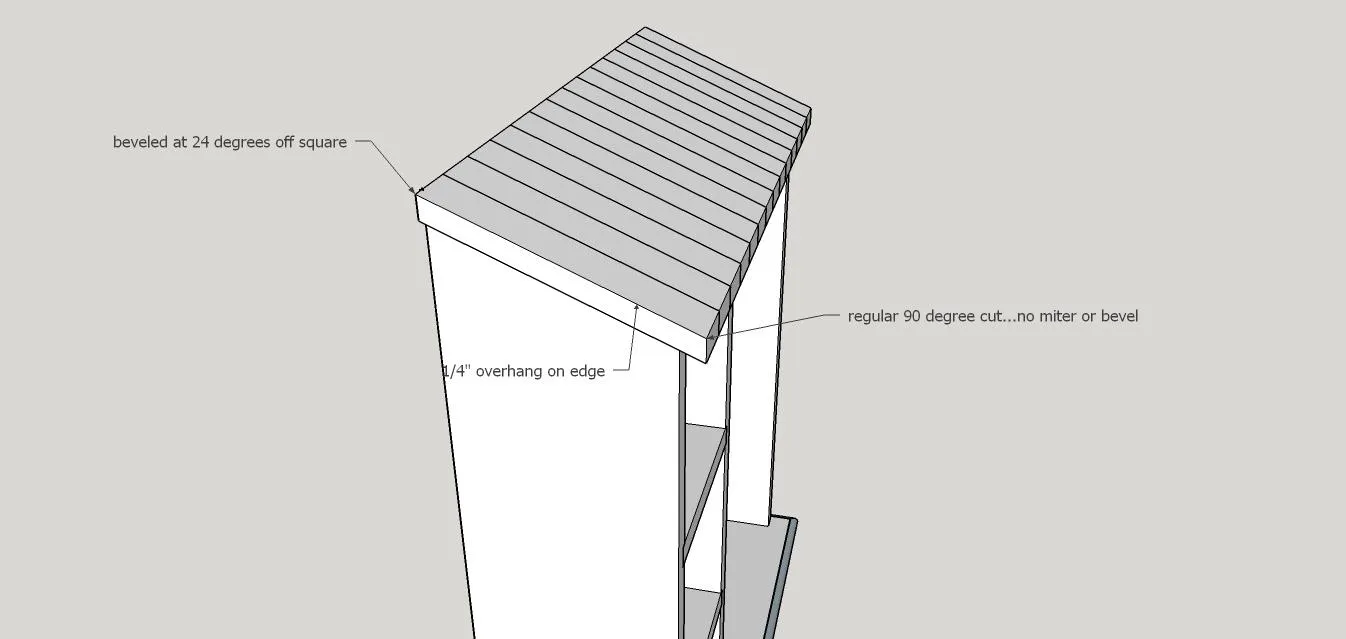
Ok, I hope that I will be able to word this without confusing anyone! Lol! I took the 1/2" poplar board listed in your materials and ripped it down to 1 1/8". I did this three times to get enough to make my boxes(later) and the roof! The roof boards are beveled at 24 degrees off square along the top, where it will meet the wall! Anyway, the boards for the roof in the picture are not rounded on the edges but as you can see in the photo of my cabinet, I did! It is up to you, I think it adds a little character but you can have straight roof boards if you would like! If you check out my blog post you can see how I used a sliver of a pvc pipe to trace and then just sanded them along the pencil line! Wasn't hard at all!
10Step 11
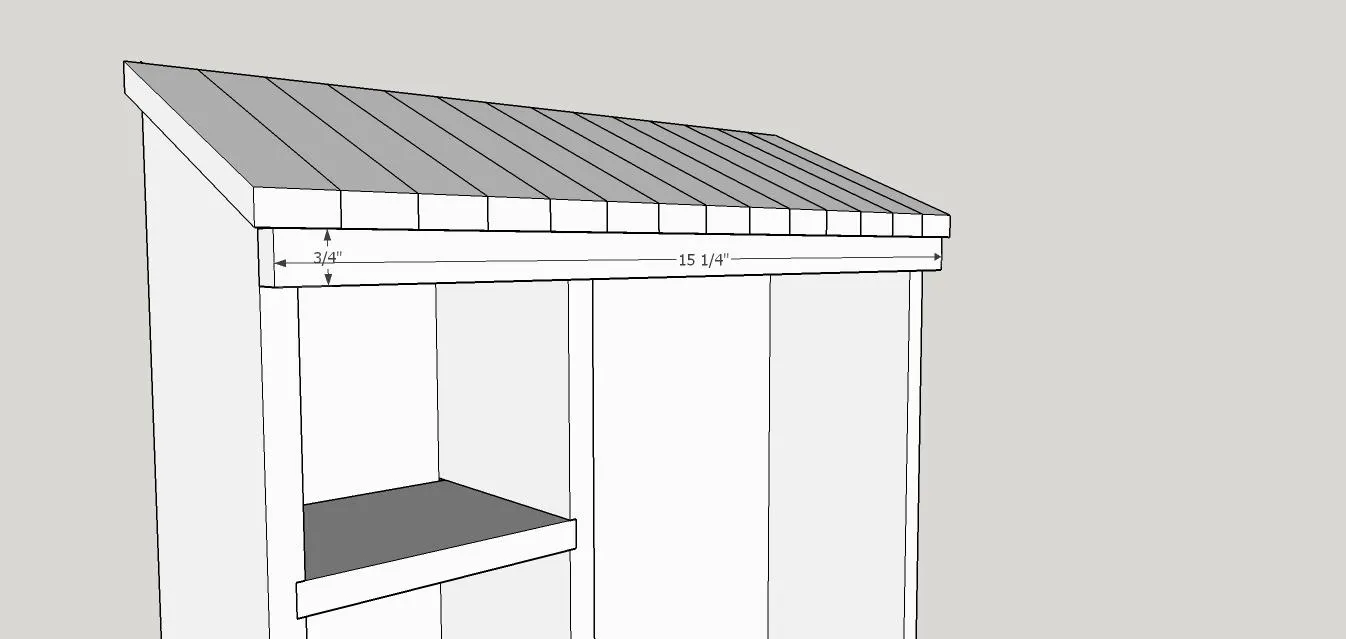
Add this small trim piece with glue and brad nails.
11Step 12
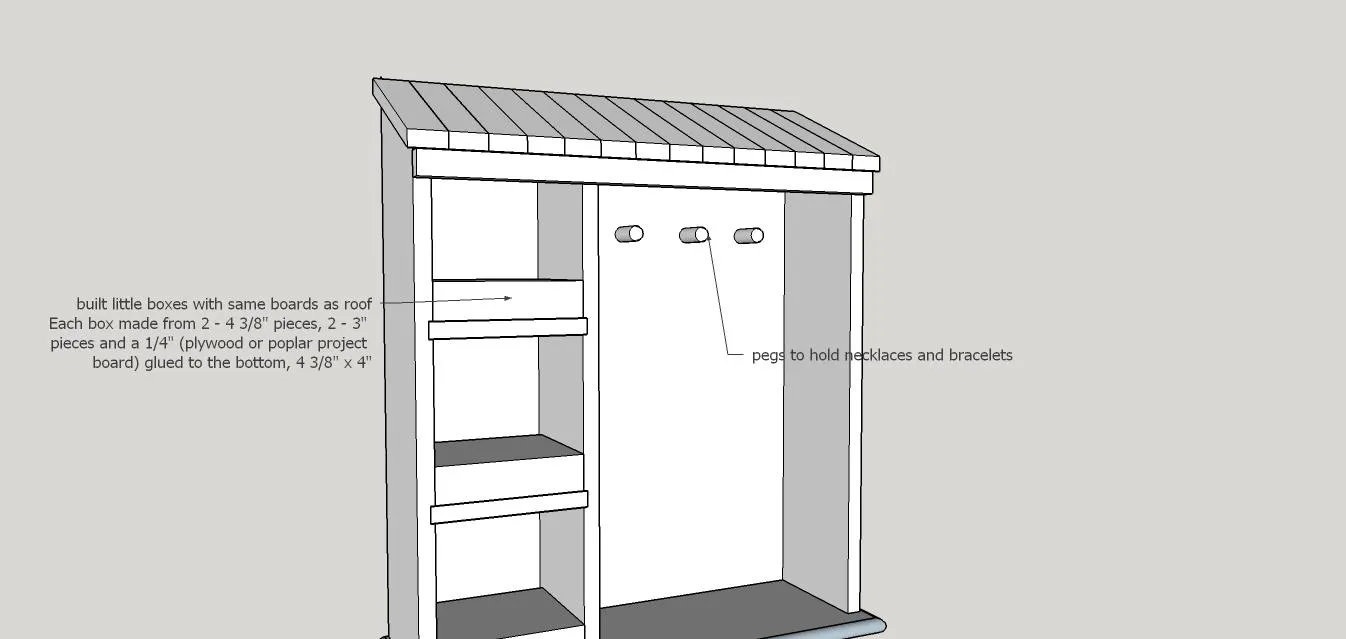
I made small boxes out of the same poplar boards that I used on the roof! They are so simple to make, just cut the boards, glue and brad nail! Viola! Then I cut some of the 1/4" poplar to size and glued and brad nailed it to the bottom of them...no the 1/4" board is not inset, it is on the bottom and shows before it's painted!
12Step 13
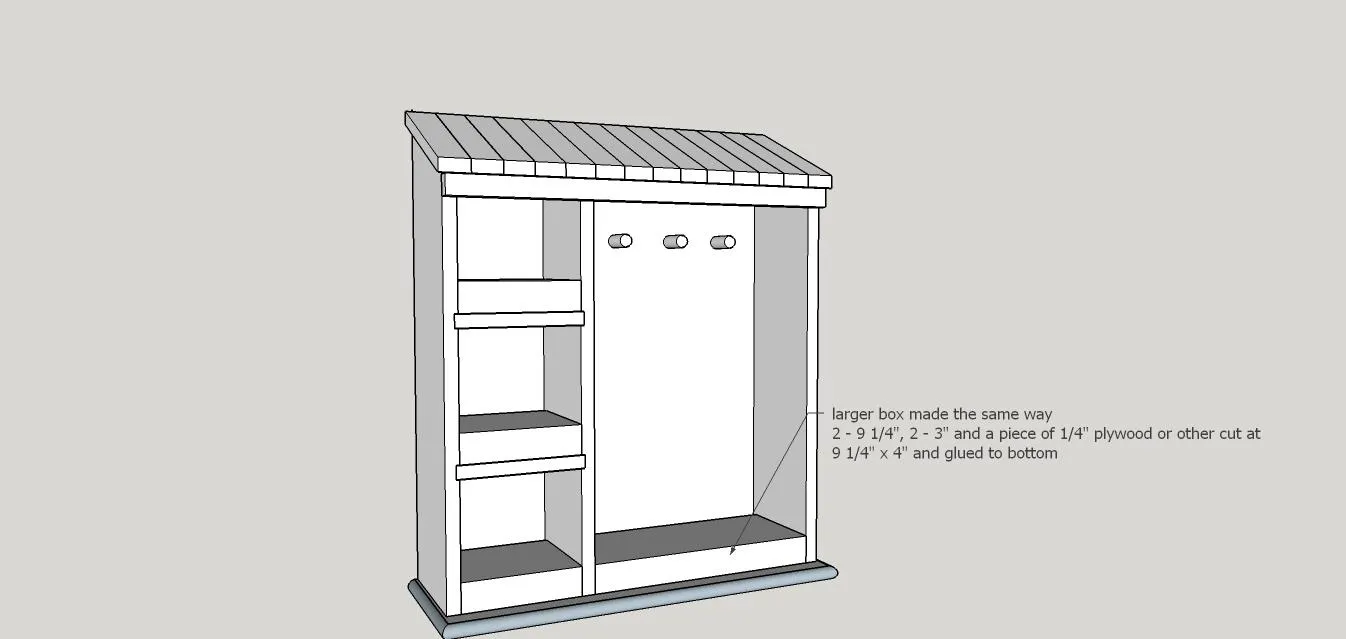
Made a little bit larger box for the larger area, same way as the previous ones!
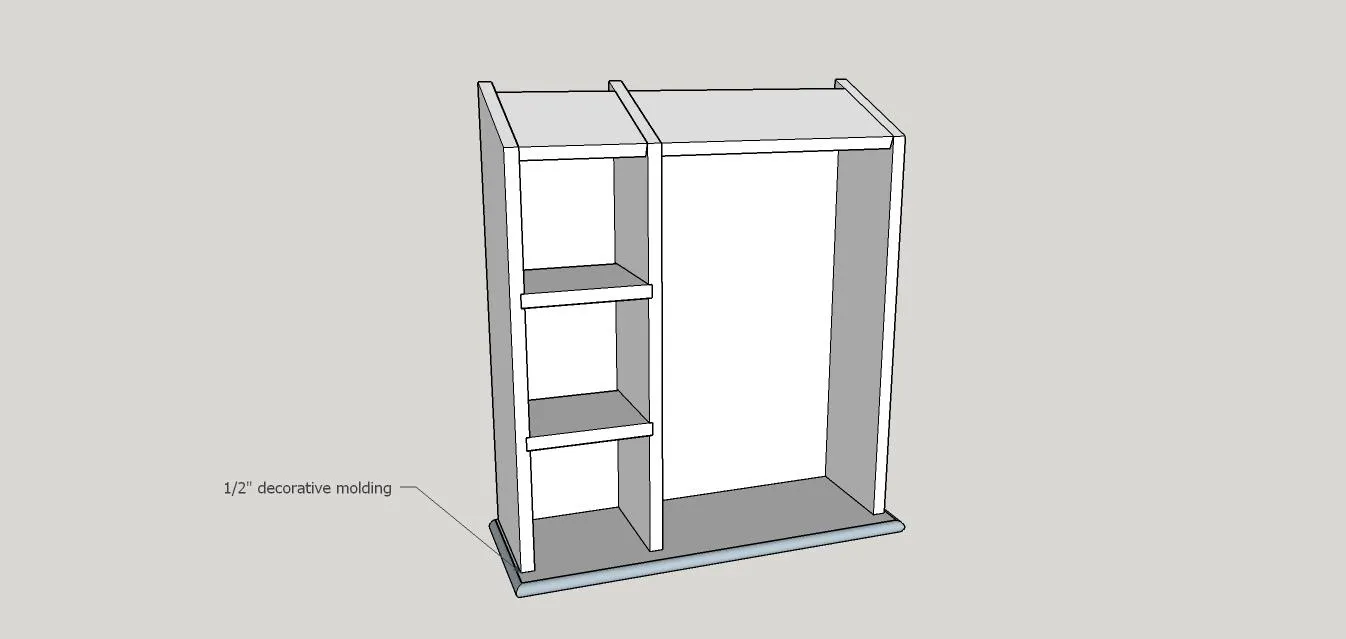
13Step 9
I went ahead and added the small molding around the bottom of the cabinet, just simply for added character and looks!
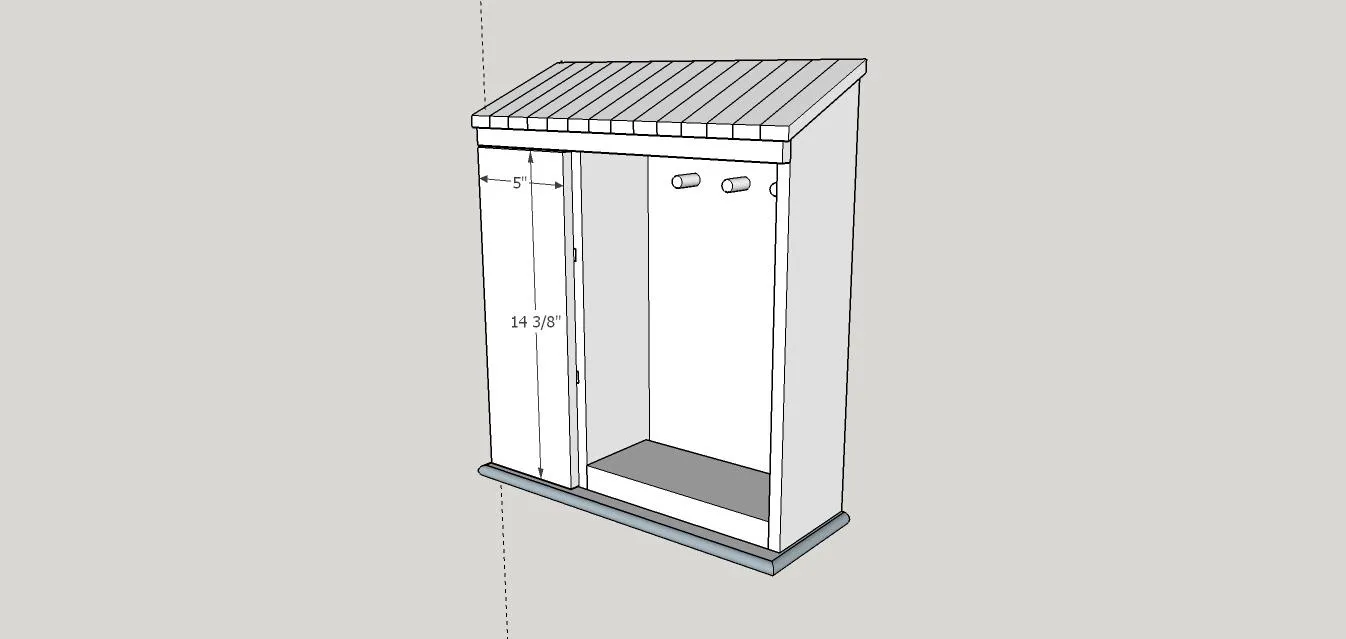
14Step 14
Next is cutting the wood for the doors! This is where it all starts coming together! I used a jigsaw to cut out the holes for my pre-made windows I bought.
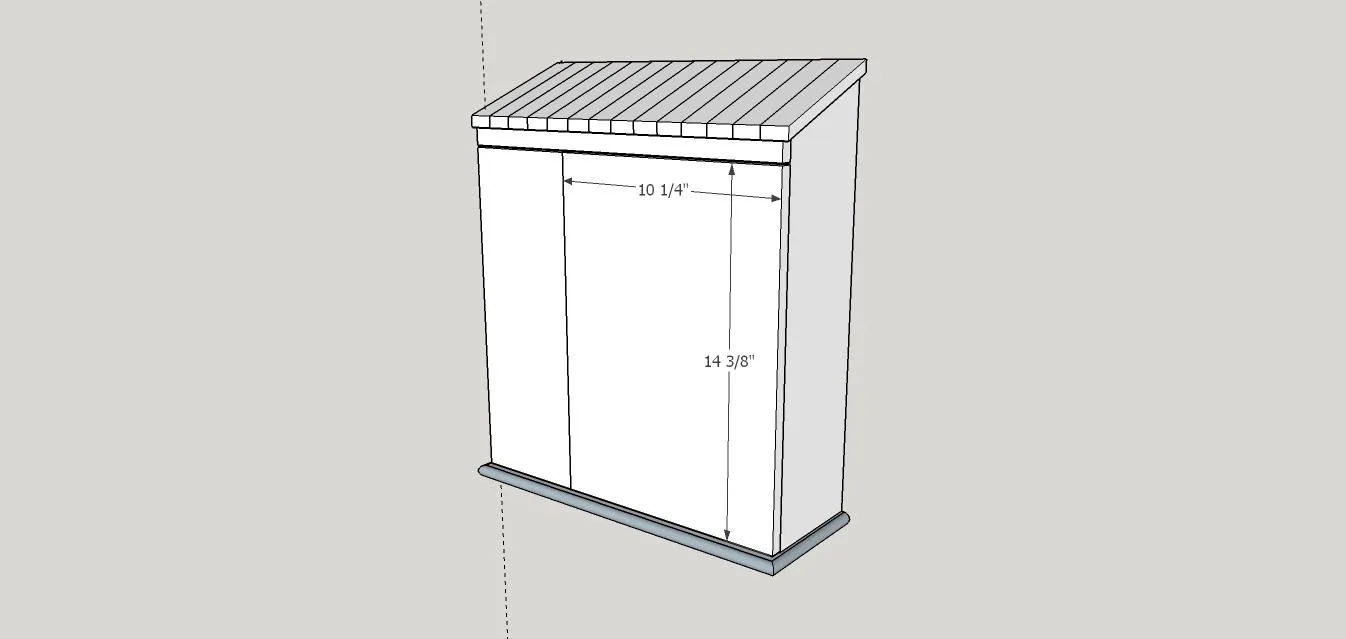
15Step 15
Other door going in! I just used small utility style hinges to attach them!
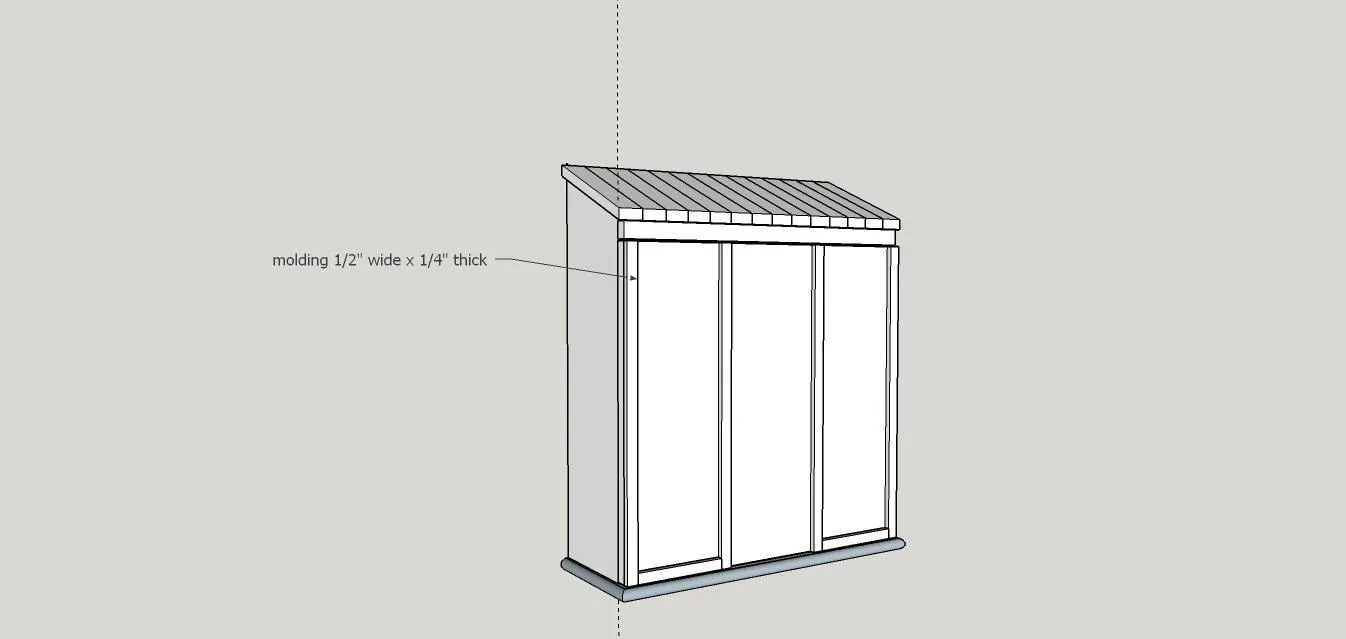
16Step 16
I added trim to the doors, using proper placement of the trim you are able to disguise the fact that there are two doors on the front, it just looks like a seamless front of a dollhouse! You could change this up though and do a myriad of things at this point!
17Step 17
Add your embellishments and paint or stain to your heart's delight! The colors I used were, SW Dorian Gray for the roof, SW Alabaster for the white trim and SW Repose Gray for the main part of the house! If you have any questions feel free to ask away!
Tags
- Bedroom
- Intermediate
Reviews & builds
No reviews yet
Sign in to review this plan or share your build.
No reviews yet. Be the first to build this.