 Notch
- Difficulty
- Intermediate
- Time
- 5.3–10 hours
- Cost
- $$
About this build
Easy to assemble dog bed frame. Built for small to medium size dogs. Bed is elevated 4 inches from the floor.
Tools
Essential
- Drill / Driver
- Jigsaw
- Miter Saw
- Pocket Hole Jig
- Random Orbit Sander
- Router
- Table Saw
Optional / nice to have
- Bar / Pipe Clamps
- Tape Measure
Materials
| Item | Qty |
|---|---|
| Plywood, 3/4" Thick 34" x 22" | 1 board |
| Board, 1x4 72" | 1 board |
| Board, 2x2 72" | 1 board |
| Board, 1x3 36" | 1 board |
| Right/Left bed frame handles | 2 each |
Overall cost: $$. Lumber prices vary by region, species, and season, so we give a band rather than a figure we would only be pretending to know.
Cut list
| Part | Qty | T × W × L |
|---|---|---|
| Plywood floor board | 1 | 3/4" × 23" × 34" |
| Head/Foot- boards | 2 | 1" × 4" × 32" |
| Legs | 4 | 2" × 2" × 12" |
| Front/Rear- frame boards | 2 | 2" × 2" × 32" |
| Side- frame boards | 2 | 2" × 2" × 21" |
| Side boards | 2 | 1" × 4" × 21" |
| Triangle support boards | 8 | 1" × 3" × 6" |
| Center bed frame board | 1 | 1" × 3" × 21" |
What to buy
Buy 6 boards at 8 ft.
2" × 2"
2 boards
1" × 4"
2 boards
1" × 3"
1 board
3/4" × 23"
1 board
Assumes 8 ft stock, a 1/8" saw kerf, and buying each part at its own width. Change the board size or kerf on the full board plan →
Instructions
1Measure twice- cut once
Measure and cut all boards to plan lengths.
2Drill pocket holes
Using your Kreg Pocket Hole Jig- drill the pocket holes for every board in the plan specifications.
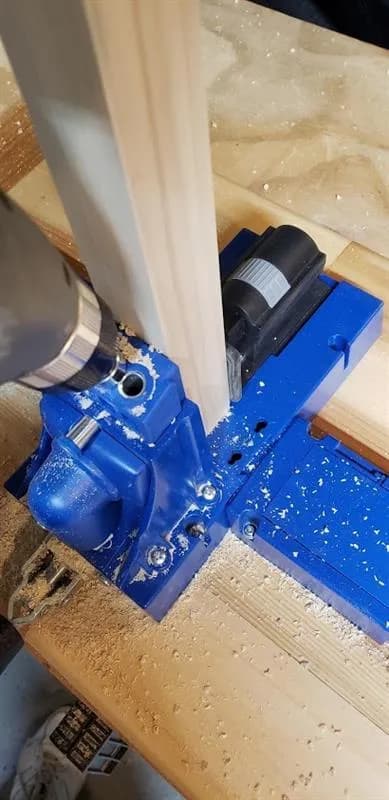
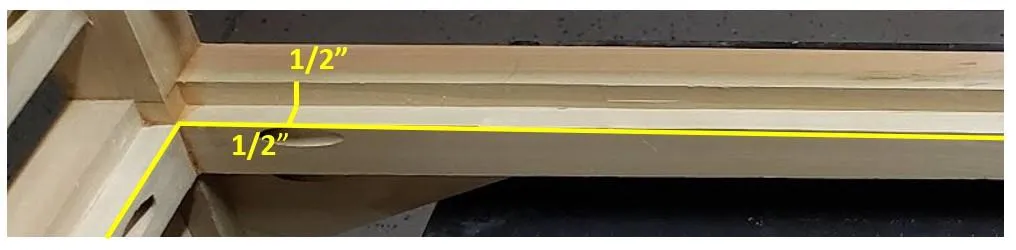
3Router the bed frame boards
Using a router and a 1/2" straight cut router bit, router the inside edge of each of the bed frame support boards. This should leave a 1/2" tall by 1/2" ledge for the bed floor board to rest on.
4Sand all boards
Using my corded Bosch hand sander to sand each board free of imperfections and splintered wood.
5Front bed board
Measure and draw the cut line for the front bed board. Use a jig-saw to make this cut. Afterwards sand the angle of the remaining board until you have a smooth flowing opening.
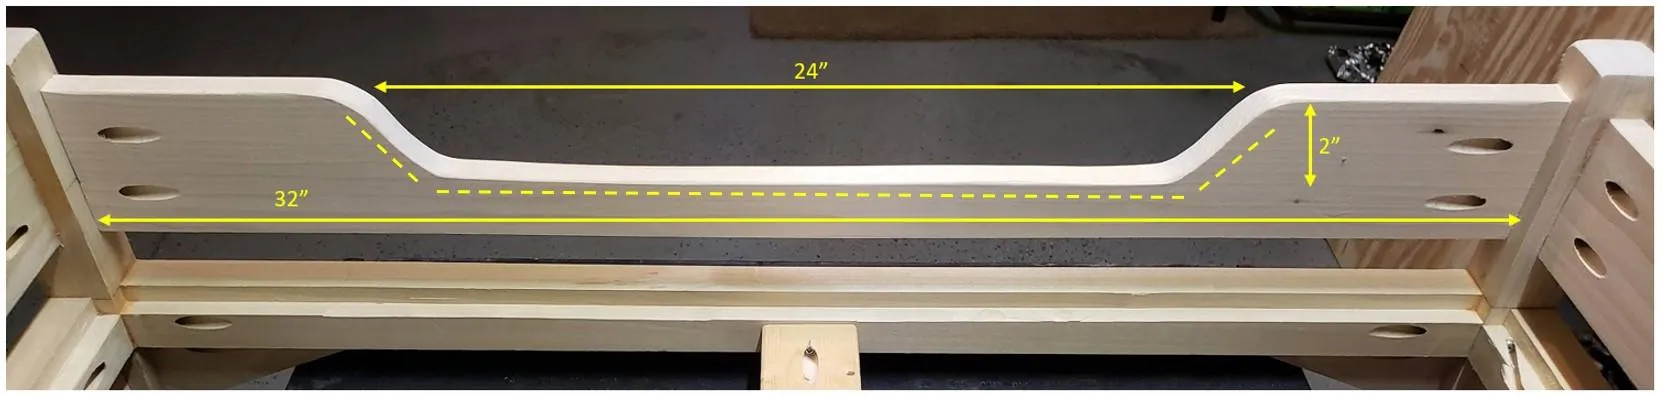
6Bed frame boards
- Measure and mark all 4 bed legs on 2 adjacent sides at 4 inches.
- Assemble the front and rear frame boards.
- Apply glue to the ends of the frame boards and position and clamp them end to end between 2 leg boards, being careful to line them up to your 4 inch line. Side clamp each joint and screw in your pocket hole screws.
- Repeat this process with the headboard and foot board. Note* Position the bed frame boards flush with the legs and all other boards to the center of the legs boards
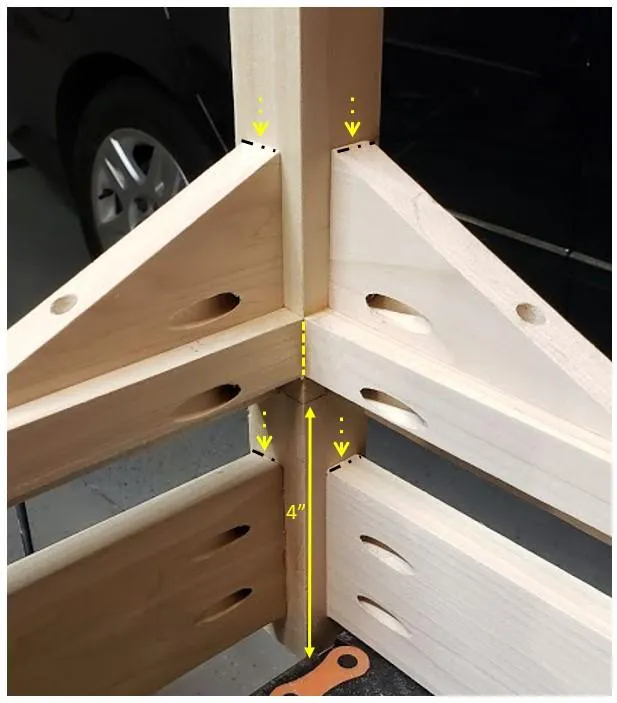
7Side bed boards
Assemble both side frame and rail boards to the already assembled front and rear bed boards. Note* Follow the same board positioning as you did in the previous step.
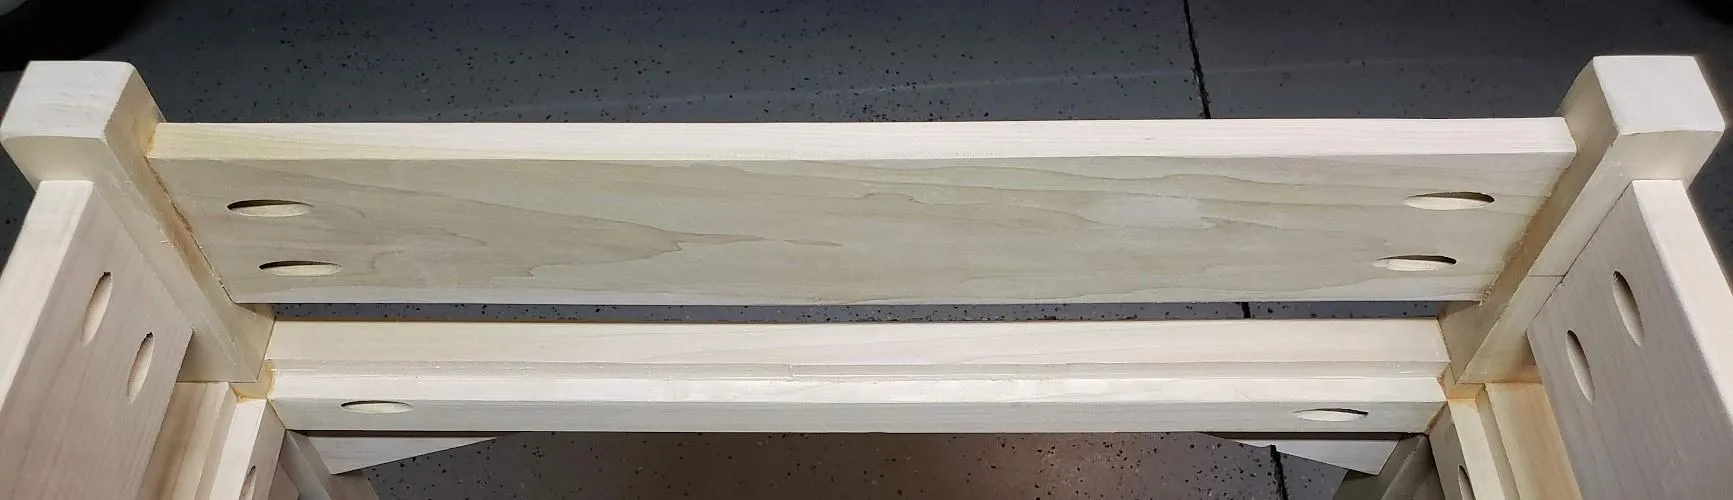
8Bottom braces
Install bottom triangle braces to the legs and the bottom of the frame boards.
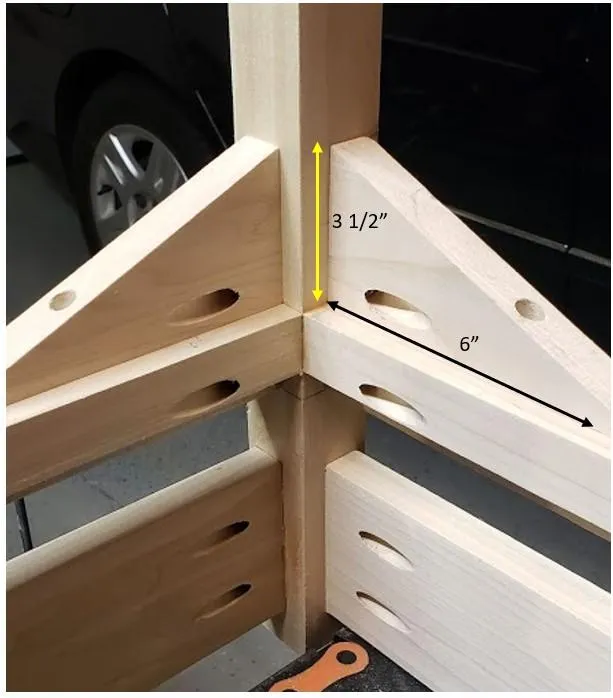
9Pocket holes front
Pocket holes placement for the front boards and bottom braces.
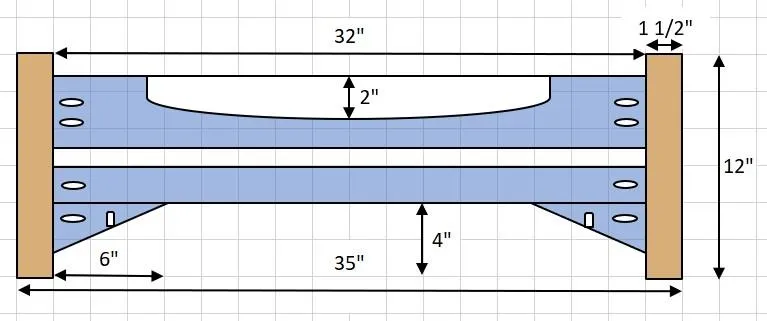
10Pocket holes side
Pocket holes placement for the side boards and bottom braces.
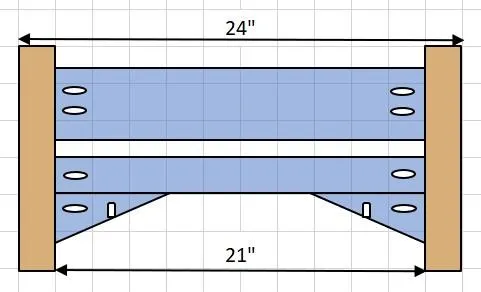
11Pocket holes center brace
Pocket holes for the center brace and measurements and placement for the bed floor.
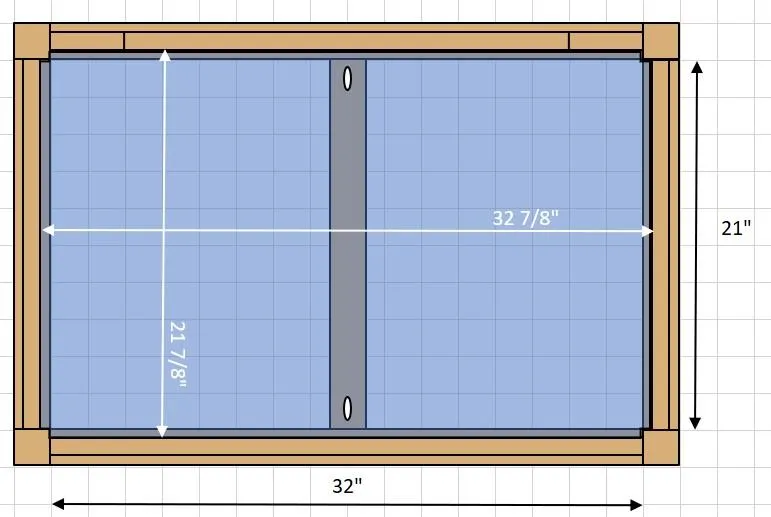
12Bed floor
Cut the bed floor board 32 7/8" by 21 7/8" and cut an 1/2" by 1/2" notch from each corner. This will allow the floor board to rest completely supported within the bed frame boards.
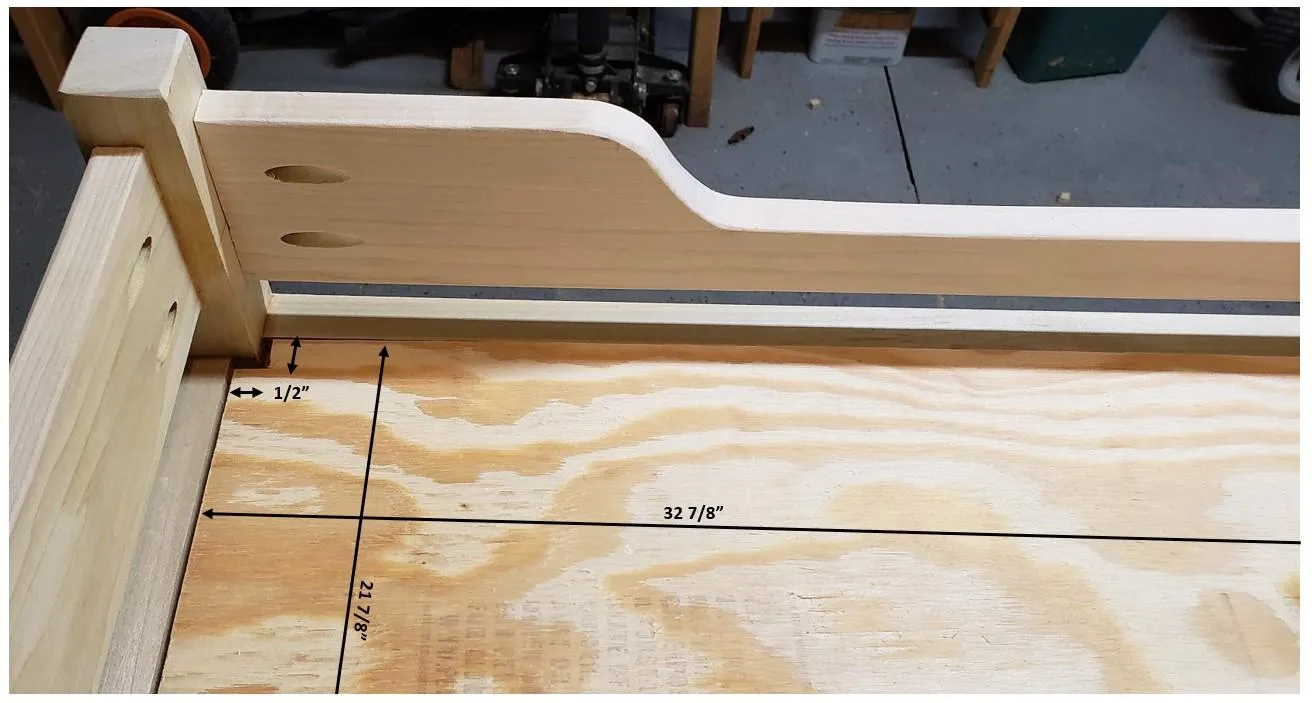
13Side board handles
Using your choice of hardware handles- measure and mount the handles in the center of each of the side boards.
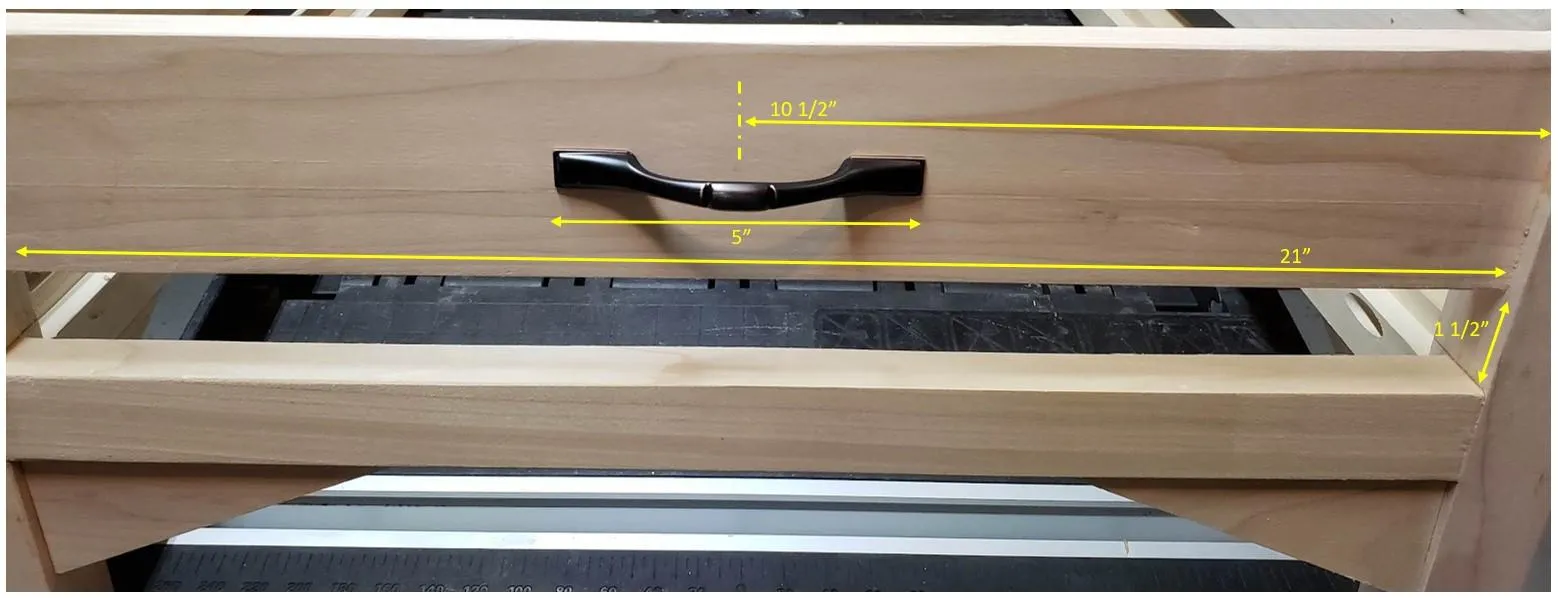
14Completed assembly
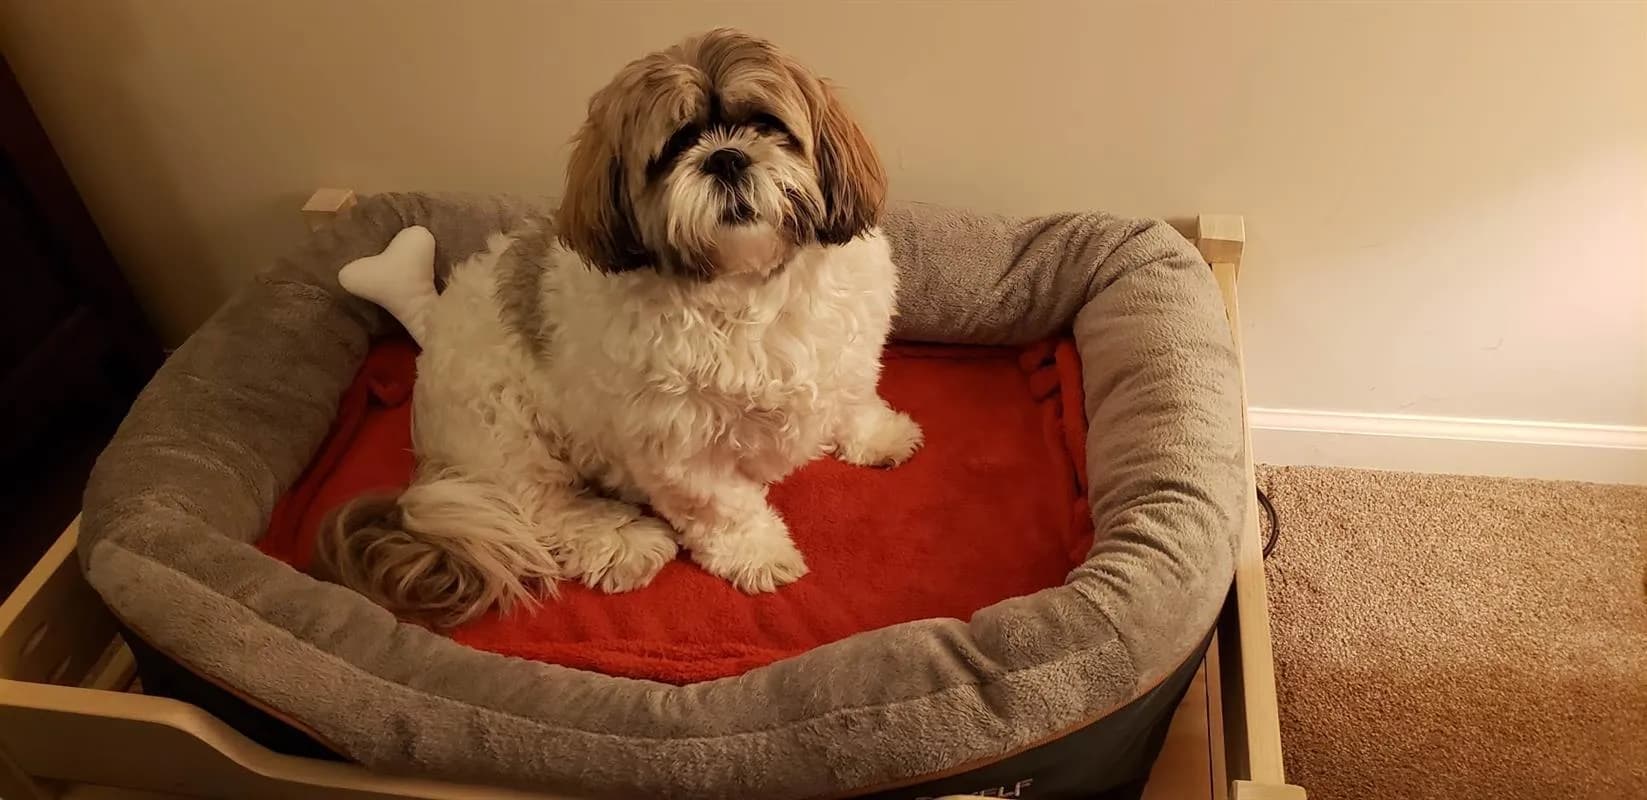
- Apply a stain or clear coat finish to the assembled bed frame and let it dry. Put in a cozy mattress.
- Add your favorite puppy and then you are done!
Tags
- Pets
- Intermediate
Reviews & builds
No reviews yet
Sign in to review this plan or share your build.
No reviews yet. Be the first to build this.