Notch
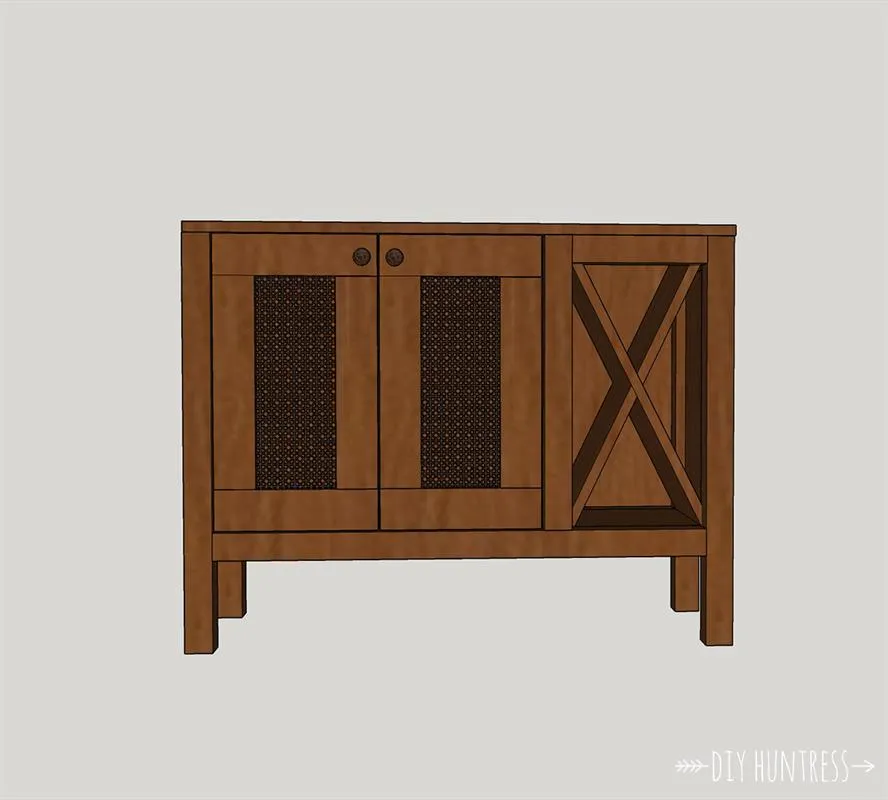
NotchDIY Wooden Sideboard/Record Cabinet With Wine Rack
Step-by-step build — 15 steps. Also available as a print sheet.
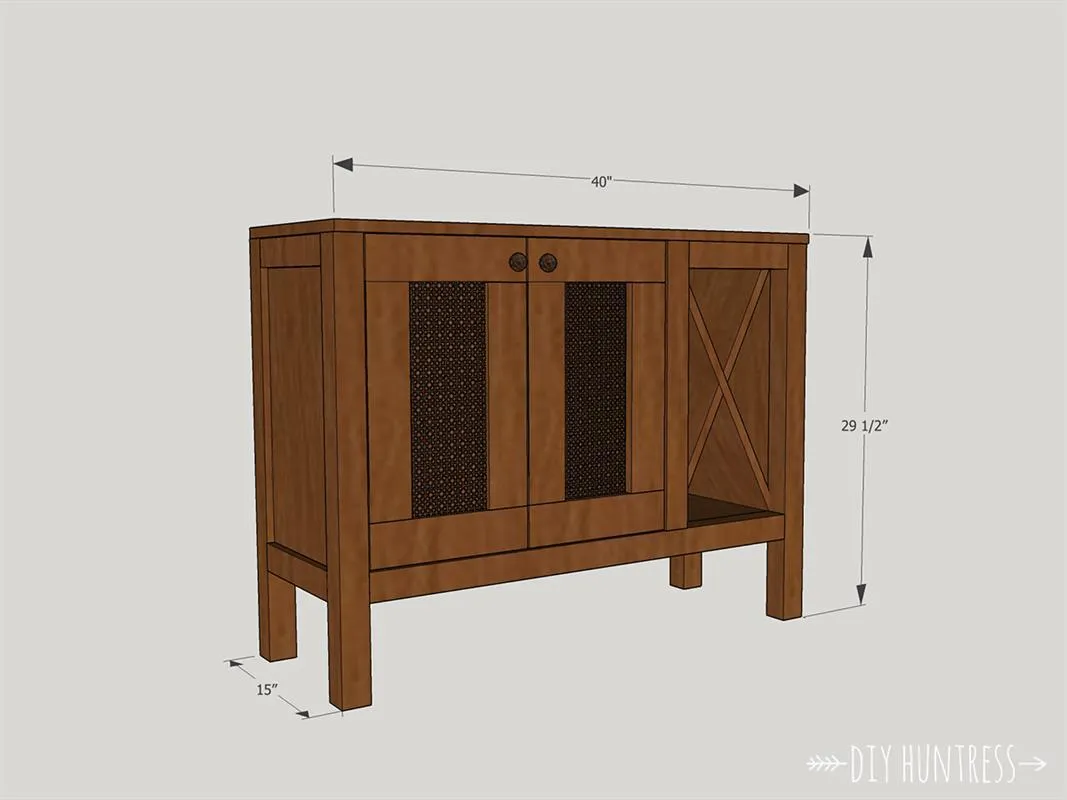
1Check Dimensions
Prior to building, check the dimensions for this project. Adjust as necessary.
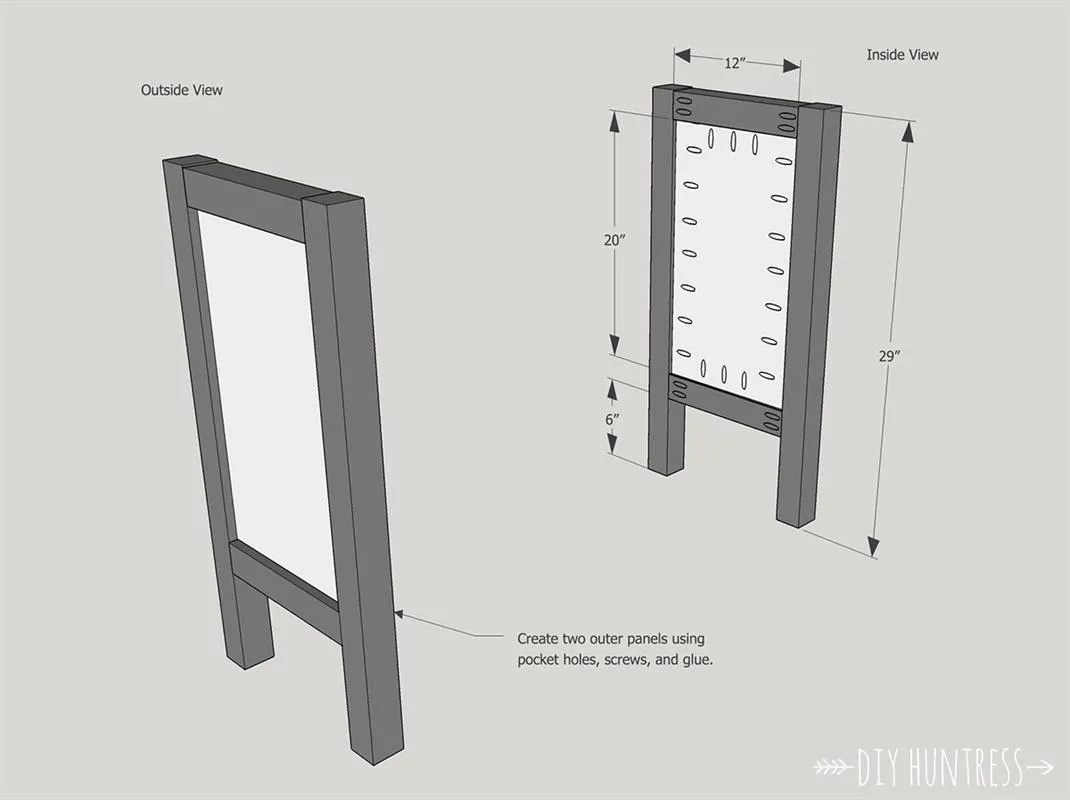
2Build Outer Frames
Create your outer frames using two of the plywood cabinet frame panels, four legs, and four 12" panel tops and bottoms. Attach all pieces using pocket holes, screws, and wood glue. Hide the pocket holes on the inside of the panels and be sure to place the plywood panels directly in the center of your 2x2 frames.
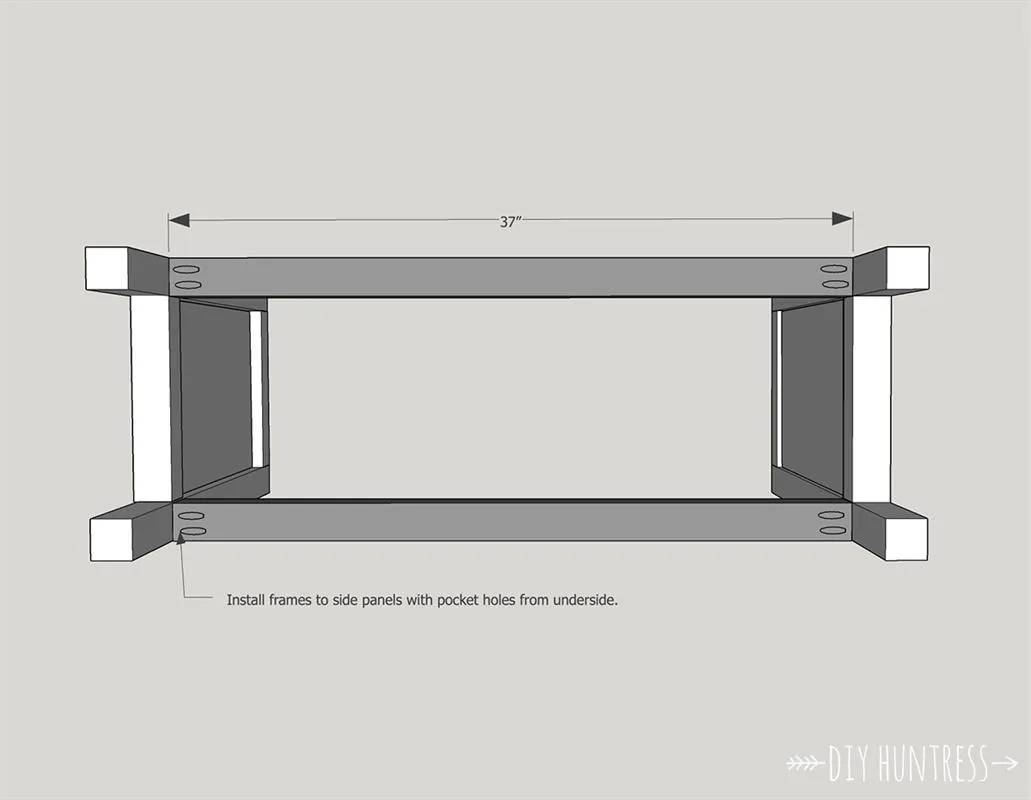
3Attach Frames
Attach the frames with pocket holes and wood glue using the 37" long cabinet frame pieces.
4Add Middle Brace
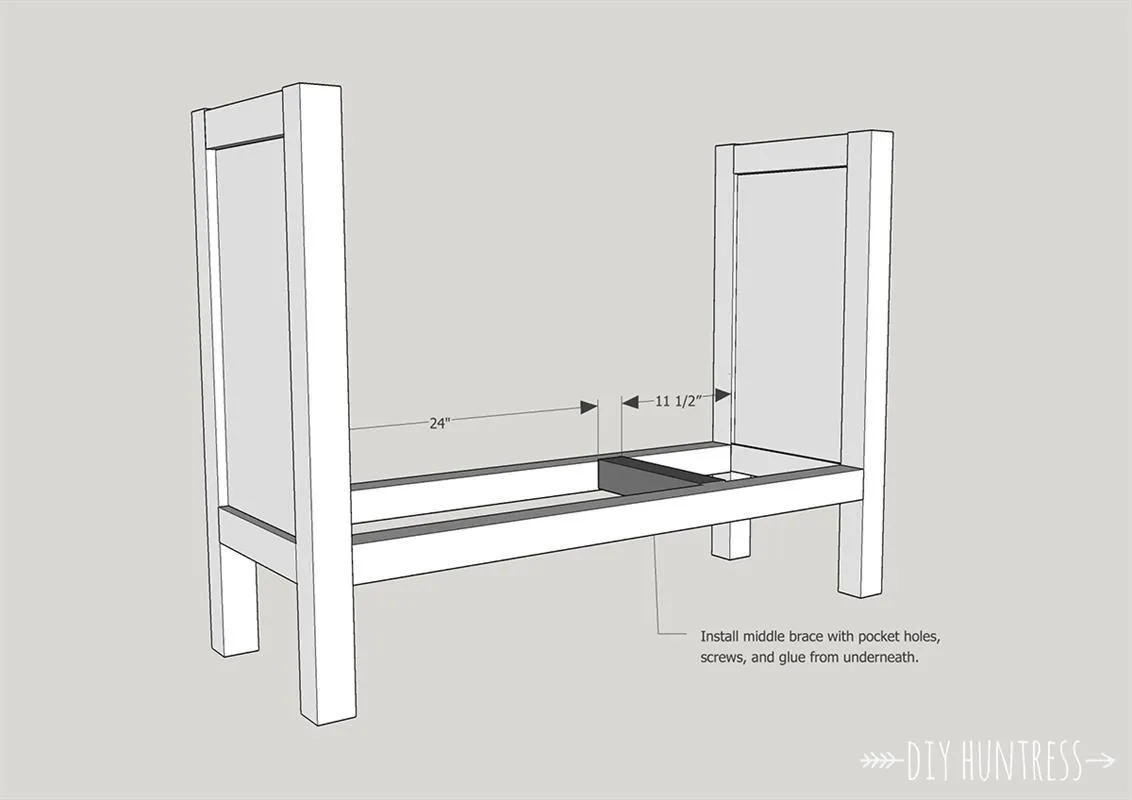
Add a 12" long middle brace to the cabinet. Make sure to leave 24" clearance on one side of the cabinet, and 11.5" on the other.
5Build Middle Panel
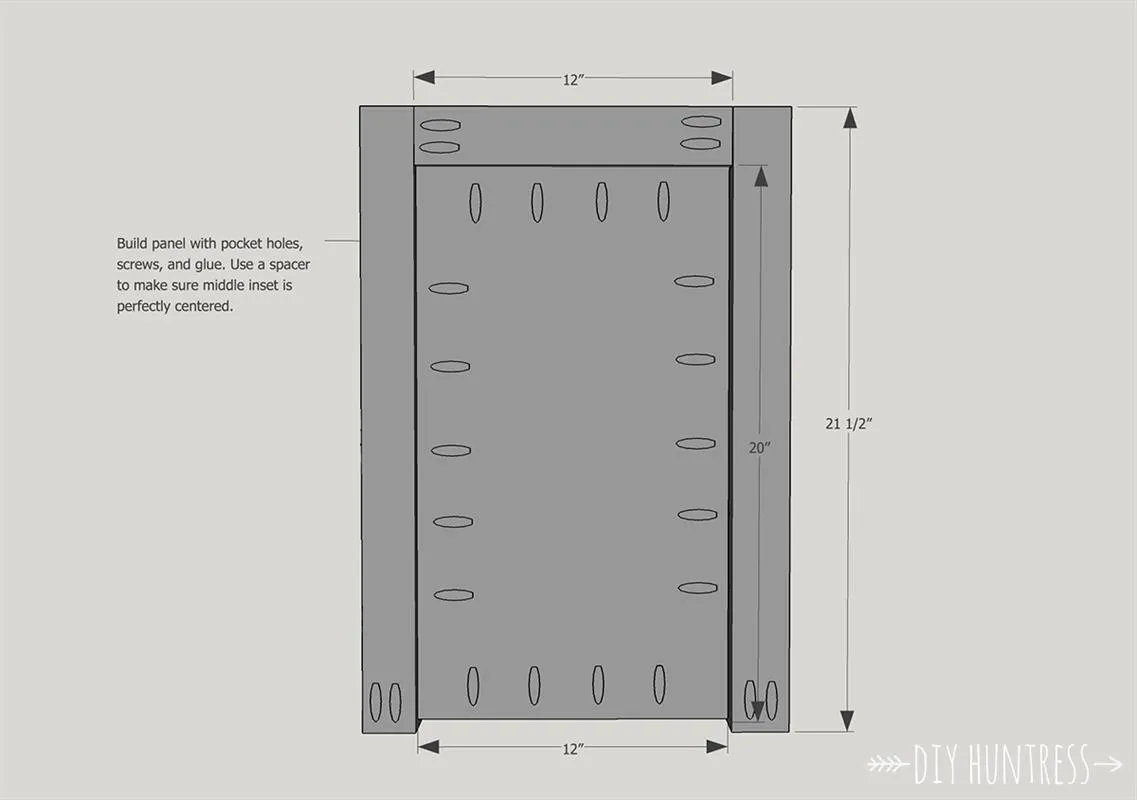
Create a panel in the middle with the leftover plywood panel piece, two 21.5" edges, and the final 12" top. Attach everything with pocket holes and wood glue. Be sure to also place this plywood panel in the center of the 2x2's as well.
6Attach Middle Panel
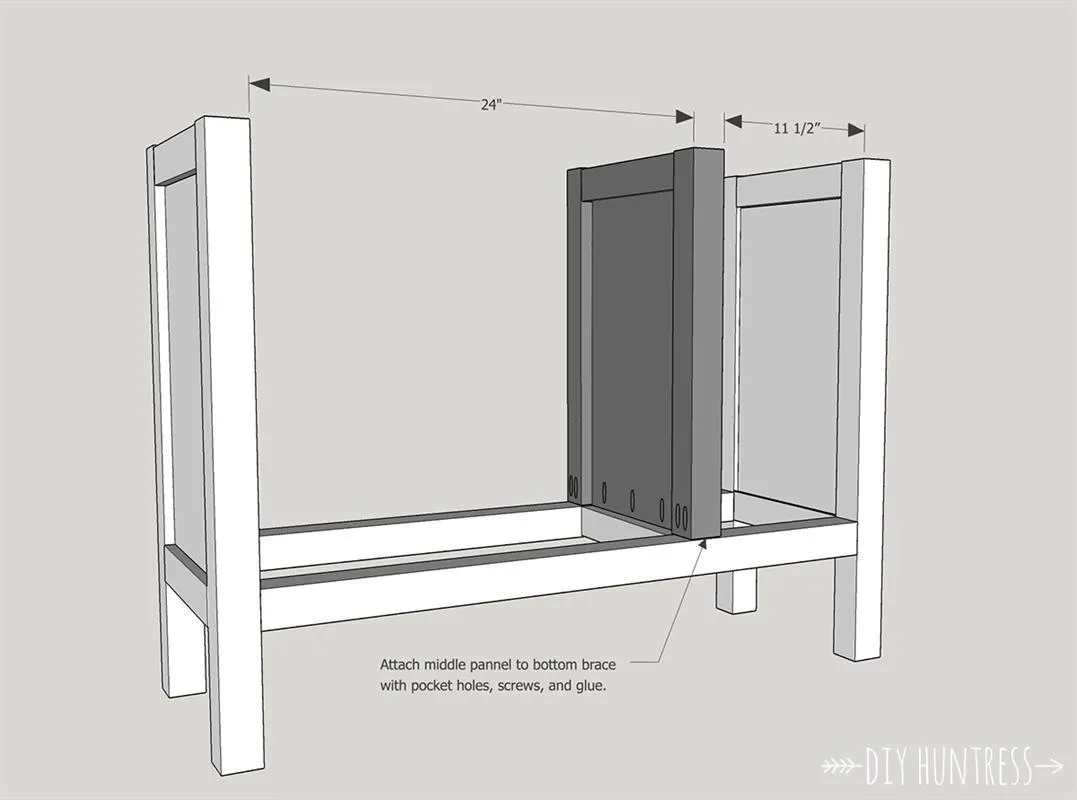
Attach the middle panel to the bottom brace using pocket holes and wood glue. Again, double checking to make sure you have 11.5" clearance on one side, and 24" on the other.
7Attach Bottom Panels
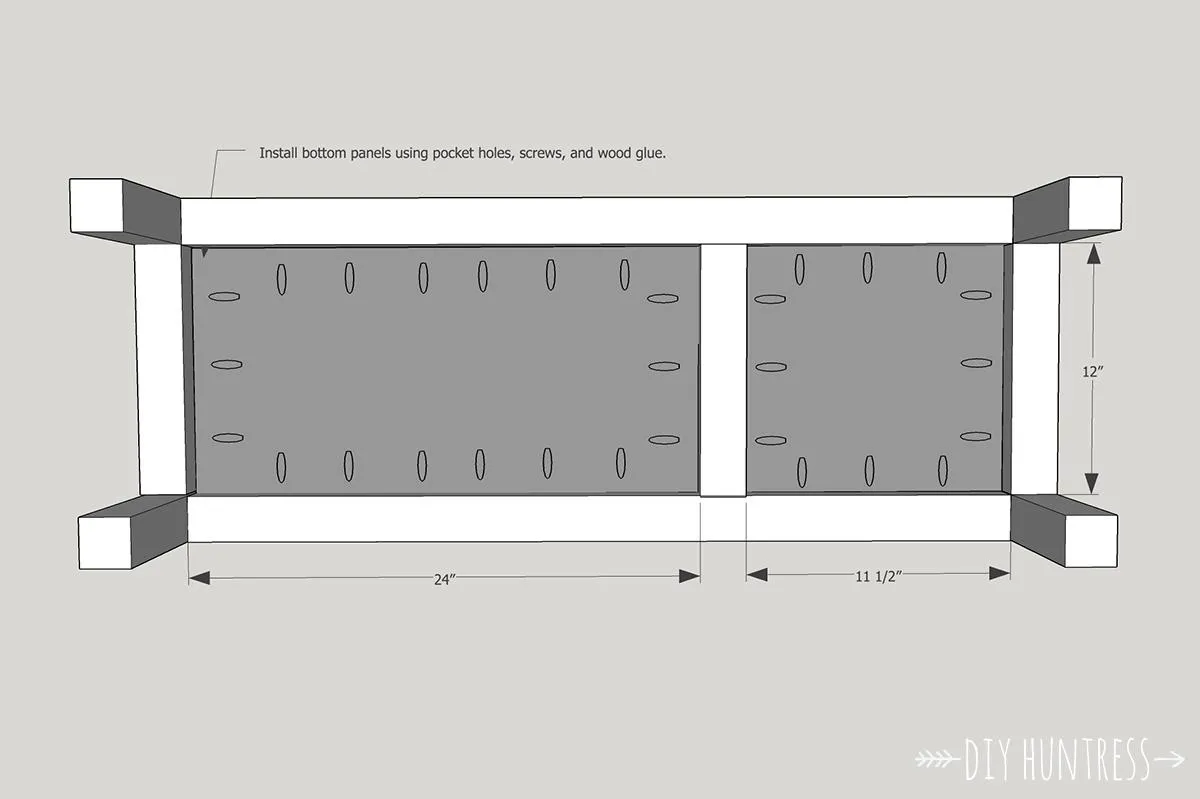
Attach your bottom panels with pocket holes and wood glue from underneath.
8Build The "X" Wine Rack
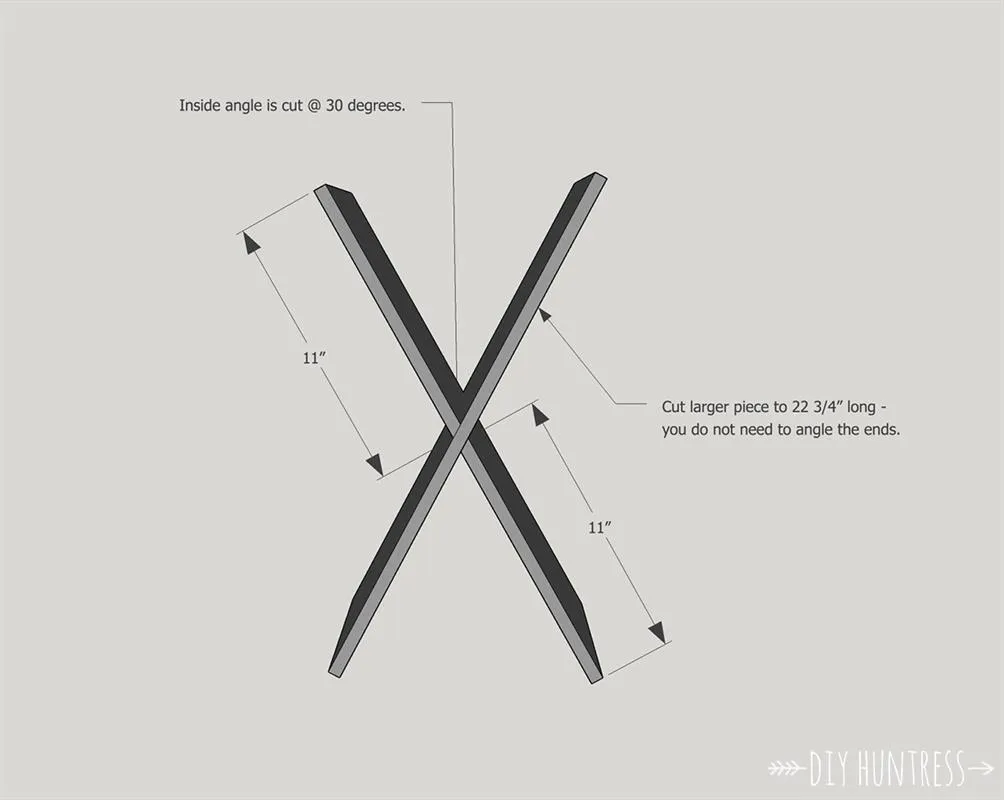
This step is always the trickiest. Use one full plywood panel for your X that is measured at 11 1/2" x 22 3/4". You do not have to angle the ends, as they will be hidden when installed. For the second piece, cut the middle angles at 30 degrees - make sure to double check all measurements before cutting, as no piece of wood is perfect. Attach everything in the next step.
9Install "X" & Top Brace
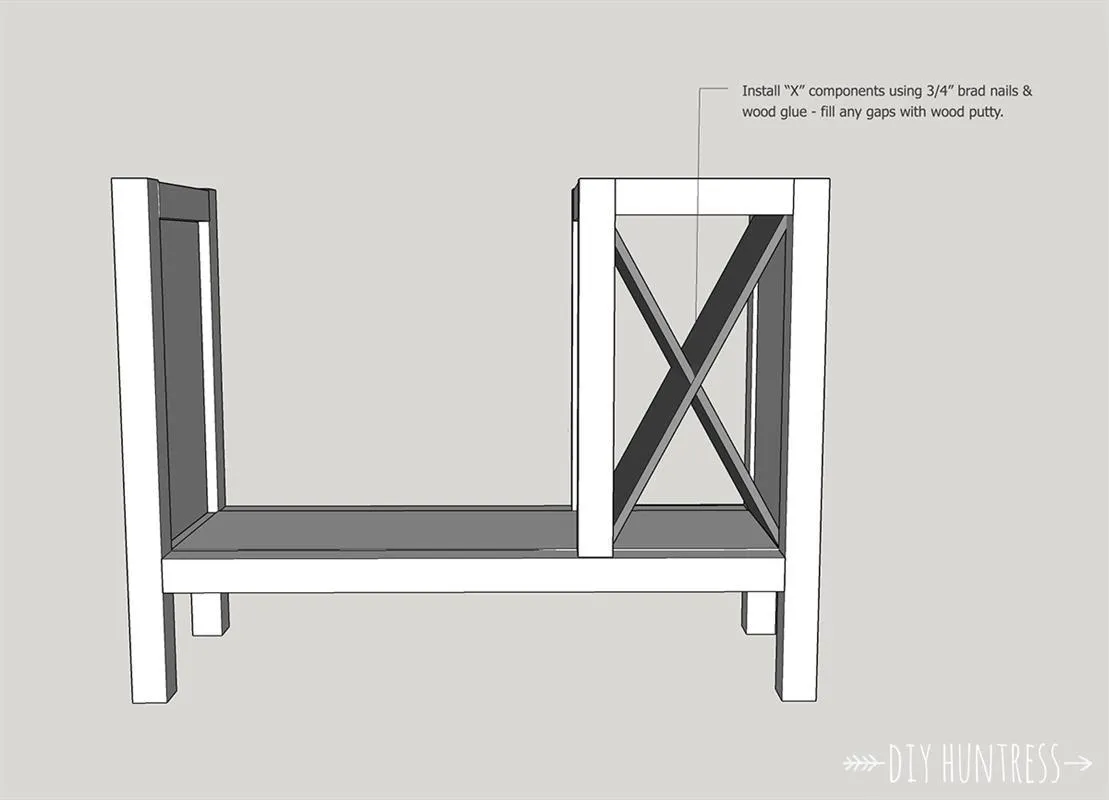
- Install your X by placing the larger piece in first and laying it against the insets in the frame.
- Nail it in place.
- Next, add your smaller pieces with 3/4" brad nails and wood glue to create your X. Don't worry about any gaps, these can be filled with wood putty later.
- Next, install your smaller 11.5" top brace to hide any imperfections and square the front of the unit. This can be installed with brad nails or pocket holes and glue from the back.
10Install Back Panels
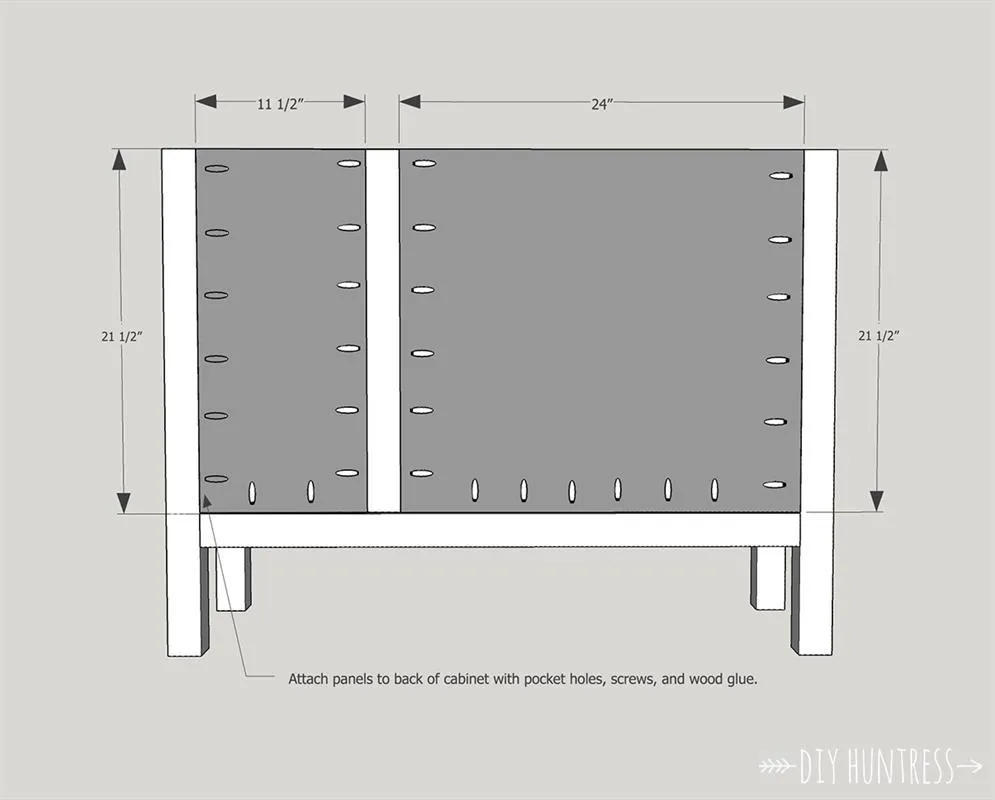
Next, install the back panels using pocket hole joinery and wood glue.
11Install The Top
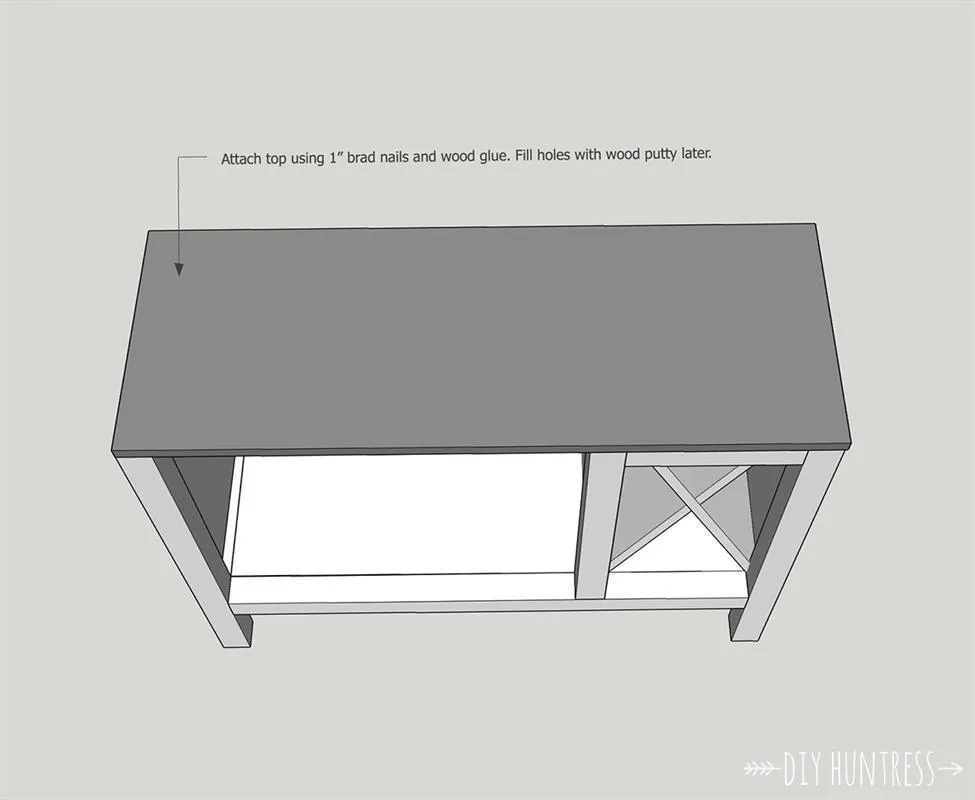
To help square the area for the cabinets, the next step is to install the top. You can do this with 1" brad nails and wood glue. Hide any holes with wood putty later.
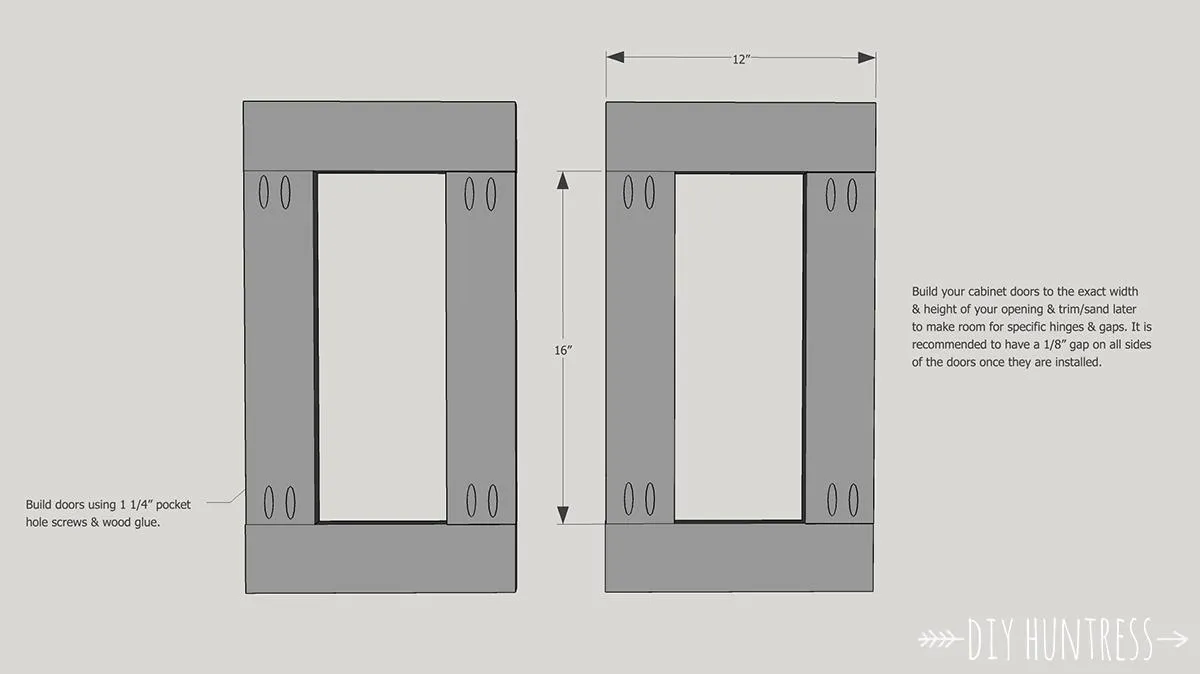
12Build Your Cabinets
This part is also tricky. I recommend building your cabinet doors to the exact measurements of your opening. Depending on what kind of hardware you will be using, you will have to trim or sand your doors to fit in the next step.
13Install Doors
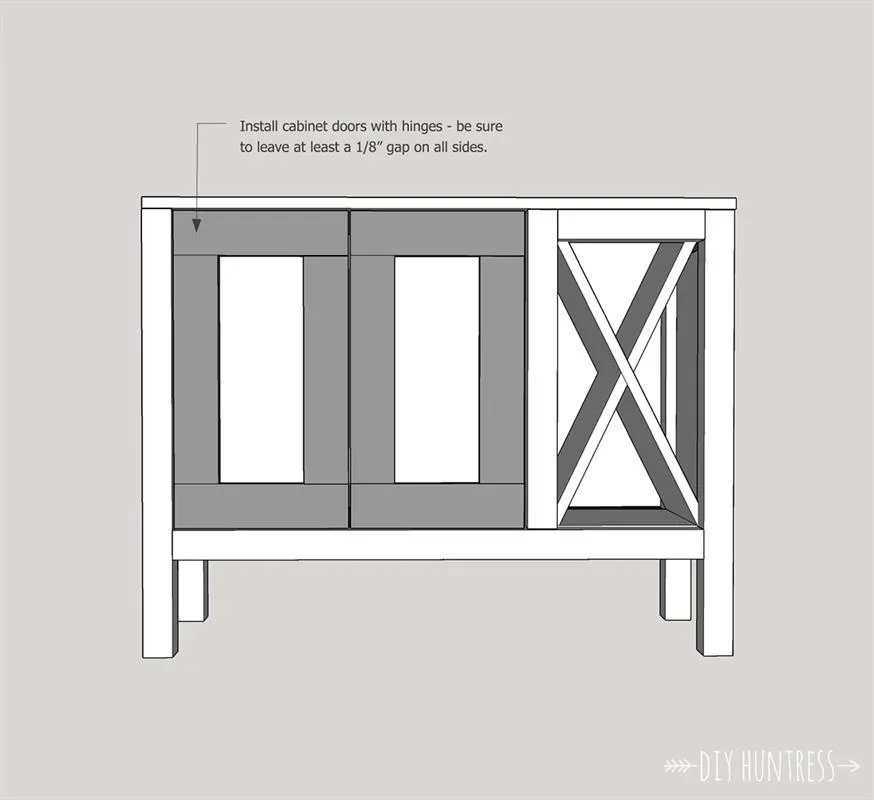
Install your doors along with your hinges. Try to leave a 1/8" gap on all sides.
14Add Your Panels
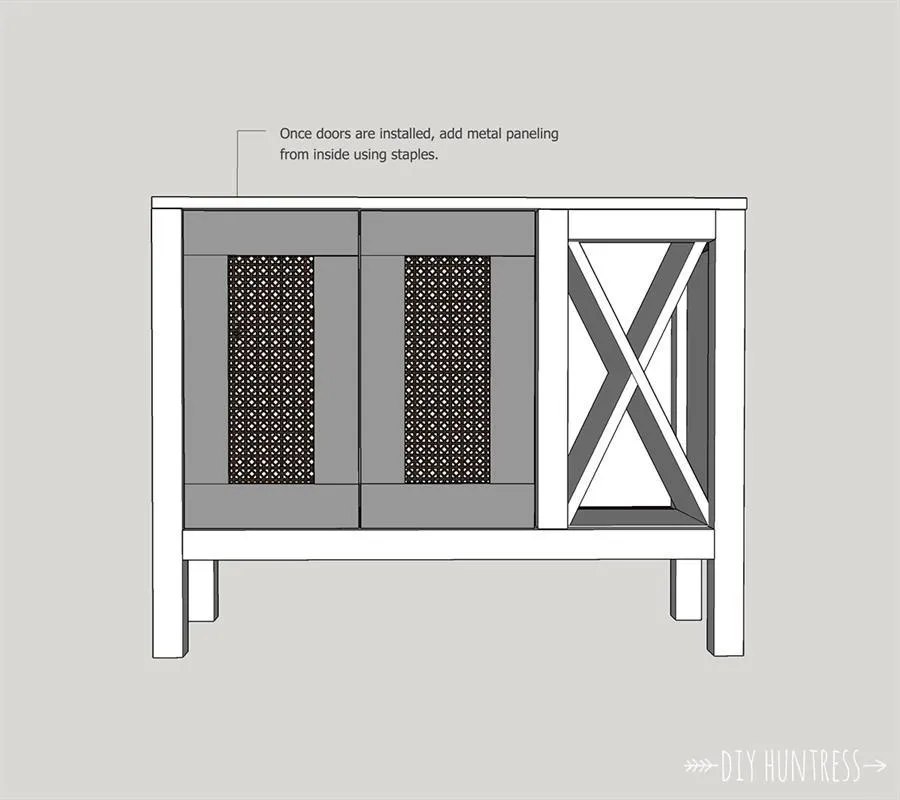
If you are using metal panels, like I did. Add them on by stapling them to the inside of the cabinet doors.
15Add Hardware & Finish
Next, sand, stain, seal, and add then hardware! You're all set! Visit my blog for a full description of the products, finishes, and hardware used on this build (direct link can be found in the "Extras" tab)!