 Notch
NotchDIY Side Table With Drawer
Step-by-step build — 11 steps. Also available as a print sheet.
1Build The Frame
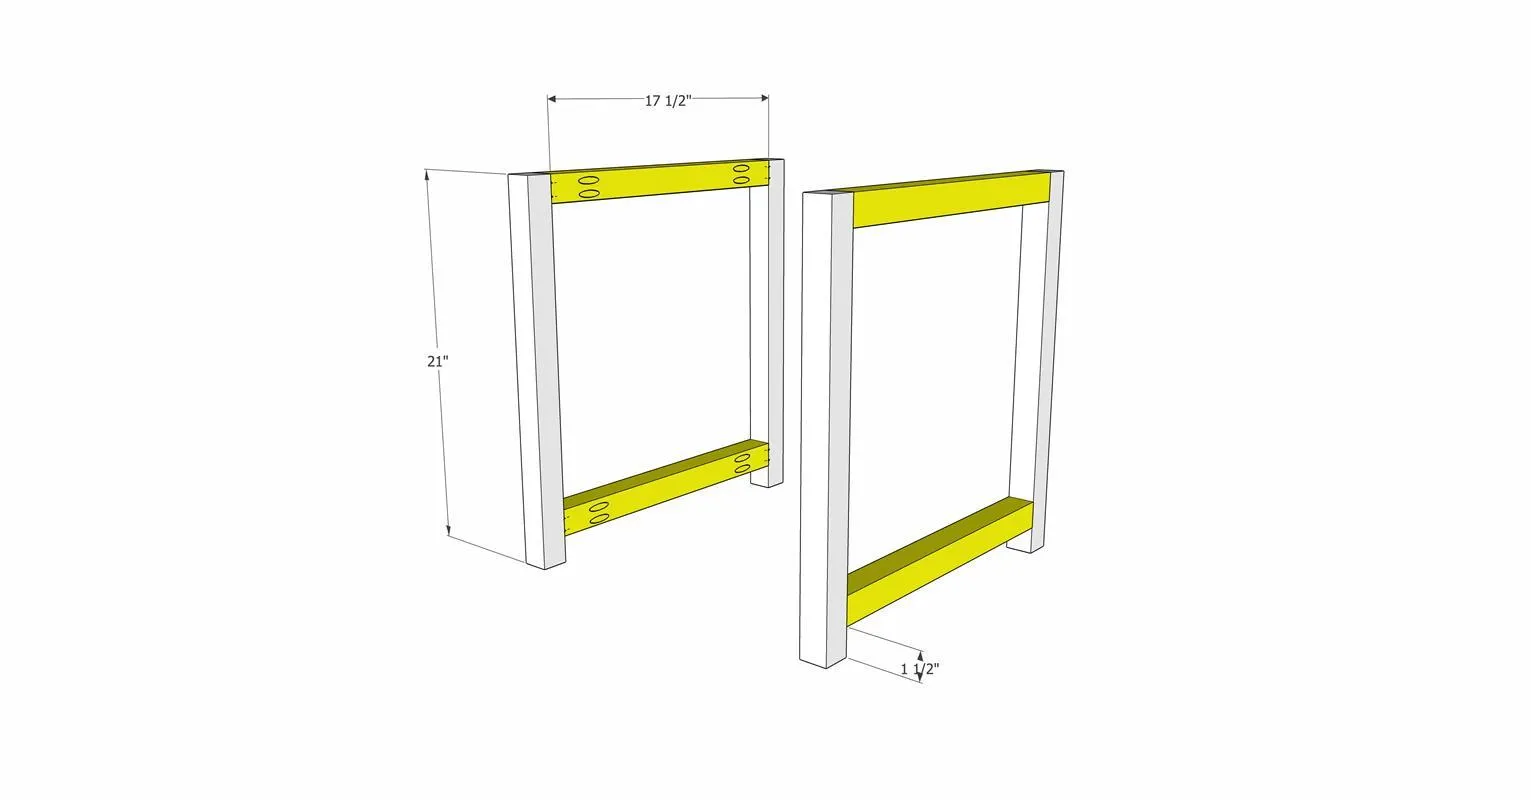
- Build the frame to make up the sides of the table.
- Drill 1 1/2" pocket holes into the top and bottom frame pieces.
- Attach to the legs with 2 1/2" pocket screws and wood glue.
2Assemble Side Panels
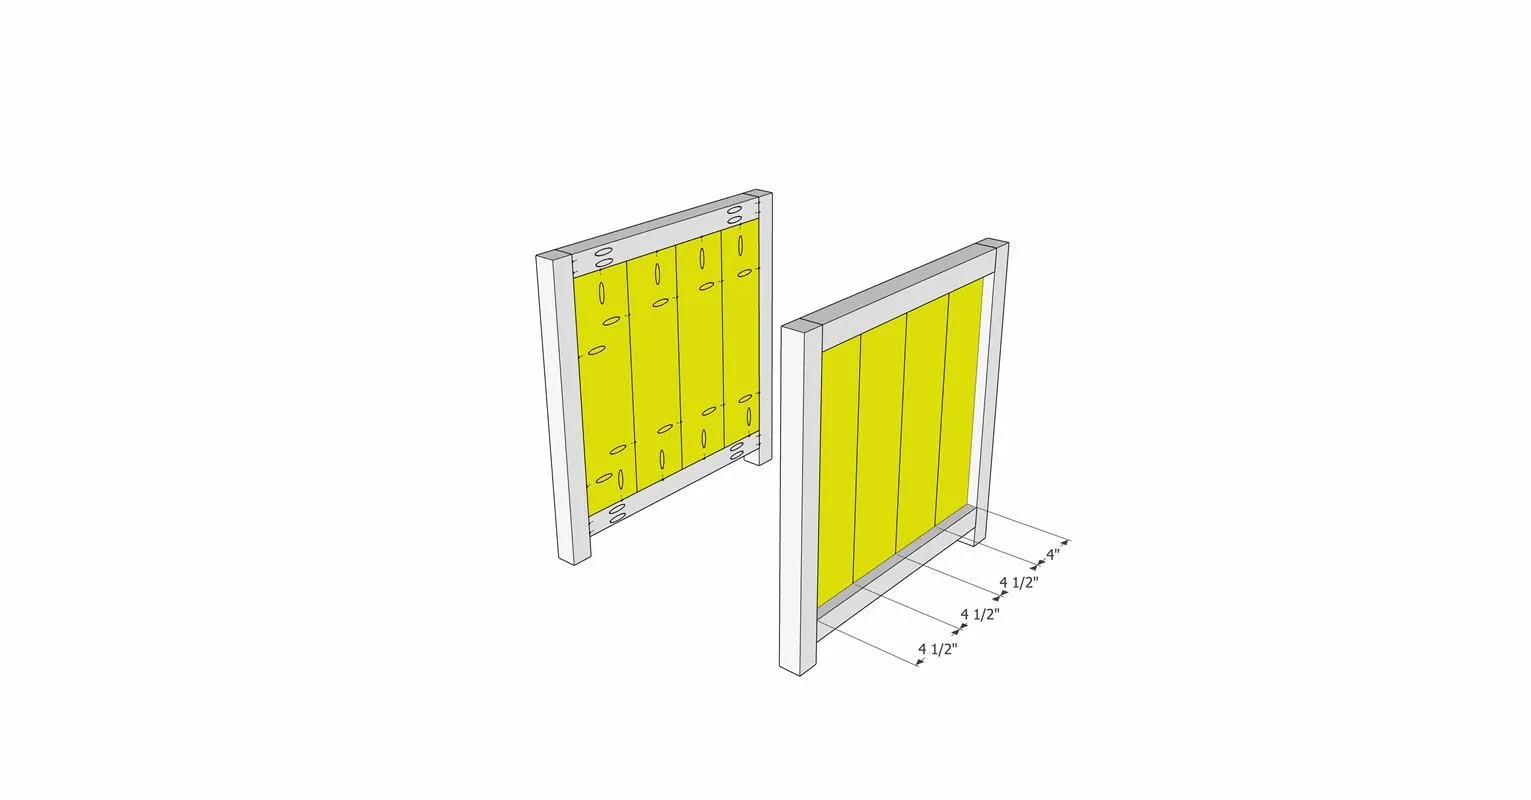
- Cut the side panel boards to size per the diagram.
- Assemble the panels with just wood glue, or drill 3/4" pocket holes into the sides and attach with wood glue and 1 1/4" pocket screws. Note that the pocket holes will need to be filled if using this joinery method. With the panels assembled, drill 3/4" pocket holes into the top, bottom and sides of the panels to attach to the frames.
- Attach to the frames, flush with the inside edge, using wood glue and 1 1/4" pocket screws. Side panels can be cut slightly long and squared up/trimmed to size using the Adaptive Cutting System or a table saw.
3Attach Front and Rear Stretchers
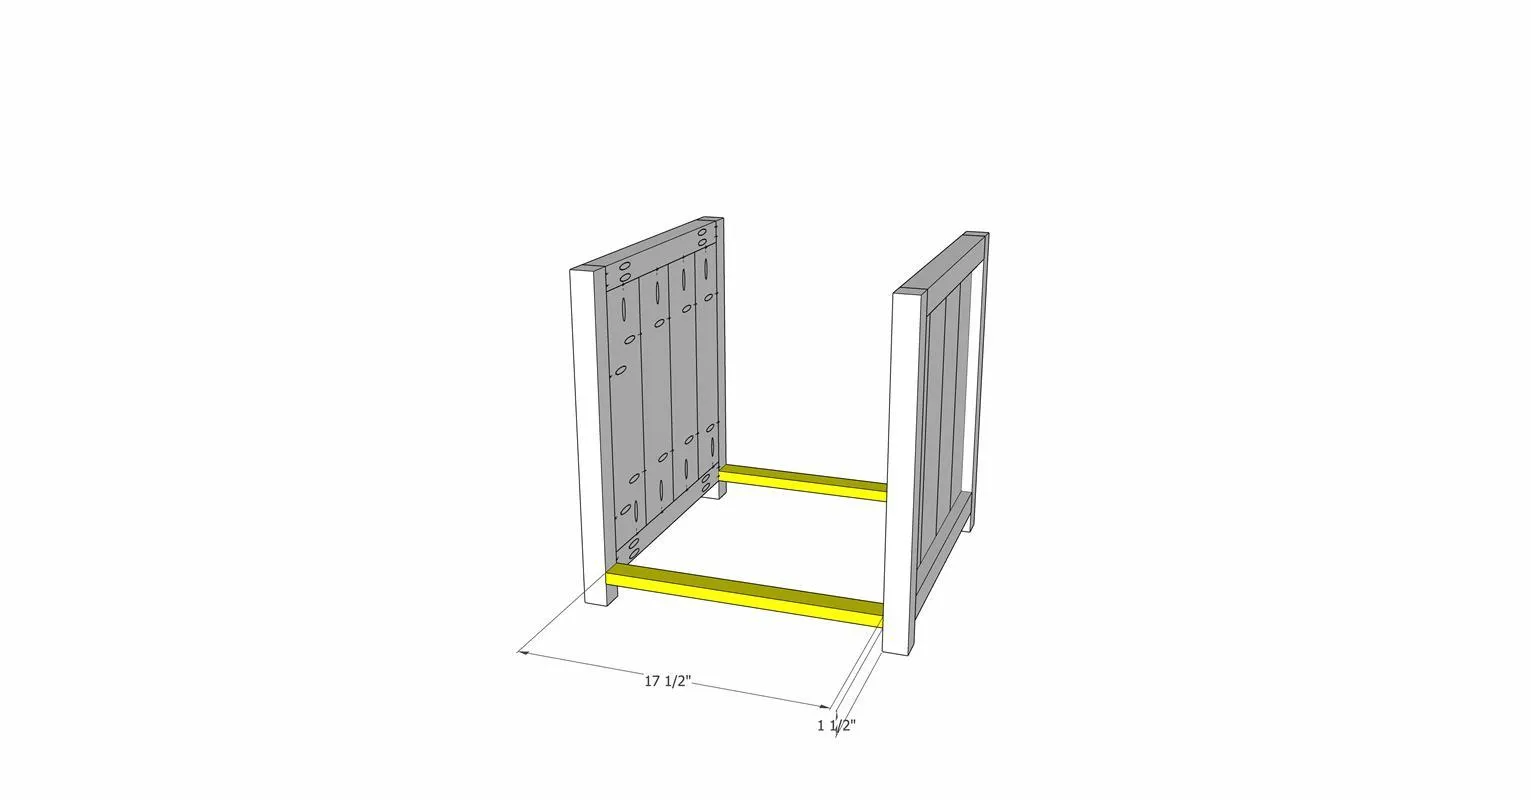
- Drill 3/4" pocket holes into each end of the 1x2 stretchers.
- Glue and clamp the stretchers to the front and back of the base, 1 1/2" up from the bottom of the legs.
- Attach with 1 1/4" pocket screws.
4Build and attach shelf
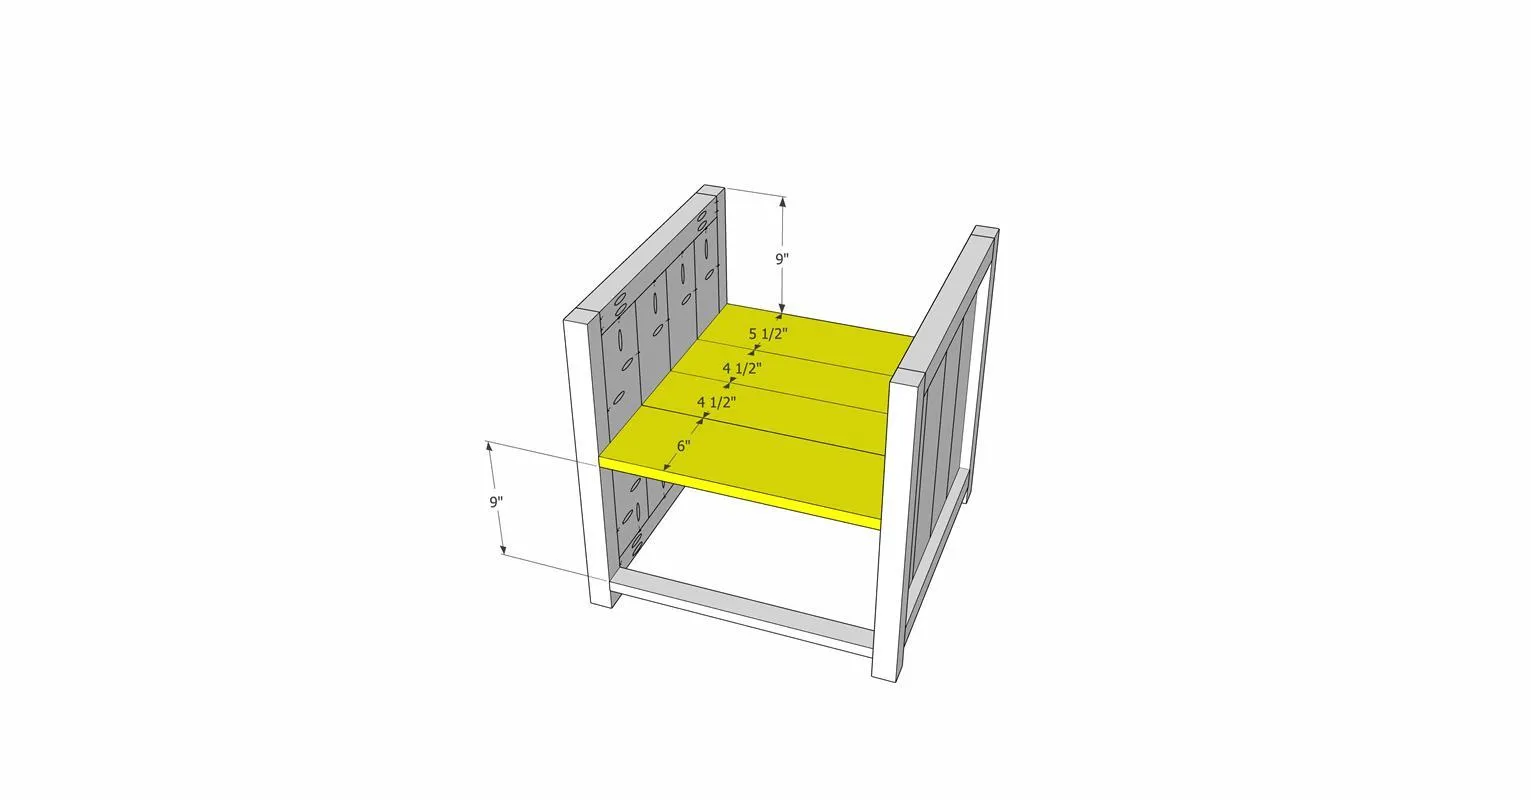
- Assemble the panel that makes up the shelf.
- Drill 3/4" pocket holes into the edges and ends of the boards. Do not drill pocket holes into the outside edges of the first and last boards.
- Glue and clamp the panel together. Secure with 1 1/4" pocket screws.
- Measure and mark 9" from the top of the legs.
- Clamp and attach the shelf at the 9" mark with wood glue and 1 1/4" pocket screws. Shelf panel pieces can be cut long and assembled, then the shelf can be trimmed to size/squared up using a table saw or the Adaptive Cutting System.
5Assemble and attach rear panel
- Assemble the rear panel by drilling 3/4" pocket holes into the inside edges of the boards.
- Attach the boards together with wood glue and 1 1/4" pocket screws.
- Drill 3/4" pocket holes into each end as well as the bottom edge of the panel.
- Attach in place with wood glue and 1 1/4" pocket screws. Rear panel pieces can be cut slightly long before assembly and finished panel can be squared up/trimmed to size on the Adaptive Cutting System or a table saw.
6Build the table top
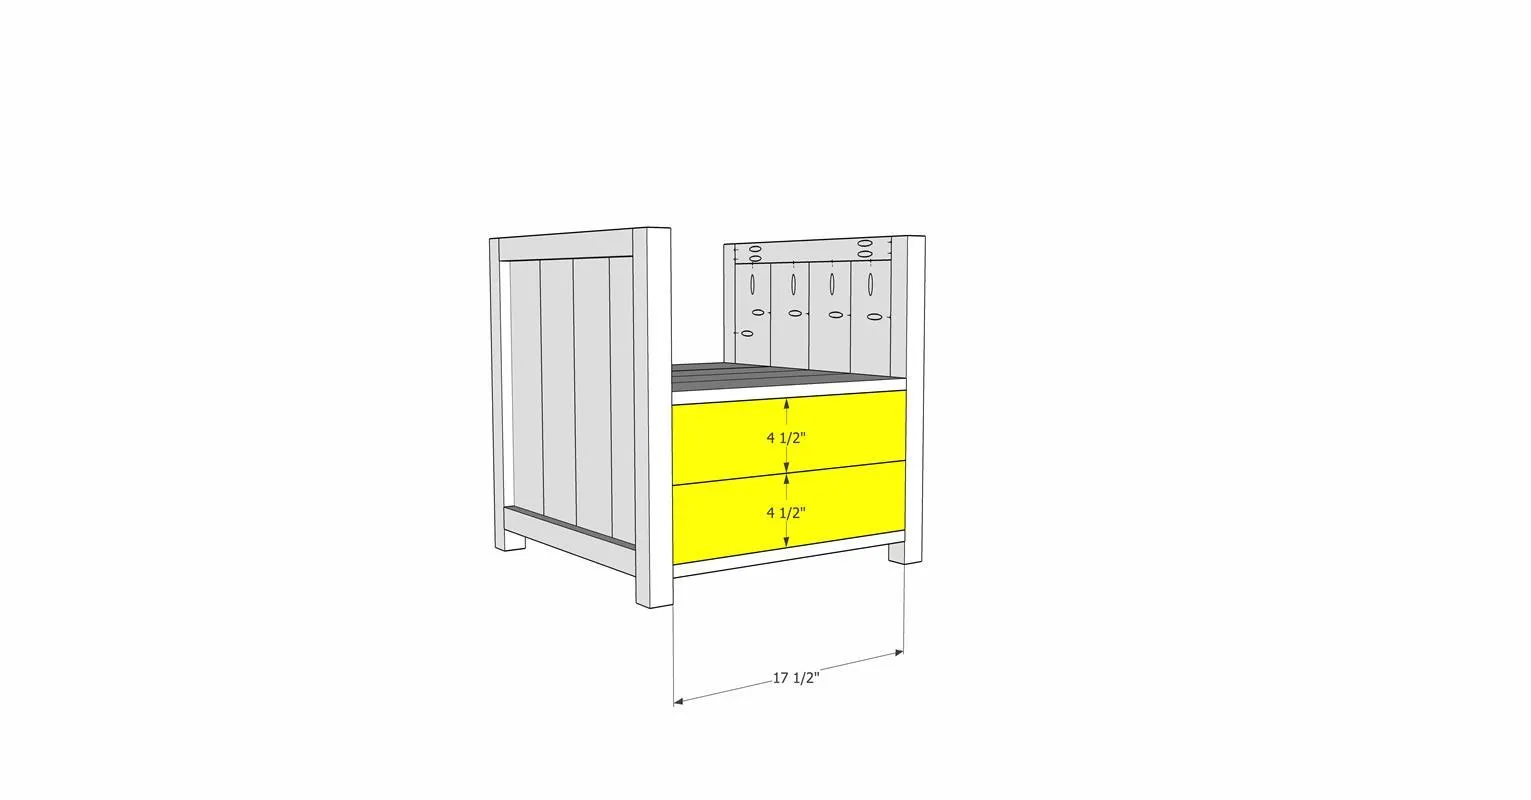
To build the table top, it can be assembled with glue only or with glue and pocket holes. For glue only, it is best to rip down wider boards to 5 1/2" wide to get a clean, straight edge. This can be done on the adaptive cutting system or a table saw. If using standard 2x6 boards, it is best to use pocket joinery to make the table top stronger. For the pocket joinery method, drill 1 1/2" pocket holes into the edges of the boards. Glue and clamp the boards together, secure with 2 1/2" pocket screws. Boards can be cut slightly long and then squared up/trimmed down on the adaptive cutting system.
7Build the drawer front
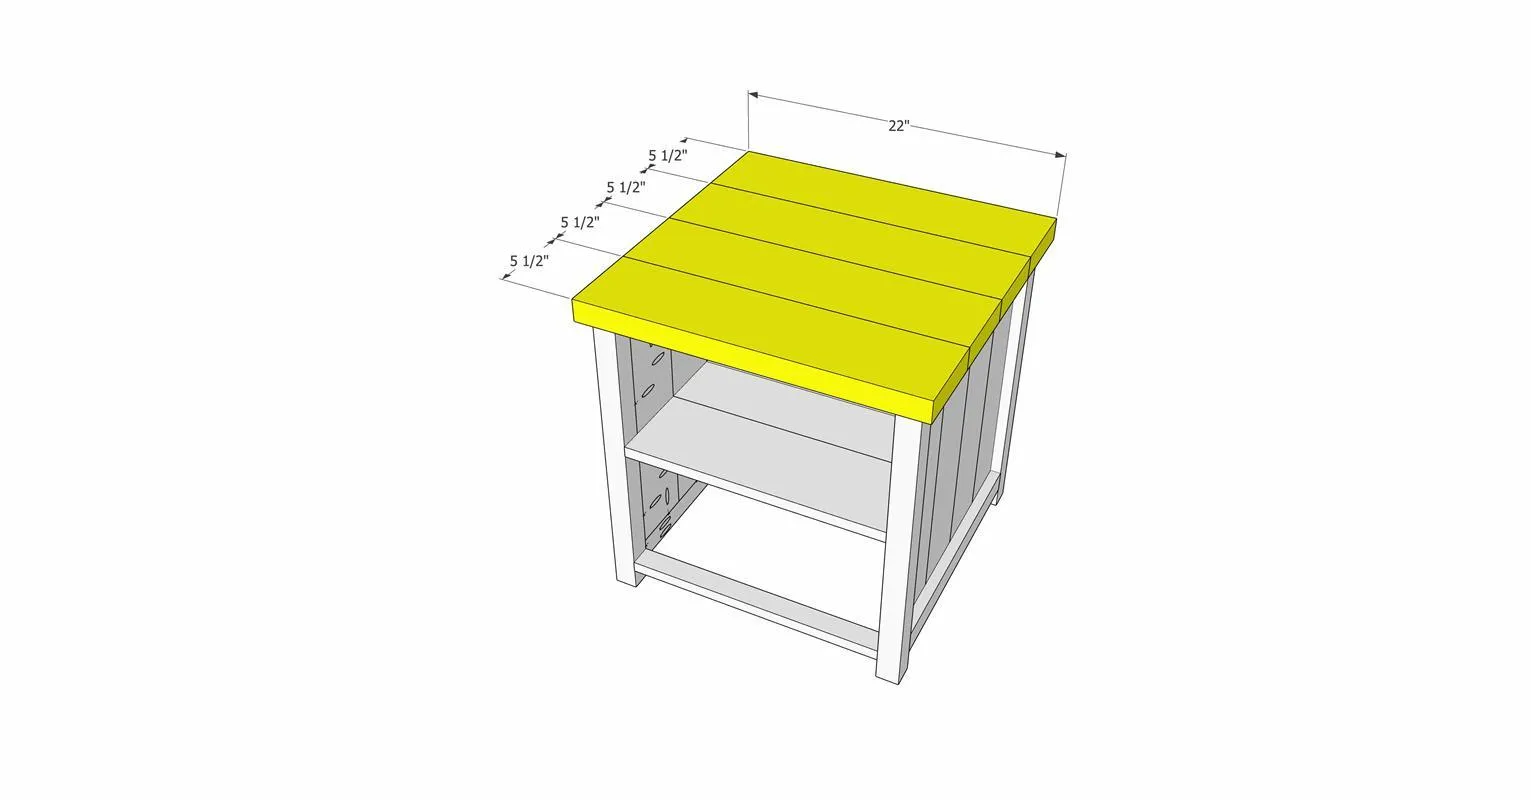
Drill 3/4" pocket holes into the pieces that make up the drawer front. Glue and clamp together, then secure with 1 1/4" pocket screws.
8Build the drawer box
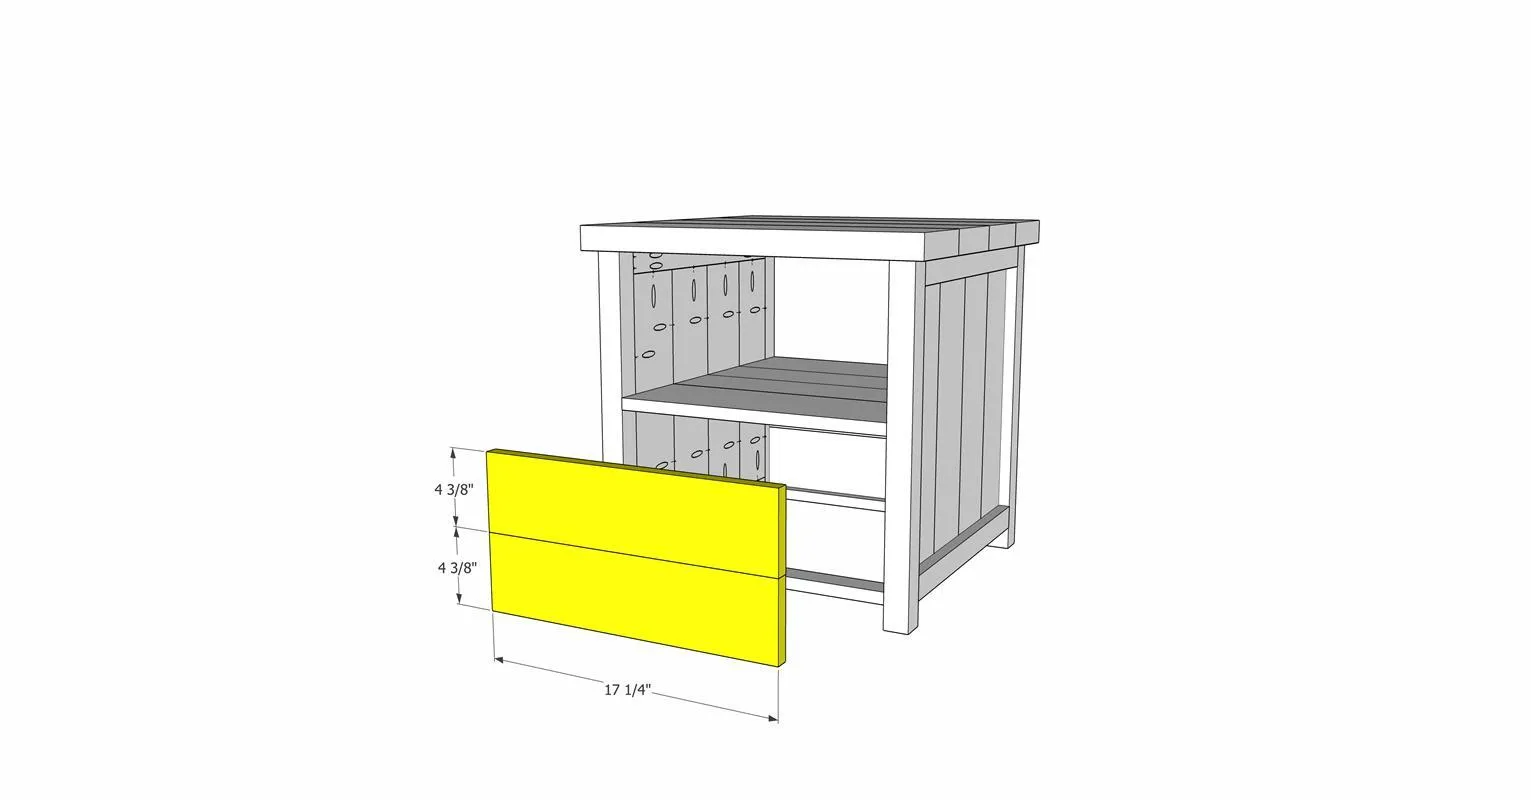
- To build the drawer box, rip the plywood pieces to 7" wide. Use the diagram as a reference for the sizes to cut the drawer box pieces. The sides should be 18" long.
- Measure the inside width of the table base. The drawer box should be 1" narrower than the inside width to accommodate the drawer slides.
- Drill 3/4" pocket holes into the front and back drawer box pieces.
- Glue and assemble the drawer box with 1 1/4" pocket screws.
- Measure the drawer box dimensions and cut 1/4" plywood to size.
- Glue and nail the plywood in place to the bottom of the drawer box.
- Attach the drawer slides to the center of the drawer box as well as the center of the base, using the Kreg drawer slide jigs
9Attach the table top
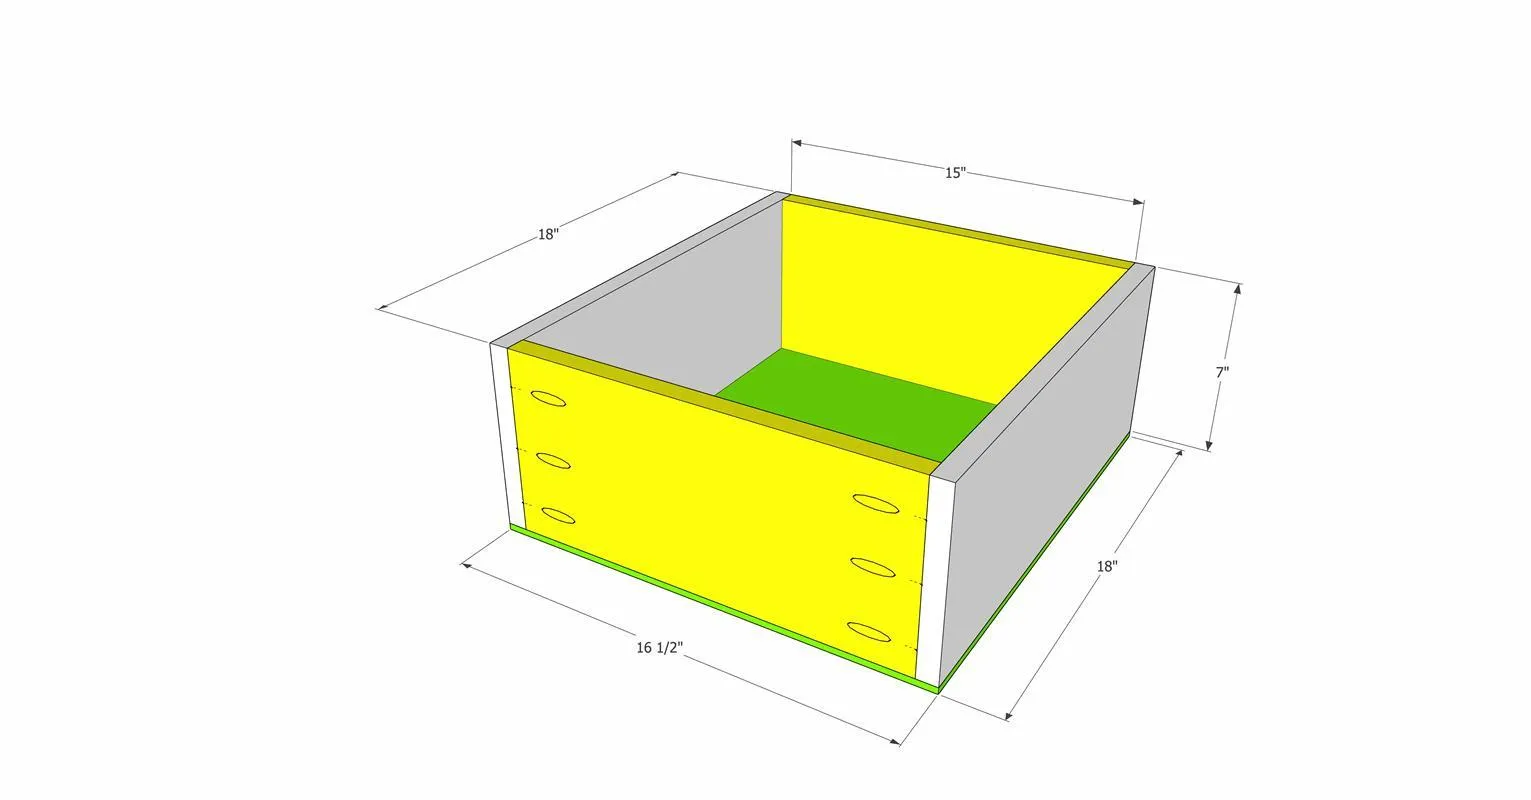
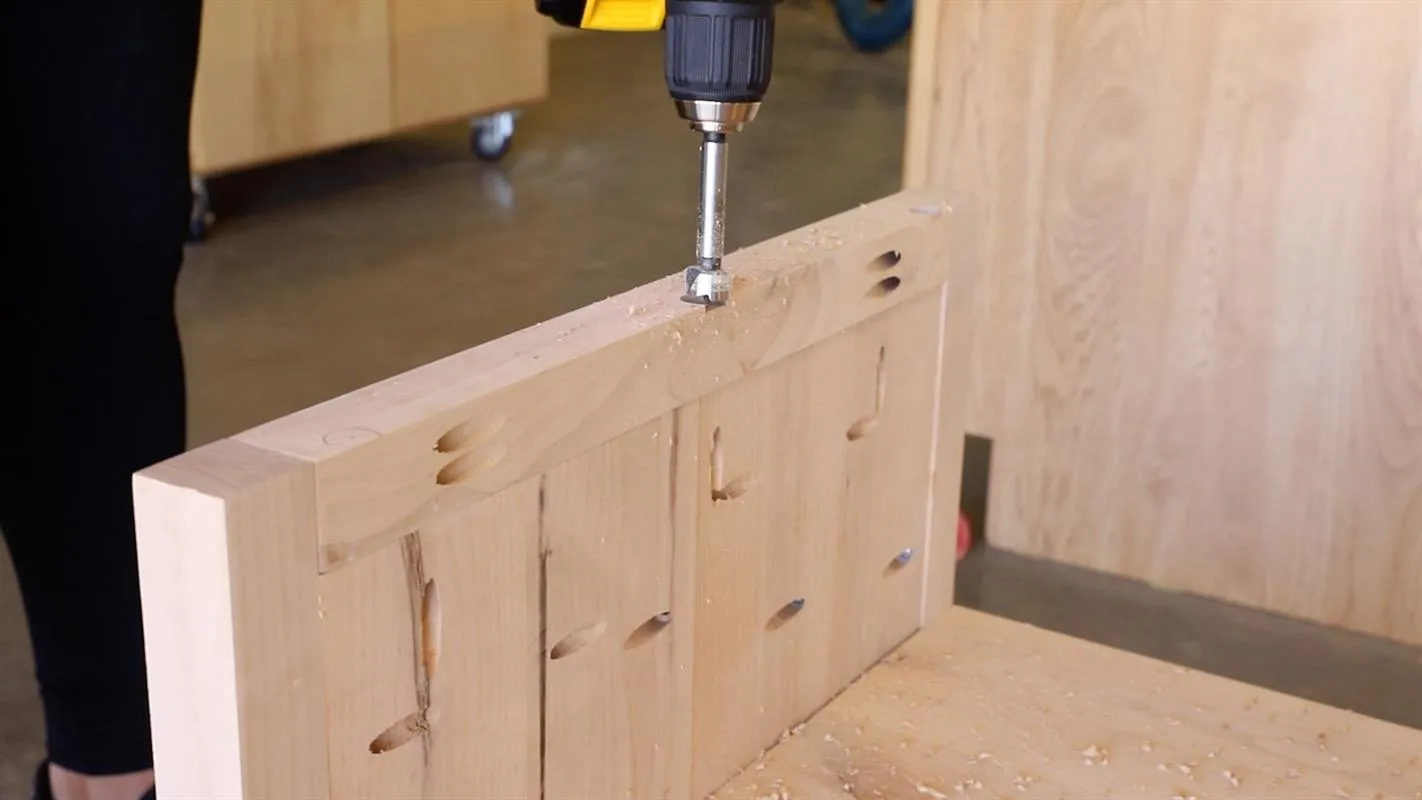
- Attach the table top to the base using desktop fasteners. Trace the outside edge of the desktop fasteners on the top of the base, 3 on each side. Using a 3/4" forstner bit, drill approximately 1/8" down until the top of the desktop fastener is flush with the top of the base.
- Attach the desktop fasteners with 1 1/4" wood screws.
- Center the table top onto the base with an equal overhang on each side.
- Clamp in place and attach via the other end of the desktop fasteners with 1 1/4" wood screws.
10Install the drawer front
- Set up the Kreg hardware jig to match the hole pattern on your hardware choice.
- Drill holes into the drawer front using the jig and a 3/16" drill bit.
- Center the drawer front over the installed drawer box and ensure an even gap all of the way around (stacks of playing cards work great for this). Drive two 1 1/4" screws through the pre-drilled holes, into the drawer box to temporarily secure the front.
- Pull the drawer out and drive screws through the inside of the drawer box to securely attach the box to the drawer front.
- Remove the screws from the drawer front and finish drilling 3/16" holes in through the drawer box.
- Attach drawer handle/pull.
11Finish as desired
Finish your project as desired with paint or stain. Remove the drawer pull/handle to finish the drawer front.