Notch
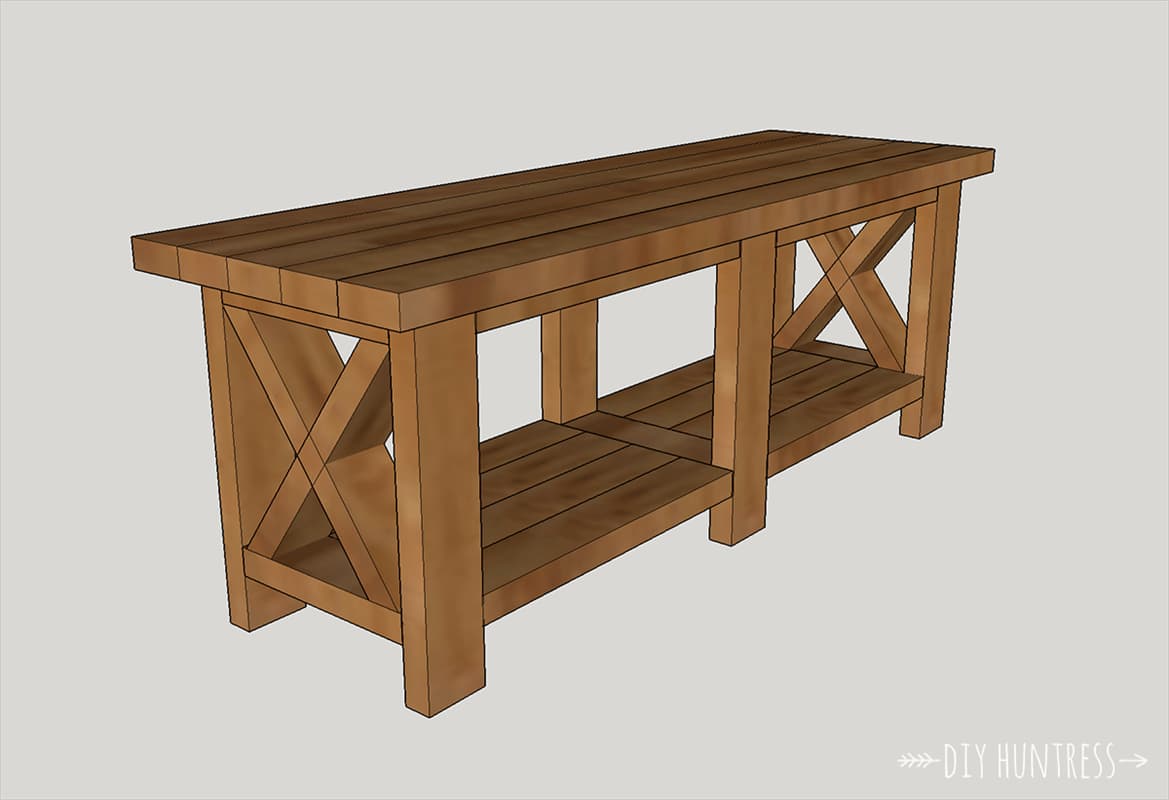
NotchDIY Rustic X Bench With Shelf
Step-by-step build — 10 steps. Also available as a print sheet.
1Review The Plans
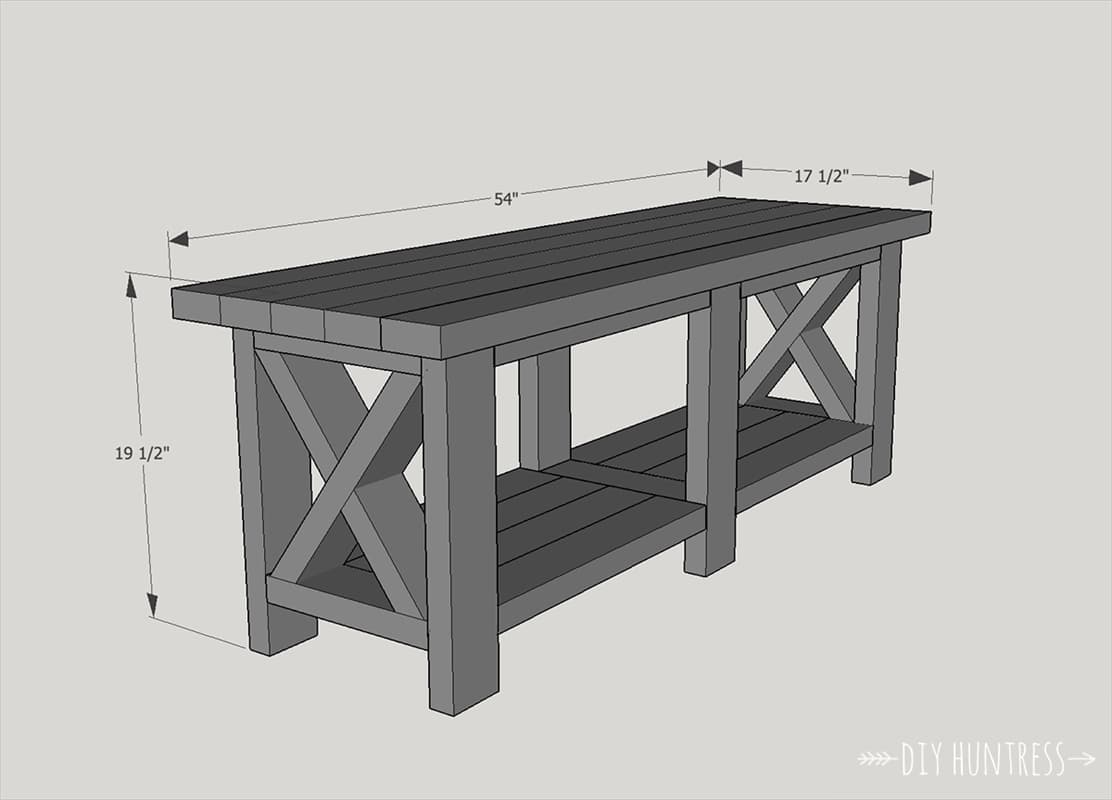
Check out the dimensions of the bench to make sure it fits in your space. You can always adjust the size by lengthening or shortening the shelf pieces and bench top pieces.
2Make Your Cuts
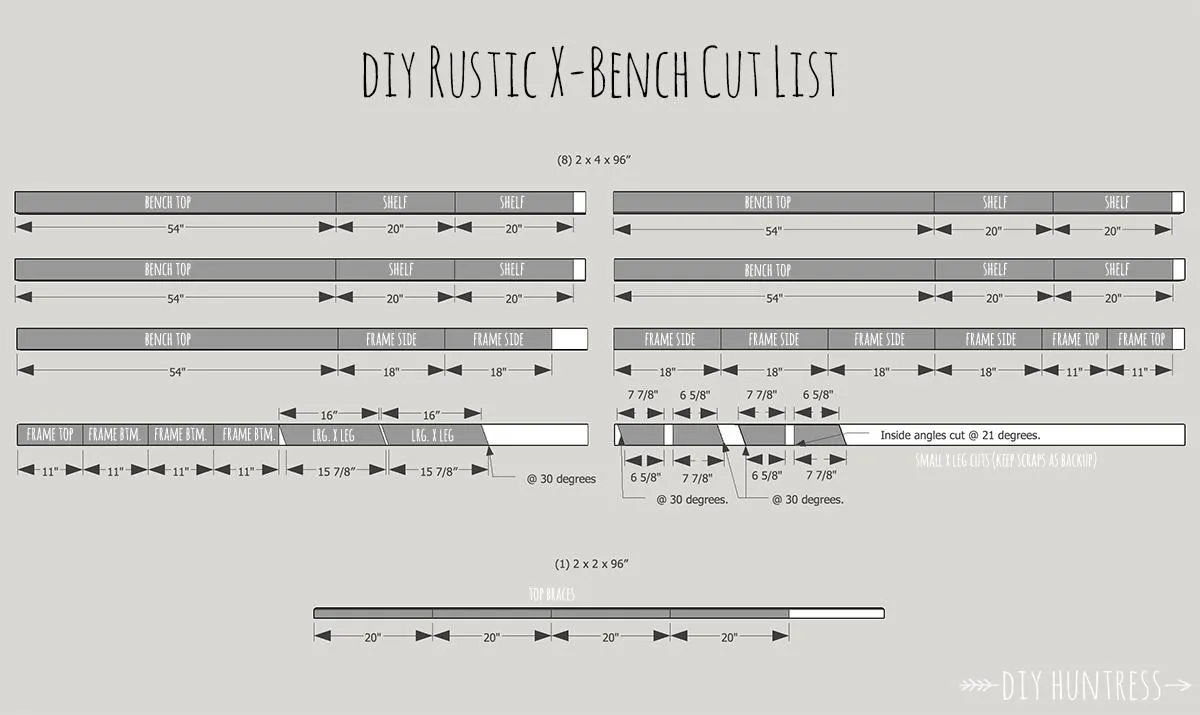
Follow the cut diagram and cut pieces for easier assembly. Make sure to refer to the diagram describing the cuts for the "X" legs before cutting those pieces.
3Create The Frames
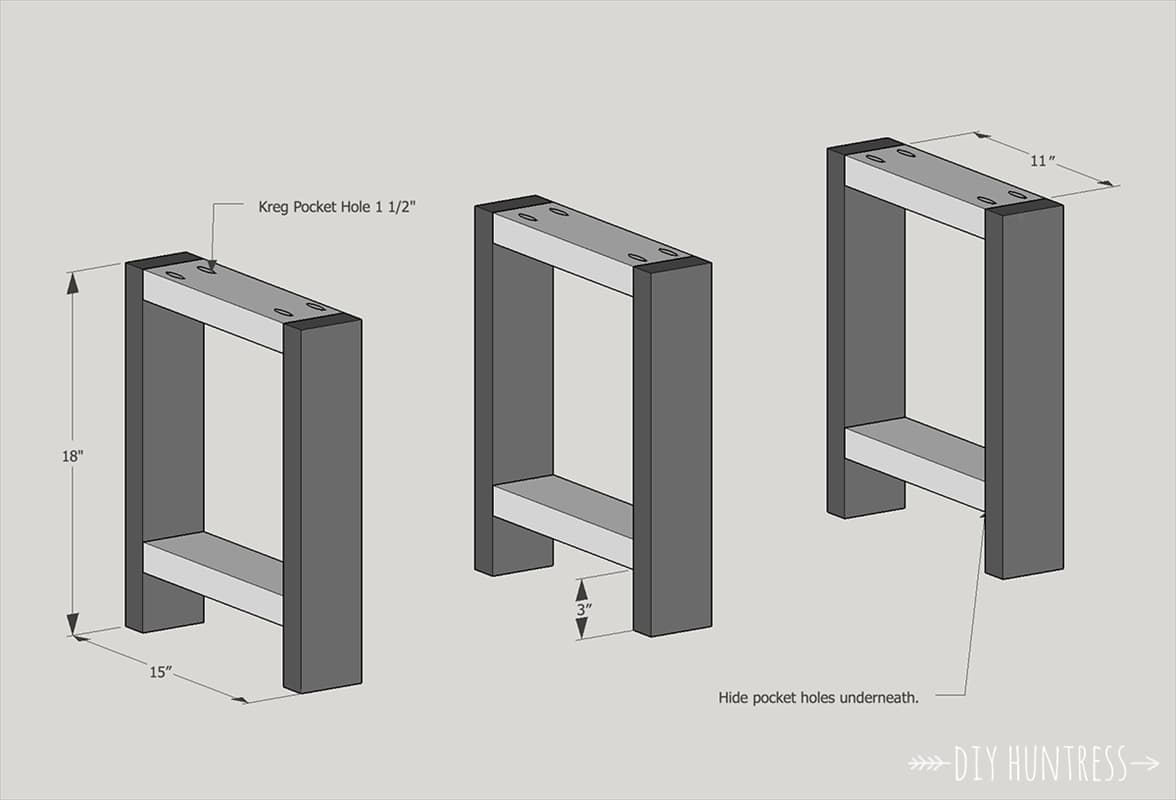
Create three frames from the Frame Side, Top & Bottom pieces. Attach them using 2 1/2" pocket hole screws and wood glue.
4Fit The X's
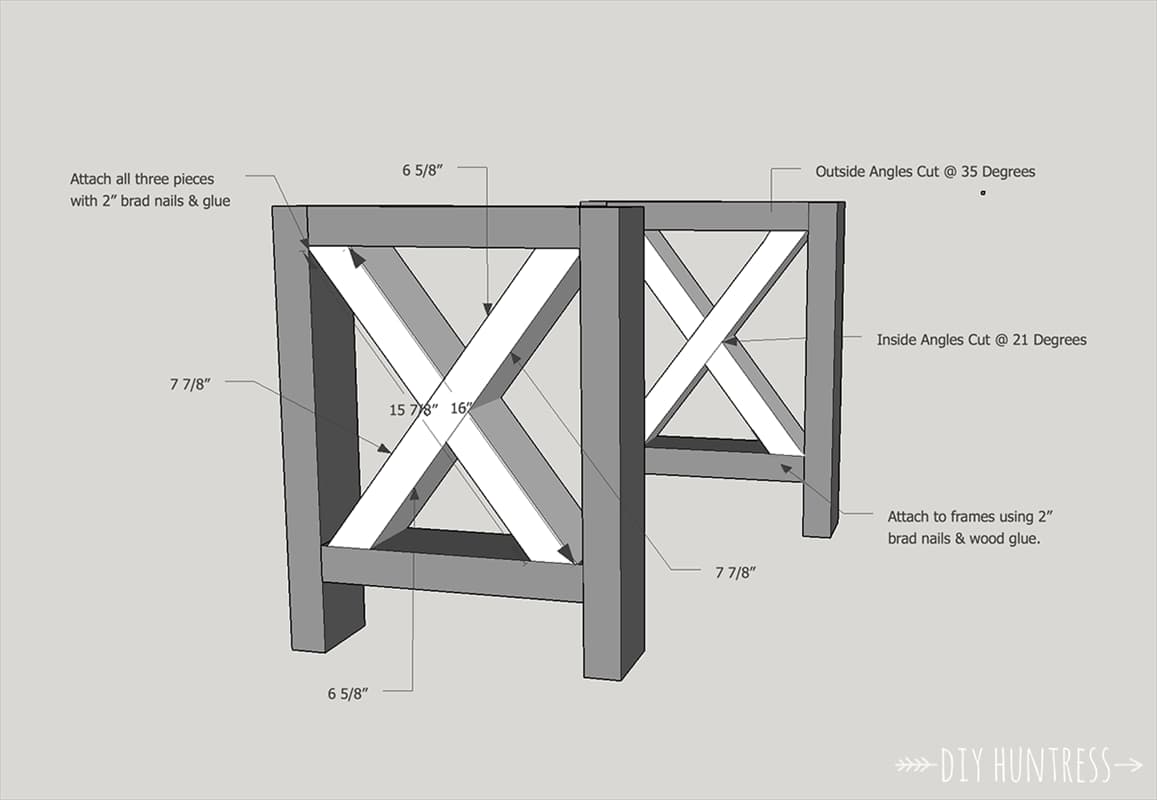
- Next step is to fit the X pieces. I did this early because I was able to place larger 2x4's under the frames at the angles I wanted and then used a pencil to mark where my cuts would be (this is how I found my angles - you may want to do this as well for security as no piece of wood is perfect).
- Start by cutting four larger pieces first with 30 degree angles on each end (cut the angle on the 2" side), and then cut the smaller pieces down to size. The inner angles are set at 21 degrees.
- Attach the X's with 2" brad nails and glue.
- Nail and glue them to the frame. You may want to sand all of these parts during this step, rather than later. For a visual aid to help get those X's right, please visit my blog (link in the extras tab)
5Create The Shelves
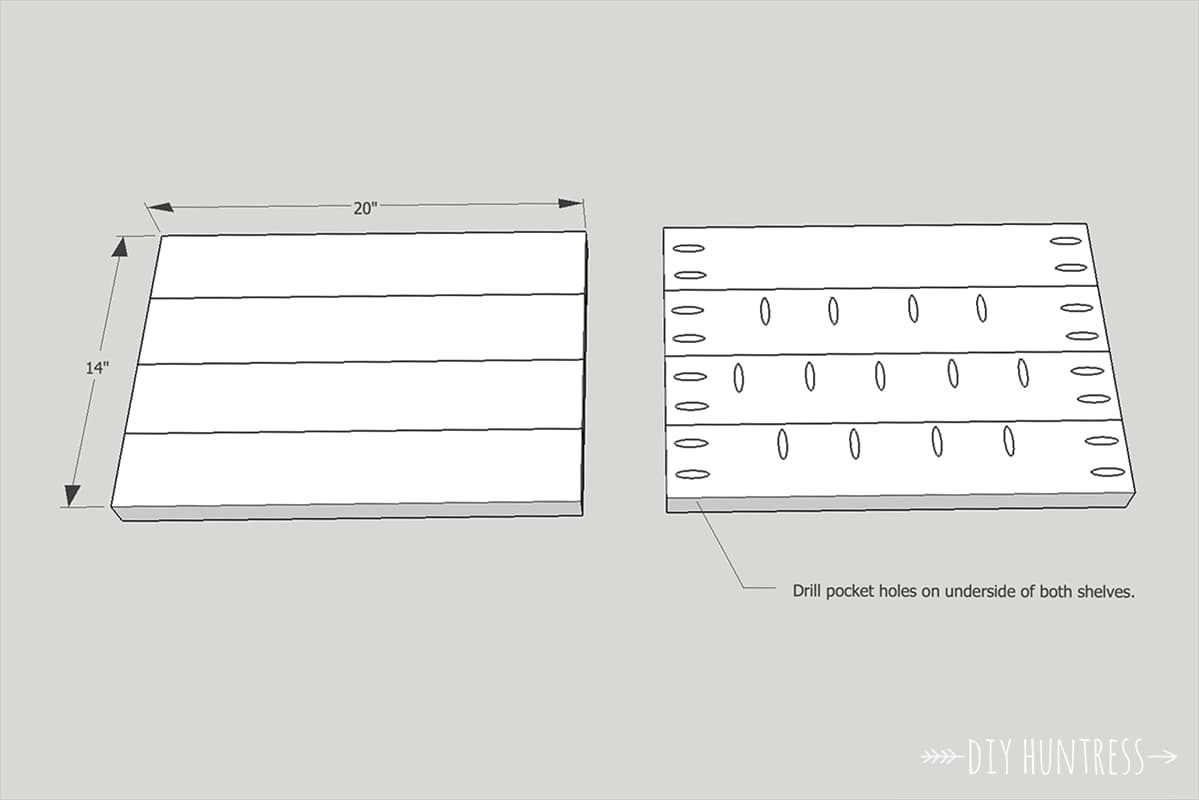
Create both shelves by attaching all of the shelf pieces using pocket holes and wood glue. Make sure to add pocket holes on both ends as well for attaching the shelves to the frames in the next step. All pocket holes will be on the bottom of the shelves when attaching them to the frames in order to hide them.
6Attach The Shelves
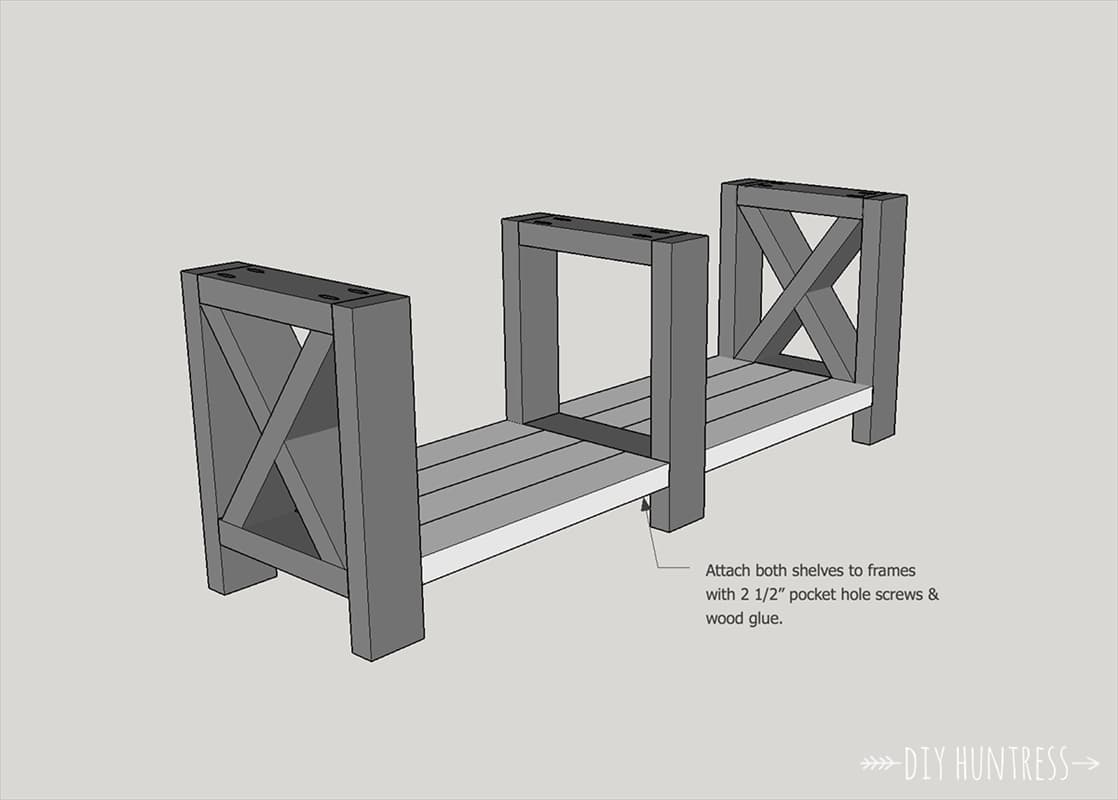
Attach the shelves to the frames using pocket holes, screws, and glue.
7Attach The Braces
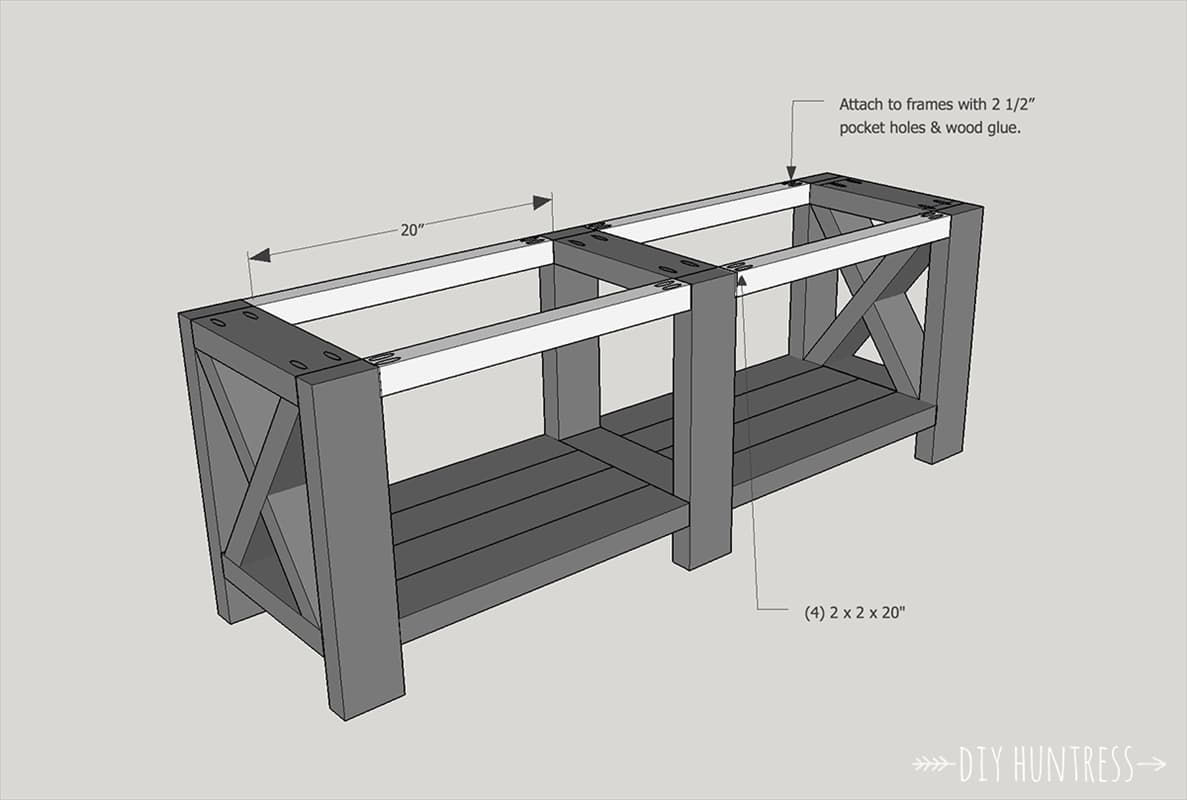
Attach the 2x2" braces to the frames for added stability. Use pocket holes, screws, and wood glue for this step.
8Build The Bench Top
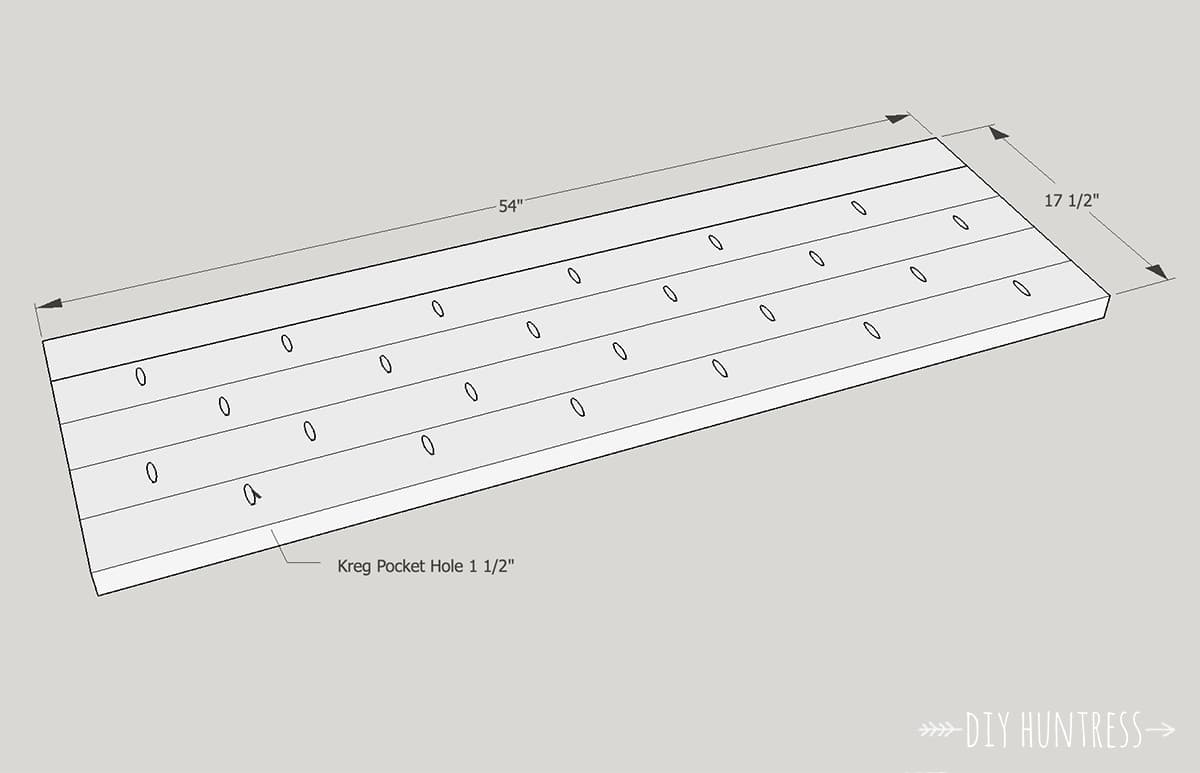
Build the bench top by attaching all of the 54" boards with pocket hole joinery and wood glue.
9Attach The Bench Top
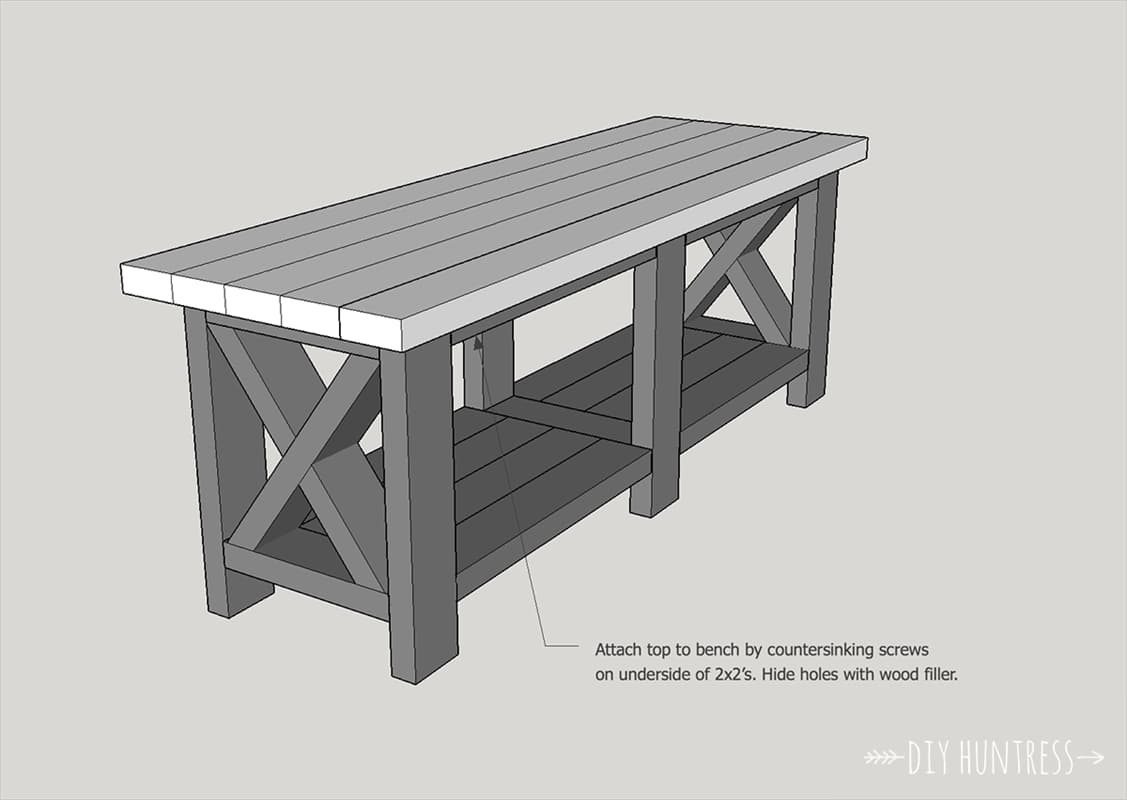
Attach the seat to the rest of the bench by screwing it in from the bottom of the braces. You can cover these holes and your pocket holes with wood filler later.
10Finish It Off
Fill all holes with wood putty and then sand, stain, and seal your bench. If you are using your bench outdoors, make sure to seal it with an outdoor/waterproof sealer.