Notch
NotchDIY Pie Carrier Display Box
Step-by-step build — 14 steps. Also available as a print sheet.
1Cut Plywood Panels for Box
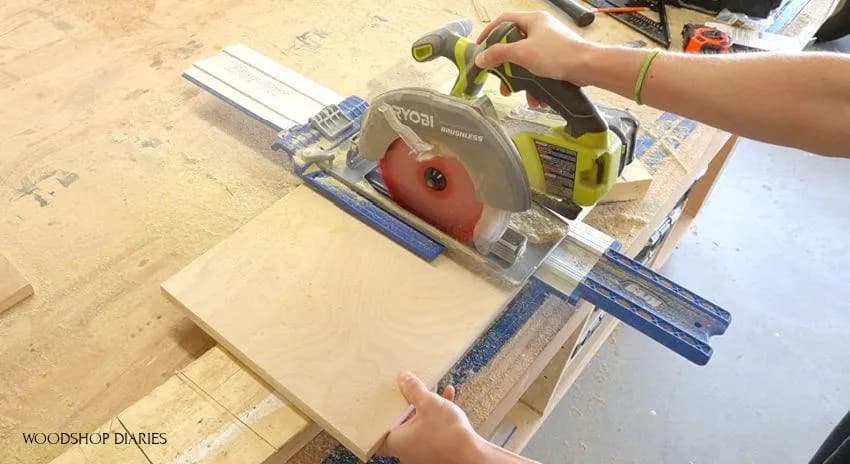
Cut plywood panels according to the cut list to make the bottom, back and two side panels. You can use 3/4" plywood scraps for this, or simply cut these pieces from a 1/4 sheet if you don't have scraps. A circular saw and Kreg Rip Cut and/or AccuCut work well for this.
2Mark to Cut Dadoes for Plexiglass
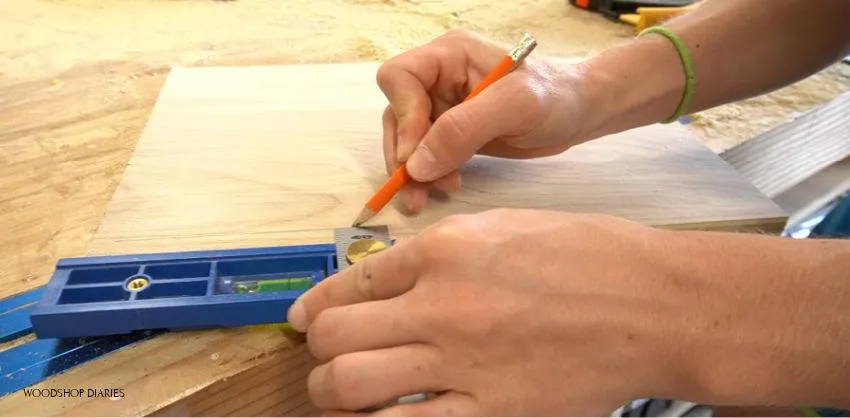
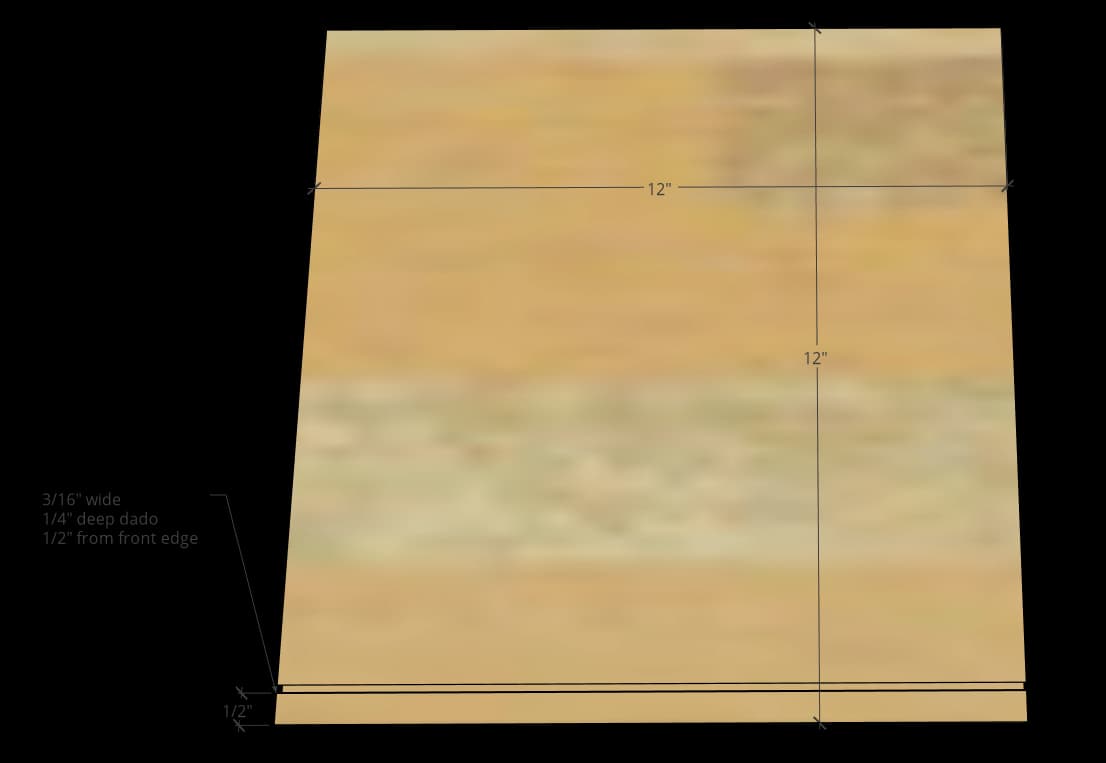
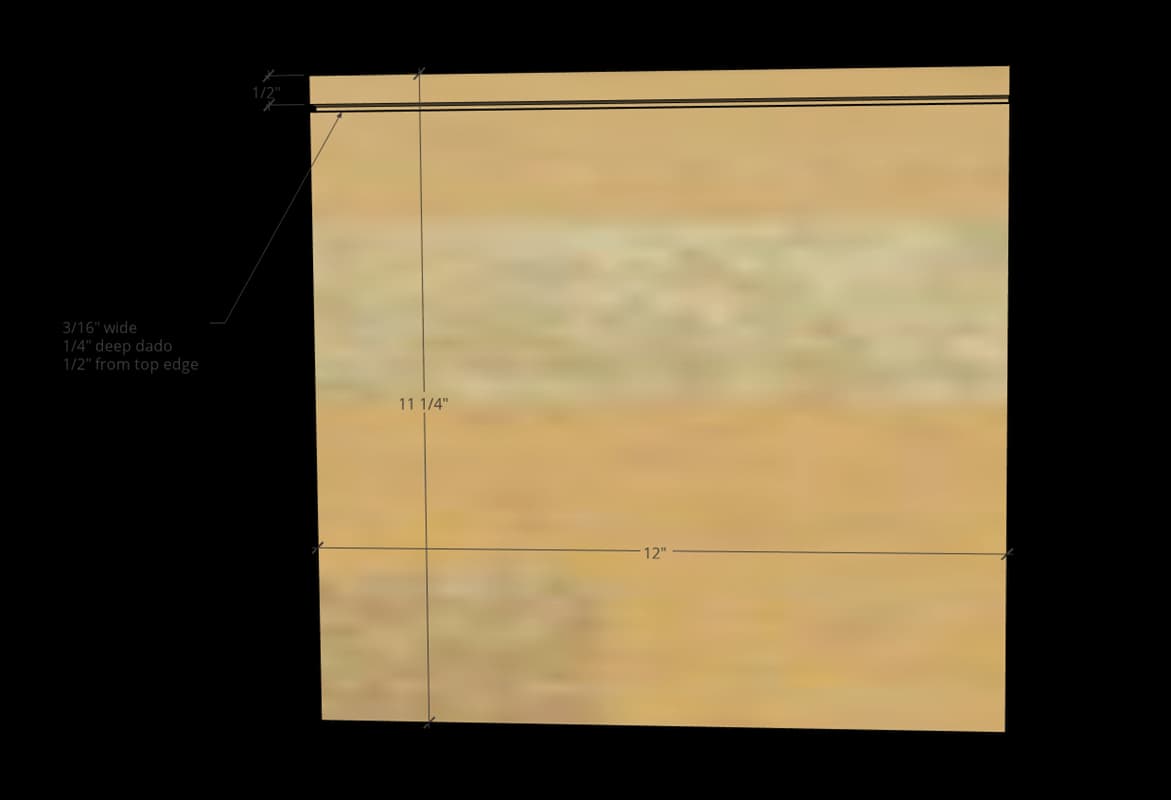
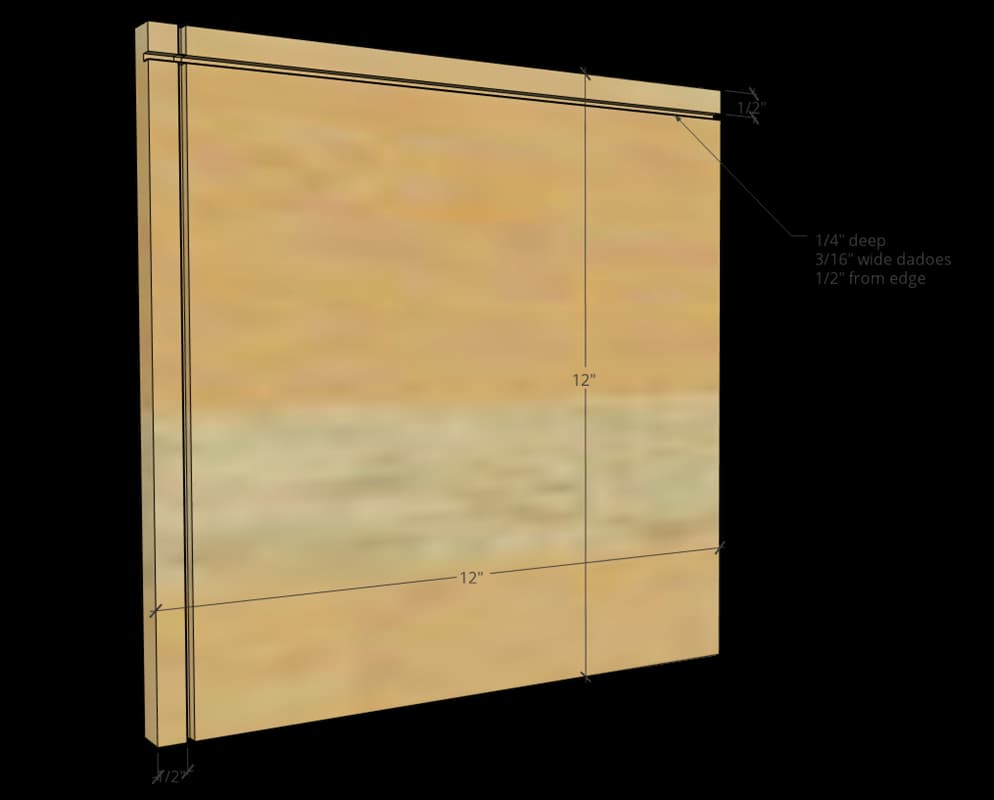
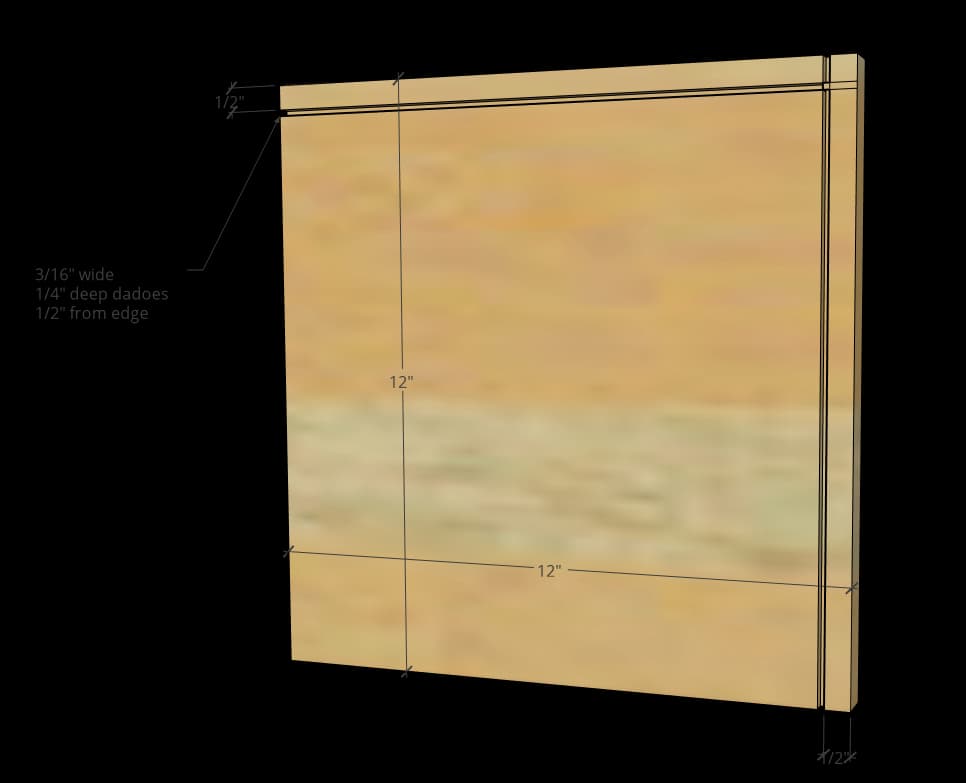
Make a mark 1/2" from the front edge of the bottom panel. Make another mark 1/2" from the top of the back panel, and mark 1/2" from the front edge and top edge of both side panels. It was helpful to set my Kreg MultiMark tool to 1/2" and simply run my pencil along the edge of it to quickly mark 1/2" from these edges.
3Cut Plexiglass Dadoes
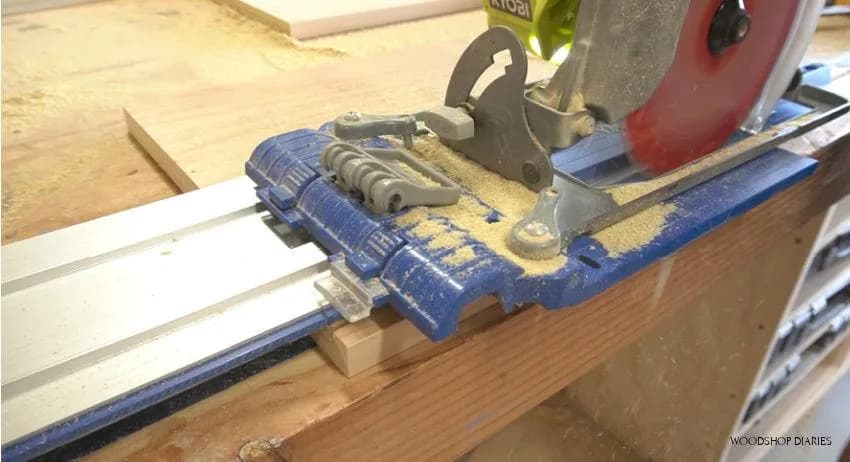
Use a straight edge or a Kreg AccuCut to use a circular saw to cut a dado along these lines from step 2. The dadoes should be SLIGHTLY over 1/4" deep (9/32nds to 5/16ths or so). To do this, I lined up my AccuCut along this line on one of the pieces and adjusted my circular saw depth so that it barely cut into the wood. I gradually dropped the depth and repeated the cut until it was just a little deeper than ¼”. After I had my blade depth set right, I adjusted my AccuCut over just to the edge of the cut and cut again. This would give me a dado thickness of about 2 blade widths, which is a little over 1/8” (about 3/16"). I was using 1/8” thick plexiglass for this, so I just needed the groove to be slightly wider.
4Bottom Dado Diagram
Here is a diagram of the bottom panel with dado cut.
5Back Dado Diagram
Here is a diagram of the back panel dado cuts.
6Left Side Panel Dado Diagram
Here is a diagram of the left side panel dado cuts.
7Right Side Panel Dado Diagram
Here is a Diagram of the right side panel dado cuts.
8Cut Handles for Display Box
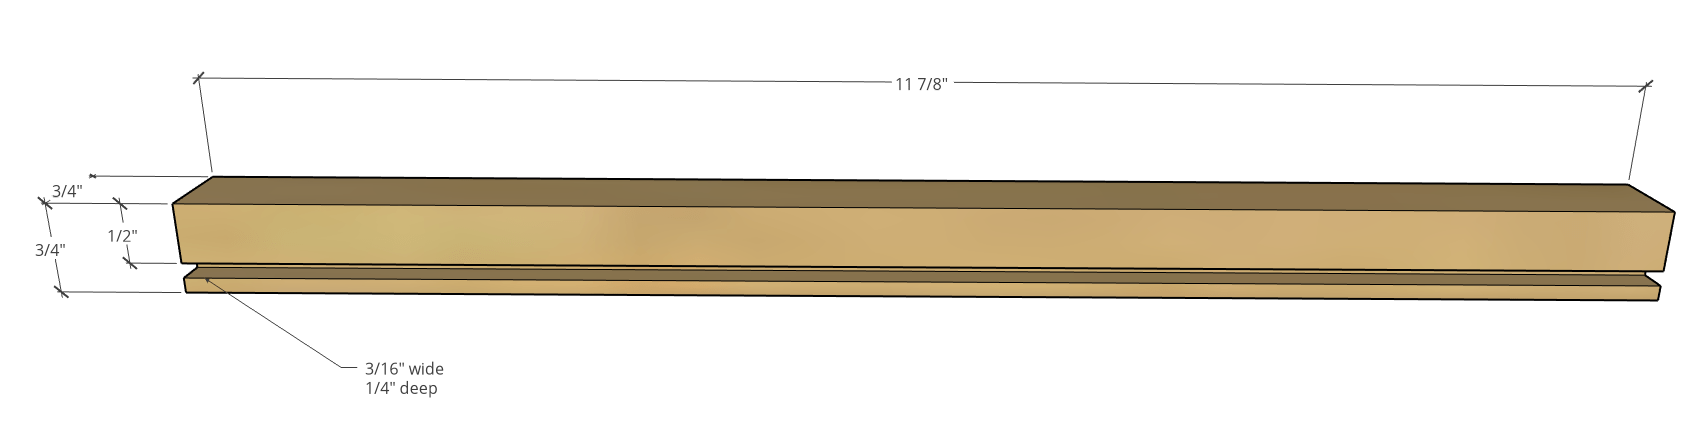
From a remaining piece of scrap plywood at least 12" wide, repeat steps 2 and 3 to mark 1/2" lines from two opposite (at least) 12" long edges and cut dadoes along the lines about 3/16" wide and a little over 1/4" deep--just like the previous dadoes. (See video in extras tab for details) Then, mark 3/4" from the edges and cut these pieces off of the plywood panel to give you two handles like shown. You're basically cutting 3/4" square dowels, but cutting a dado in it first. Trim the length to be about 11 7/8" so that it'll have a little wiggle room to slide in and out once the plexiglass is attached.
9Cut Plexiglass Panels
I called up my local glass shop to cut me two pieces of 1/8" thick plexiglass for the top and the front of this box. The dimensions are in the cut list. Also, if you don’t know of a local glass shop, you can usually buy sheets from your local big box store and cut them yourself OR sometimes they will cut it for you as well.
10Assemble Pie Box
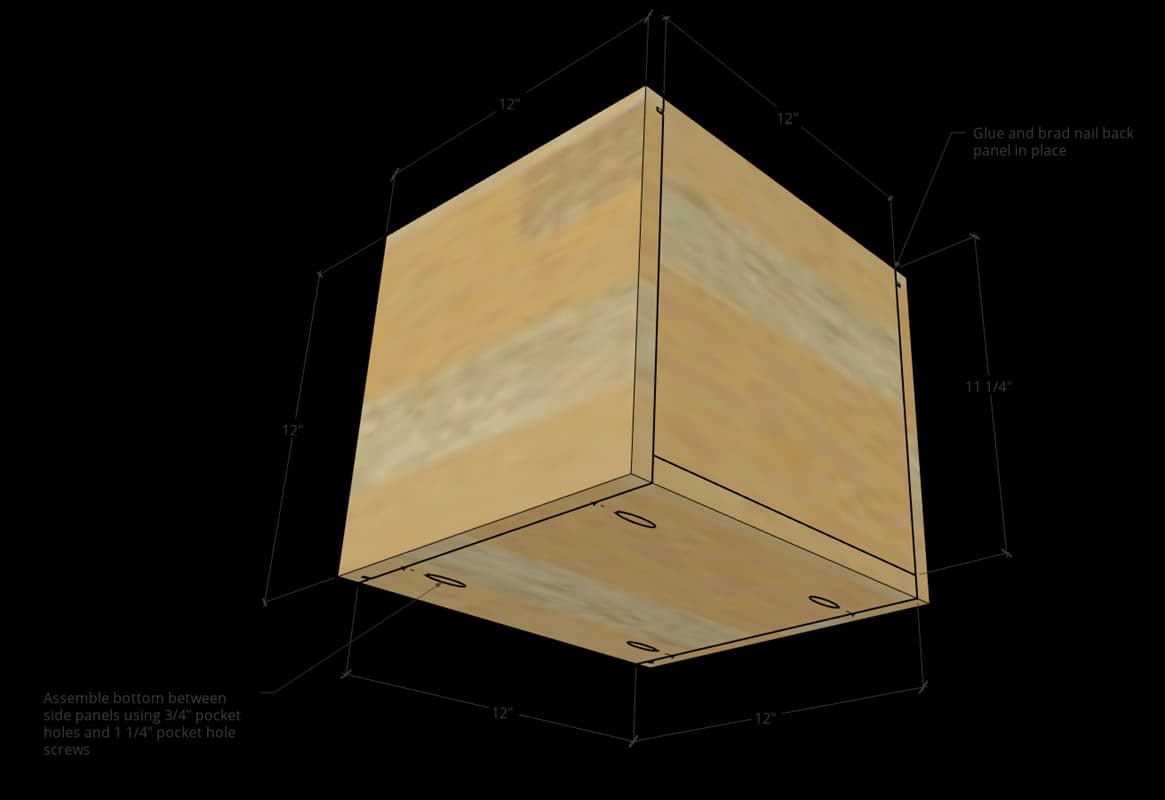
Because the bottom of the box will be holding the weight and they’ll be hidden, I chose to use 3/4" pocket holes and 1 1/4" pocket hole screws on the bottom panel like shown. BUT, you would probably be fine with just glue and nails, if you didn’t want to use pocket holes. After assembling the bottom panel between the sides with pocket holes and screws, use wood glue and nails to secure the back panel.
11Attach Plexiglass to Handles
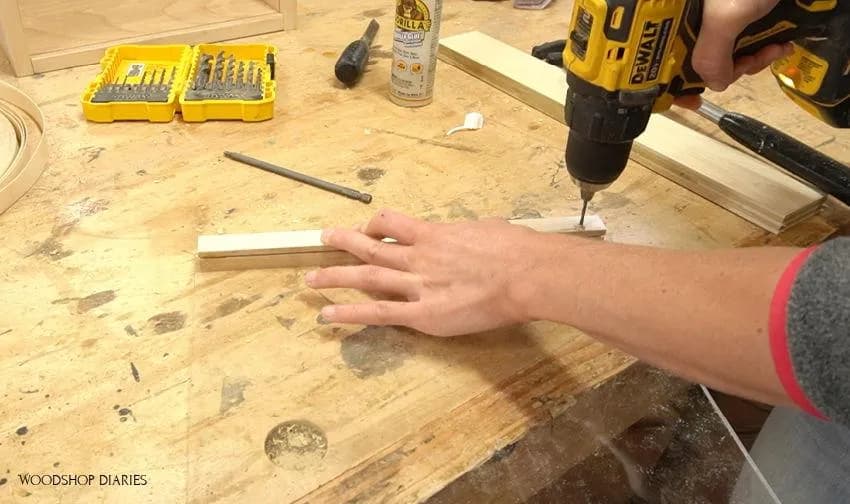
I used some clear Gorilla Glue in the dadoes on the handles and slid the panels into the grooves. Make sure to center them so there's equal overhang on both ends of the handles. VERY CAREFULLY predrill holes for some small 5/8” wood screws. I tried to get as close to the edge as I could so the screw would still hold. Honestly, I think the clear Gorilla Glue would have held it just fine once it was dry, but a couple added screws don’t hurt. So those are optional. I think if I was doing it over, I’d skip them.
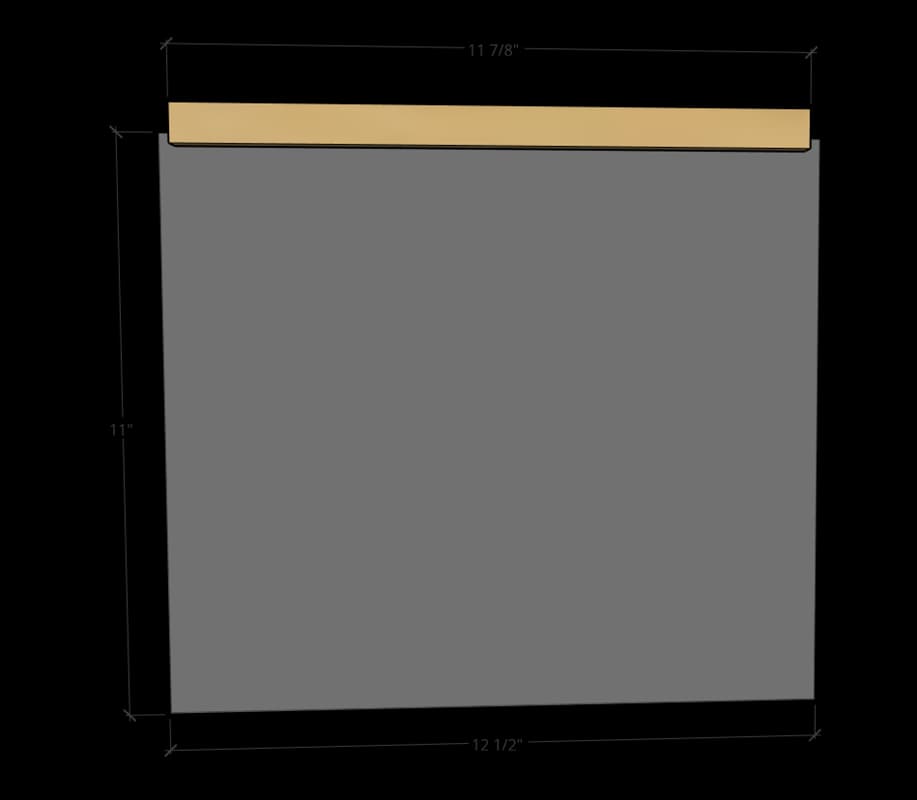
12Top Plexiglass Panel Diagram
Here is a diagram of the top plexiglass panel assembly.
13Front Plexiglass Panel Diagram
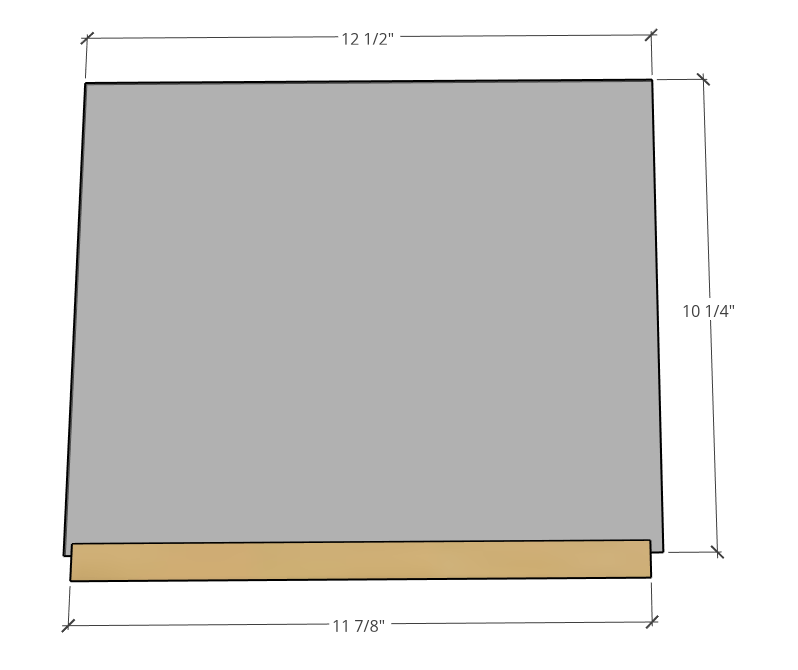
Here is a diagram of the front plexiglass panel assembly.
14Finish
- Once all the glue is dry, give the wood components a food safe finish and be sure to clean the plexiglass with a glass cleaner or soft rag.
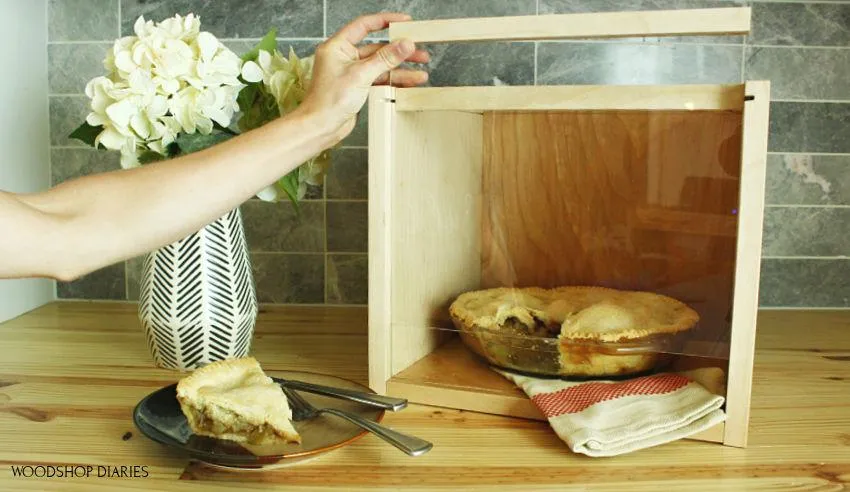
- Then it's ready for whatever you'd like to display inside! I built this originally as a cake/pie box carrier. I thought it would be cute to use to bring desserts or foods to family gatherings and meals. But this would also make a great display case for awards, trophies or keepsakes. Simply slide the top and front panels in and out as needed to access what's inside.
- Check out details and the video tutorial in the extras tab for more information.