 Notch
Notch- Difficulty
- Intermediate
- Time
- 7.8–15 hours
- Cost
- $$$
About this build
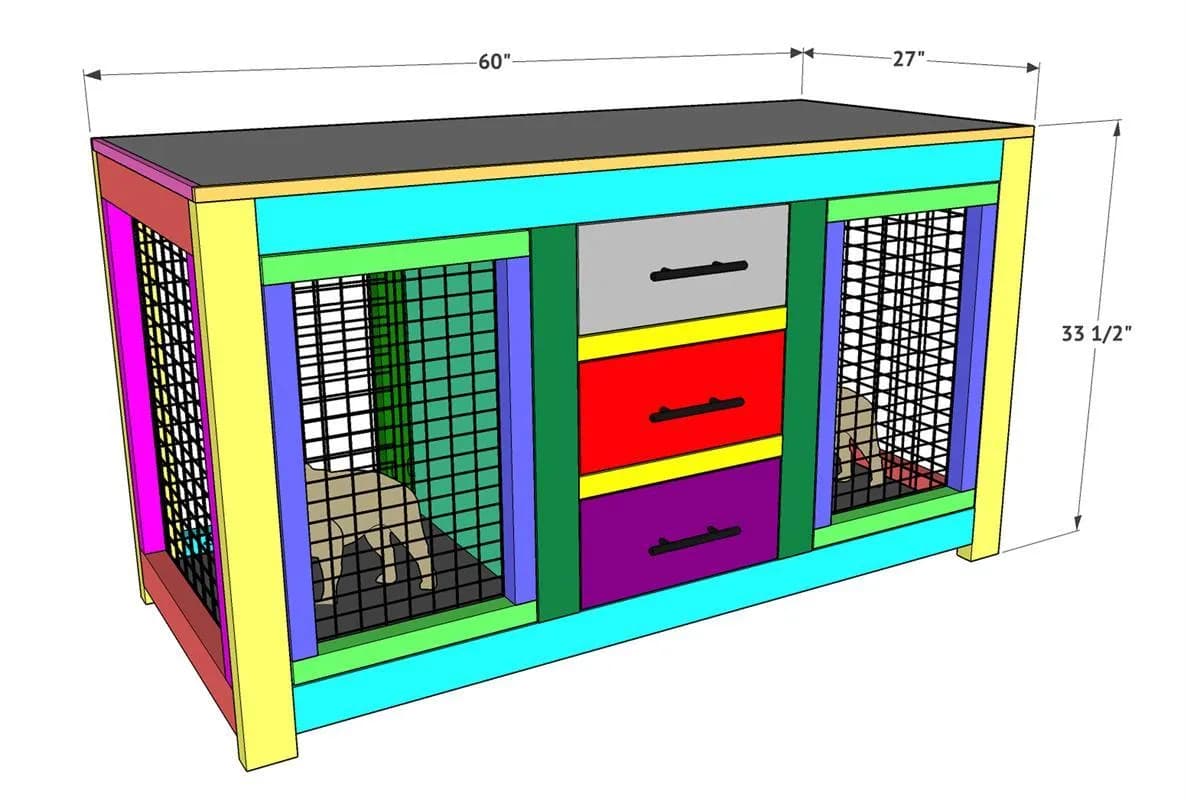
This DIY Dog Crate Console is the perfect combination of form and function. Forget the retail dog crates and build a piece of furniture that will accommodate two large dog, it has plenty of drawers for storage and the bottom drawer hides the food and water! Free plans by www.shanty-2-chic.com
Tools
Essential
- Brad Nailer
- Drill / Driver
- Jigsaw
- Miter Saw
- Pocket Hole Jig
- Table Saw
Materials
| Item | Qty |
|---|---|
| Board, 2x4 96" | 8 board |
| Board, 2x2 96" | 3 board |
| Board, 1x4 96" | 1 board |
| 1 1/4" pocket hole screws | 50 each |
| 2 1/2" pocket hole screws | 50 each |
| 3/4" staples | 50 each |
| 1" pin nails | 25 each |
| 1 3/4" wood screws | 10 each |
| Roll of black PVC coated welded wire | 1 each |
| 22" drawer slides | 6 each |
| Hinges | 4 each |
| Latches | 2 each |
| Dog bowls | 2 each |
Overall cost: $$$. Lumber prices vary by region, species, and season, so we give a band rather than a figure we would only be pretending to know.
Cut list
| Part | Qty | T × W × L |
|---|---|---|
| Boards | 8 | 2" × 4" × 8" |
What to buy
Buy 1 board at 8 ft.
2" × 4"
1 board
Assumes 8 ft stock, a 1/8" saw kerf, and buying each part at its own width. Change the board size or kerf on the full board plan →
Instructions
1Step 1
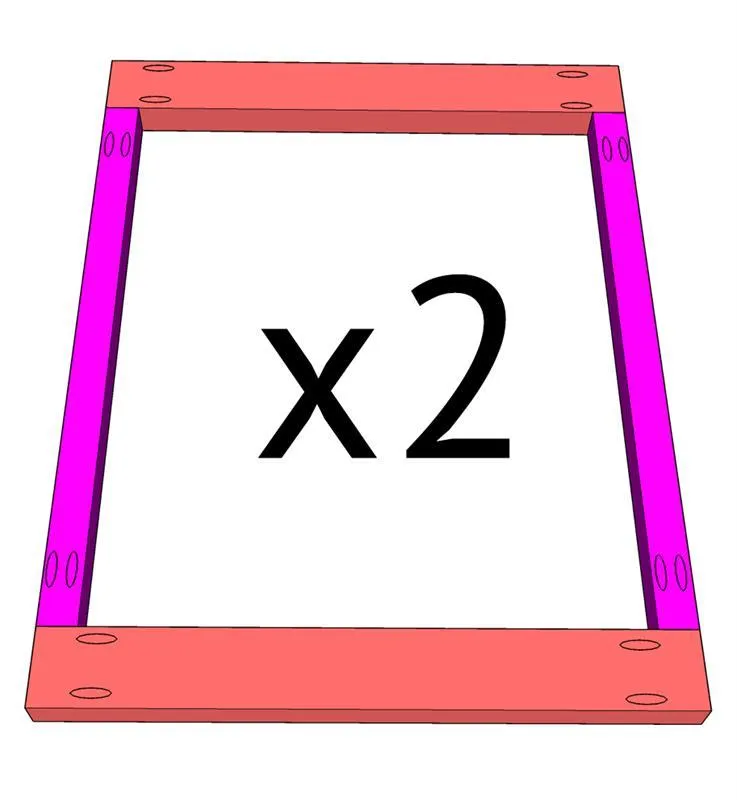
- Cut the side pieces to size and drill 1 1/2" pocket holes into the two side boards.
- Attach the side pieces to the top pieces with 2 1/2" pocket hole screws and wood glue.
- Build two frames.
2Step 2
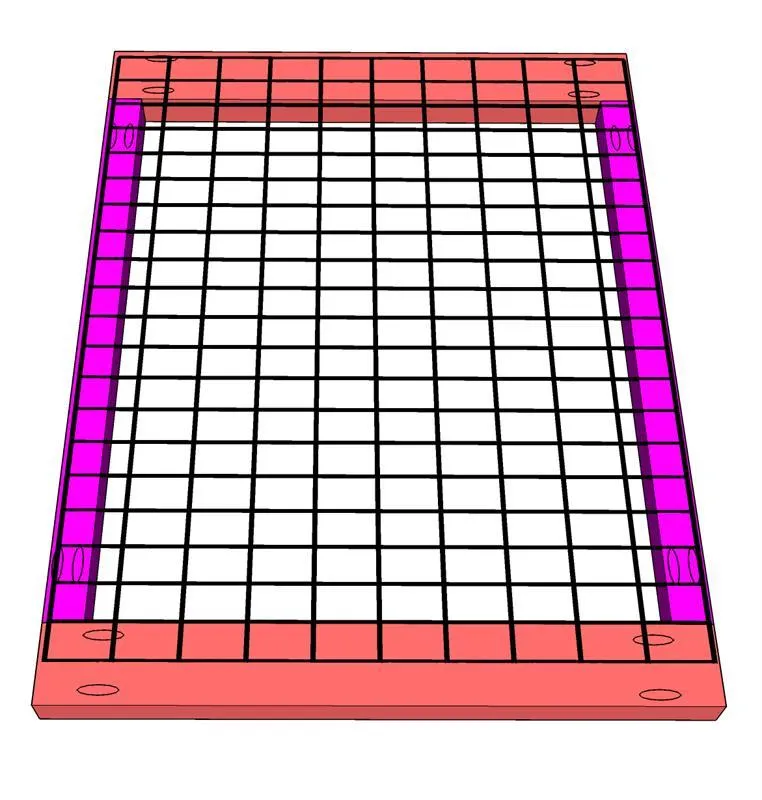
Cut the mesh to size and attach it to the back of the side assemblies with 3/4" staples.
3Step 3
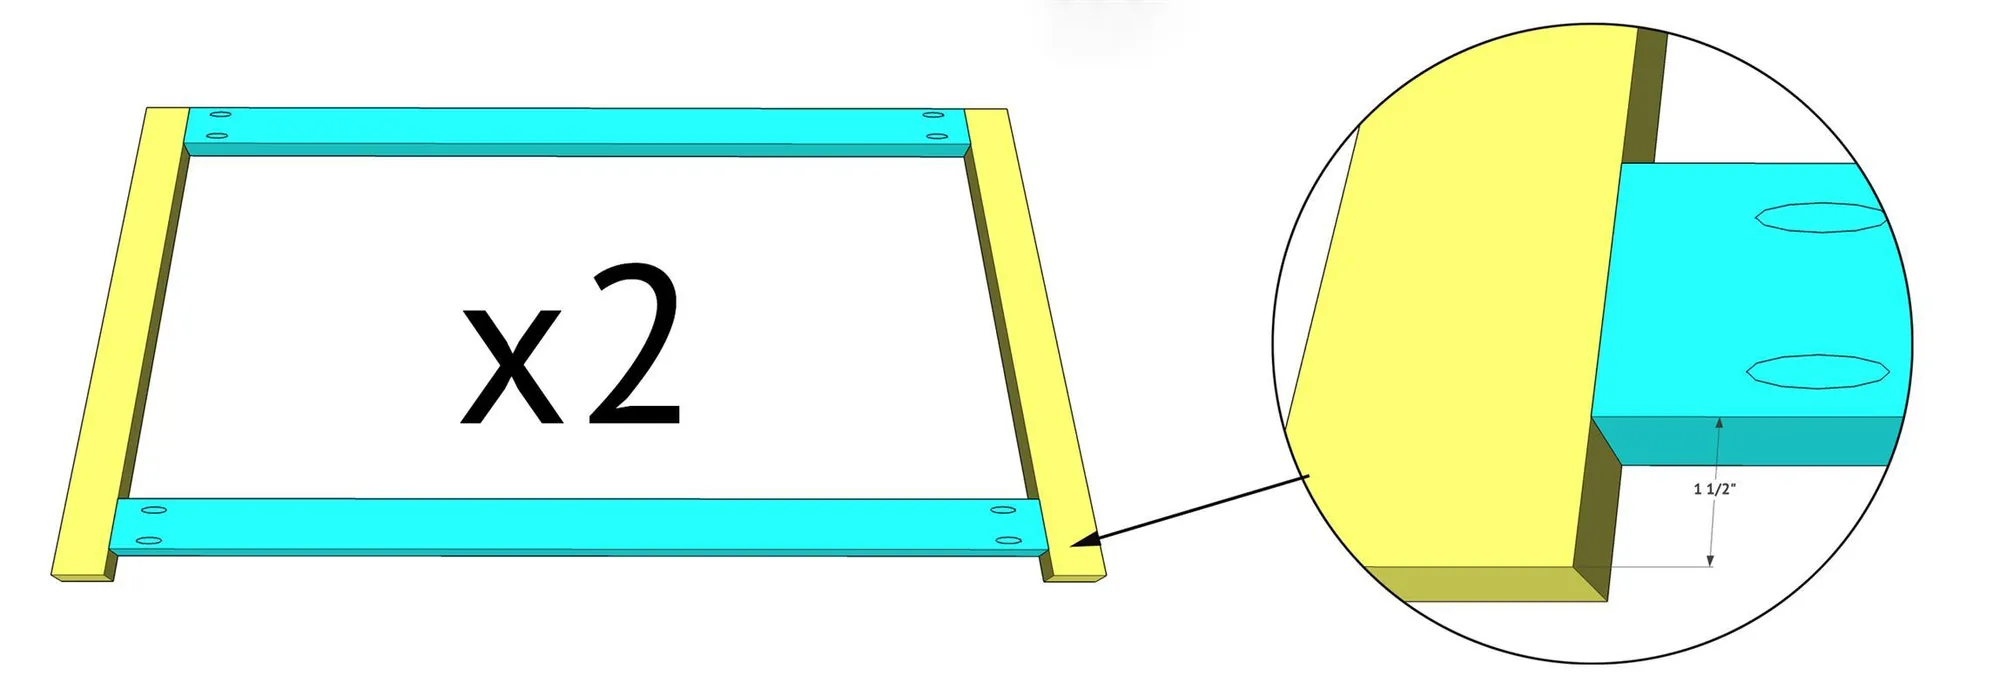
- Cut the front and back frame pieces to size and drill 1 1/2" pocket holes into the ends of the top and bottom apron pieces.
- Attach the apron pieces to the legs with 2 1/2" pocket holes and wood glue.
- Build two frames.
4Step 4
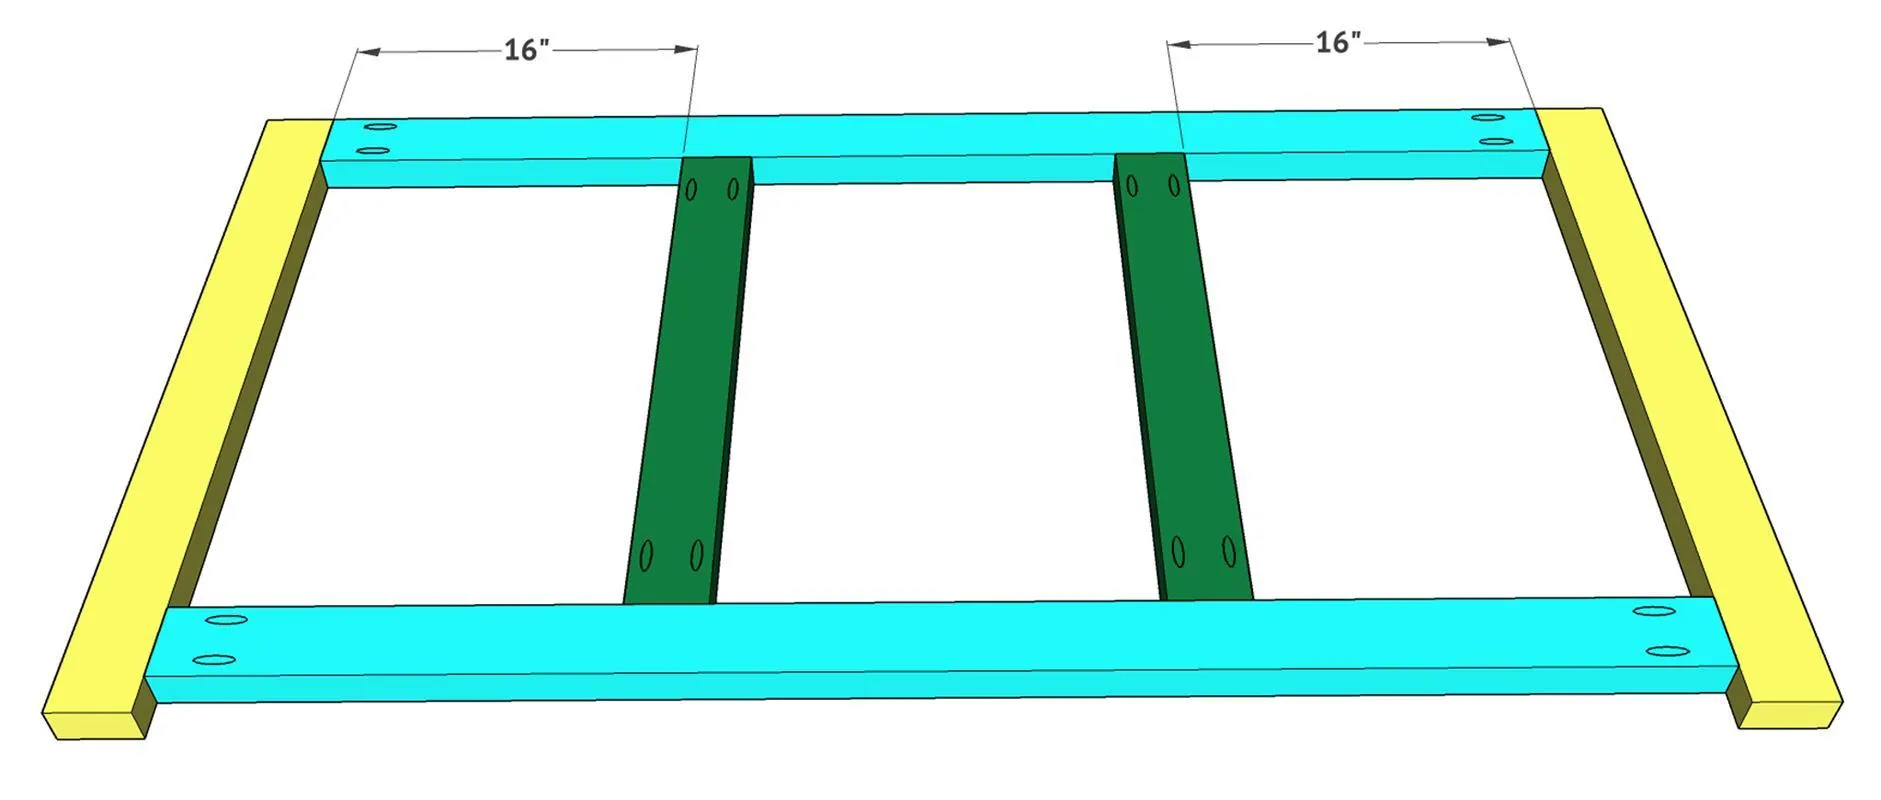
- Cut the vertical dividers to size and drill 1 1/2" pocket holes in both ends.
- Attach them to the top and bottom apron pieces with 2 1/2" pocket hole screws and wood glue. Do this for both frames.
5Step 5
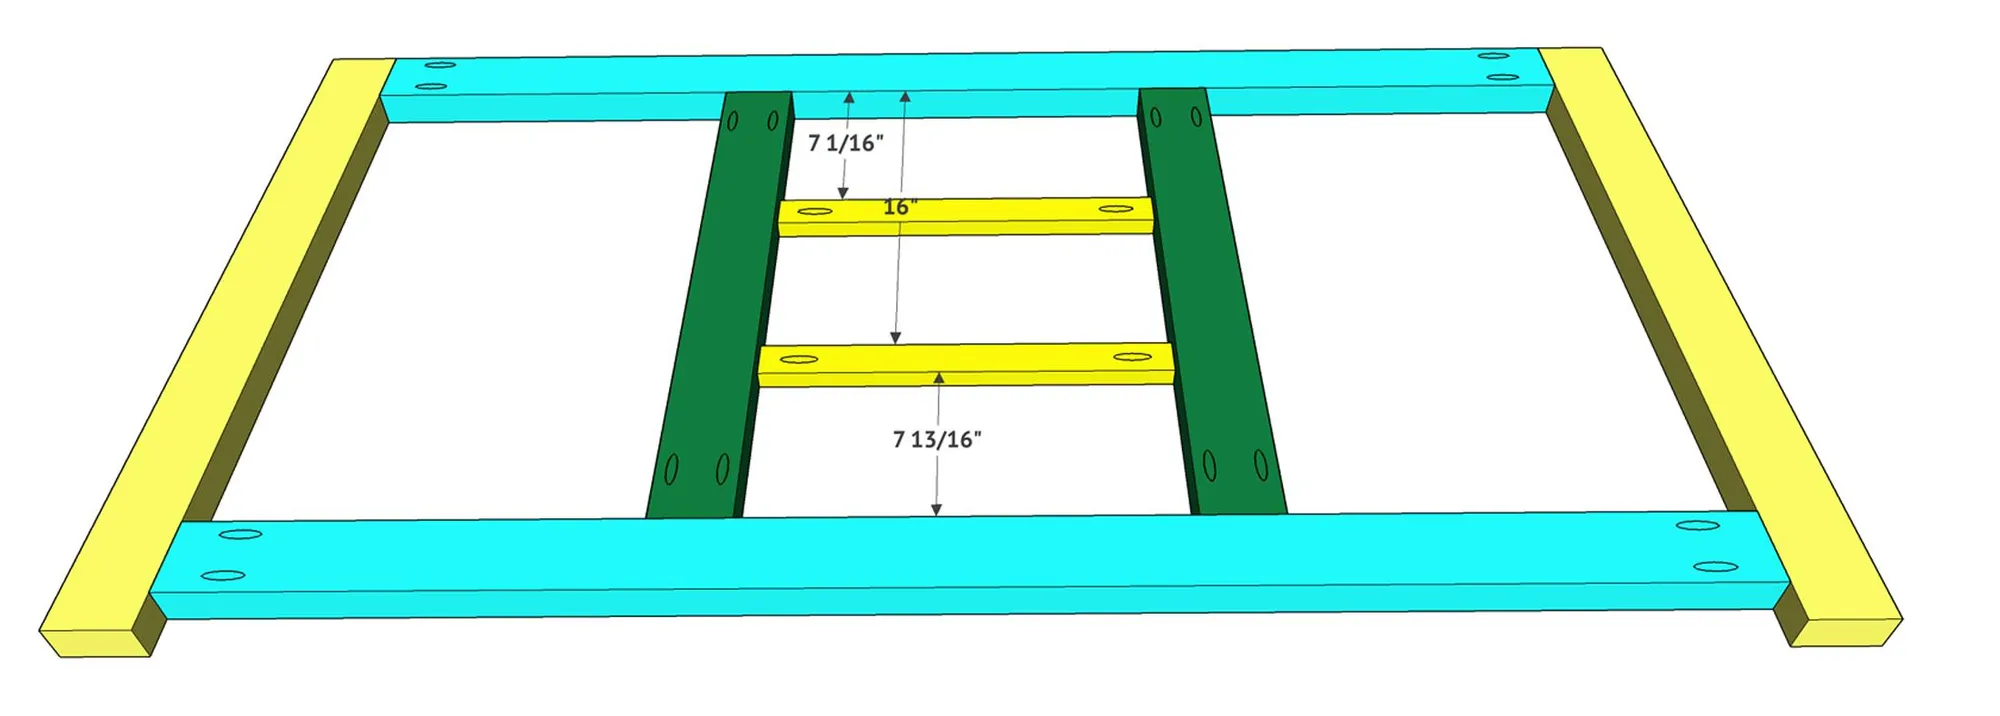
Cut the horizontal dividers to size and drill 3/4" pocket holes into both ends. Attach them to the vertical dividers with 1 1/4" pocket hole screws and wood glue.
6Step 6
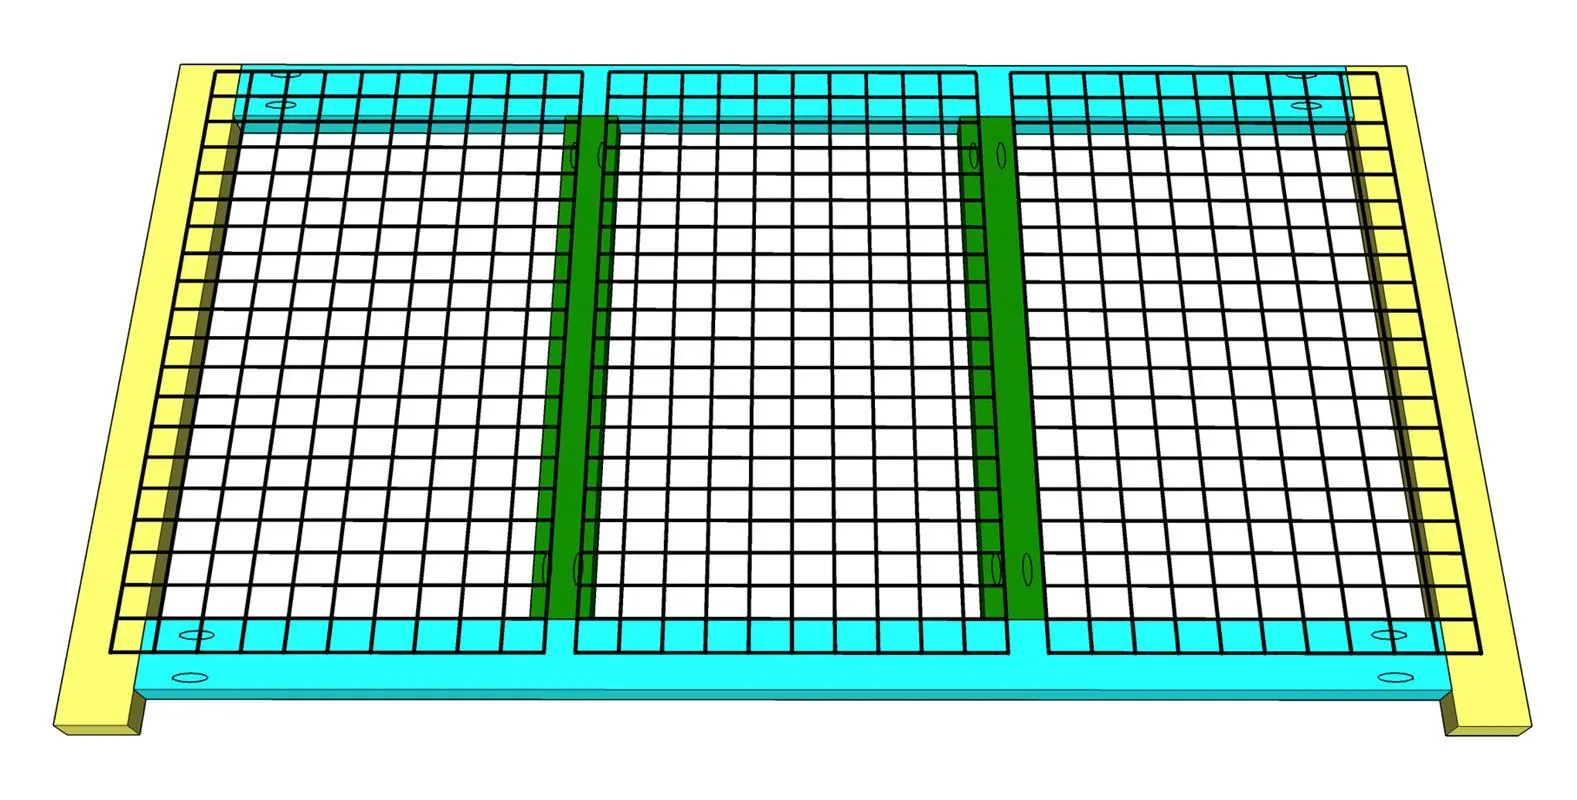
Cut the mesh to size and attach it to the packframe with 3/4" staples.
7Step 7
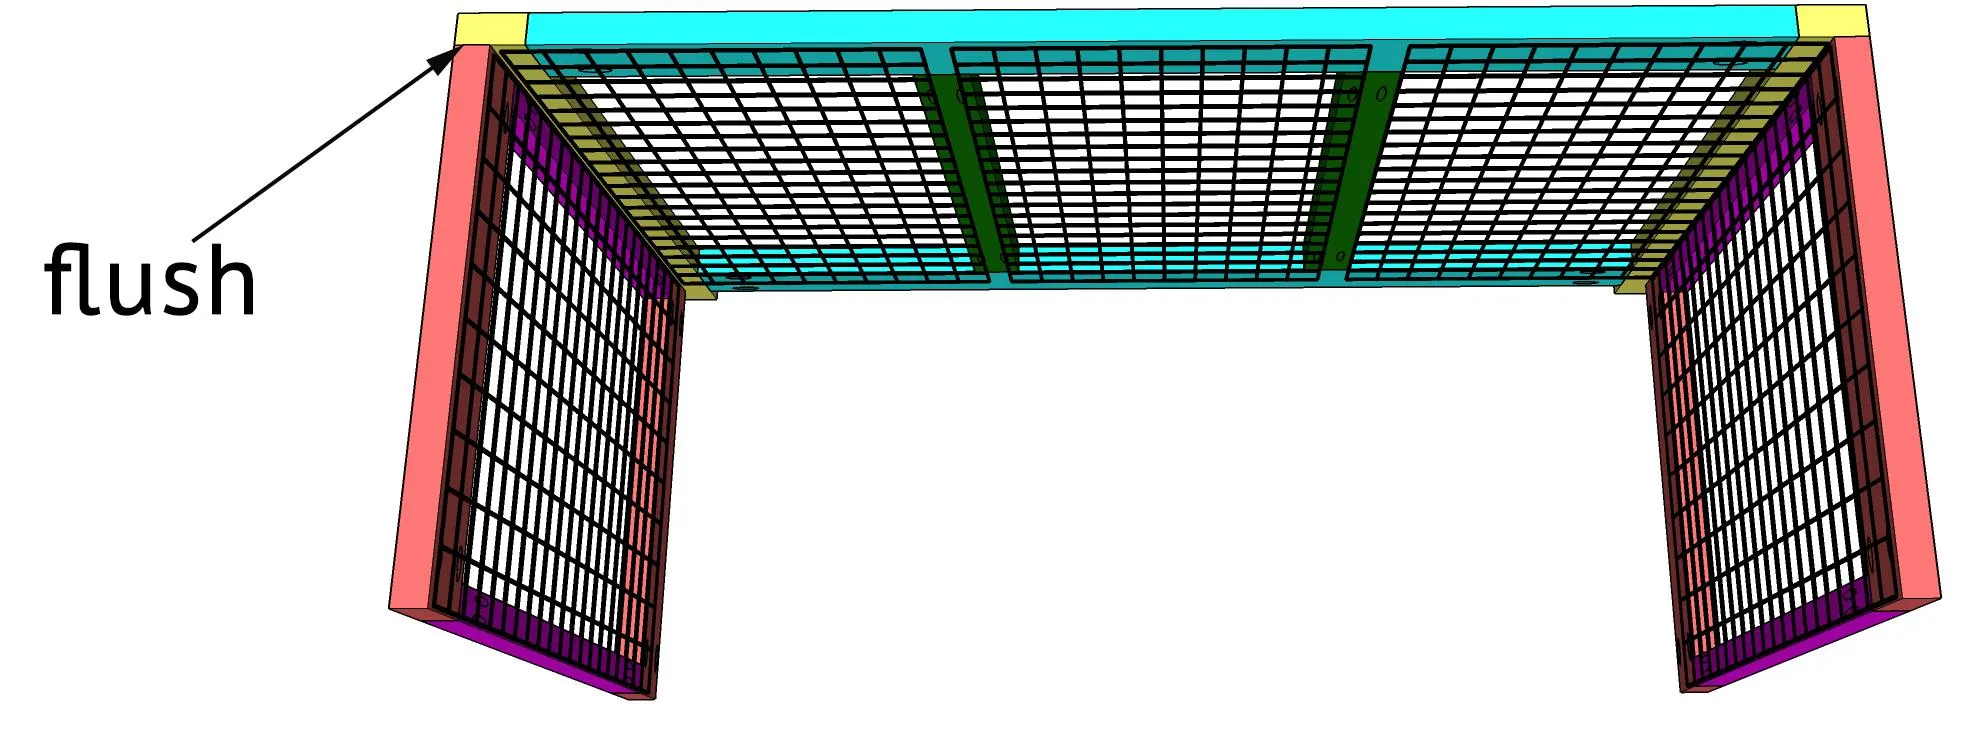
Attach the side assemblies to the back frame with 2 1/2" pocket hole screws and wood glue.
8Step 8
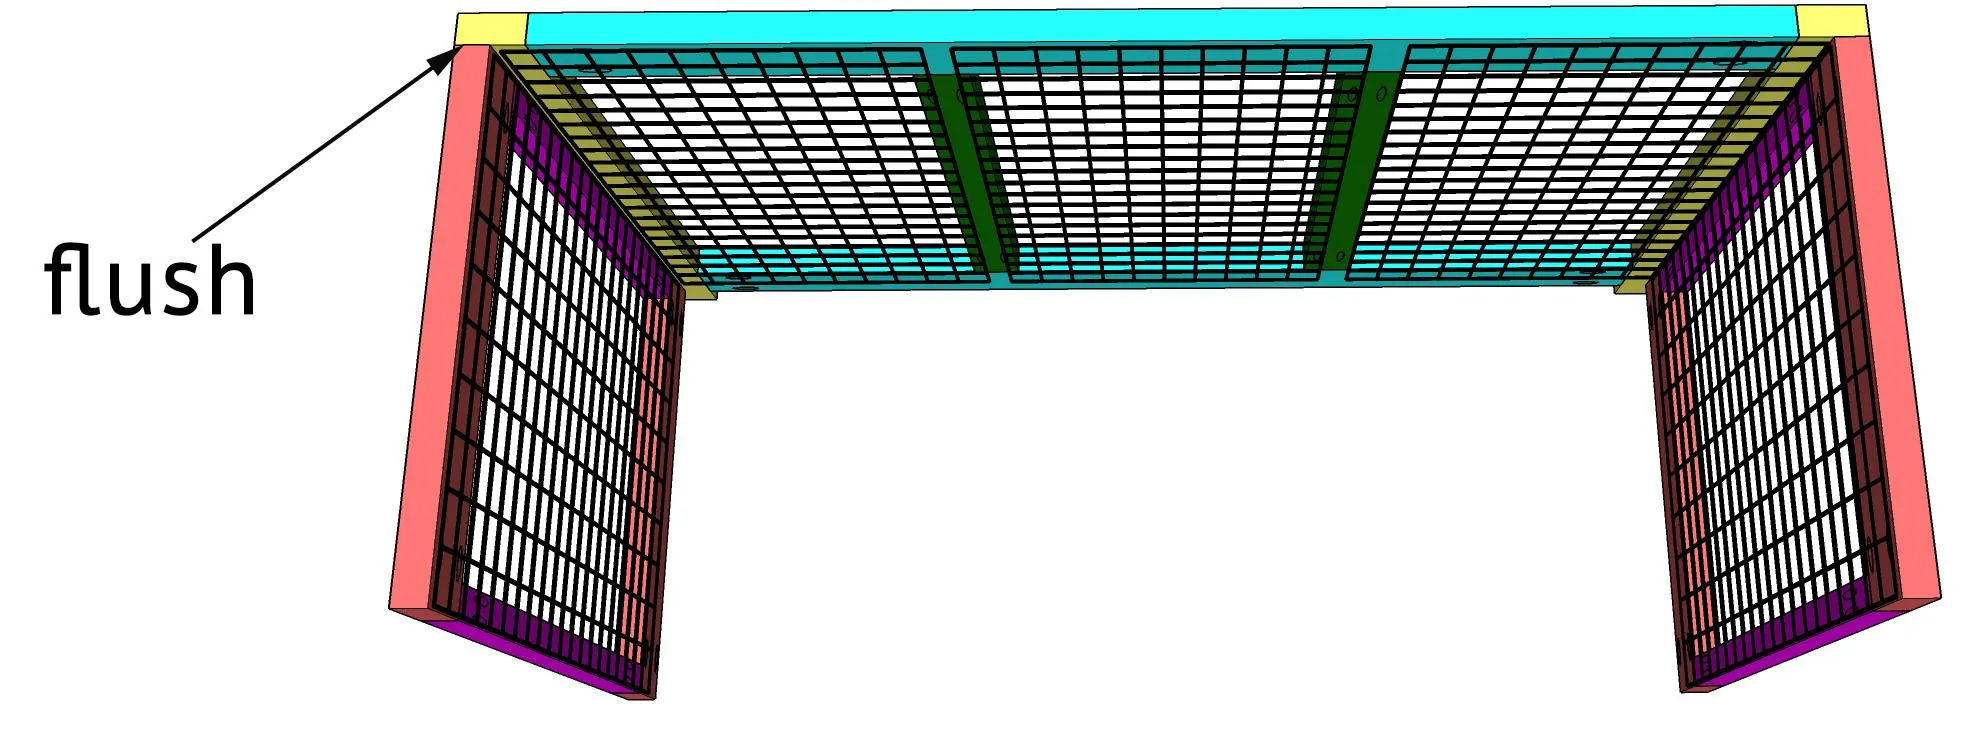
Attach the side assemblies to the back frame with 2 1/2" pocket hole screws and wood glue.
9Step 9
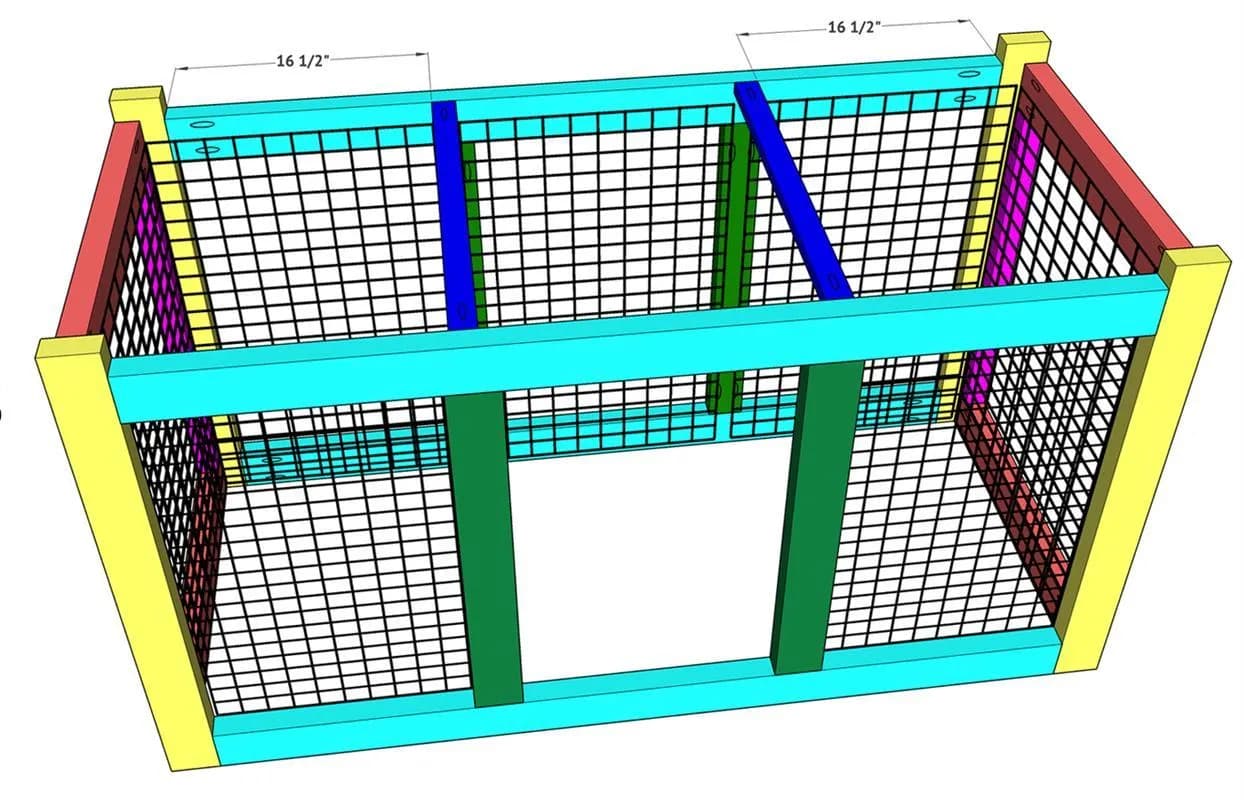
Cut the bottom supports to size and drill 3/4" pocket holes into both ends. Attach them to bottom, front and back aprons with 1 1/4" pocket hole screws and wood glue.
10Step 10
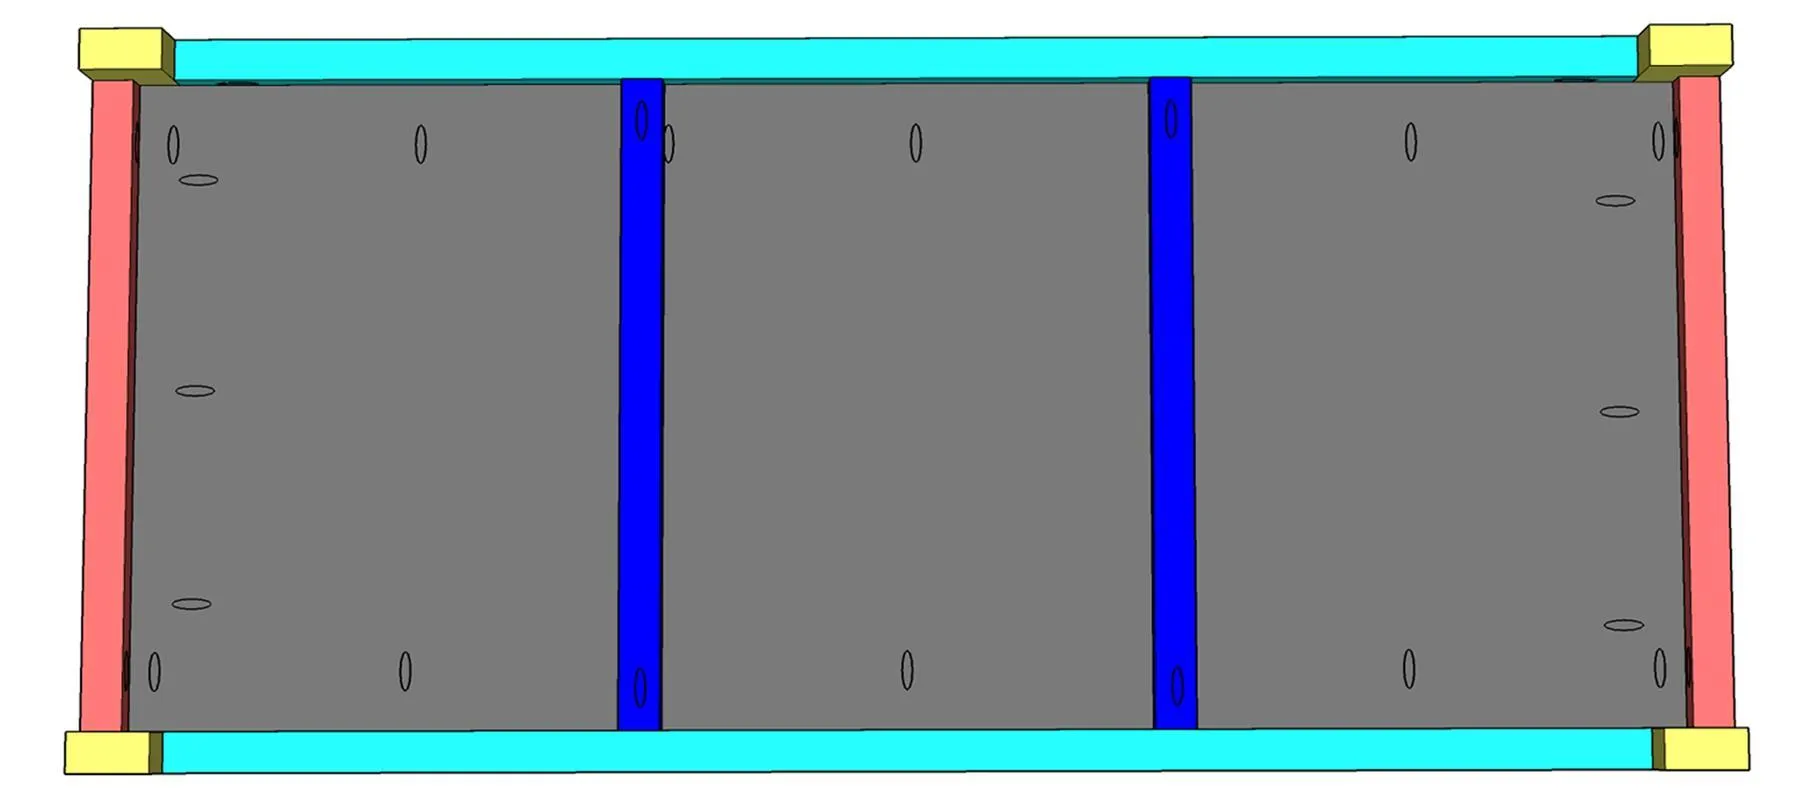
- Cut the bottom panel to size and drill 3/4" pocket holes around all edges.
- Slide it on top of the bottom supports and attach it to the bottom and side aprons with 1 1/4" pocket hole screws and wood glue. The bottom panel should be flush with the top of the bottom aprons.
11Step 11
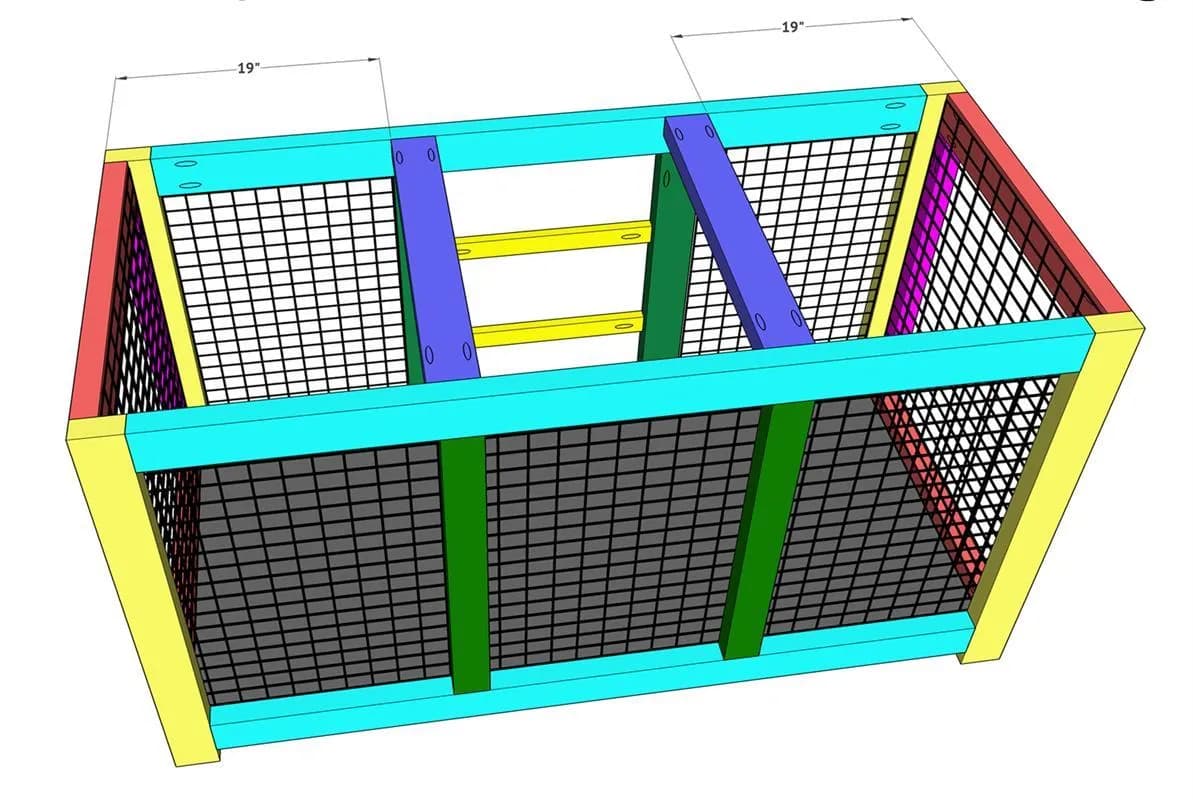
Cut the top support pieces to size and drill 1 1/2" pocket holes into both ends. Attach them to the top aprons with 2 1/2" pocket hole screws and wood glue.
12Step 12
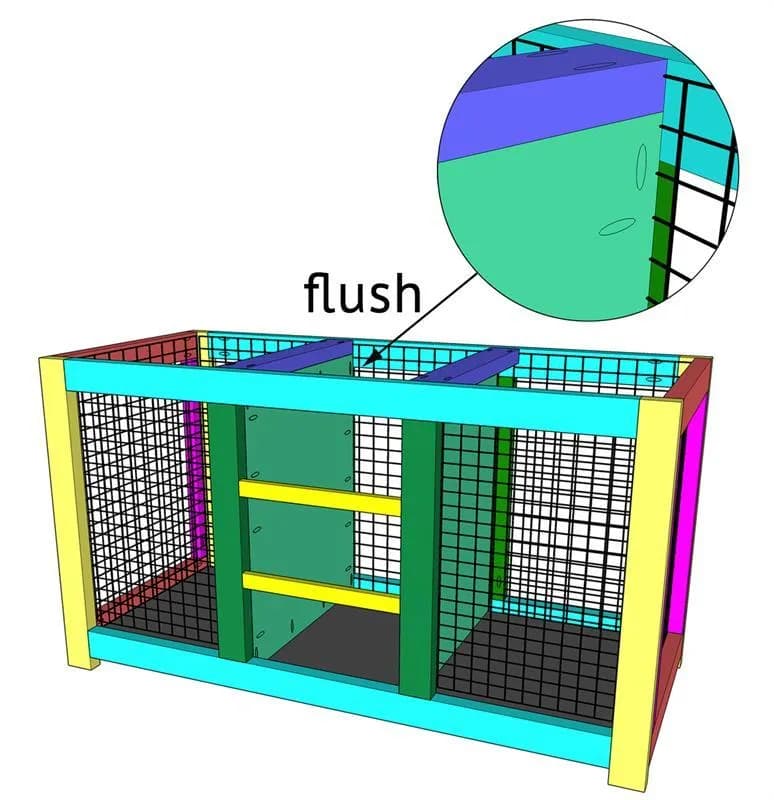
Cut the center dividers to size and drill 3/4" pocket holes around all edges. Attach them tot he vertical dividers with 2 1/2" pocket hole screws and wood glue.
13Step 13
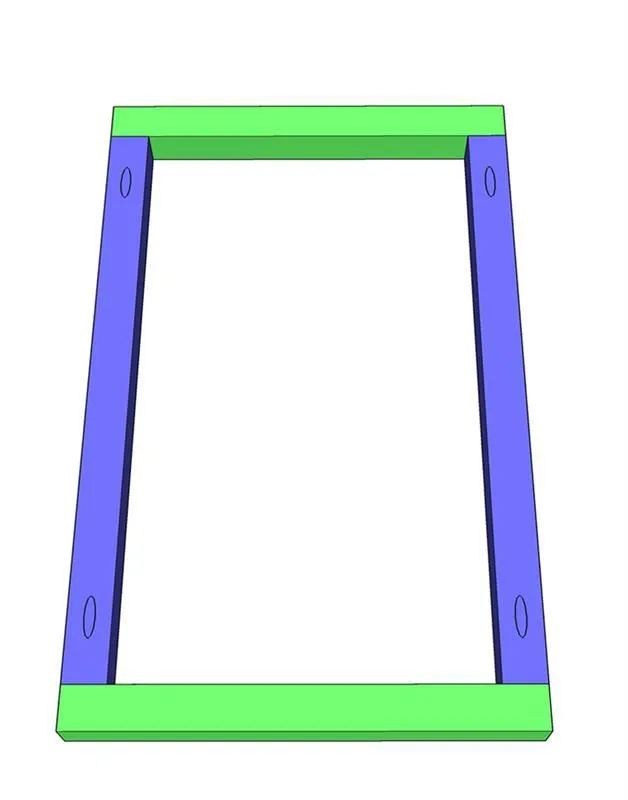
Cut the door pieces to size and drill 1 1/2" pocket holes into the side boards. Attach them to the top and bottom pieces with 2 1/2" pocket hole screws and wood glue.
14Step 14
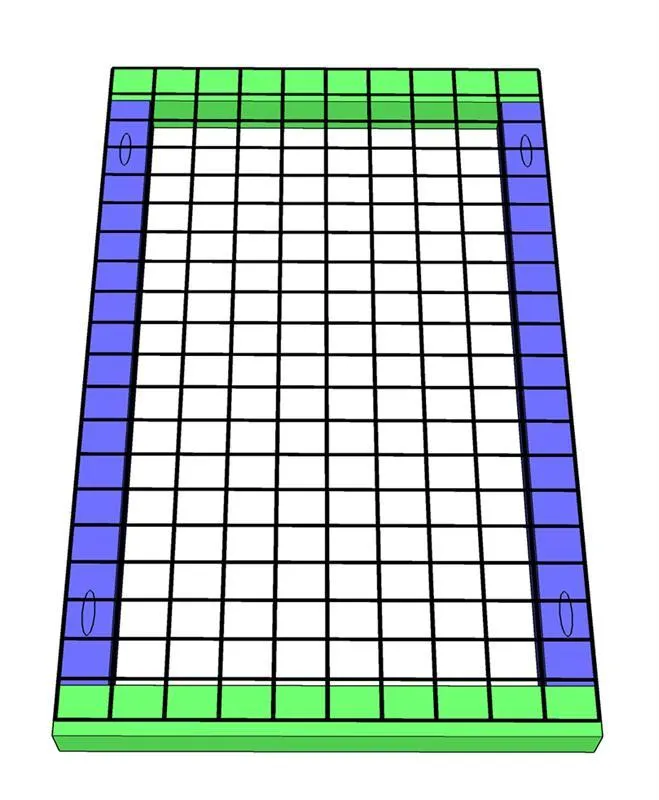
Cut the mesh to size and atta h it to the back of teh door frames with 3/4" staples.
15Step 15
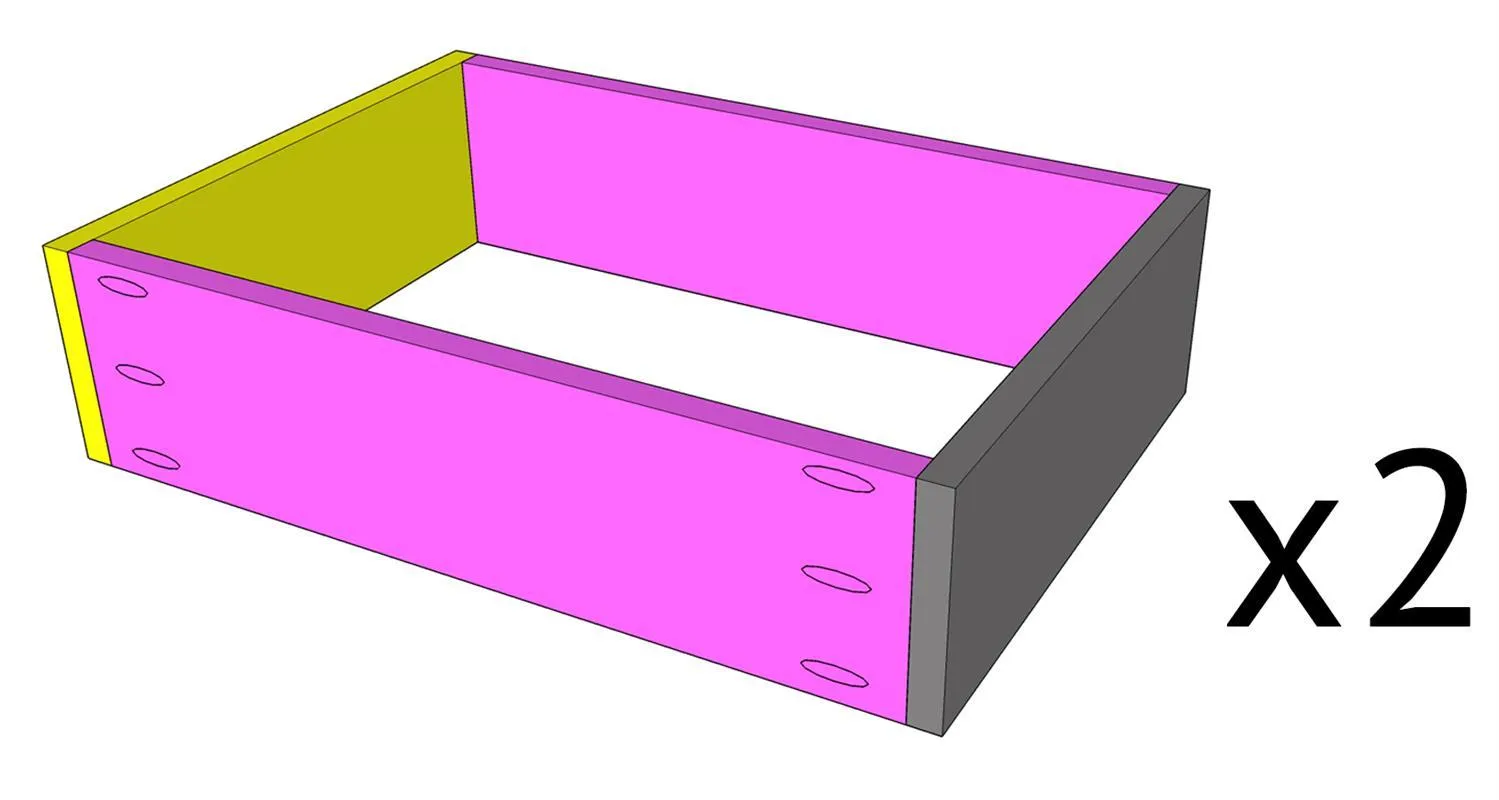
- Cut the top and middle drawer pieces to size and drill 3/4" pocket holes into the ends of the long pieces.
- Attach the long pieces to the short pieces with 1 1/4" pocket hole screws and wood glue.
- Build two drawers.
16Step 16
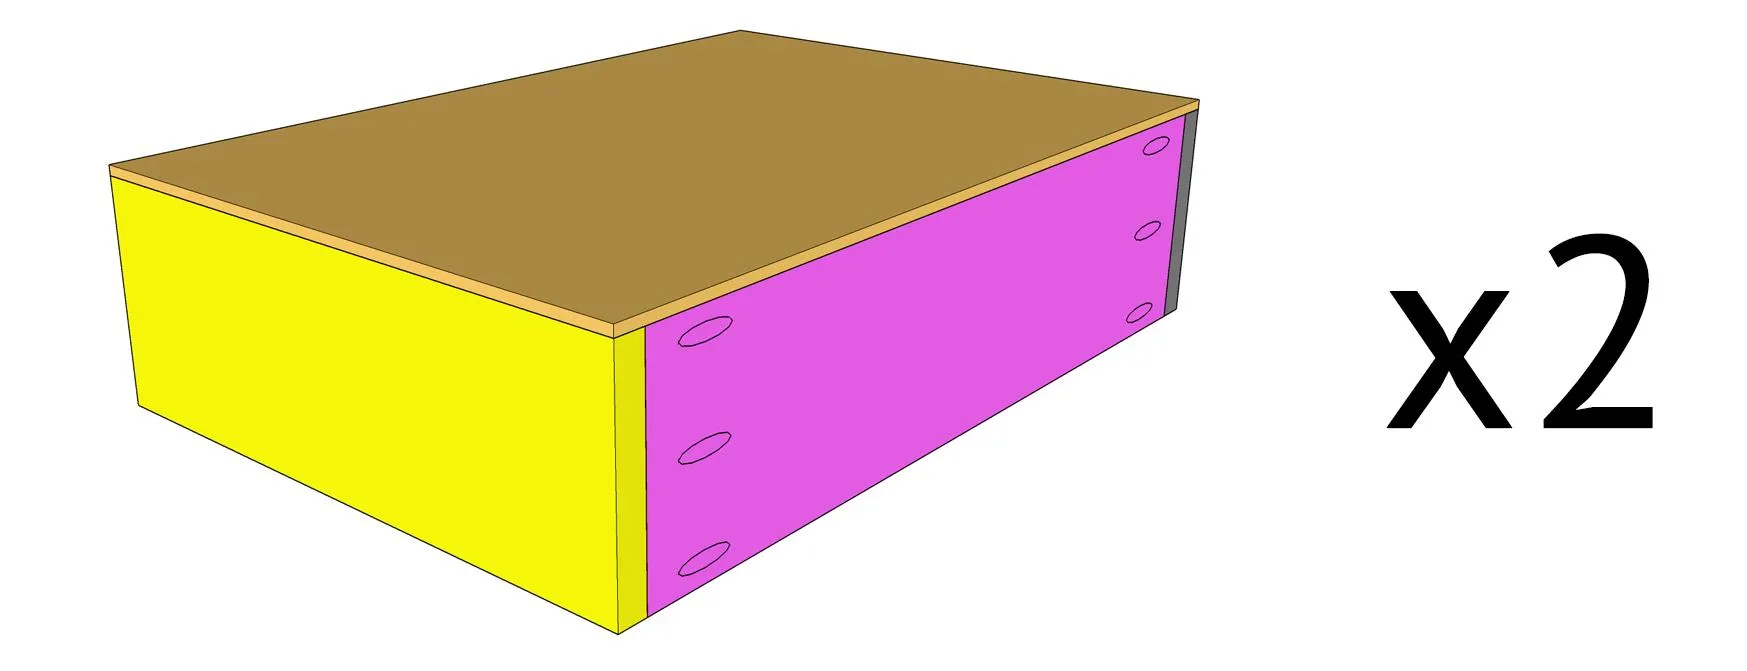
Cut the drawer bottoms to size and attach them to the bottom of the drawer frame with 3/4" staples and wood glue.
17Step 17
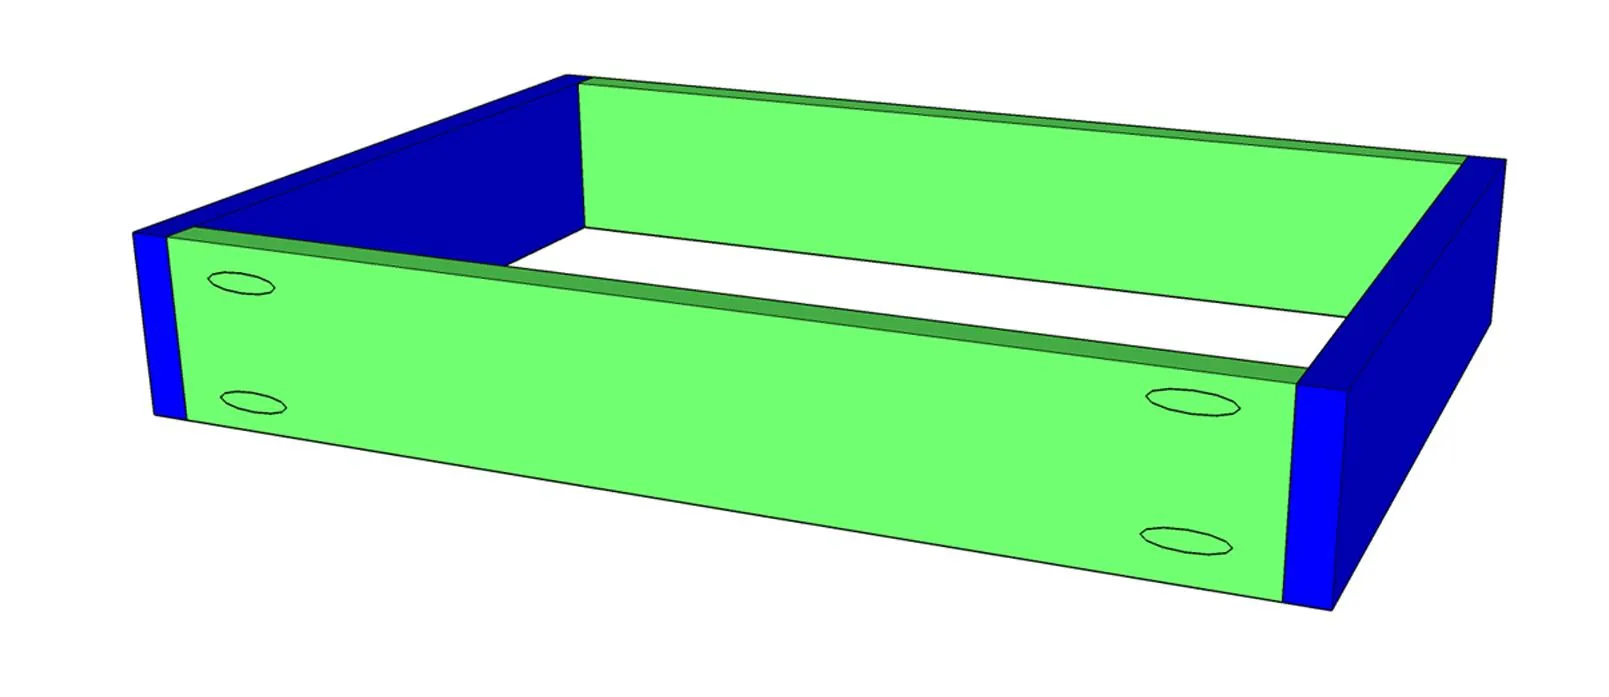
Cut the bowl drawer pieces to size. Drill 3/4" pocket holes into both ends of the long pieces and attach them to teh short pieces with 1 1/4" pocket hole screws and wood glue.
18Step 18
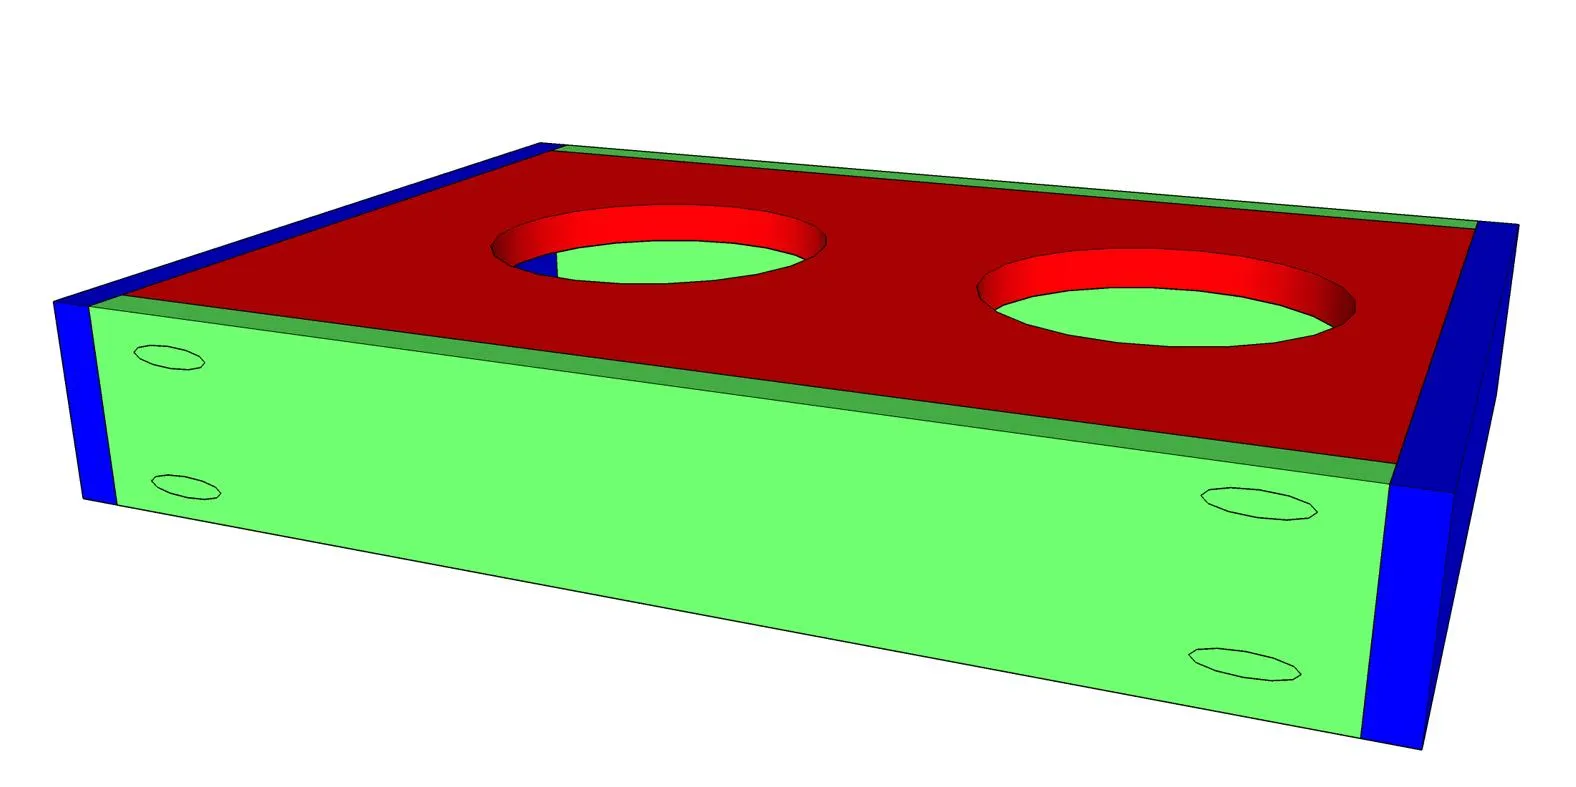
- Cut the top piece of the dog bowl to size and use a jigsaw to cut the circles for the bowls.
- Attach the top inside the frame and use 1 1/4" brad nails and wood glue to attach. The top should be flush with the top of the frame.
19Step 19
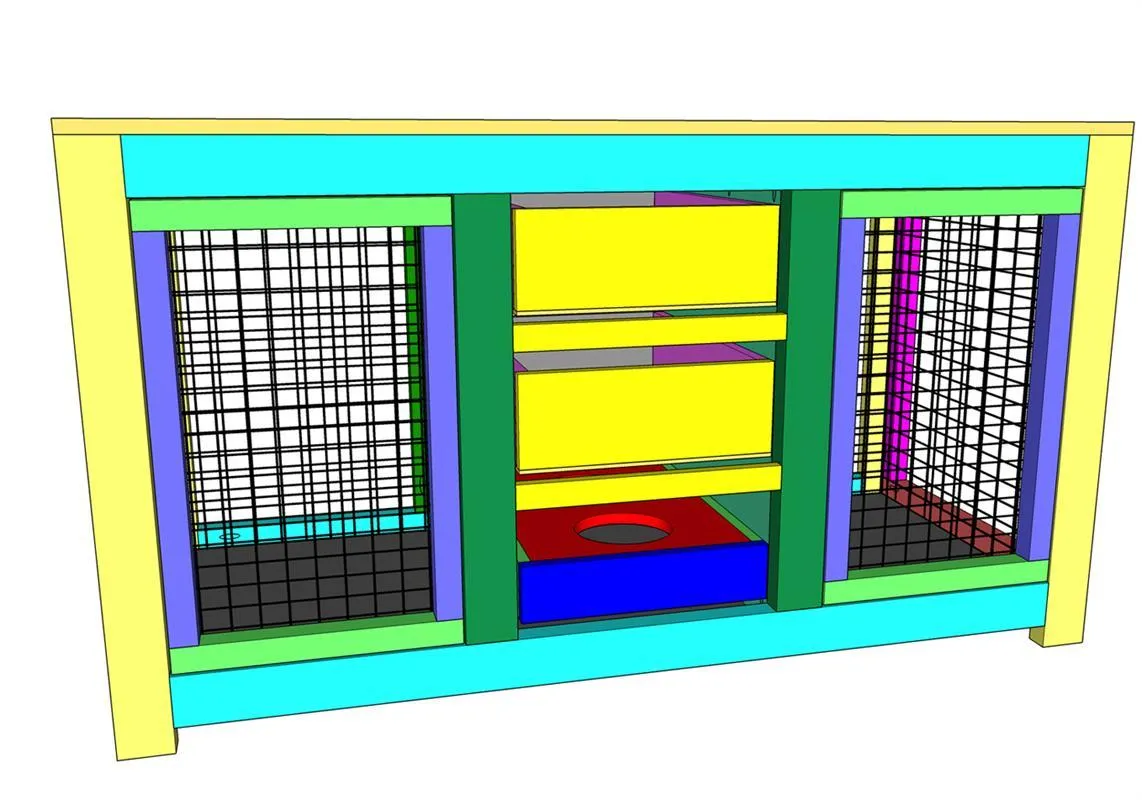
Install the drawers inside the cabinet with drawer slides. You can get more details on how we installed ours in the post above!
20Step 20
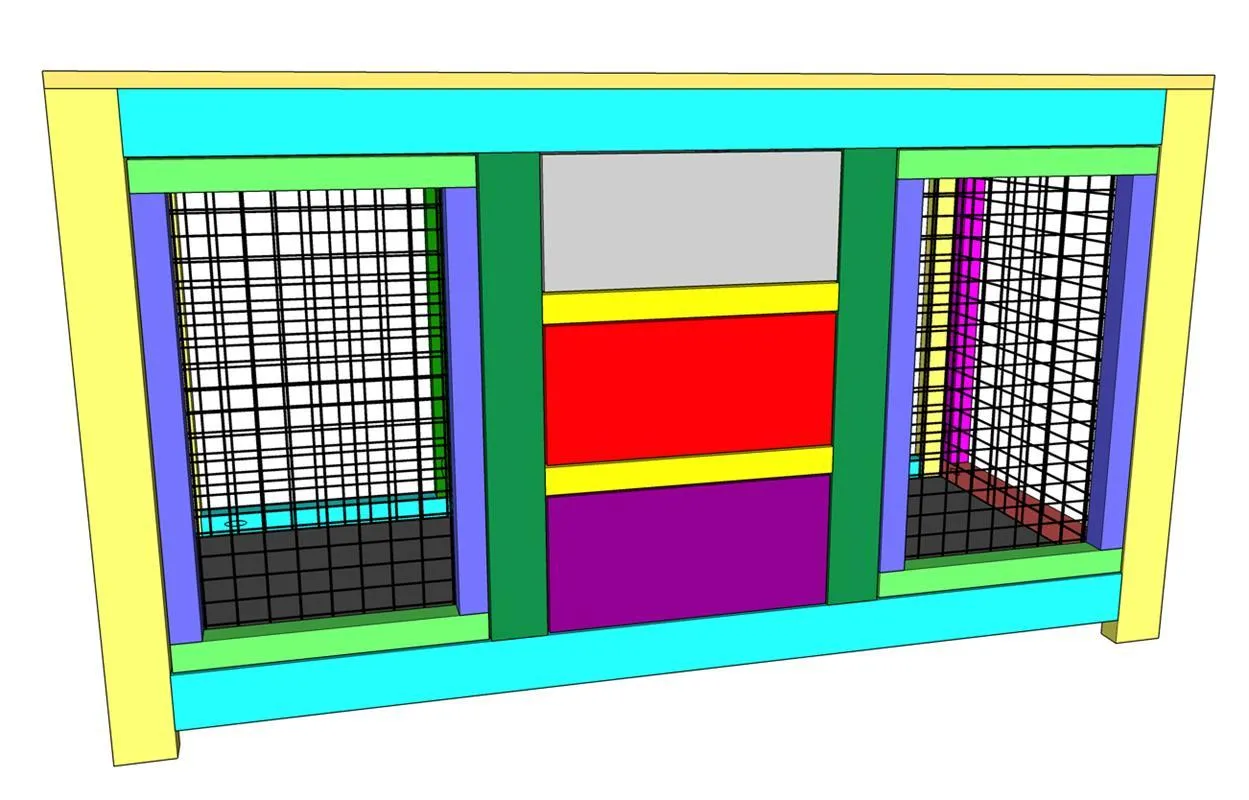
Cut the drawer face pieces to size and attach them to the front of the drawrs with 1 1/4" wood screws, from the inside of the drawer and into the back of the drawer face.
21Step 21
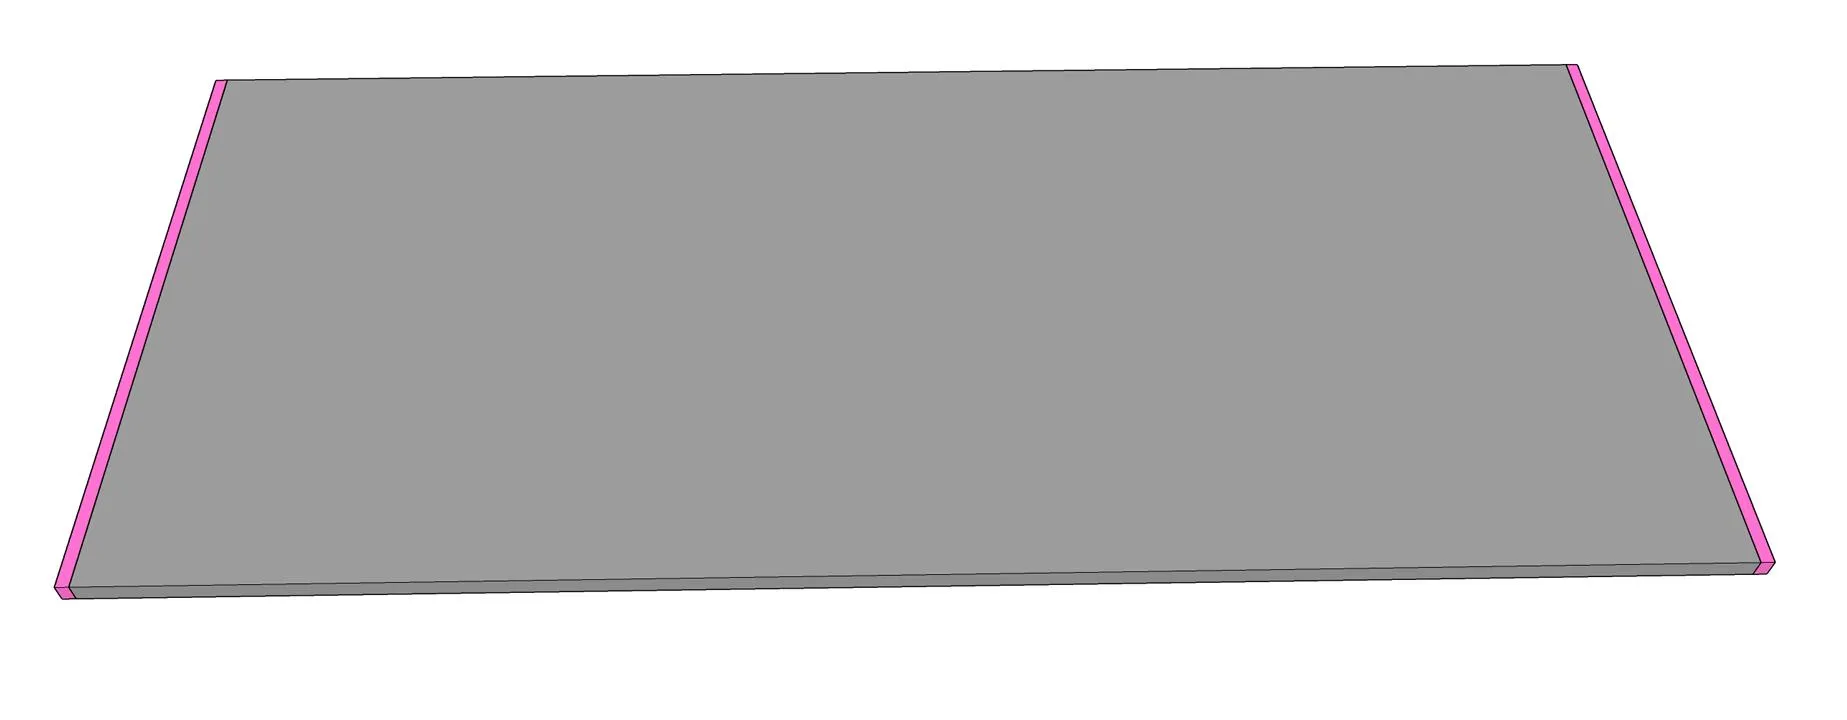
Cut the top panel to size then, measure and cut the side trim pieces to size. Attach the side trim pieces with wood glue and 1" pin nails.
22Step 22
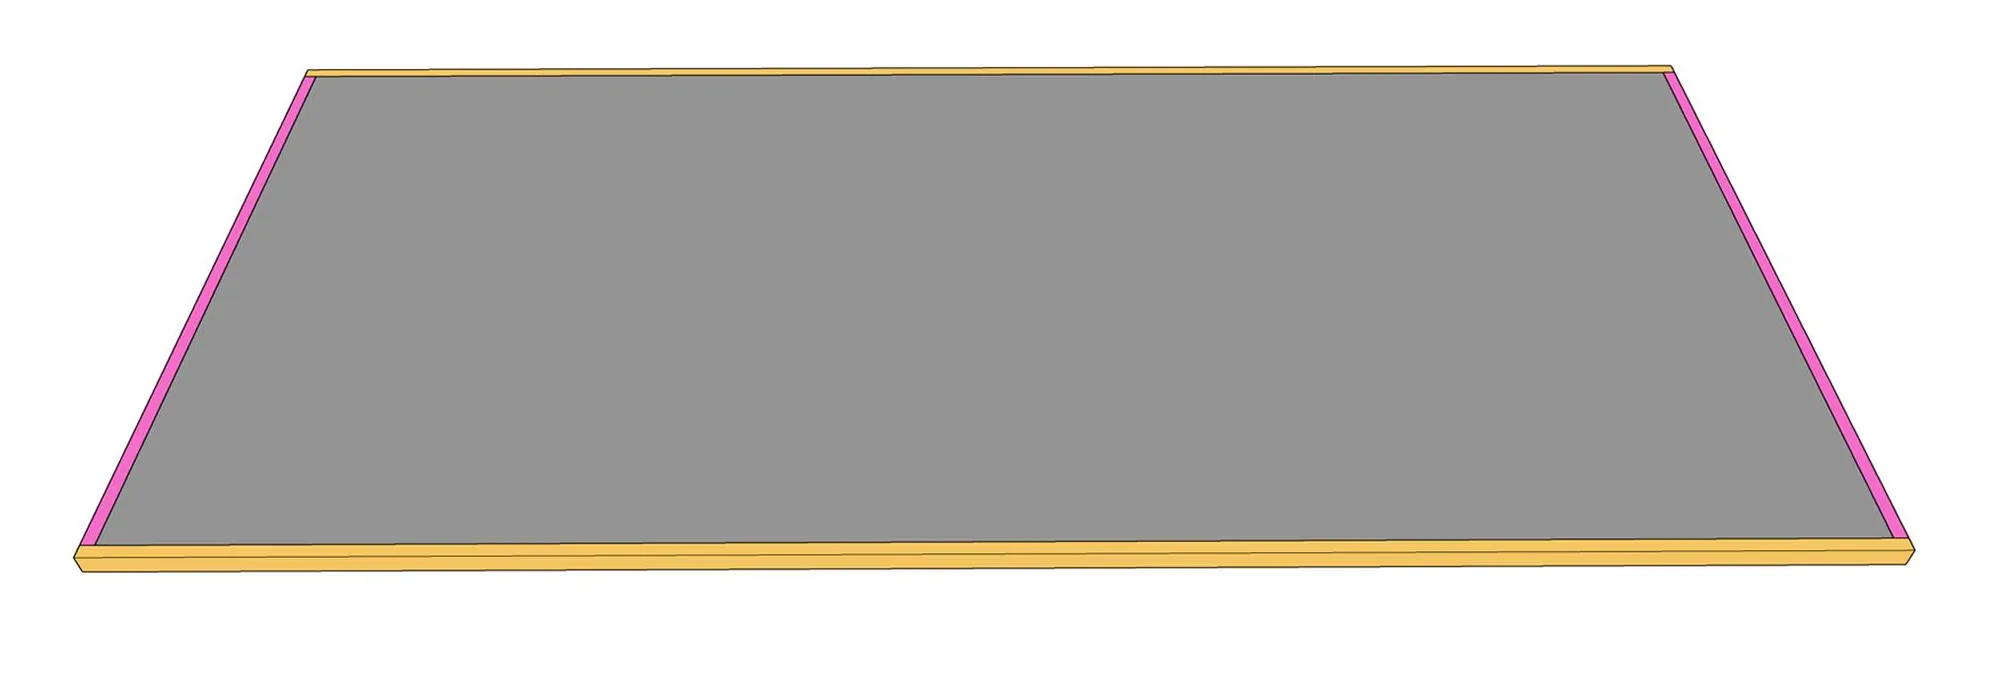
- Measure and cut the front and back trim pieces to size.
- Attach them to the top panel with 1" pin nails and wood glue. To attach the top, use 1 3/4" wood screws from the top supports and into the plywood top.
23Step 23
Now, just add a finish, hardware and dog bowls and you're done! Make sure to share your builds with us on social media and use #shanty2chic so we can share them too! Happy Building!
24Step 24
Now, just add a finish, hardware and dog bowls and you're done! Make sure to share your builds with us on social media and use #shanty2chic so we can share them too! Happy Building!
Tags
- Pets
- Intermediate
Reviews & builds
No reviews yet
Sign in to review this plan or share your build.
No reviews yet. Be the first to build this.