 Notch
- Difficulty
- Easy
- Time
- 2.8–5.3 hours
- Cost
- $$
About this build
Darts is a classic game played in bars and homes alike. If your dartboard is at home, build a nice cabinet to make it look like a built in piece of your home! These plans will help you build a dartboard cabinet to impress your friends!
Tools
Essential
- Drill / Driver
- Miter Saw
- Pocket Hole Jig
- Random Orbit Sander
- Table Saw
Optional / nice to have
- Bar / Pipe Clamps
- Tape Measure
Materials
| Item | Qty |
|---|---|
| Plywood sheet, 4' x 8' x 3/4" | 1 board |
| Plywood sheet, 2' x 4' x 1/4" | 1 board |
| Box of 1 1/4" Kreg pocket hole screws (see tools list) | 1 each |
| Wood glue | 1 each |
| Dartboard | 1 each |
| Cabinet knobs | 2 each |
| Hinges | 4 each |
| Magnet catches | 2 each |
Overall cost: $$. Lumber prices vary by region, species, and season, so we give a band rather than a figure we would only be pretending to know.
Cut list
| Part | Qty | T × W × L |
|---|---|---|
| Back | 1 | 3/4" × 20" × 20" |
| Box sides | 2 | 3/4" × 5" × 21" |
| Box Top and Bottom | 2 | 3/4" × 5" × 20" |
| Top and Bottom Trim | 2 | 3/4" × 6" × 23" |
| Dart Holder | 1 | 3/4" × 2" × 9" |
| Doors | 2 | 3/4" × 10" × 21" |
| Door sides | 4 | 1/4" × 2" × 21" |
| Door Top and Bottom | 4 | 1/4" × 2" × 10" |
What to buy
Buy 7 boards at 8 ft.
3/4" × 20"
1 board
3/4" × 10"
1 board
3/4" × 6"
1 board
3/4" × 5"
1 board
3/4" × 2"
1 board
1/4" × 2"
2 boards
Assumes 8 ft stock, a 1/8" saw kerf, and buying each part at its own width. Change the board size or kerf on the full board plan →
Instructions
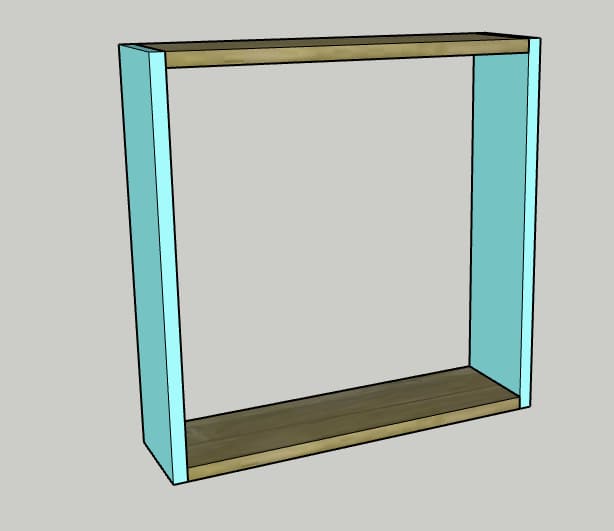
1Assemble box
Drill two pocket holes on each end of the Box Sides, Box Top and Box Bottom. Using 1 1/4" pocket hole screws, attach the Box Top and Bottom to the Box Sides flush on the ends using the pocket holes on the Box Top and Bottom. Do not use pocket holes on the Box Sides as those will be used later.
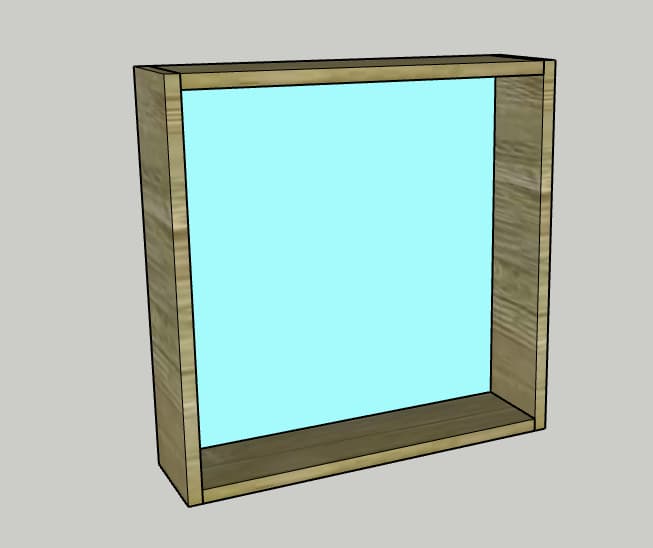
2Add back
- Drill three pocket holes on each side of Back.
- Slide the Back into the box flush against the edges. Using 1 1/4" pocket hole screws, attach the Back to the box.
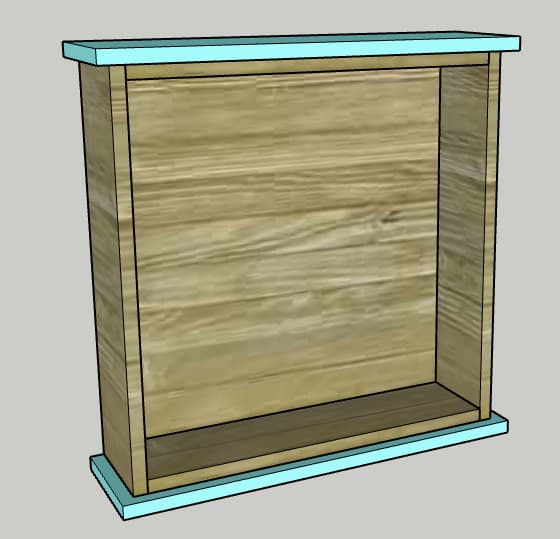
3Attach trim boards
- Lay the box down on the Back and spread wood glue on the Box Top and Bottom.
- Align the Top Trim with 3/4" overhang on the sides and front.
- Attach using 1 1/4" pocket hole screws through the two pocket holes on each of the Box Sides.
- Repeat for the Bottom Trim the same way.
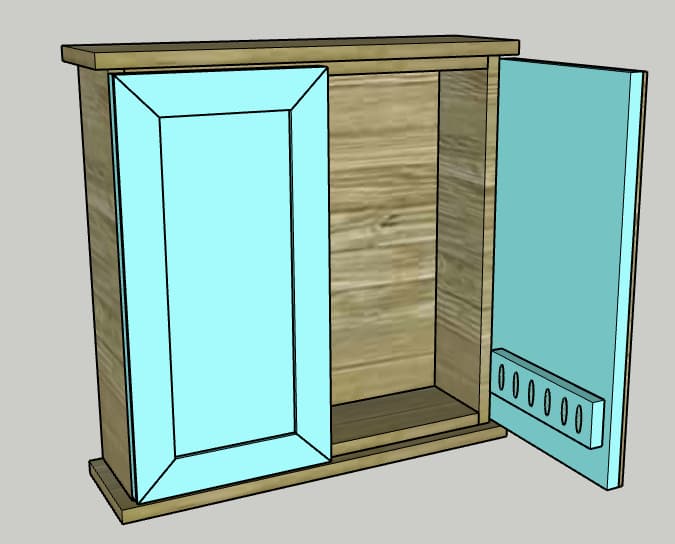
4Assemble doors
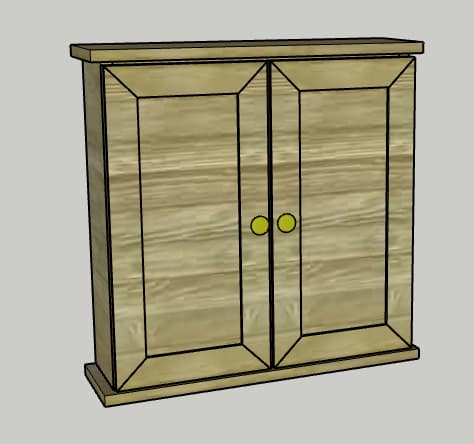
- Cut 45 degree miters on the ends of the Door Sides and Door Top and Bottoms, keeping the length of the long edge of each corresponding with the cut list. Using wood glue, attach these trim pieces to the front of each Door and then clamp in place until dry.
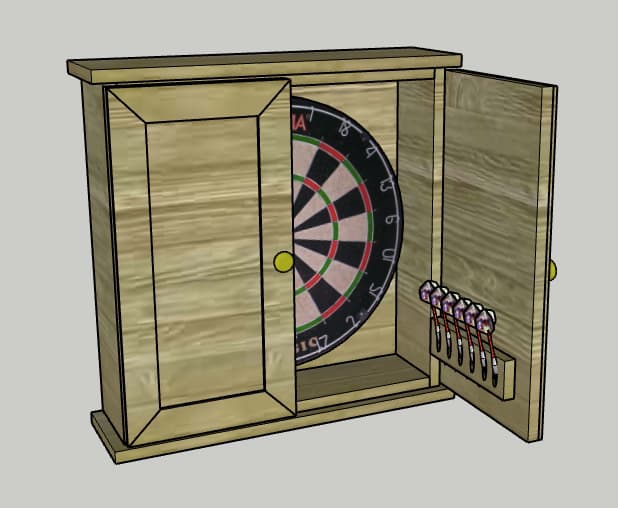
- Drill 6 pocket holes in the long edge of the Dart Holder. Using wood glue, attach the Dart Holder to the inside of one Door.
- Once everything is dry, attach the Doors to the Box Sides using hinges.
5Add hardware
Attach a cabinet knob to the front of each door. Attach magnet catches to the inside of the cabinet and their corresponding magnet plates to the inside of the Doors to keep them closed.
6Insert Dartboard
- Hang your dart board inside the cabinet using the included screw.
- Insert darts into the pocket holes in the dart holder. You may have to push down slightly the first time to push the steel tips through the end of the hole.
- Then, they will go through easily each time after that.
7Enjoy!
Enjoy your handiwork and tag @CharlestonCrafted on Instagram with a picture!
Tags
- Father's Day Gifts
- Beginner
Reviews & builds
No reviews yet
Sign in to review this plan or share your build.
No reviews yet. Be the first to build this.