Notch
NotchDIY Aquarium or TV Stand
Step-by-step build — 17 steps. Also available as a print sheet.
1Assemble Side Frames
- Cut pieces of 2x4 according to the cut list for the side frames. There should be 4 pieces at 27” long (these are the vertical pieces) and 4 pieces at 16” long (these are the horizontal pieces).
- Drill 1 ½” pocket holes into each end of the 16” pieces and assemble two frames like shown using 2 ½” pocket hole screws.
2Insert Side Panel
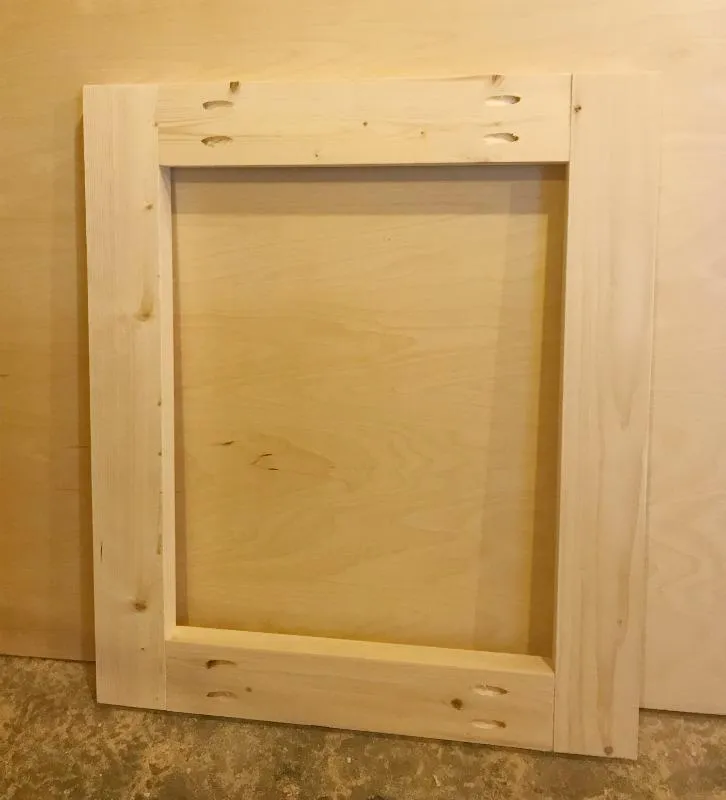
Cut 2 pieces of 16” x 20” plywood for the side panels. Drill ¾” pocket holes around the edges and attach inside the frames from step 1 with 1 ¼” pocket hole screws like shown.
3Attach Side Panels with Frame
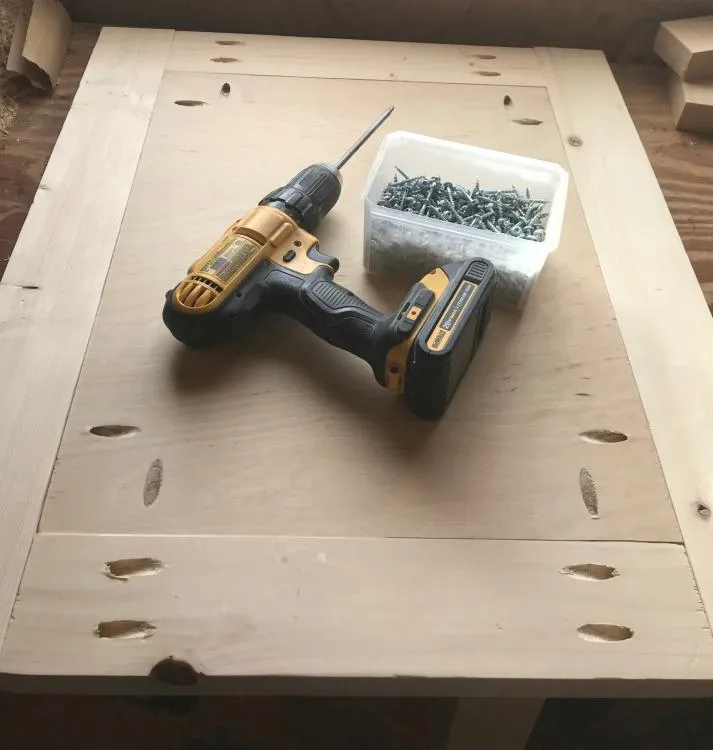
Cut 4 2x4 boards according to the cut list for the top and bottom frame pieces. Drill 1 ½” pocket holes into both ends of each board and attach between the two side panels using 2 ½” pocket hole screws like shown.
4Add Bottom
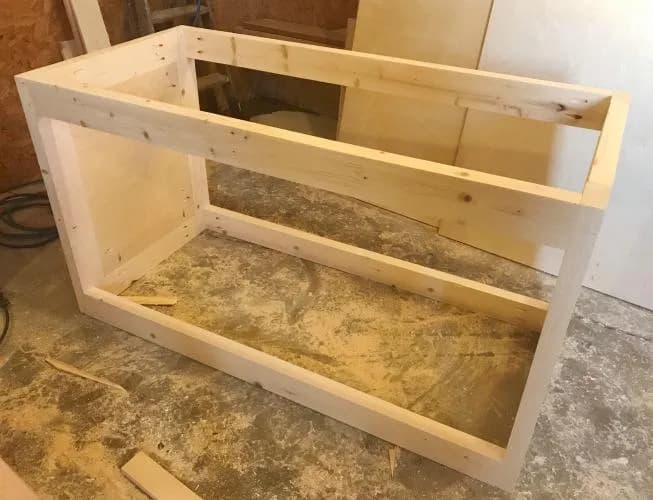
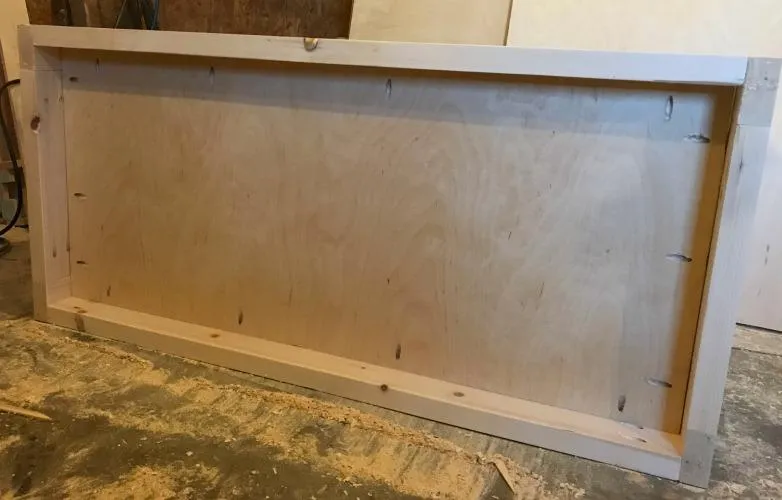
- Cut a piece of plywood 21” x 41” according to the cut list for the bottom.
- Drill ¾” pocket holes along the edges.
- Place this board into the bottom of the frame so that the top is flush with the top of the bottom 2x4s.
- Attach in place using 1 ¼” pocket hole screws like shown.
5Add Middle Divider Supports
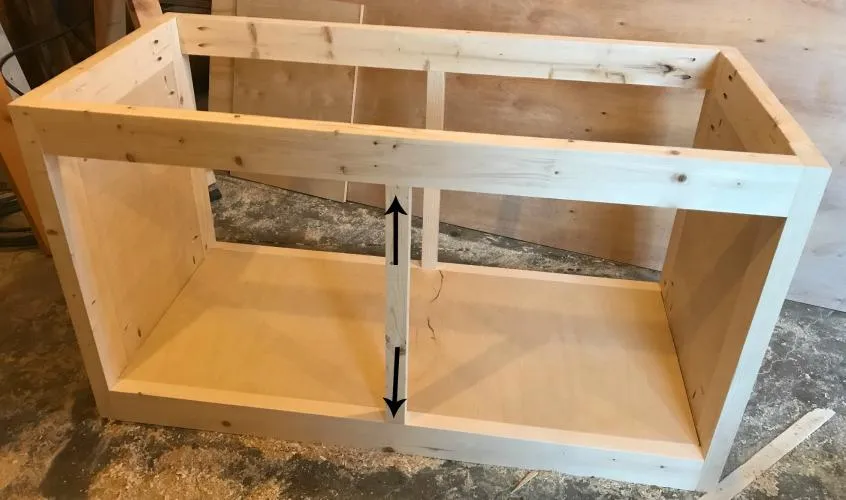
- Cut two 2x2 pieces 20” long (according to the cut list) and drill 1 ½” pocket holes in each end.
- Center one on the front between the top and bottom 2x4s and the other on the back between the top and bottom 2x4s. Make sure the top and bottom are both centered so that the board is square.
- Attach in place using 2 ½” pocket hole screws.
6Add Middle Top Support
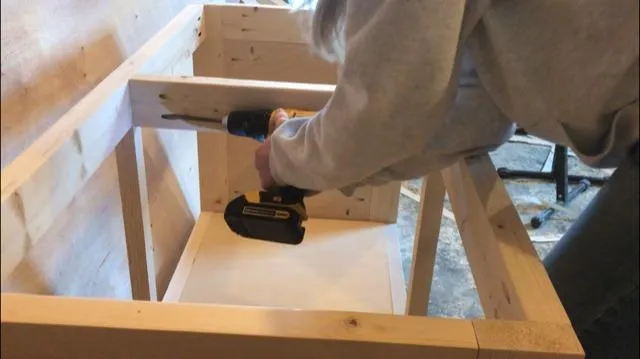
Cut a piece of 2x4 to 20” long to fit between the two top 2x4s. Drill 1 ½” pocket holes into each end of the board and attach at the top in the center using 2 ½” pocket hole screws like shown.
7Add Middle Plywood Panel
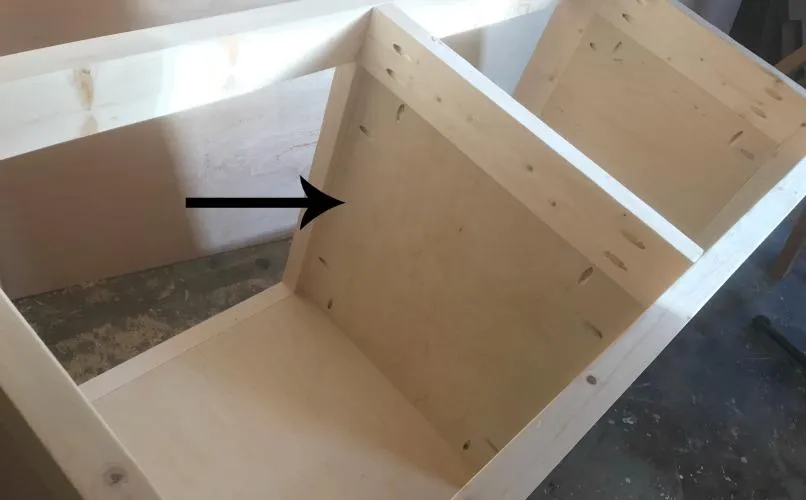
- Cut a piece of plywood according to the cut list for the middle panel.
- Drill ¾” pocket holes around the edges and attach in the middle between the supports from steps 5 and 6. Make sure the “clean” (no hole drilled) side is flush with the edge of the 2x2s on the side of the cabinet that will be left open. This way, your pocket holes will be hidden inside the cabinet on the other side.
- Attach in place using 1 ¼” pocket hole screws.
8Add Drawer Spacer Block
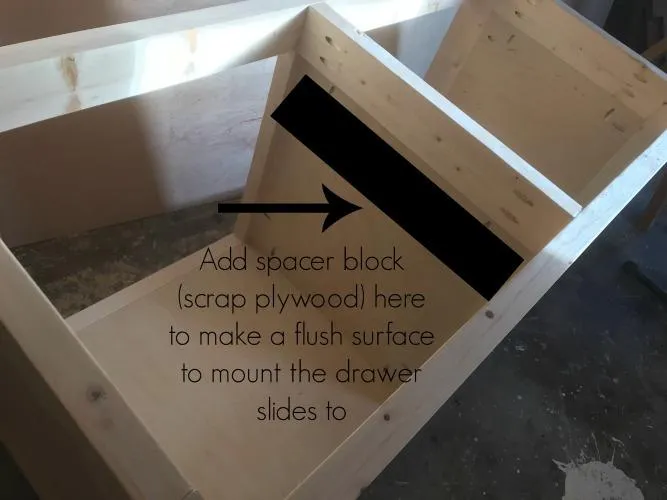
To help when adding drawer slides, cut a piece (about 3" wide) of scrap ¾” plywood about 19-20” long and screw into the middle panel at the top of the side that's not flush as a spacer. This is so you can mount your drawer slides on a smooth, flush surface.
9Attach Drawer Slides to Cabinet
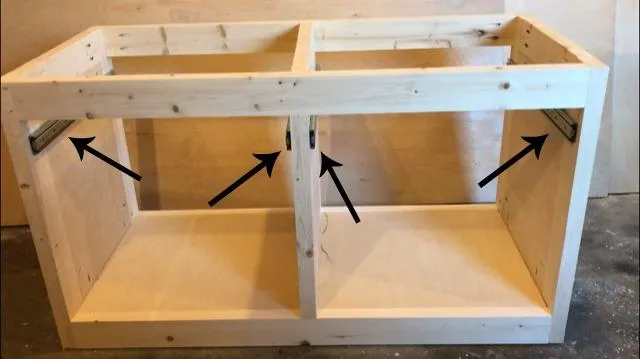
Attach 22” drawer slides to the cabinet at the top like shown. In the video (link in the extras tab), you will see that I used a 1 ½” piece of scrap as a spacer block to attach the drawer slides 1 ½” from the bottom of the 2x4 frame at the top. Make sure you also attach them ¾” from the front edge of the cabinet to allow for drawer fronts.
10Build and Install Drawers
- Cut your drawer pieces according to the cut list. I cut a dado groove along the bottom sides of the drawer pieces for the drawer bottom to slide into. However, you could also just staple on the drawer bottom after you assemble the sides. Either way is fine.
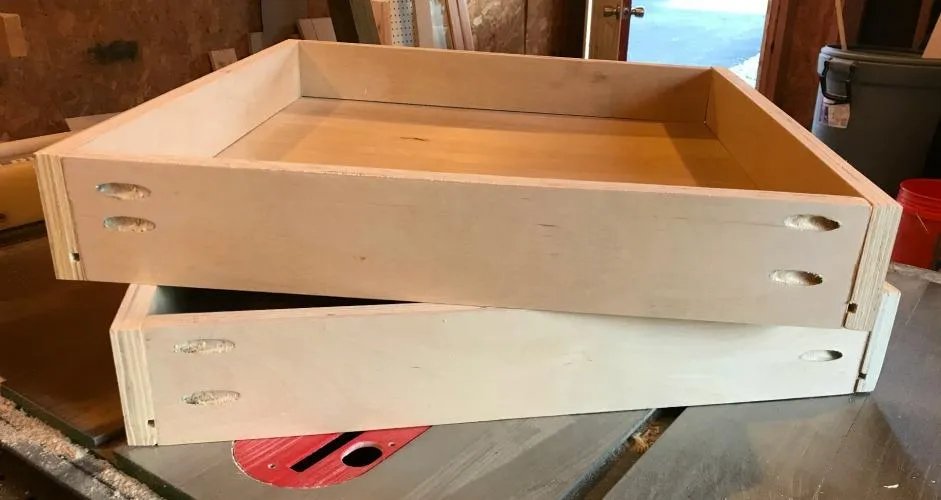
- Drill ¾” pocket holes into each end of the front and back drawer pieces and assemble the drawers like shown using 1 ¼” pocket hole screws.
- Then, install into the cabinet onto the drawer slides.
11Attach Drawer Fronts
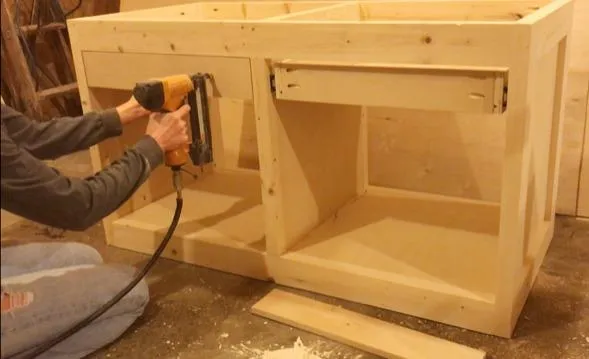
- Cut two drawer fronts according to the cut list and brad nail in place onto the front of each drawer. Make sure your gaps along the edges are even.
- Once it’s nailed into place, use a couple 1 ¼” wood screws to attach the drawer front more securely from the inside of the drawer (you can see this done in the video in the extras tab).
12Prepare the Door
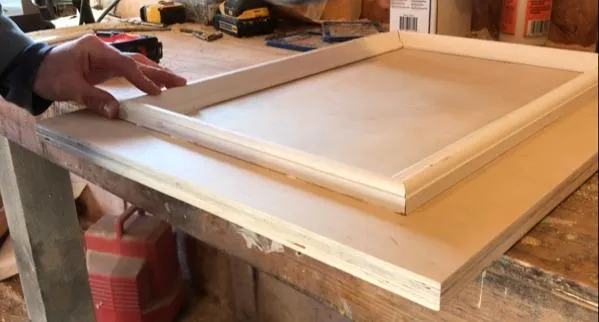
Cut the door according to the cut list. You can add whatever detail (or leave it plain) to the door that you wish. I used some molding to add a decorative touch to mine. Simply cut the molding at 45 degrees at the corners and glue and brad nail in place onto the door. Make sure the molding is square to the door before attaching and not crooked.
13Attach the Door
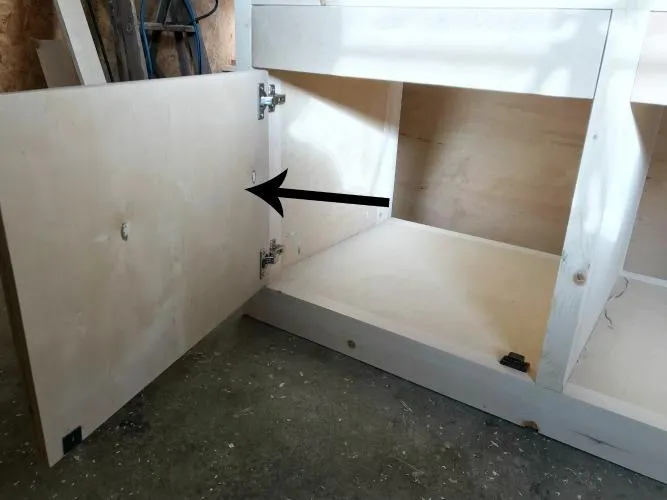
Using a Kreg Concealed Hinge Jig, drill holes for your concealed hinges on the back side of the door. Then attach your hinges to the door and the cabinet and adjust as needed until your door sits flush to the front of the cabinet and square.
14Add Back
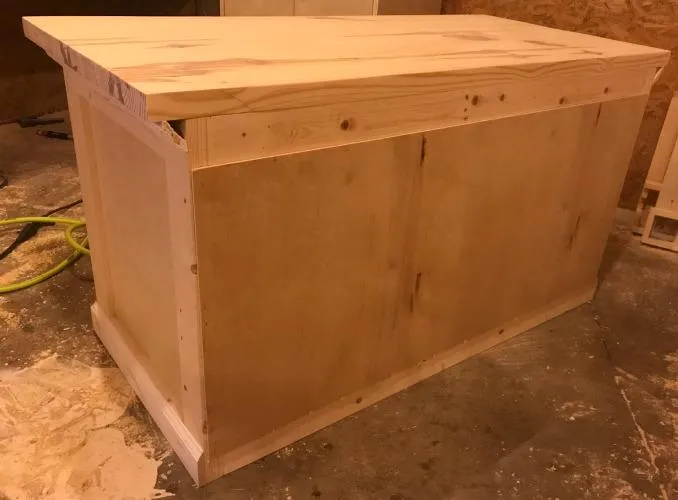
Finally, cut a piece of ¼” plywood backing to staple onto the back side like shown.
15Finish
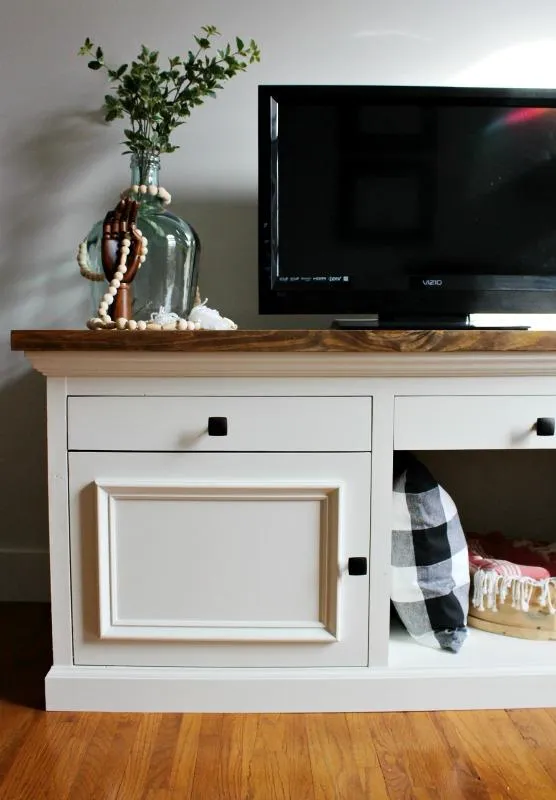
- Finish as desired. I stained the top and painted the bottom, but you can finish however you like. Don’t forget to add your door and drawer pulls or knobs!
- Then, enjoy your new TV stand! I actually built this to hold a large aquarium, so it’s pretty sturdy if you want to use it for something else besides just a TV, too. Don’t forget to check out the YouTube video for this build at the link in the extras tab.
16Add Top
- Glue (or use 1 1/2" pocket holes and 2 1/2" pocket hole screws) 3 pieces of 2x10 boards cut to 48" long together.
- Trim edges flush and sand well.
- Drill 1 1/2" pocket holes around the inside top of each side of the cabinet. You can see this done in the YouTube video in the extras tab of this plan. It would have been easier to drill these before assembling, but I forgot about it. Either way works.
- Center the top on the cabinet and attach through these pocket holes using 2 1/2" pocket hole screws.
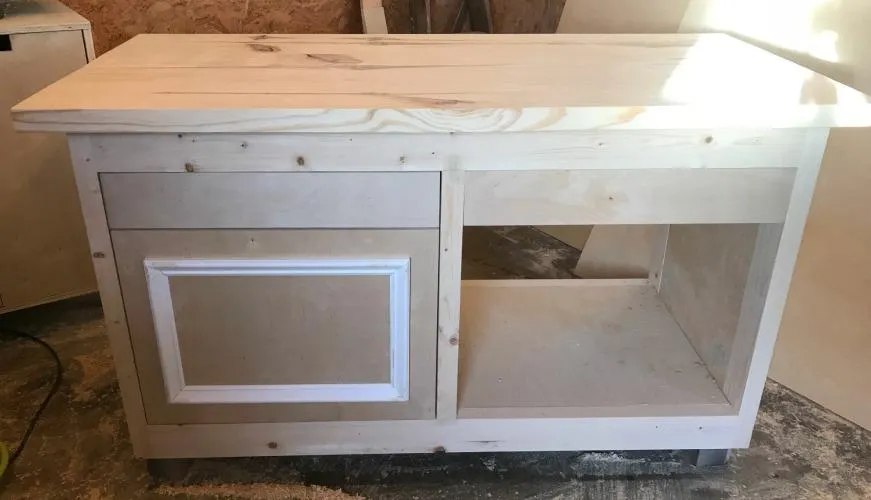
17Add Trim
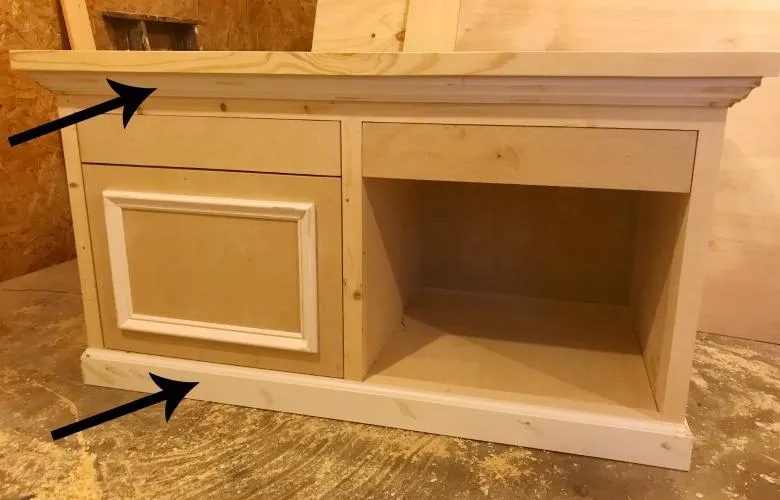
- Cut to fit baseboard around the bottom edge of the cabinet and crown molding around the top.
- Attach with brad nails. This step is optional, but really adds some character to the cabinet.