 Notch
NotchDisplay Shelf
Step-by-step build — 7 steps. Also available as a print sheet.
1Make the Shelf Parts
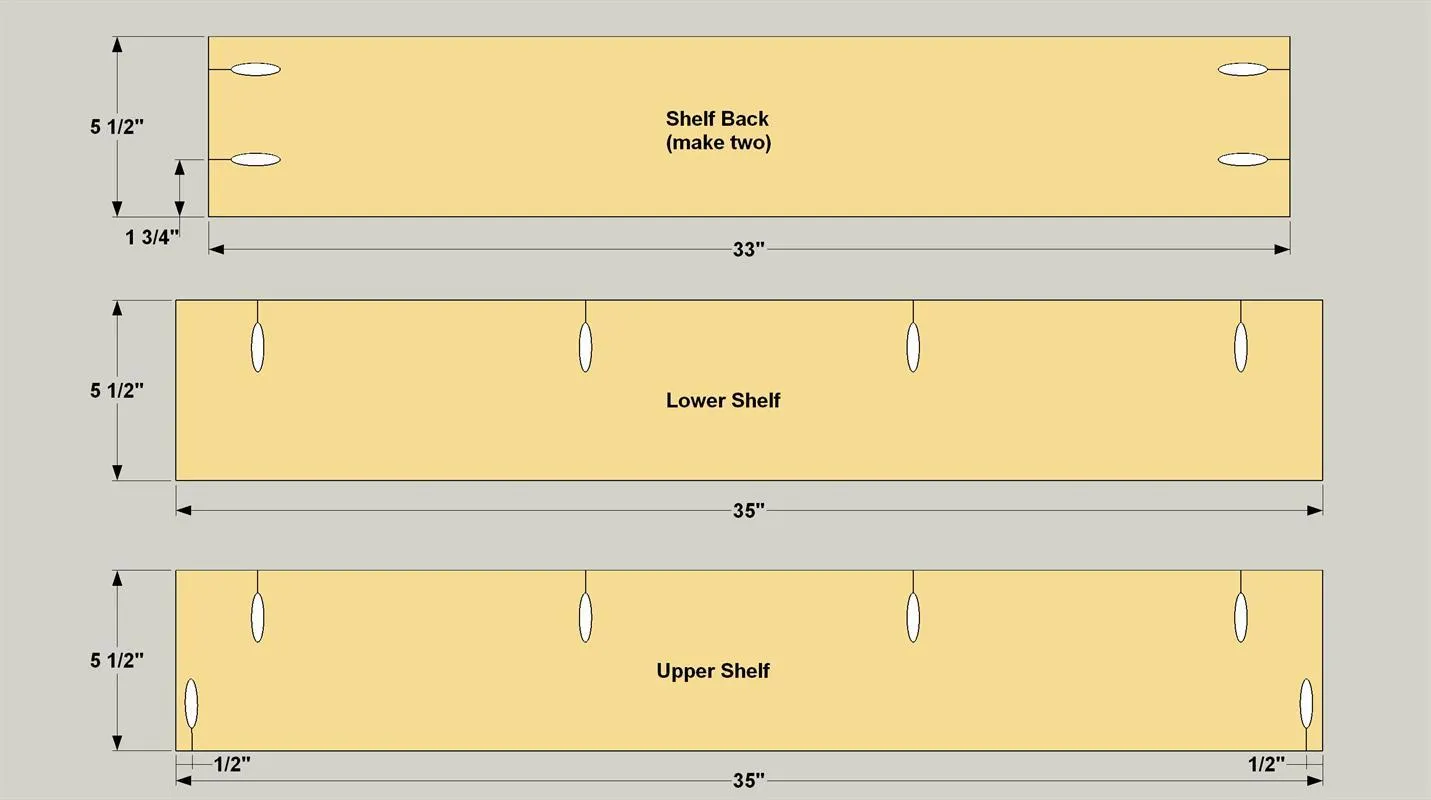
- Cut one Lower Shelf, one Upper Shelf, and two Shelf Backs from 1x6 pine boards, as shown in the cutting diagram.
- Set your pocket hole jig for 3/4" thick material, and then drill pocket holes where shown. Note the Upper Shelf has two additional pocket holes that connect it to the front Support Stiles.
2Assemble the Shelves
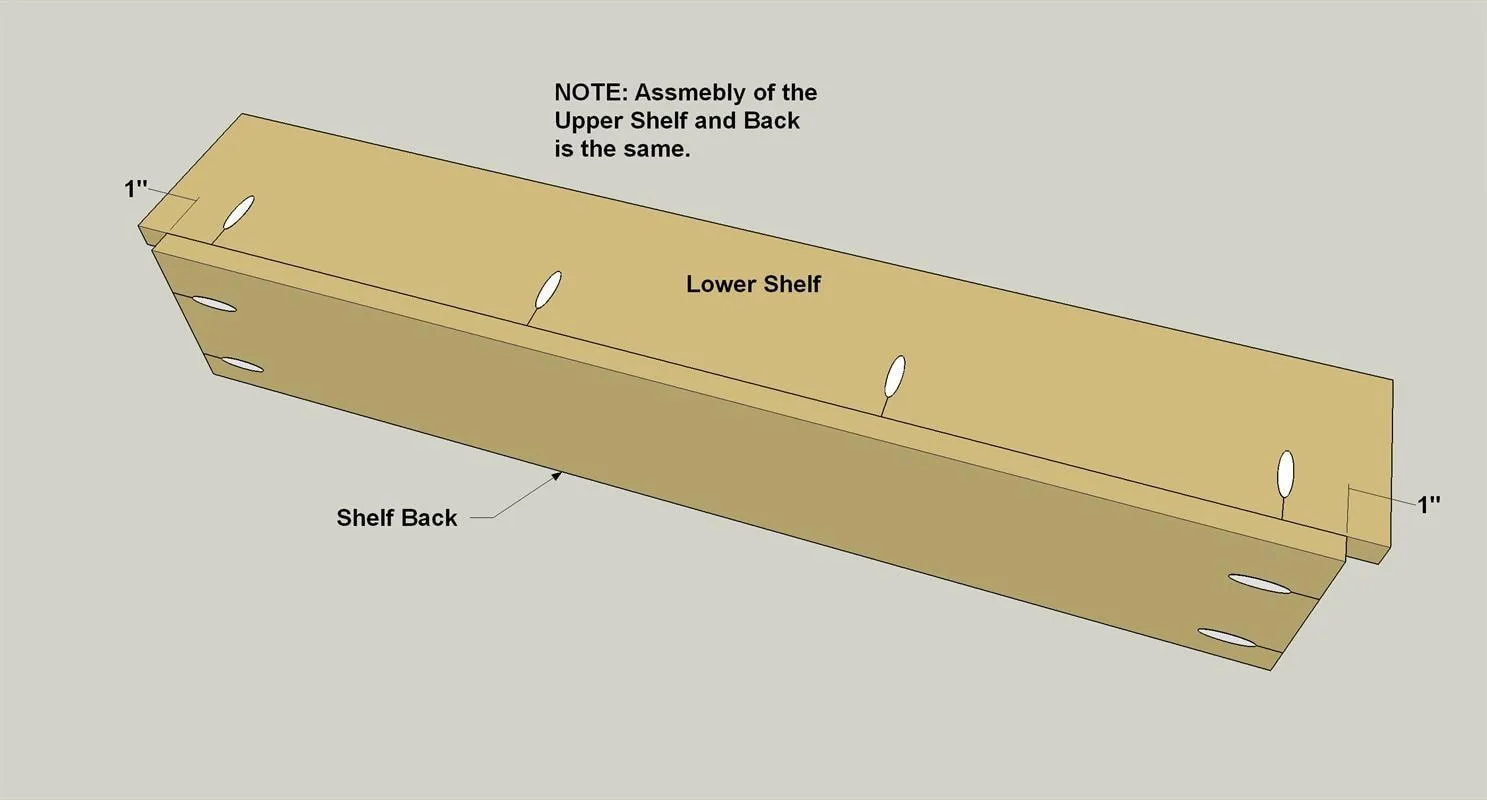
Attach each Shelf to a Shelf Back, as shown, using 1 1/4" coarse-thread pocket hole screws. If you plan to stain or finish the shelves differently from the support frames, as we did, go ahead and apply the finish to the shelf assemblies now.
3Cut the Support Frame Parts
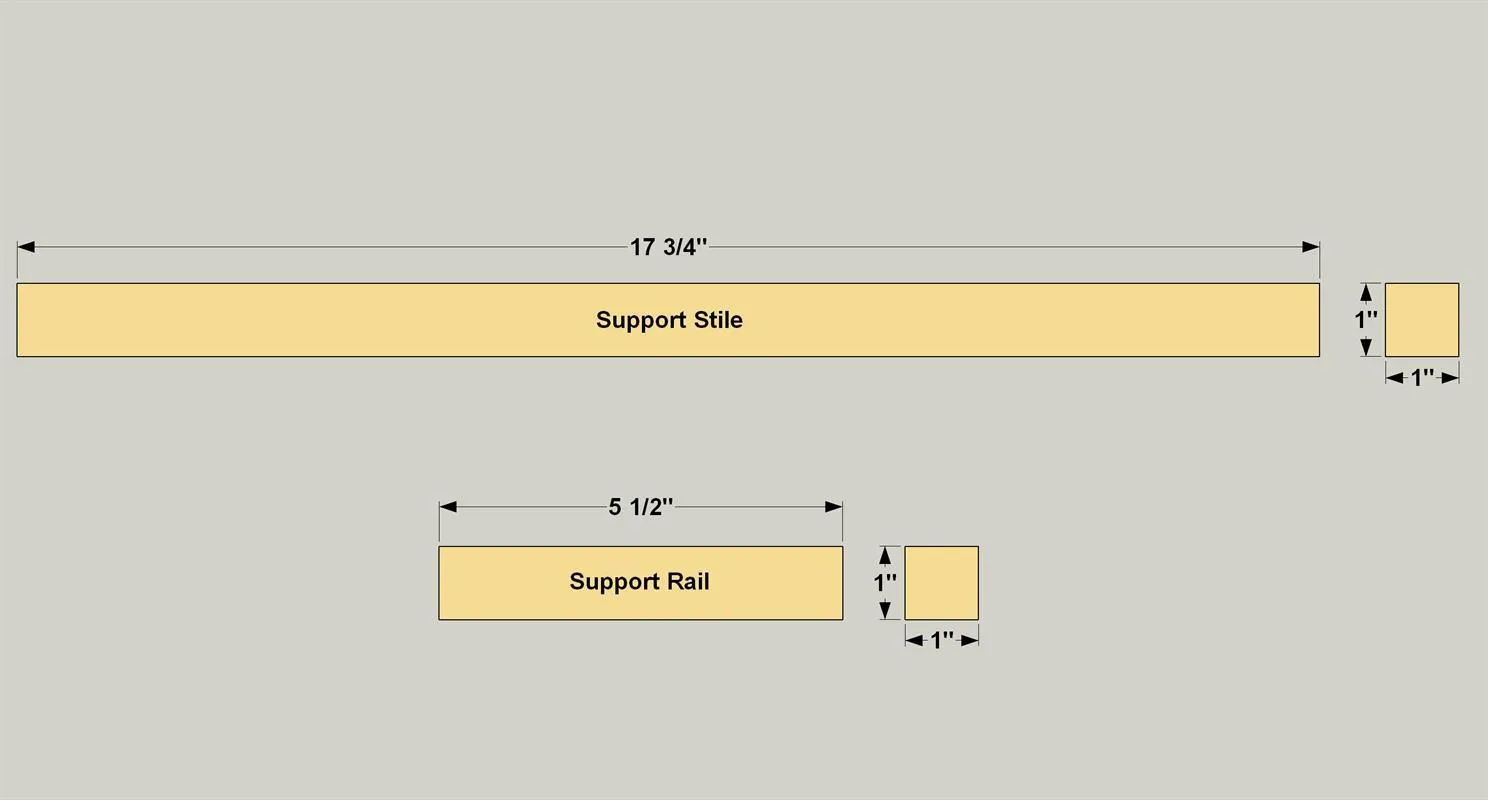
Cut four Support Stiles and four Support Rails from 1" square dowels, as shown in the cutting diagram.
4Assemble the Support Frame
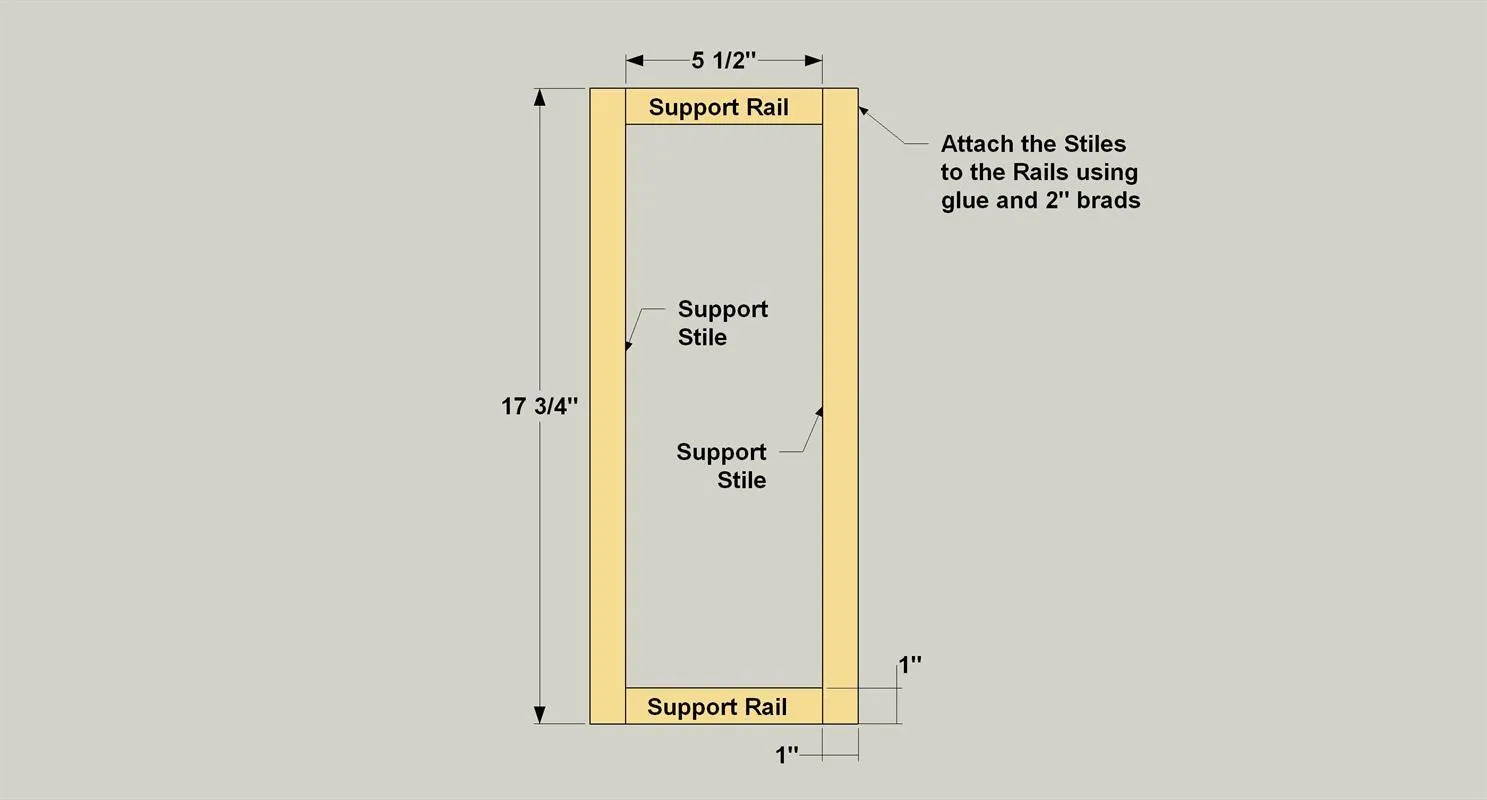
Assemble the support frame using glue and 2" brad nails. The nails will help hold the pieces together while the glue sets. Adding the shelf assemblies later will also strengthen the frame assemblies. Be sure to check that the frame supports are square as you assemble them. If you have access to a brad nailer, that’s the best way to nail the assemblies. If you’re using a hammer and nails, predrill holes to prevent splitting the wood. After the glue dries, you’ll want to finish the frame assemblies now if you’re using a finish different from the shelves.
5Install the Lower Shelf
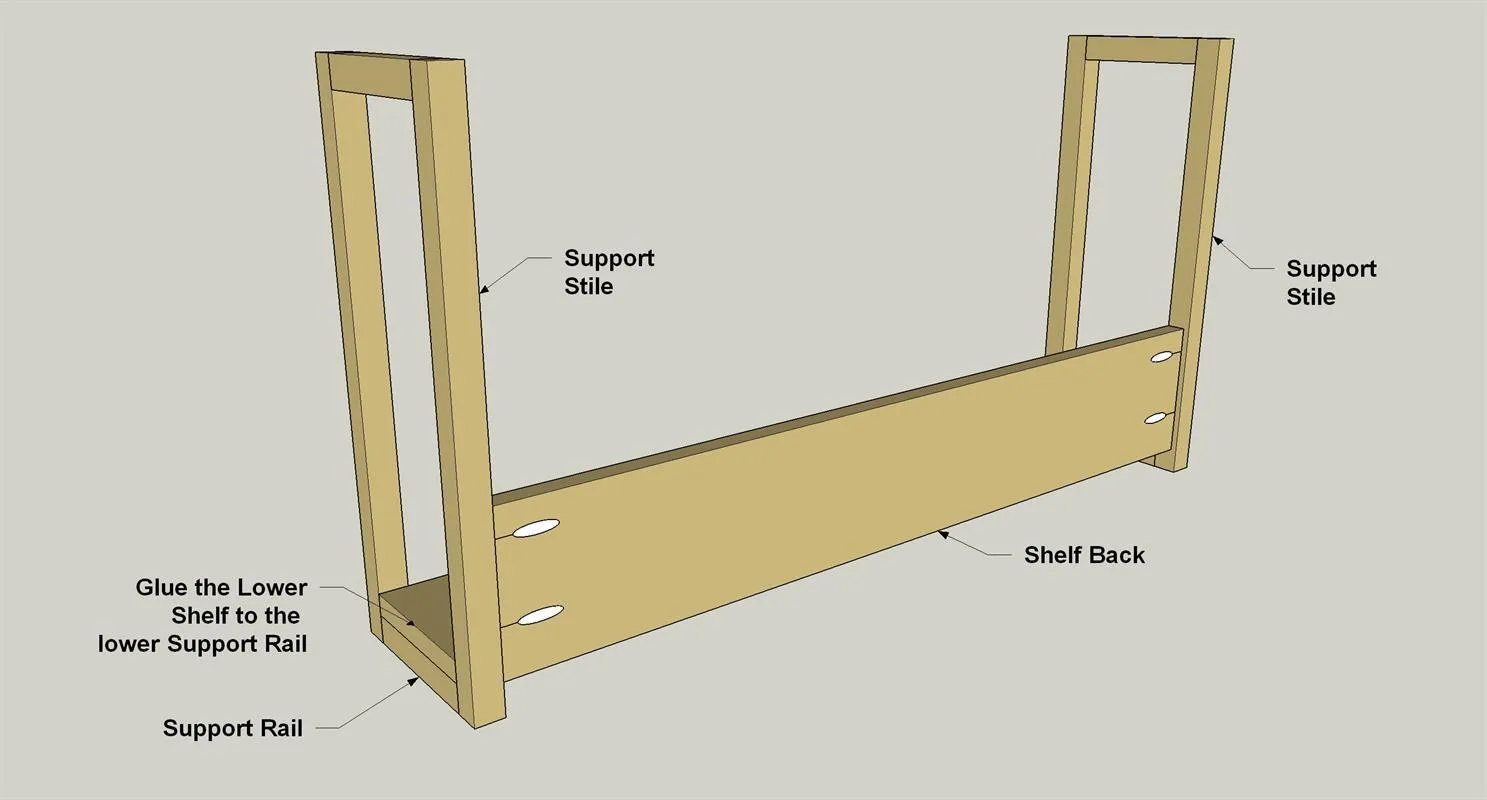
- Attach the lower shelf assembly to the support frames using 1 1/4" coarse-threaded pocket hole screws, as shown.
- Also dab a bit of glue onto each of the lower Support Rails before you position the lower shelf assembly. Make sure the front of the Shelf Back is flush with the front edge of the Support Stiles and the Shelf Assembly is resting on the bottom Support Rail.
- Clamp the Lower Shelf to each Support Rail, if needed. Note: The Shelf Backs sit inset 1/4" from the back of the Support Stiles. This allows for space for the hanging hardware that gets added later.
6Install the Upper Shelf
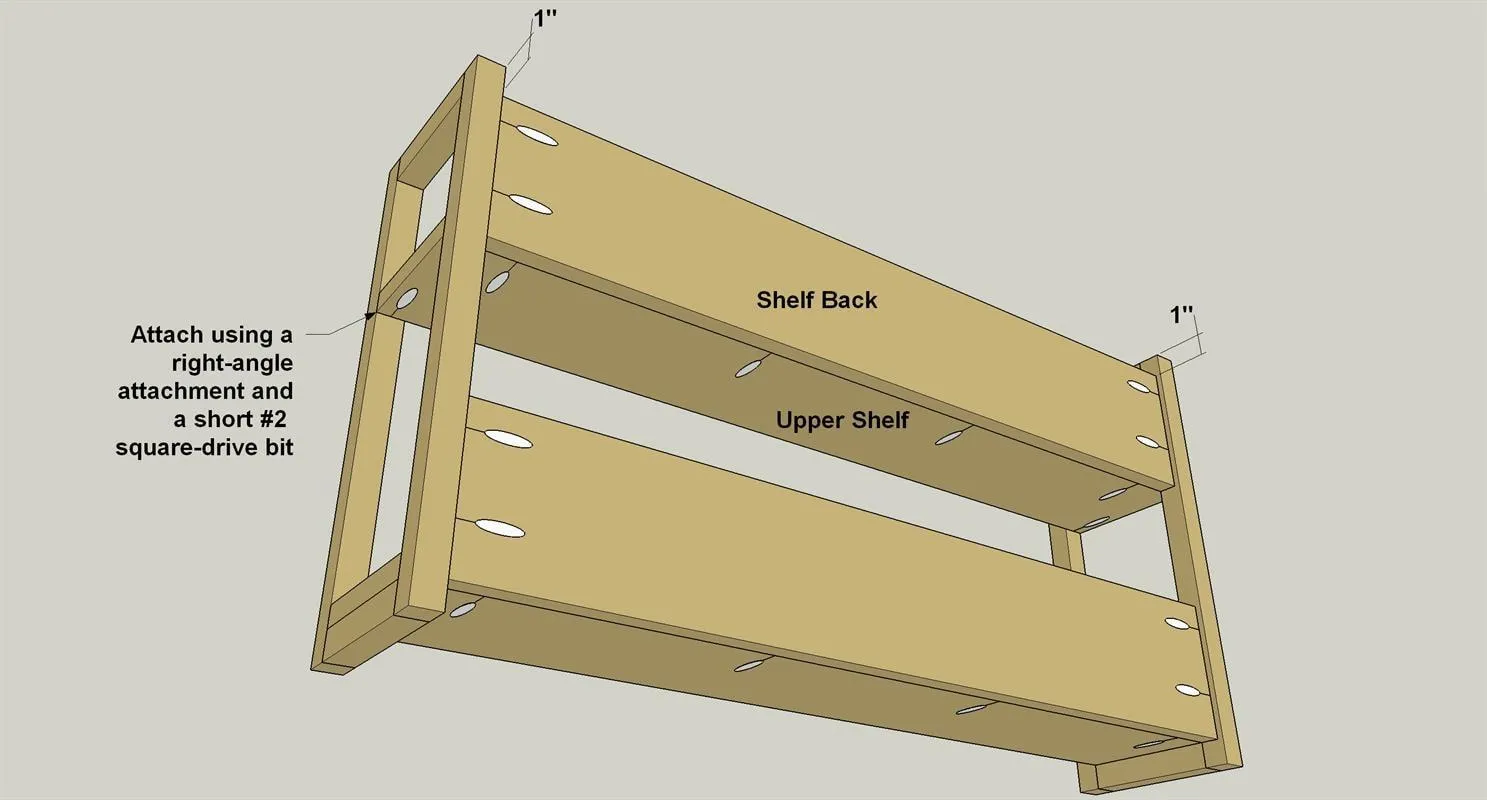
Attach the upper shelf assembly to the support frame assembly using 1 1/4" coarse-threaded pocket screws. Make sure the front of the Shelf Back is flush with the front edge of the Support Stiles. A right-angle attachment, such as the Kreg 90° Pocket-Hole Driver, will be needed to attach the Upper Shelf to the front Support Stile.
7Add Hardware and Hang
With assembly complete, you can hang it on the wall. We used a two-part “Hangman” cleat system. One half attaches to the wall, and the other half attaches to the upper Shelf Back.