 Notch
Notch- Difficulty
- Advanced
- Time
- 6.8–13.3 hours
- Cost
- $$$
About this build
Daybed porch swing built for a standard twin size mattress. This is a very beefy swing and will definitely stand the tests of time.
Tools
Essential
- Brad Nailer
- Drill / Driver
- Jigsaw
- Miter Saw
- Pocket Hole Jig
- Random Orbit Sander
- Table Saw
Optional / nice to have
- Bar / Pipe Clamps
- Tape Measure
Materials
| Item | Qty |
|---|---|
| Board, 1x6 96" | 23 board |
| Kreg HD Screws | 1 each |
| Timberlok 6" Screws | 4 each |
| Kreg 1 1/2" Screws | 1 each |
| 2" Screws | 1 each |
| 1" Screws | 1 each |
Overall cost: $$$. Lumber prices vary by region, species, and season, so we give a band rather than a figure we would only be pretending to know.
Cut list
| Part | Qty | T × W × L |
|---|---|---|
| Front & Rear Support Beams (will glue up) | 6 | 3/4" × 5" × 96" |
| Side Support Beams (will glue up) | 6 | 3/4" × 5" × 38" |
| Front Verticals (will glue up) | 6 | 3/4" × 2" × 24" |
| Rear Verticals (will glue up) | 6 | 3/4" × 2" × 14" |
| Rear Pickets | 9 | 3/4" × 5" × 22" |
| Side Pickets | 10 | 3/4" × 5" × 12" |
| Armrests | 2 | 3/4" × 4" × 42" |
| Back Support (will glue up) | 2 | 3/4" × 3" × 80" |
| Slat Supports (front and back) | 2 | 3/4" × 2" × 77" |
| Slat Supports (sides) | 2 | 3/4" × 2" × 36" |
| Slat Spacers | 10 | 3/4" × 3/4" × 9" |
| Slats | 6 | 3/4" × 5" × 38" |
What to buy
Some parts are longer than a 8 ft board, so there is no honest board count to show here. Open the board plan to pick a longer stock length — it names every part that does not fit.
3/4" × 5"
9 boards
3/4" × 4"
1 board
3/4" × 3"
2 boards
3/4" × 2"
6 boards
3/4" × 3/4"
1 board
Assumes 8 ft stock, a 1/8" saw kerf, and buying each part at its own width. Change the board size or kerf on the full board plan →
Instructions
1Glue Up
- [ FRONT & REAR BEAMS... glue up 3 of the 3/4" x 5 1/2" x 96" boards and repeat for the other 3 boards.
- Cut to a finish size of 2 1/4" x 5" x 87" ] [ SIDE BEAMS... glue up 3 of the 3/4" x 5 1/2" x 24" boards and repeat the for the other 3 boards.
- Cut to a finish size of 2 1/" x 5" x 35 3/4" ] [ FRONT VERTICALS... glue up 3 of the 3/4" x 2 3/4" x 24" boards and repeat the for the other 3 boards.
- Cut to a finish size of 2 1/4" x 2 1/4"" x 17" ] [ REAR VERTICALS... glue up 3 of the 3/4" x 2 3/4" x 14" boards and repeat the for the other 3 boards.
- Cut to a finish size of 2 1/4" x 2 1/4"" x 12" ] [ BACK SUPPORT... glue up the 2 @ 3/4" x 3 1/2" x 80" boards.
- Cut to a finish size of 1 1/2" x 3" x 77" ]
2Step 1
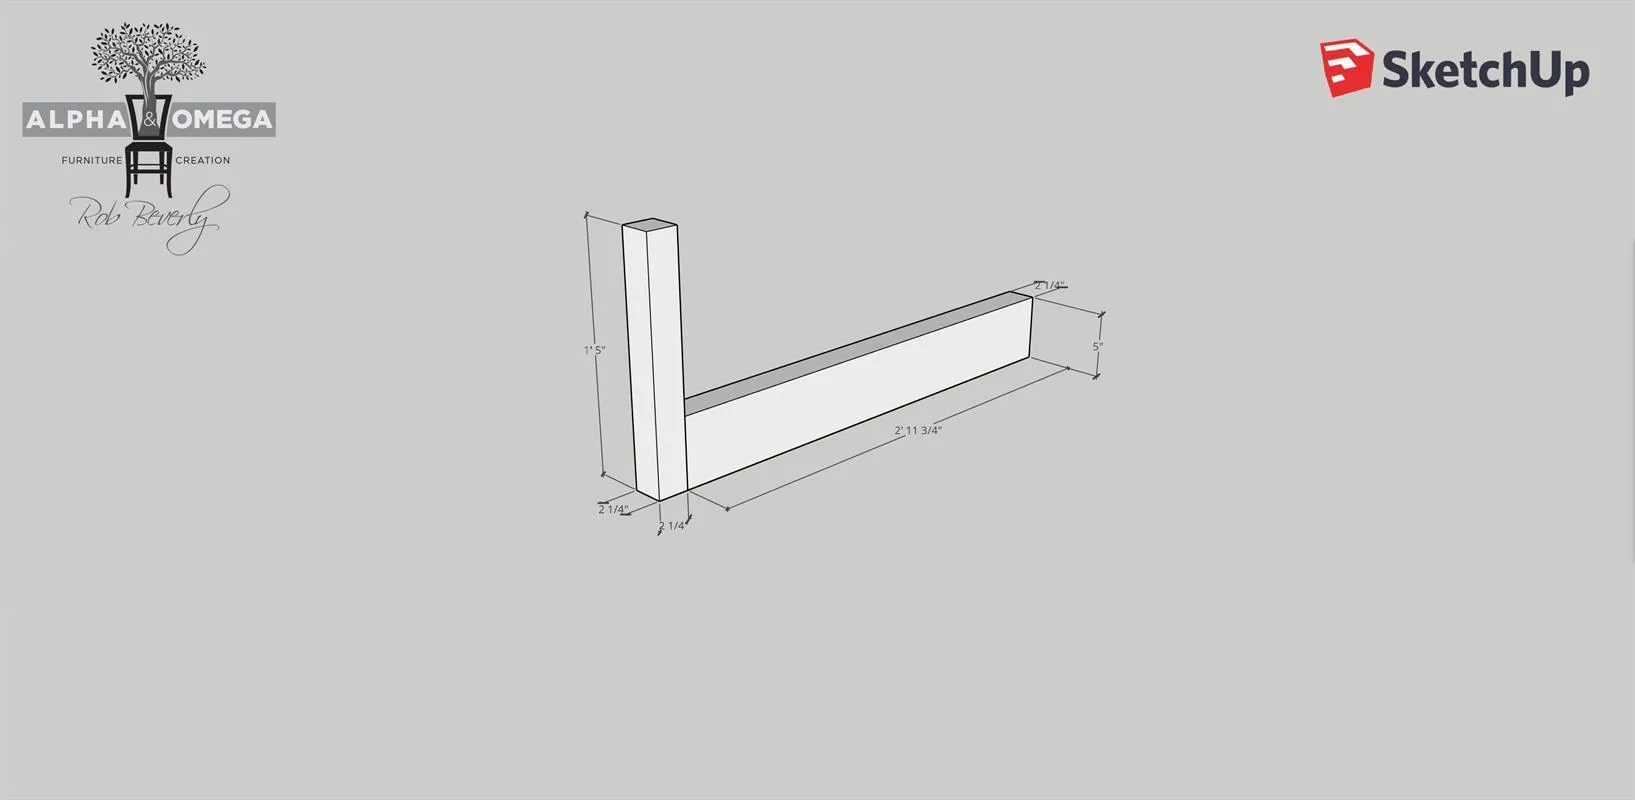
Connect the bottom side support to the front vertical support. You can glue these up or use pocket holes on the side facing the inside of the bed. A later step will require 7" screws going through these which will make them even stronger.
3Step 2
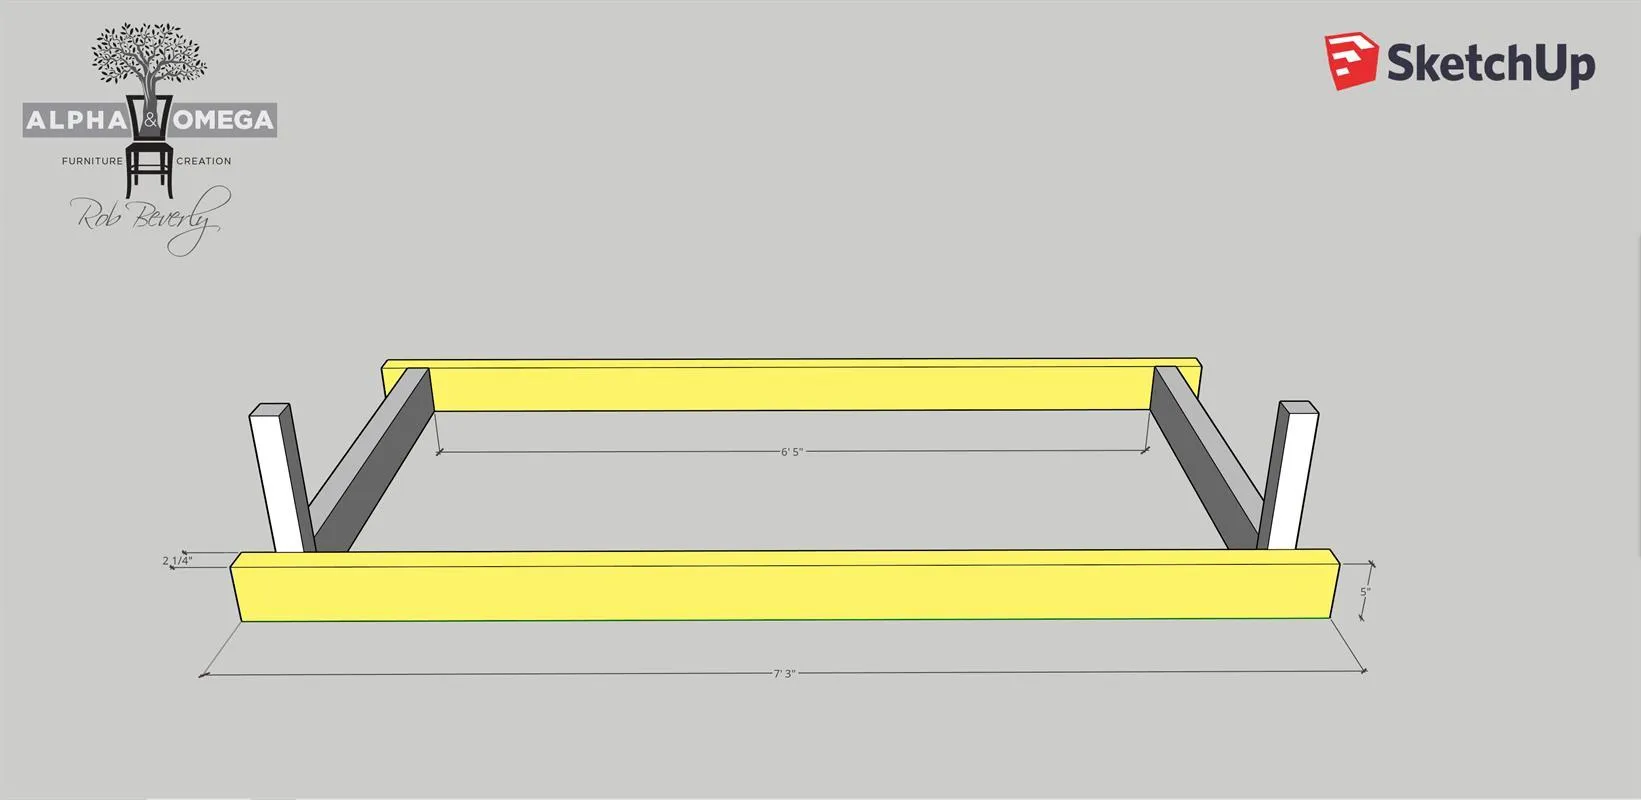
Attach the front and back support beams. For the front beam, you will glue it up, then drill pilot holes and then use 6" Timberlok screws (2 per side) to attach the front beam to the vertical and side supports. For the rear beam, make 3 Kreg HD pocket holes on the inside of the side supports and attach the the rear beam.
4Step 3
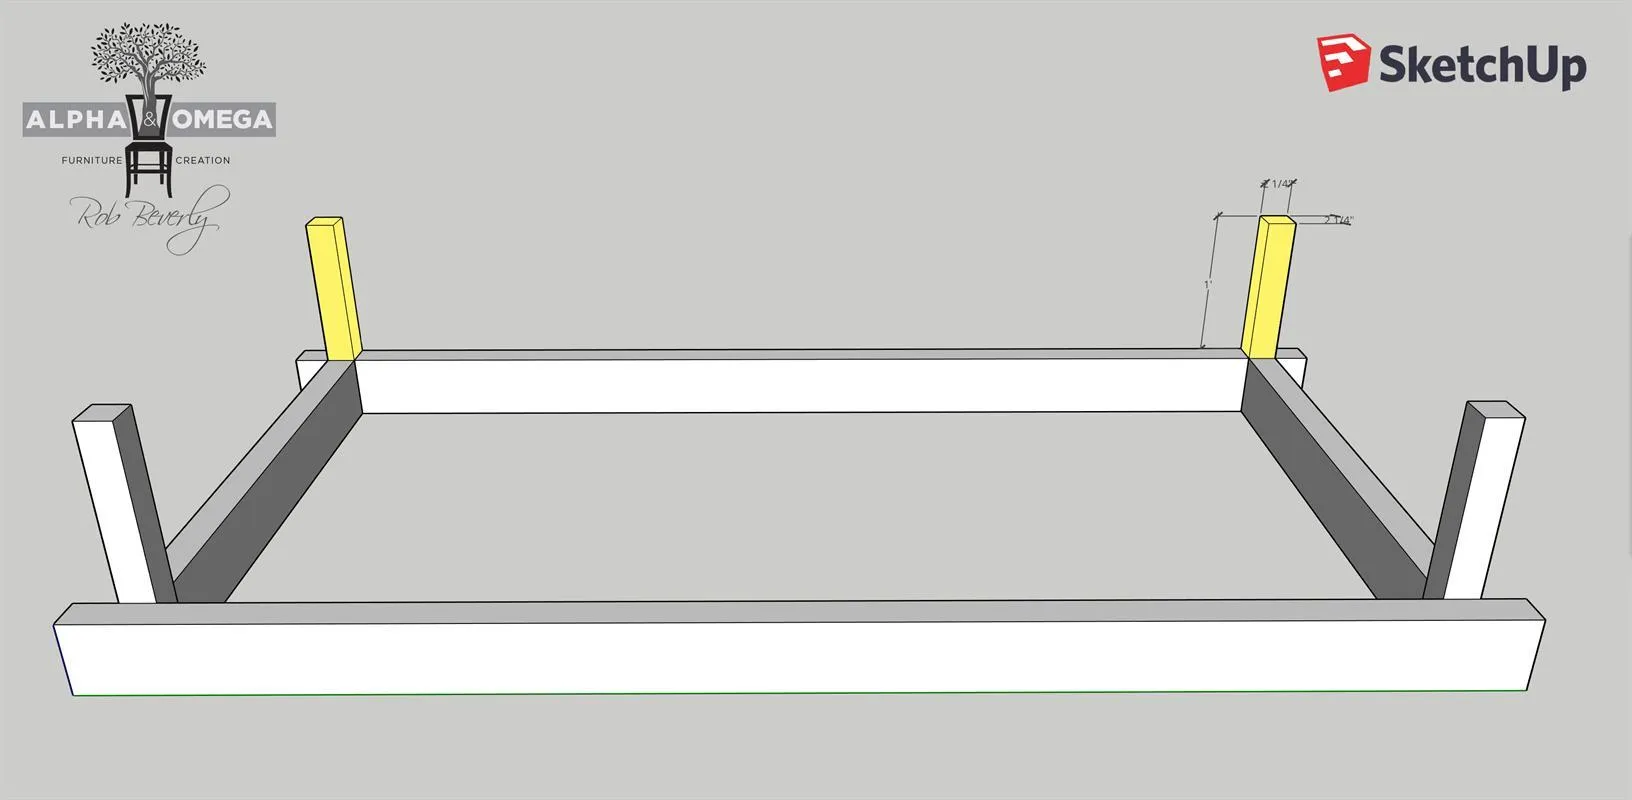
Attaching the rear vertical supports. To attach these, use the Kreg HD and place 2 pocket holes on the inner sides of the verticals and attach them to the rear support beam.
5Step 4
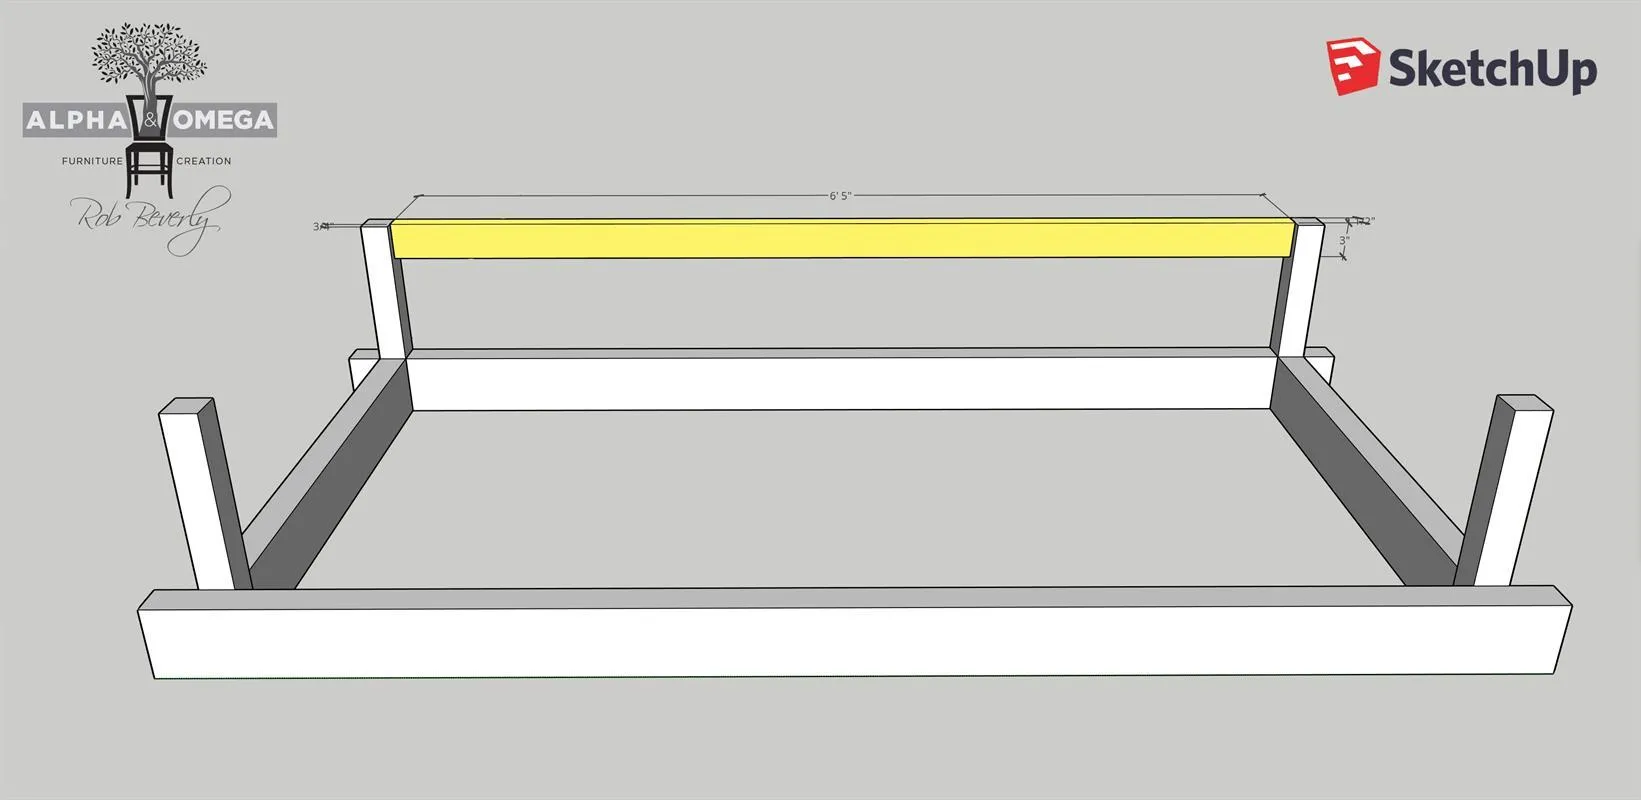
Attaching the back support. Using 2 Kreg HD pocket holes on each side of the back support, attach it to the rear vertical supports. You will align the top flush and the back flush. This will leave a 3/4" space from the front of the back support to the front of the rear vertical support to allow for back pickets to fit.
6Step 5
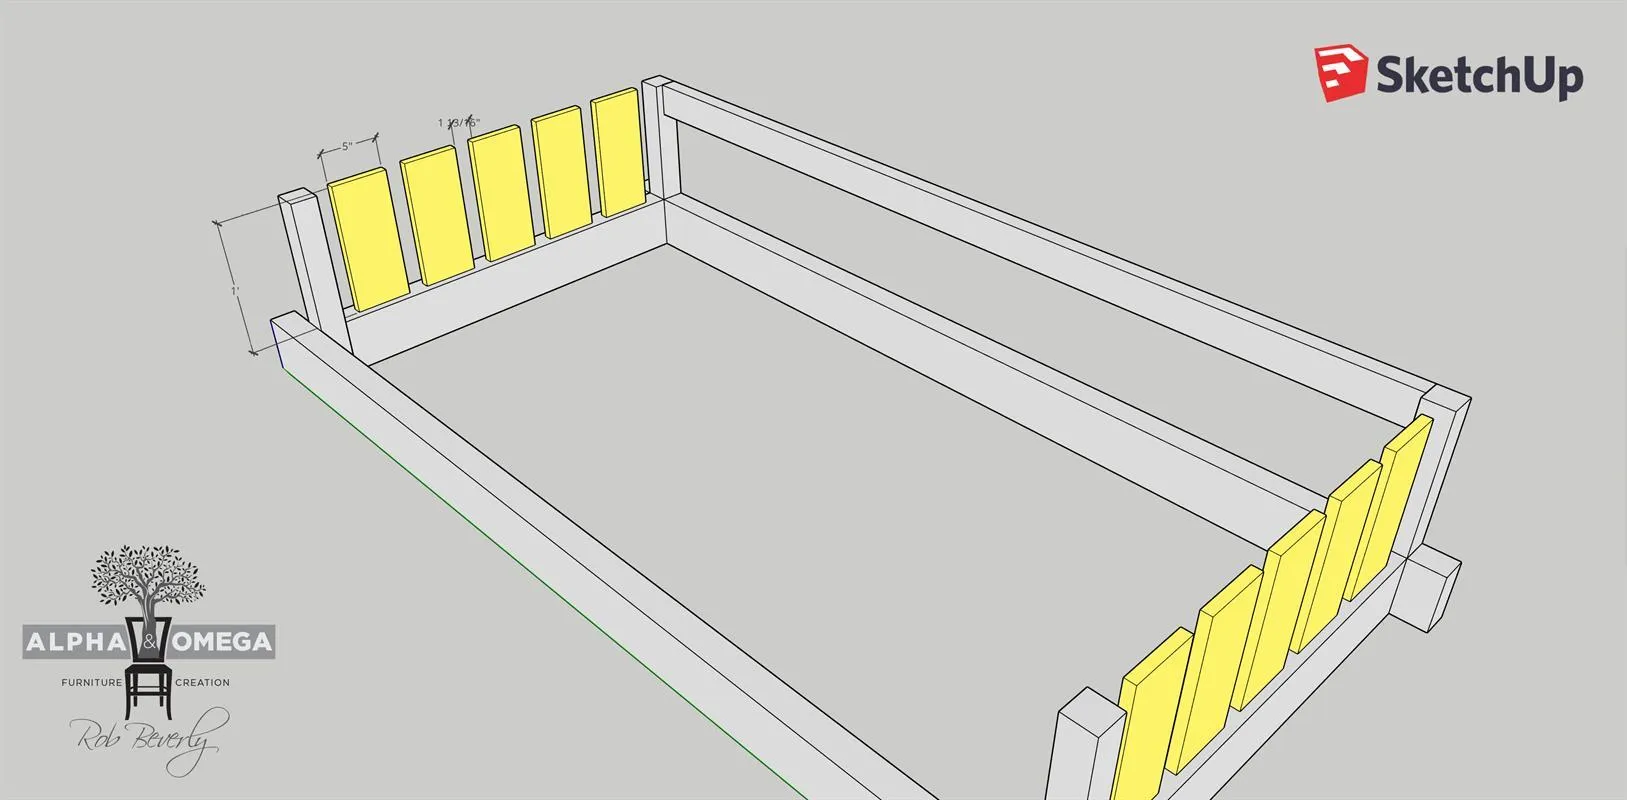
Attaching the side pickets. You will need to put 2 pocket holes in the top and bottom of each picket. You will have a 1 13/16" space between each picket. I cut a spacer that is 1 13/16" wide to set my spacing between each picket. I start from the front and work towards the back so if the last space is not perfect, it will not be as noticeable. You will attach the bottom of the pickets to the top of the side support rails.
7Step 6
- Attaching rear pickets.
- Place 2 pocket holes into the bottom of each of the rear pickets.
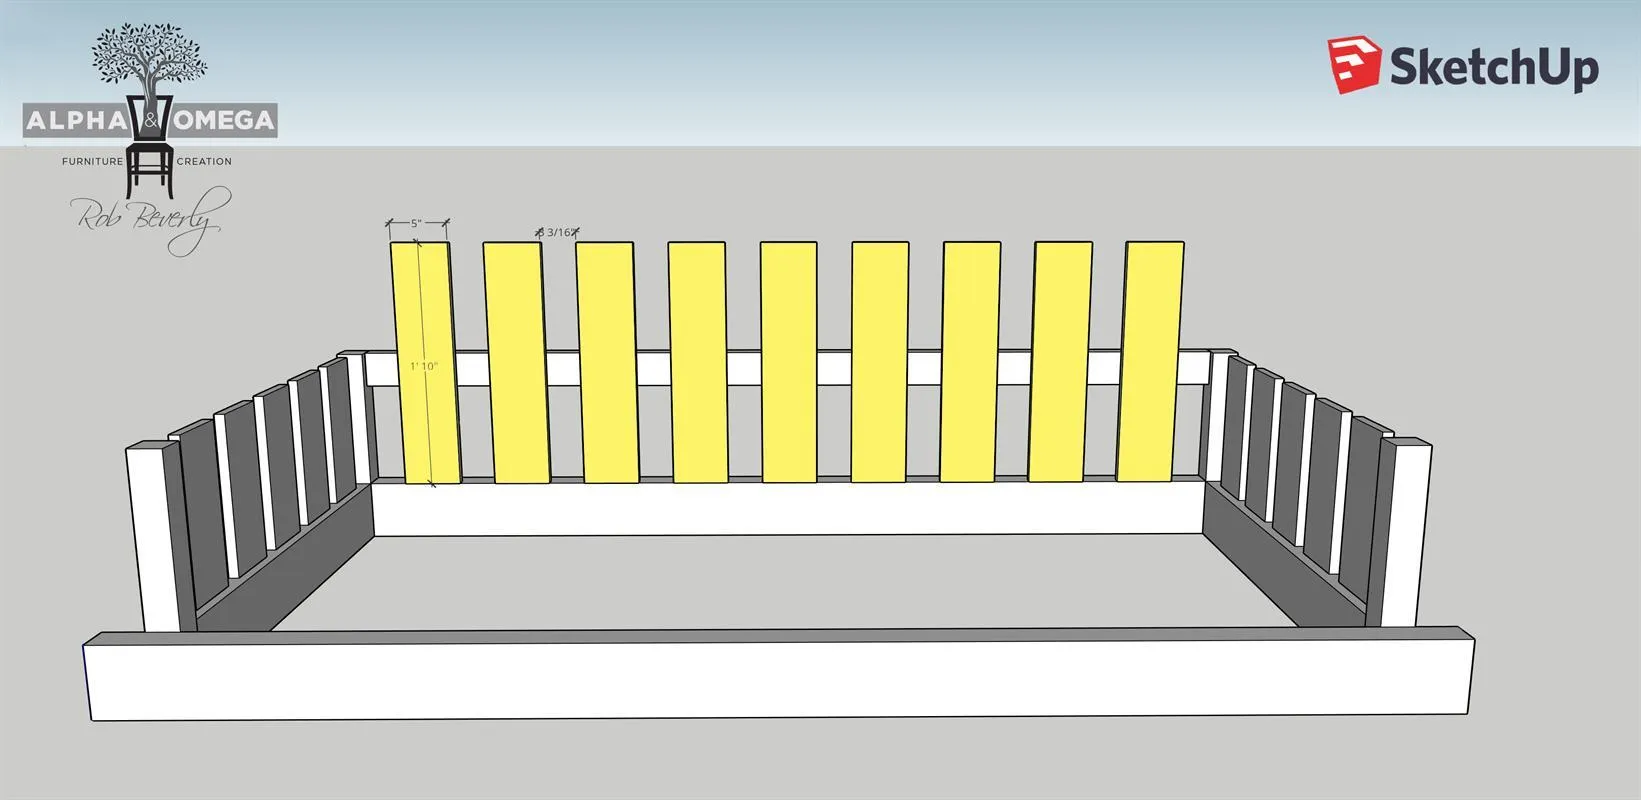
- Attach the bottom of the rear pickets to the top of the rear support beam. The space between each picket is 3 3/16". I also use a spacing block on these as well. On these, I start on the outer edge of both sides and work my way towards the center with the center being the last one. Use a finish nailer to attach the pickets to the back support.
8Step 7
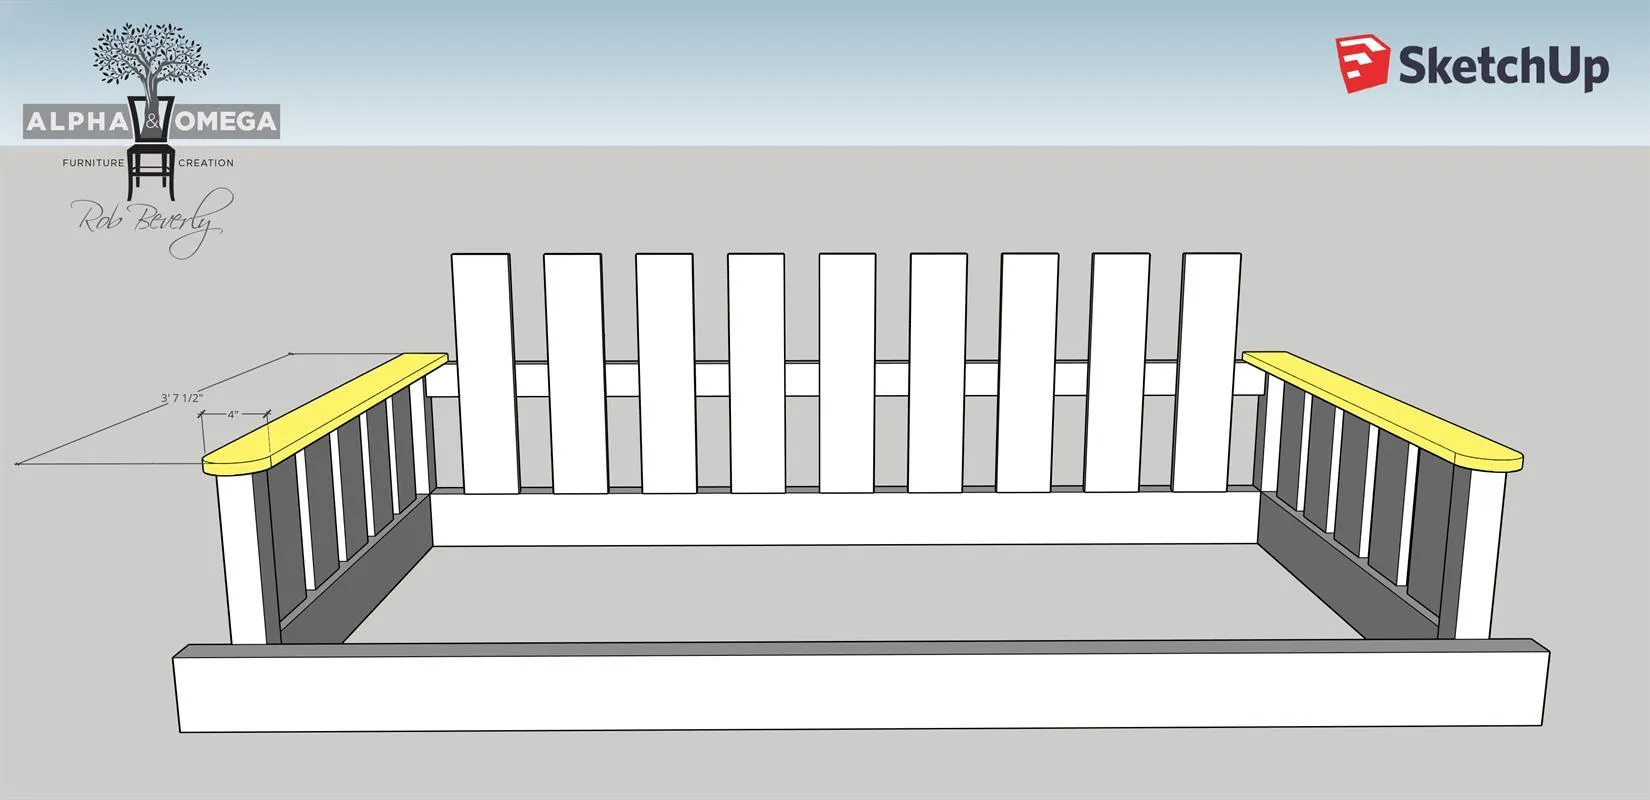
- Attaching the armrests.
- Align the back of the arm rest flush with the back of the rear vertical support.
- Center the armrest from side to side on the vertical support. Use a finish nailer to attach the armrest to the vertical supports and use pocket screws to attach the pickets to the armrests.
9Step 8
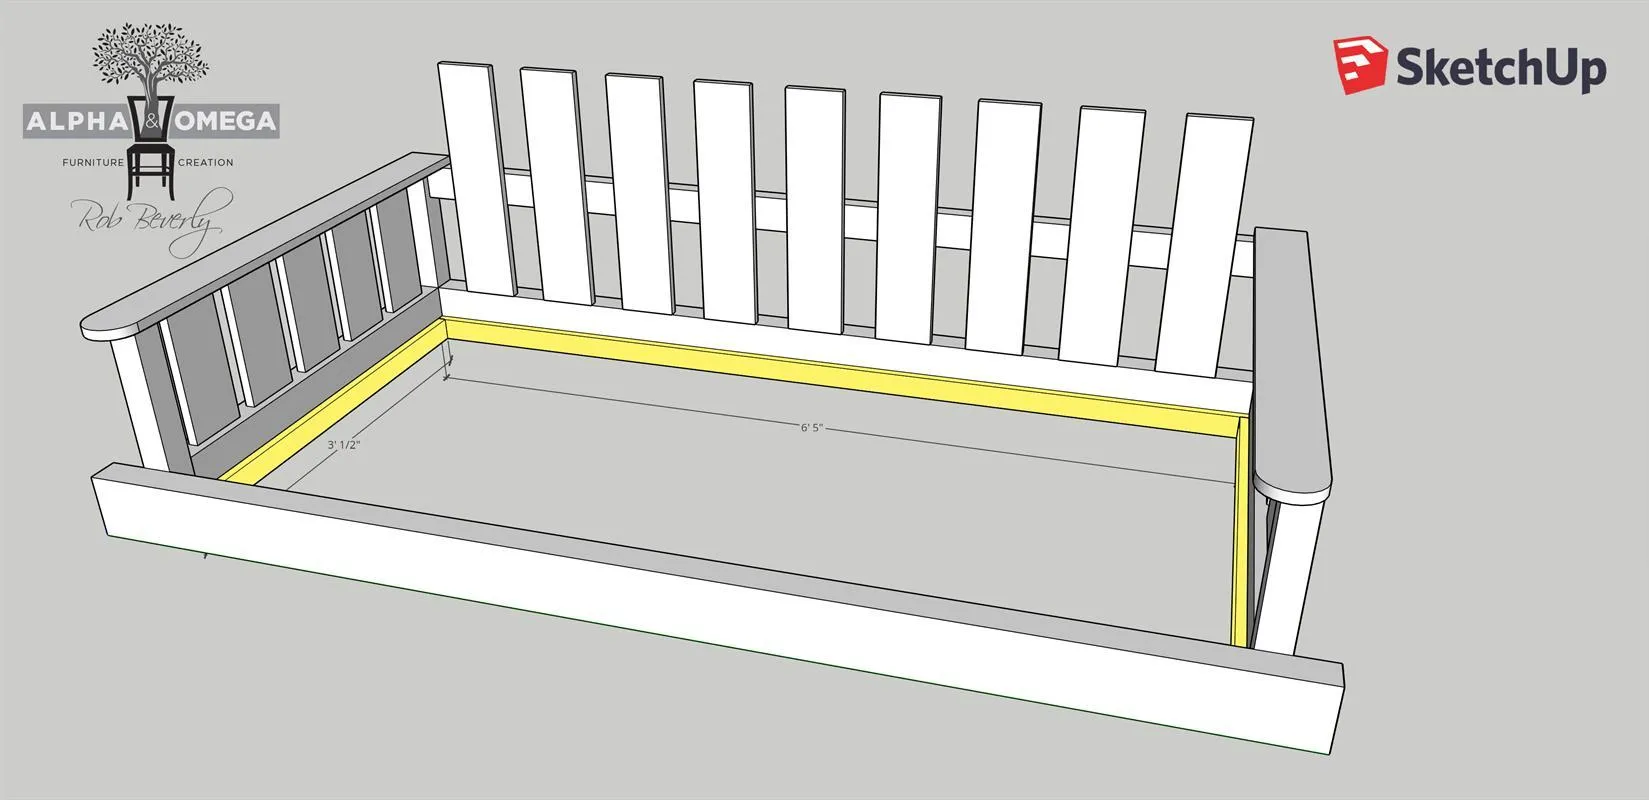
Attaching the slat supports. Align the bottom of the slat supports flush with the bottom of the support beams and attach using 2" screws.
10Step 9
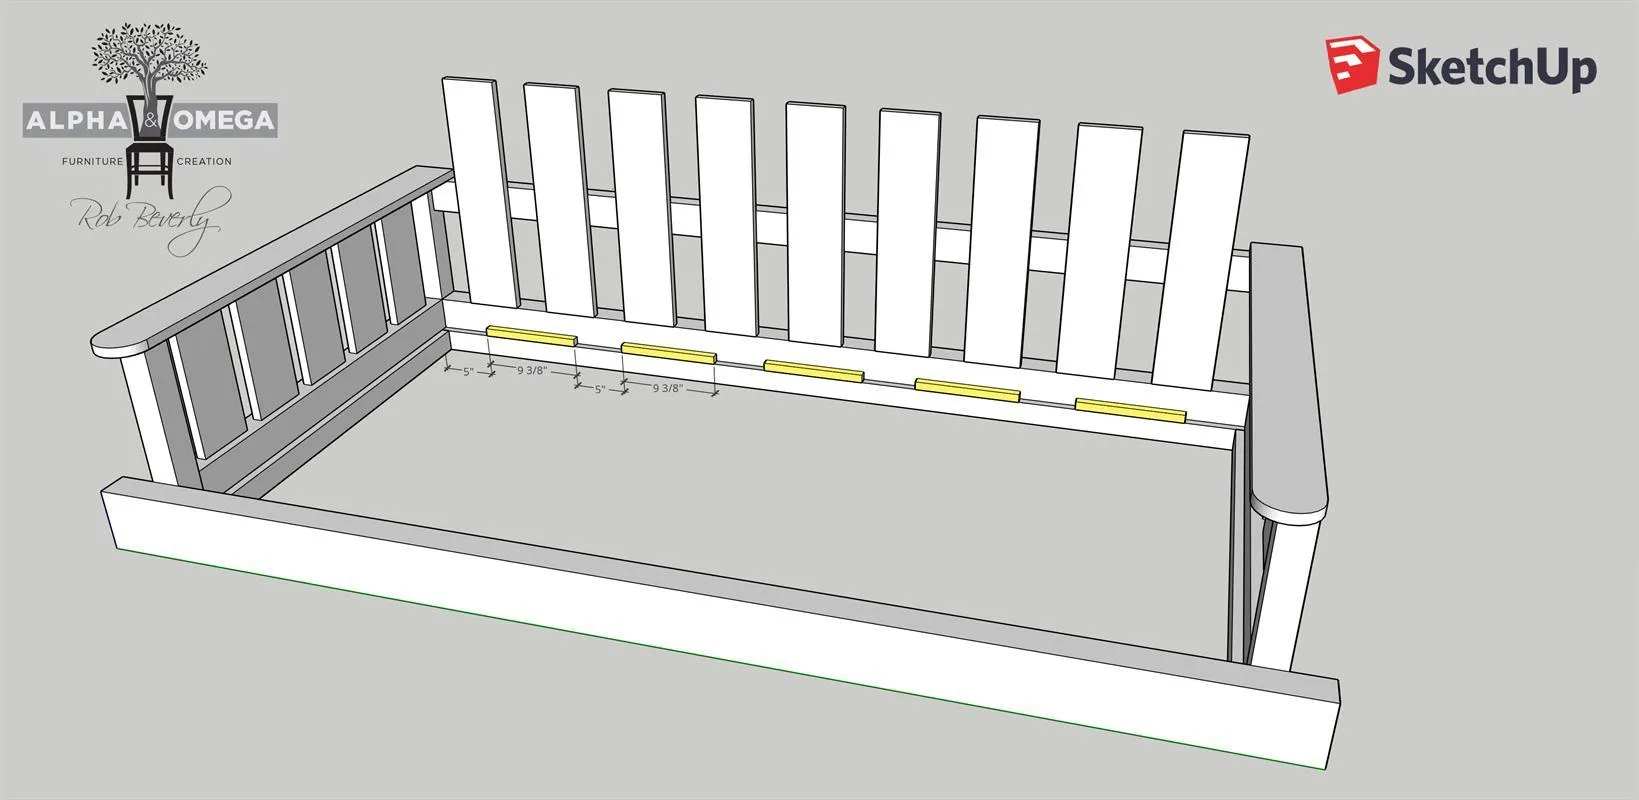
- Attach the slat spacers. Skecthup calls for the spacers to be 9 3/8", but to allow for an easier fit, it is best to go with 9 1/4". The only purpose the spacers serve is to not allow the slats to slide. This step is not totally necessary, but I personally like having the slats locked in place. Ypu can actually lay your slats in and the spacers as you go.
- Predrill the spacer boards with 2 holes in each and use a 1" screw to hold them in place.
11Step 10
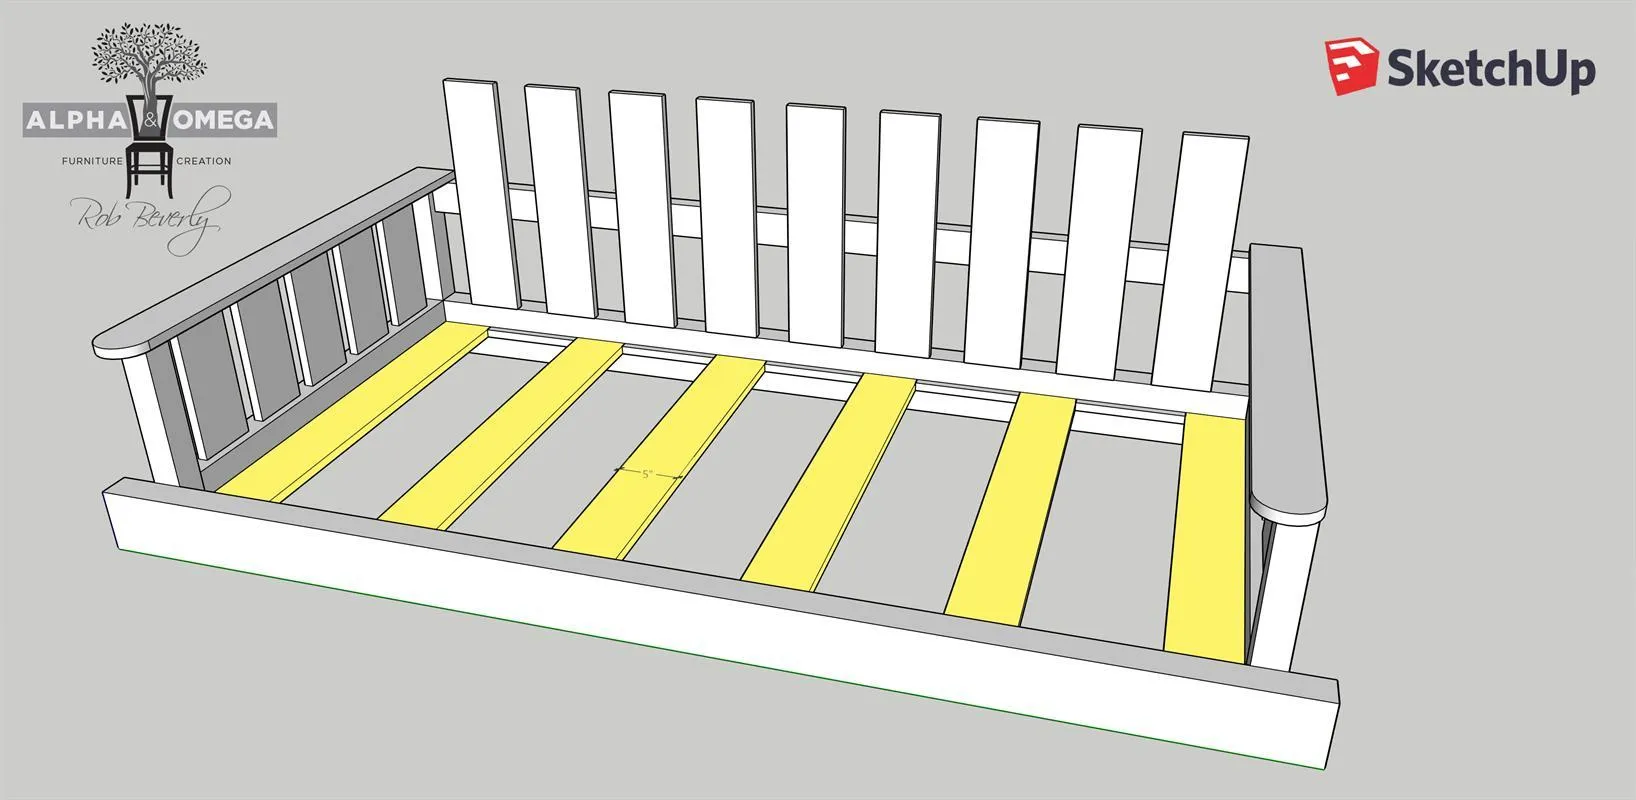
Attaching the slats. If you did not do the slats when you did the spacers, at this point place your slats in the gaps and predrill holes and use 1" screws to attach them to the slat support boards.
12Step 11
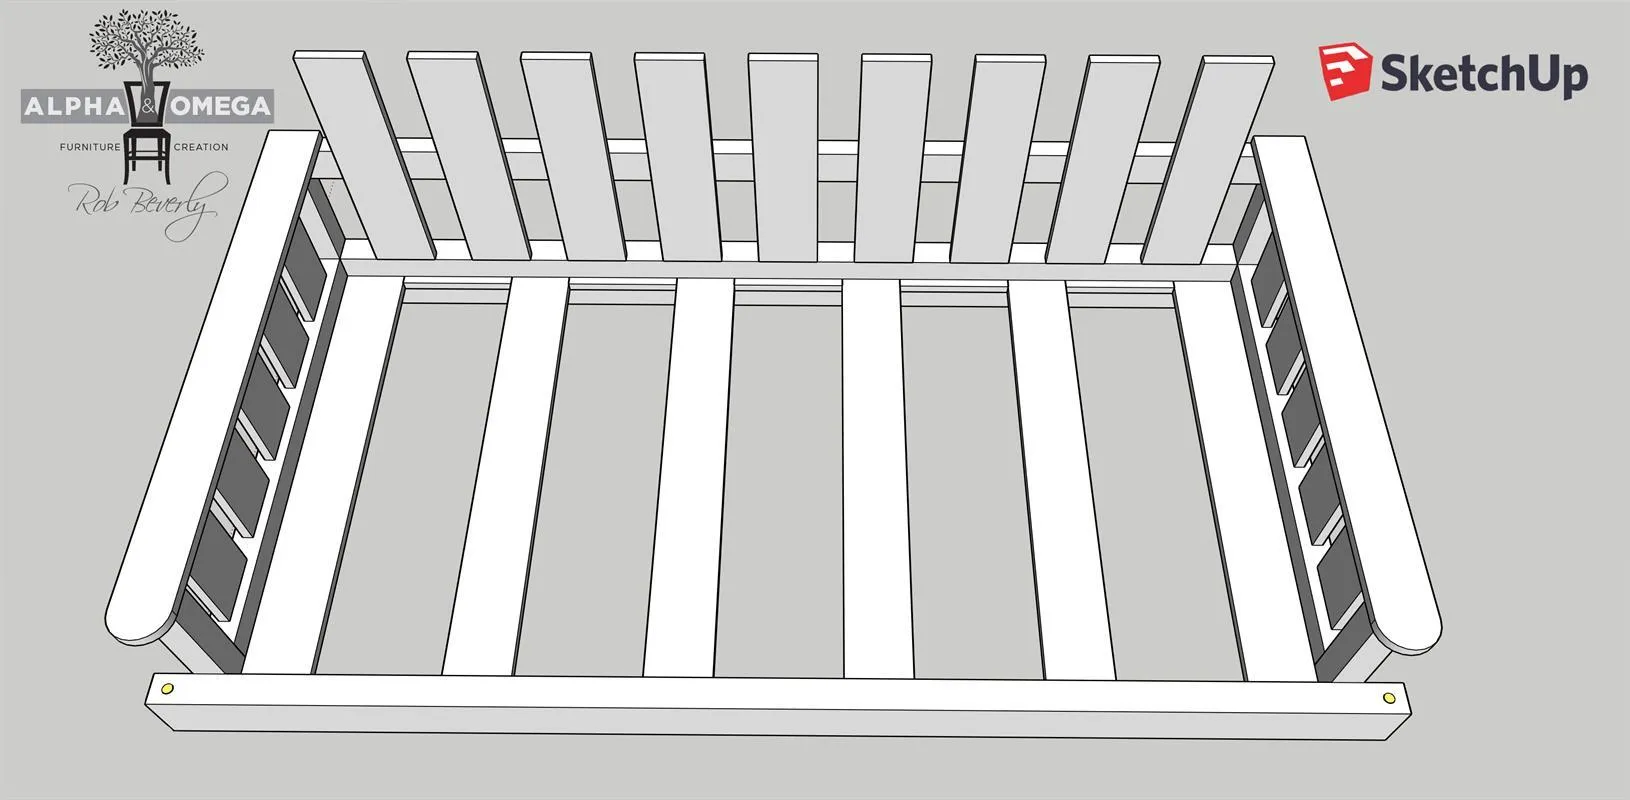
I measured in 1" from the sides of the front and rear support beams and bored a 3/4" hole from the top through the bottom. I hang mine with rope and use these holes to run the rope through and attach them. You can also use eye bolts and use chain.
13Step 12
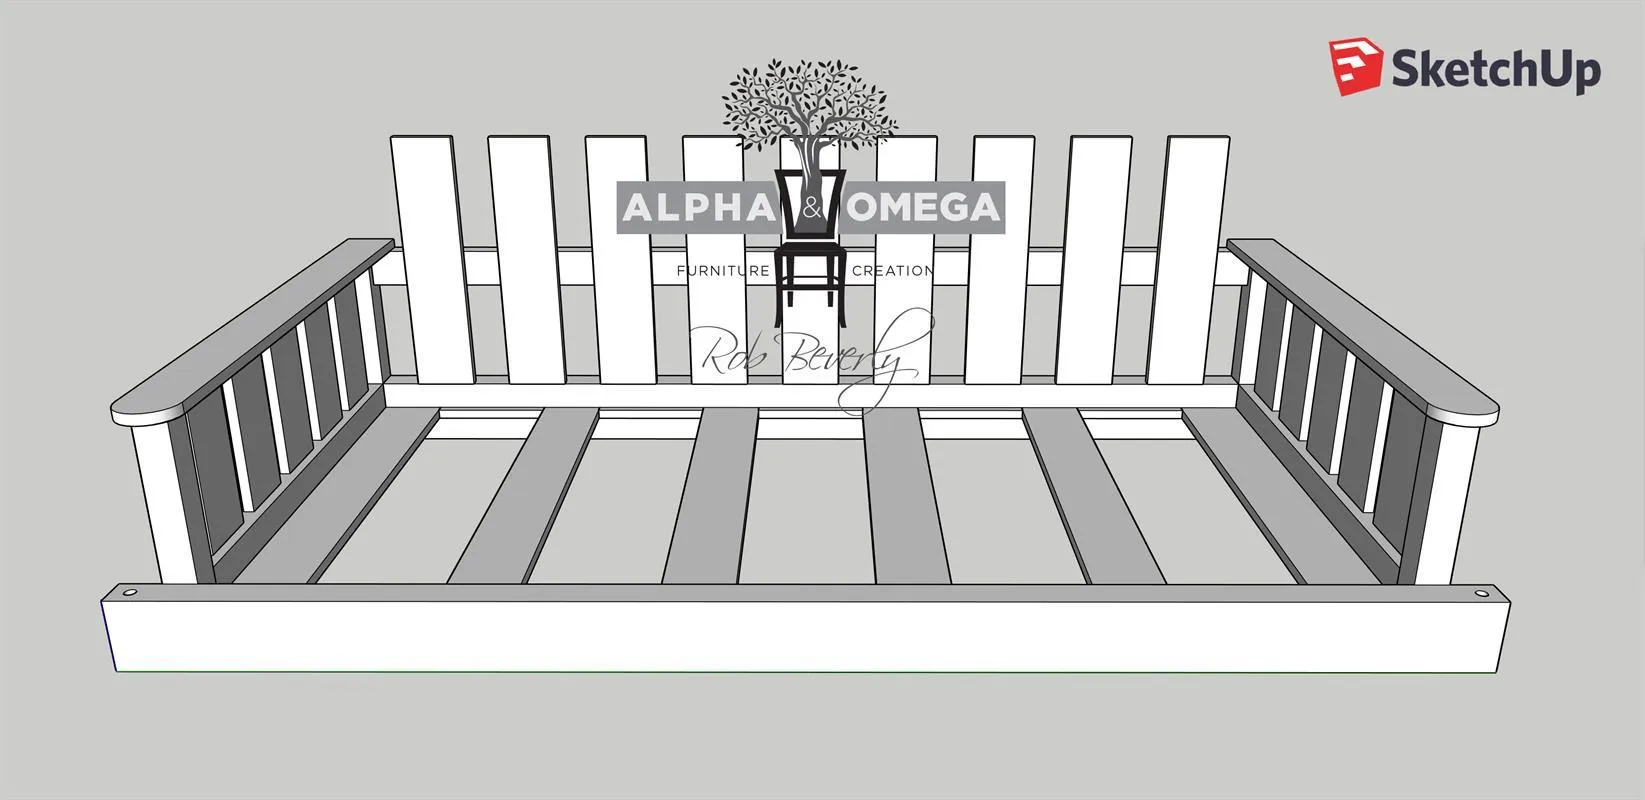
Your Daybed Porch Swing is built and ready for the finish of your choice!
Tags
- Outdoor Furniture
- Advanced
Reviews & builds
No reviews yet
Sign in to review this plan or share your build.
No reviews yet. Be the first to build this.