 Notch
Notch- Difficulty
- Intermediate
- Time
- 7.3–14 hours
- Cost
- $$
About this build
This crosscut sled is a versatile sled that features Kreg Top Trak, Extension fence and T-Track.
Tools
Essential
- Drill / Driver
- Hammer
- Jointer
- Miter Saw
- Router
- Table Saw
Optional / nice to have
- Bar / Pipe Clamps
- Combination Square
- Tape Measure
Materials
| Item | Qty |
|---|---|
| Plywood, 3/4" Thick Half Sheet | 1 board |
| Kreg Top Trak | 1 each |
| Rockler T-Track Intersection Kit | 3 each |
| Rockler 2 Ft. Universal T-Track | 1 each |
| Rockler 24" Aluminum Miter Bar | 2 each |
| Kreg KMS7303 30-Inch Jig and Fixture Bar | 1 each |
| Kreg KMS8000 Precision Trak and Stops Kit | 1 each |
| Gorilla 2 Part Epoxy, 5 Minute Set, .85 ounce Syringe, Clear | 1 each |
| Bob Smith Industries BSI-157H Maxi Cure/Insta-Set Combo Pack (3 oz. Combined) | 1 each |
Overall cost: $$. Lumber prices vary by region, species, and season, so we give a band rather than a figure we would only be pretending to know.
Cut list
| Part | Qty | T × W × L |
|---|---|---|
| Sled base | 1 | 3/4" × 24" × 30" |
| Fence parts | 6 | 3/4" × 3" × 24" |
What to buy
Buy 3 boards at 8 ft.
3/4" × 24"
1 board
3/4" × 3"
2 boards
Assumes 8 ft stock, a 1/8" saw kerf, and buying each part at its own width. Change the board size or kerf on the full board plan →
Instructions
1Review the Entire Plan
Please review all the steps prior to beginning. It will help make the process faster and more enjoyable. Keep in mind that in order for a crosscut sled to function properly you must be precise with your cuts and alignment of the fence. I didn't not include the steps for the zero clearance inserts. If you would like more information on that please let me know.
2Complete Cut List
Use the cut-list to break down 3/4" plywood to the specified dimensions. You could also use MDF just make sure you the stock you use is nice and flat.

3Glue up fences
Glue up two pieces of your fence parts together with a good bit of glue and several clamps to ensure even clamping pressure. You should have 3 fences. Two will be your front fences(colored red) and one will be the back fence(colored blue).

4Joint fences
Joint the fences with a jointer so you have one straight edge.
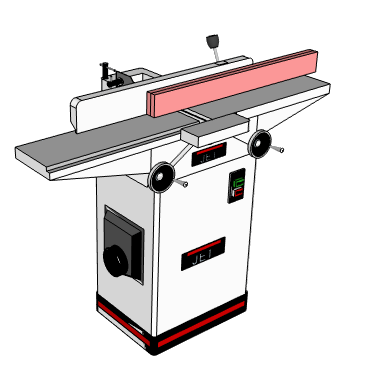
5Cut groves in fences
Take your front fences and cut a 3/4" groove 3/8" away from the jointed edge. Make sure you use the same jointed edge on both front fences. The purpose of this groove is to allow one of the extension fences to be attached when needed.

6Trim Front fences to final size
Take your front fences and cut them to 2 1/4" width on the Table saw. Make sure to use the jointed edge. This is the height the Kreg Swing Stops need to function properly.

7Cut front fence for Top Trak
Next you need to cut away some of the front fences so that the Top Track can sit properly. . Cut a 3/4" deep cut that is 1 1/2" away from the jointed edge.

8Cut the rabbet
Flip the front fences 90 degrees. Move the fence in to 5/8" and make a pass to create a rabbet. Make sure the side with the groove is what is riding along the fence of the table saw.
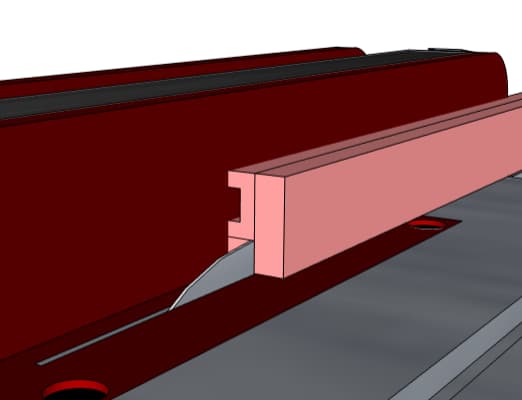
9Attach Top Trak
Attach one of the 24" Kreg Top Trake sections to each of the front fences with the provided screws. Make sure they are sitting flush and the fences are straight when attaching. Don't worry about getting the Top Trak to align to the edges. yet those will be trimmed up later.

10Trim Fences to final size
The next step is crucial to allow the fences to work together flawlessly. Cut each of the front fences to 24" in length. You need to make sure your miter saw is square so that the two front fences butt up together perfectly. Your miter saw can cut through the Top Trak just make sure to go slowly.

11Cut Groves in Sled base (Optional)
Take your sled base and cut 3/4" grooves based on the attached image. Make sure the groves are a little over 3/8" deep. You can make these cuts with a Router or dado stack on your table saw. These grooves allow for t-track. You do not need to add t-track its just an option.
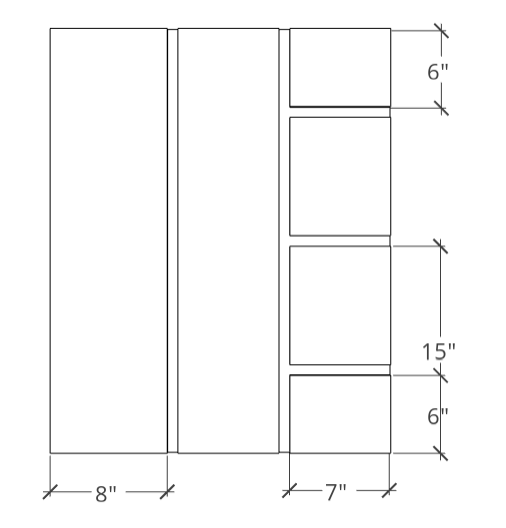
12Attaching T-track
If you are adding t-track apply some 5-min epoxy to the groves then install the track. For the groves that intersect use the Rockler T-Track Intersection Kits. It helps to avoid cutting the miters on the miter saw. The piece of track on the right side should be about 24" to allow for use of hold down clamps.

13Cut chamfer on fences
Add a chamfer to the fences so that dust does not collect against the fence potentially causing inaccuracies in your cuts. You can make the cut on a router table or with a trim router.

14Ready for assembly
Your crosscut sled is ready for assembly! Pay close attention to the following steps because they are the most important.
15Attach Miter bars to Sled base
- Place a few washers in the miter slots of your table saw.
- Position the miter gauges on the washers to elevate the bars above the table saw base.
- Apply some CA glue to the bars and position your table saw fence at 11". Carefully lower the sled base onto the miter bars ensuring that everything lines up properly.
- Attach the miter bars with the provided screws.

16Attach the back fence
Attach the back fence to the sled with 6 1-1/2" drywall screws. Make sure to clamp the fence down and pre-drill with a chamfer bit so that the screw sits slightly shy of the sled base so that it doesn't catch when the sled slides.

17Testing the fit
At this point you are ready to start squaring up your crosscut sled. Before you start make sure you test the fit of sled. Slide it back and forth and make sure there is no side to side play and that the sled slides smoothly.

18Start the cut
Lay your sled on the table saw and raise the blade slowly until the blade protrudes from the sled top. Push the sled about 3/4 of the way in and shut off the saw. This still will help you to square up the fence.

19Attaching front fence
- Take one ofthe front fences and clamp it to the sled base.
- Attach one screw to the right side of sled base to secure the fence in place and act as pivot. Use a framing square to help get the fence square to the blade.
- Once you are comfortable with the squareness of the fence attach another screw on the right side of the sled to hold it in place.

20Perform the five cut method
In order to test the squareness of the sled you need to conduct the five cut method. Many people have done this method and a a simple google search will help you achieve this.
21Attach extension fence
- Attach the Fixture bar to the second front fence with some #6-1/2" screws.
- Slide the extension fence onto the other fence and make sure the traks are touching correctly.
- Attach the Fixture bar to the front fence with more screws and your fence is good to go.
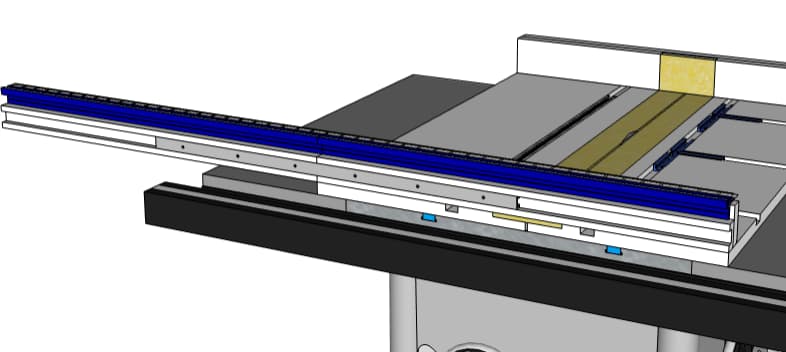
22Apply tape to Top Trak
Apply the tape to the Trak and dial in the saw, you should have about 13" of cut capacity to the left of the blade and about 11" to the right. The extension fence can be attached to either side giving you a lot of versatility with your cuts.
Tags
- Workshop
- Intermediate
Reviews & builds
No reviews yet
Sign in to review this plan or share your build.
No reviews yet. Be the first to build this.