 Notch
Notch- Difficulty
- Beginner
- Time
- 2.3–4.3 hours
- Cost
- $$
About this build
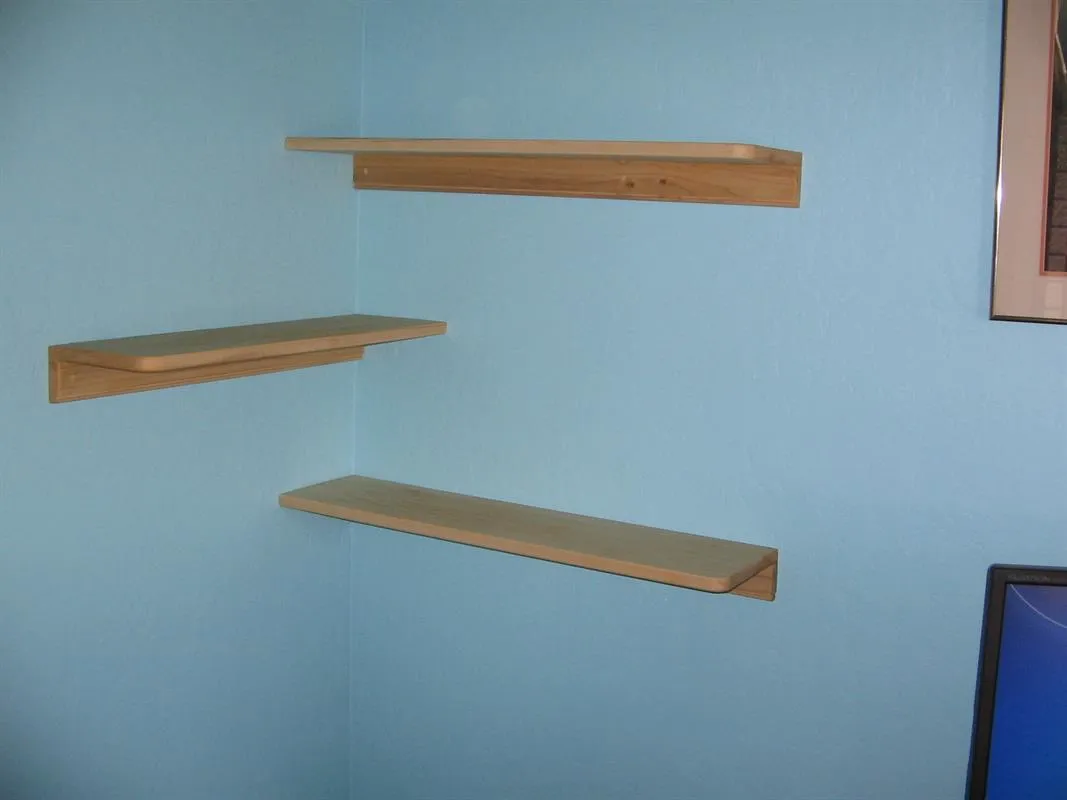
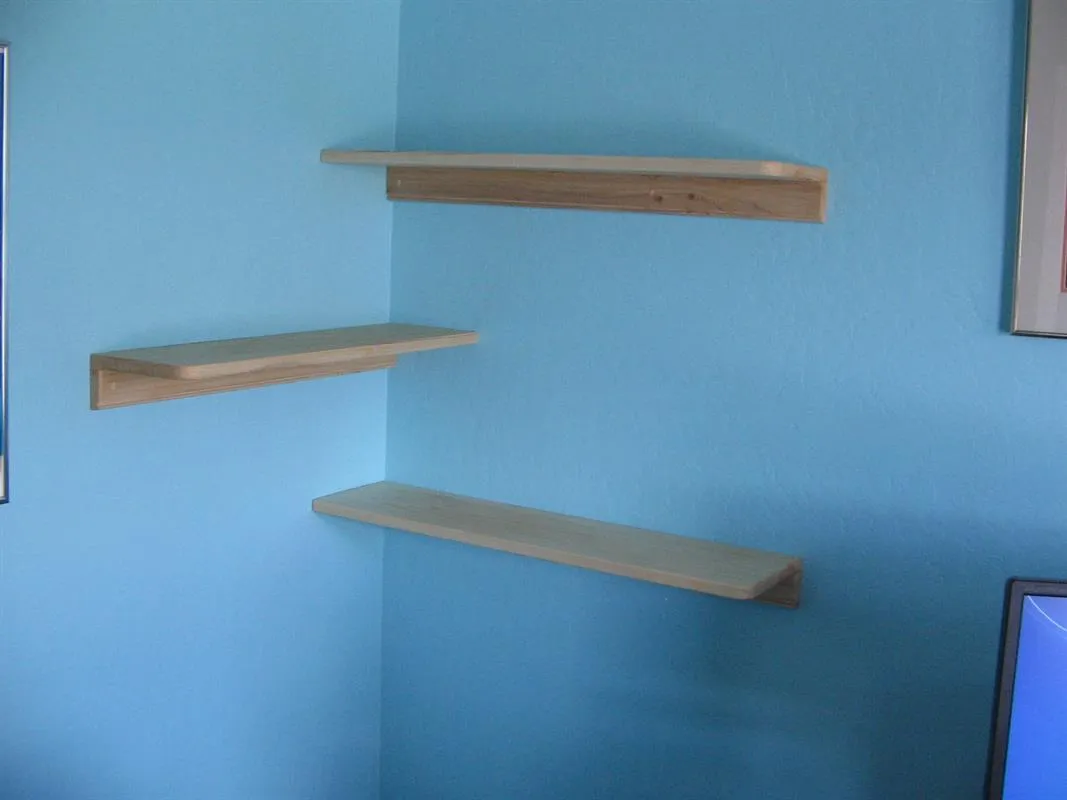
If you have a spare corner and the need to display books, knick knacks, collectables, pictures etc. this simple plan is for you. Make one, two, three or more shelves and use pocket screws to mount them in place.
Tools
Essential
- Band Saw
- Drill / Driver
- Jigsaw
- Miter Saw
- Pocket Hole Jig
- Random Orbit Sander
- Router
- Router Table
- Table Saw
Optional / nice to have
- Bar / Pipe Clamps
- Tape Measure
Materials
| Item | Qty |
|---|---|
| 3/4" Poplar, 1x8 72" | 1 board |
| 1 1/4" coarse Kreg Pocket Screws | 15 each |
| 2" coarse Kreg Pocket Screws | 6 each |
| Minwax Polycrylic Satin Finish | 1 each |
Overall cost: $$. Lumber prices vary by region, species, and season, so we give a band rather than a figure we would only be pretending to know.
Cut list
| Part | Qty | T × W × L |
|---|---|---|
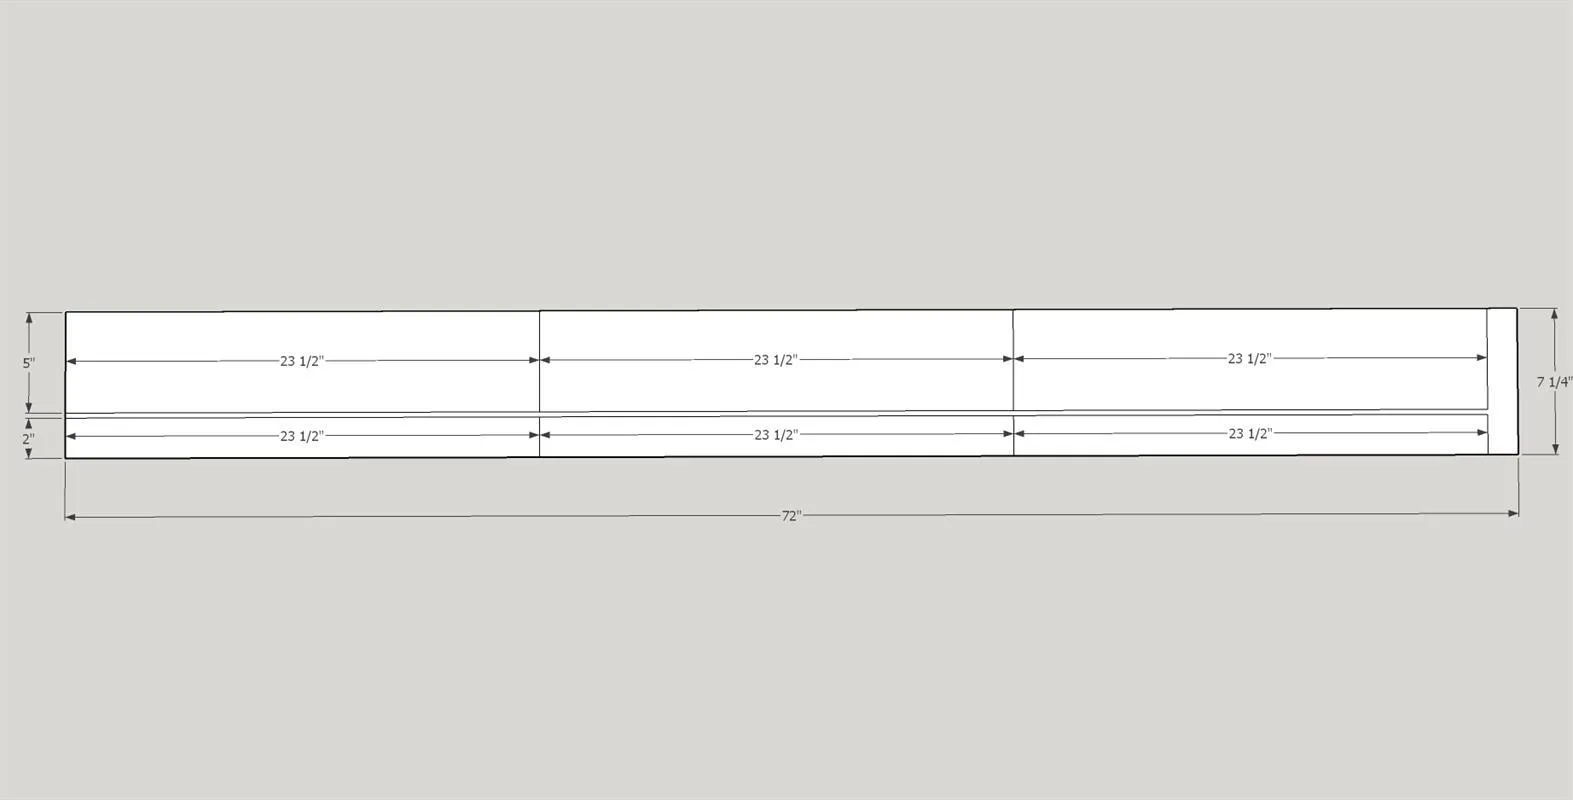
| Shelf Tops | 3 | 3/4" × 5" × 23" |
| Shelf Backs | 3 | 3/4" × 2" × 23" |
What to buy
Buy 2 boards at 8 ft.
3/4" × 5"
1 board
3/4" × 2"
1 board
Assumes 8 ft stock, a 1/8" saw kerf, and buying each part at its own width. Change the board size or kerf on the full board plan →
Instructions
1Introduction
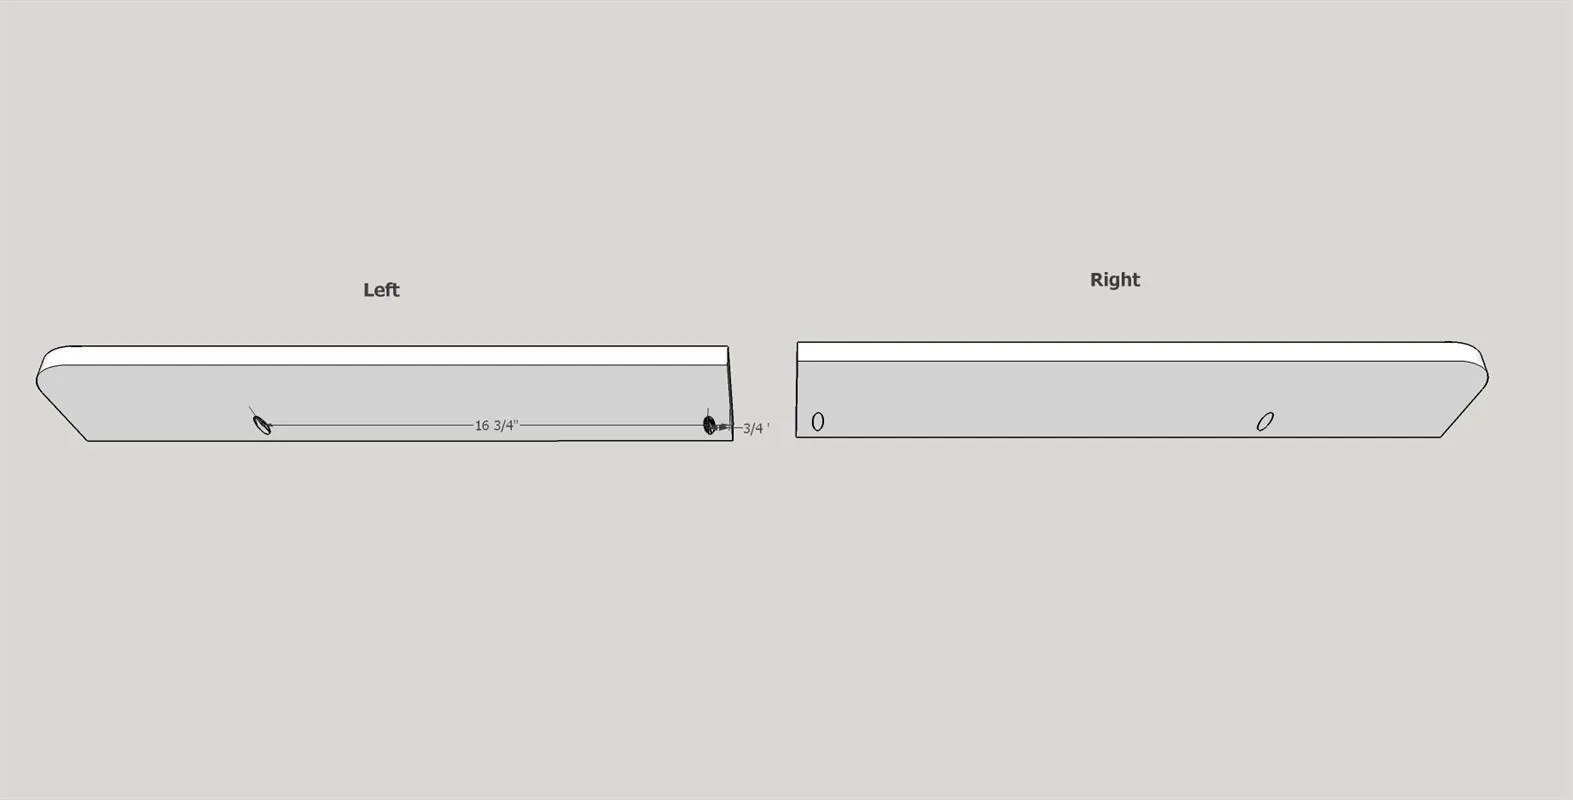
Please be sure to read through complete instructions before you begin any work on this project. This plan is designed to build three corner shelves. By cutting additional wood you can make four, five, six or more shelves...as many as you need. Please note that there are right and left bookshelves, so take that into consideration when planning your build. The completed shelves are held in place by using 2" Kreg pocket screws to mount them to the wall studs. For my plan I assume that the studs are 16" on center. Please make sure that you determine your walls stud placement before drilling those pocket holes.
2Cut the board
Cut the three shelf tops and the three shelf backs from the 1X8 poplar board.
3Prepare the shelf backs
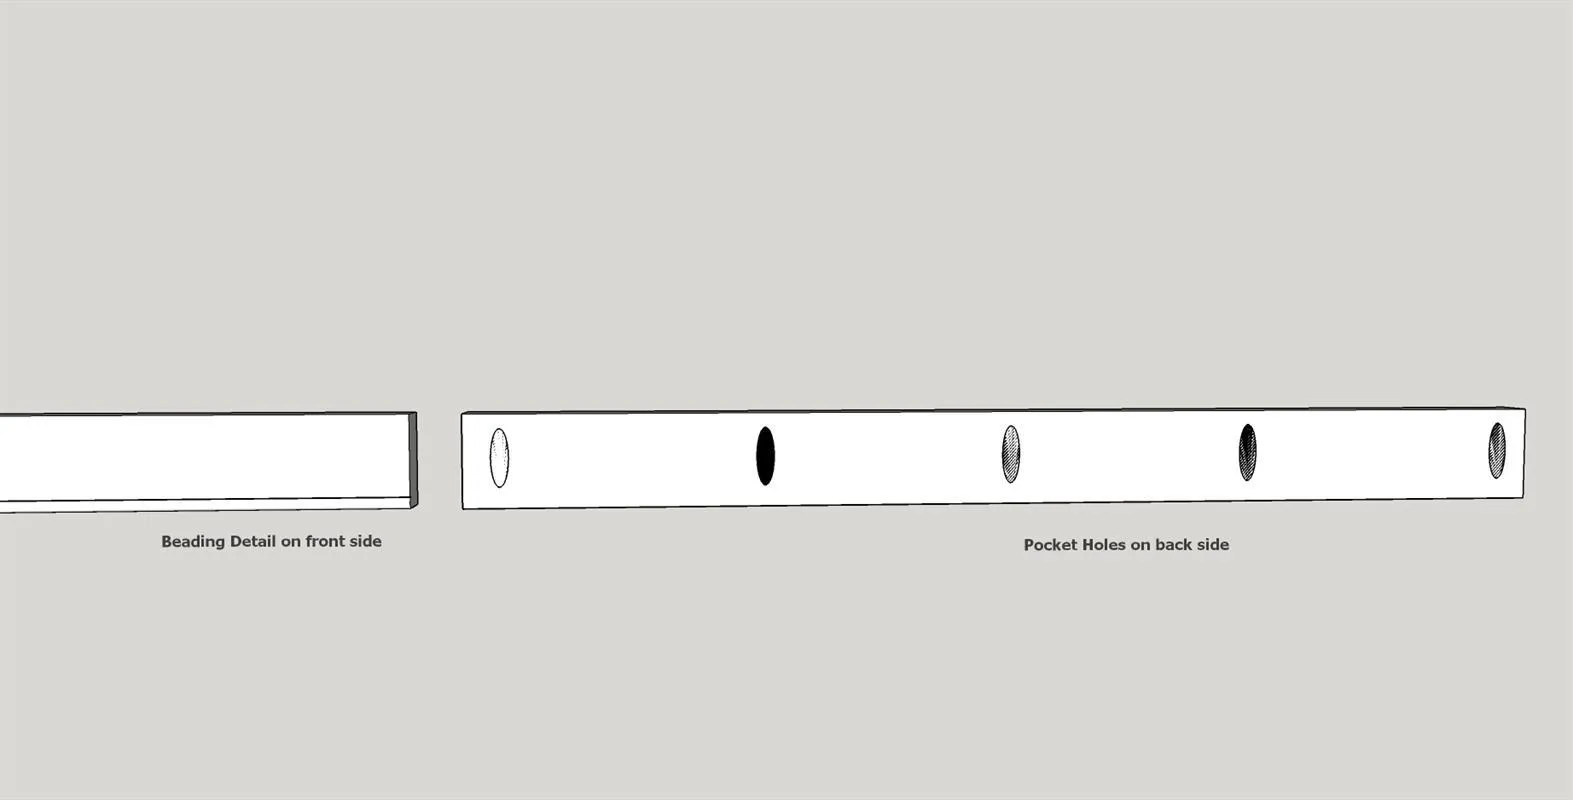
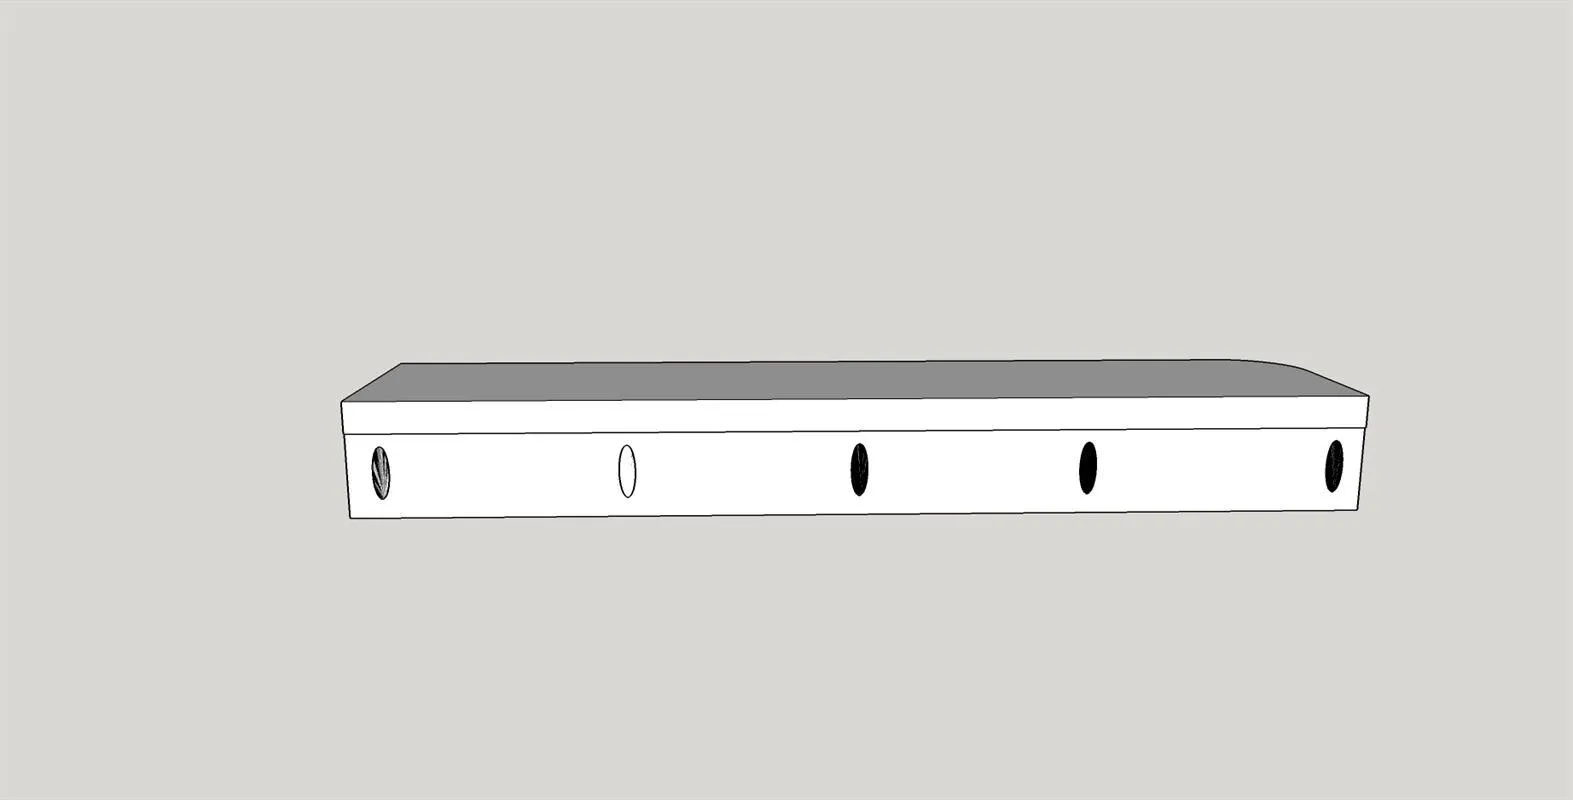
Using a 1/8" beading router (I use a Freud 80-102) in a router table cut a bead along the lower edge of all three backs. Using a Kreg pocket screw jig (set to 3/4" for all pockets on this project), drill five pocket holes in the top back edge as shown in the attached diagram. It is a good idea to mark where you are putting the holes to prevent mistakes. Use 100 - 180 grit sandpaper to smooth the backs.
4Prepare the shelf tops
Determine where you will be mounting your shelves. Find the studs in the walls and measure their spacing. Most construction now uses studs on 16" centers. Radius one corner of each top board. I used a 1 3/4" diameter bottle as my guide and marked the board. You can use either a jig saw or a band saw to round the corners. Next drill the two pocket holes. I used a Kreg Pocket hole Jig set at 3/4". Please see attached diagram. It is a good idea to mark where the pocket holes go so that you end up with the correct number of left and right shelves. Use 100 - 180 grit sandpaper to smooth the backs.
5Attach the backs and tops
Use Titebond I wood glue and Kreg 1 1/4" pocket screws to attach the shelf backs to the shelf tops.
6Finishing
- Now that the build is complete use 220 sandpaper to do a once over on all surfaces in preparation for the finish.
- Clean well to remove all dust. (I use compressed air and clean dry rags). I did not use a stain, just finished with Minwax Polycrylic Satin finish. I gave the slelves three coats following manufacturers instructions.
7Mount to the walls
Using a level, mark the locations of the three corner shelves. Then use Kreg 2" pocket hole screws to mount the shelves to the walls.
Tags
- Floating Shelves
- Beginner
Reviews & builds
No reviews yet
Sign in to review this plan or share your build.
No reviews yet. Be the first to build this.