 Notch
Contemporary Display Shelf
Step-by-step build — 6 steps. Also available as a print sheet.
1Make the Outside Box Parts
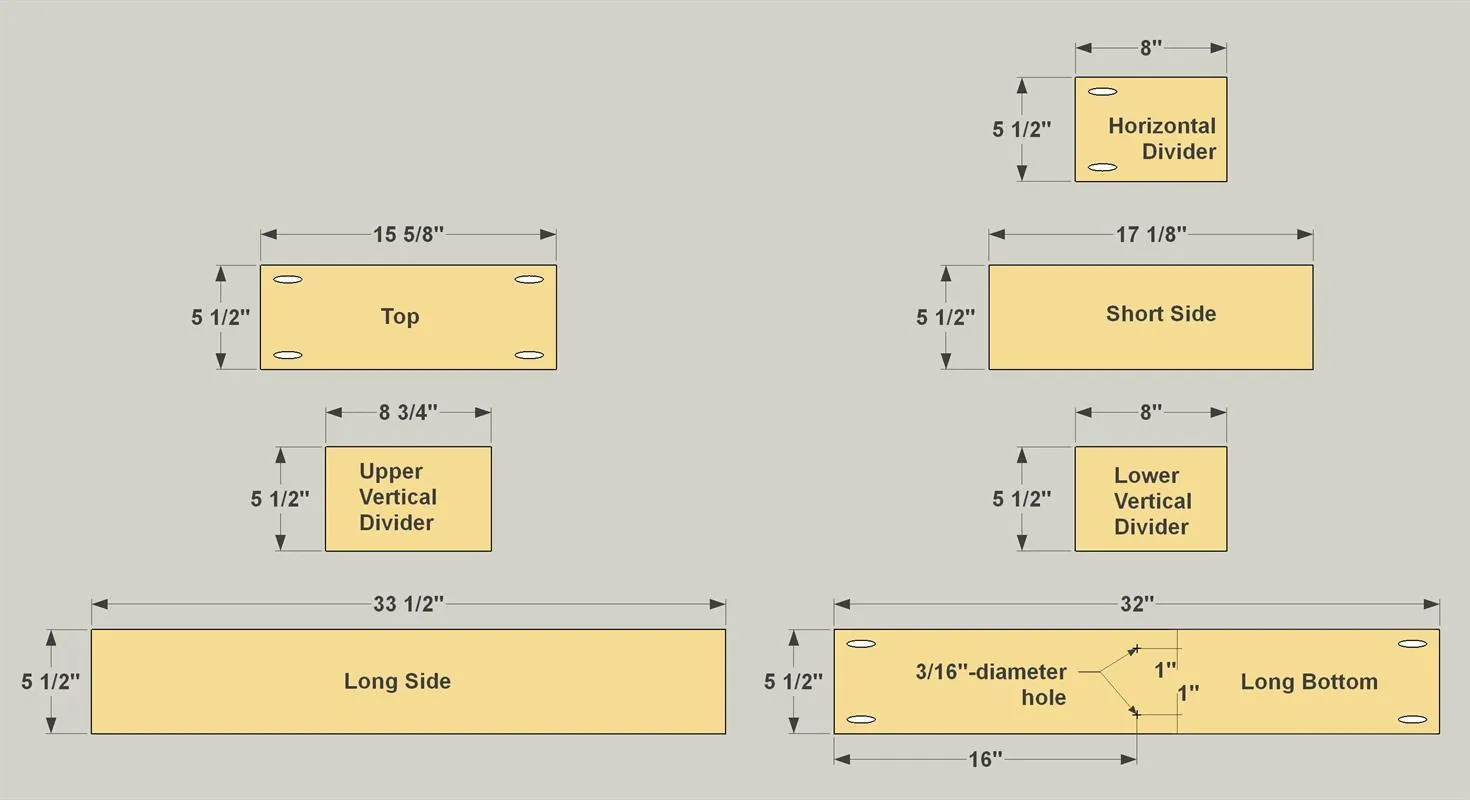
- Start by cutting the parts for the outside box from 1x6 boards, as shown in the cutting diagram. You’ll need one Top, one Long Bottom, one Long Side, one Short Side, two Horizontal Dividers, as well as a Lower Vertical Divider and and Upper Vertical Divider. With your pocket hole jig set up for 3/4" material, drill pocket holes where shown.
- Also drill a pair of 3/16" holes in the Long Bottom, where shown.
2Assemble the Outside Box
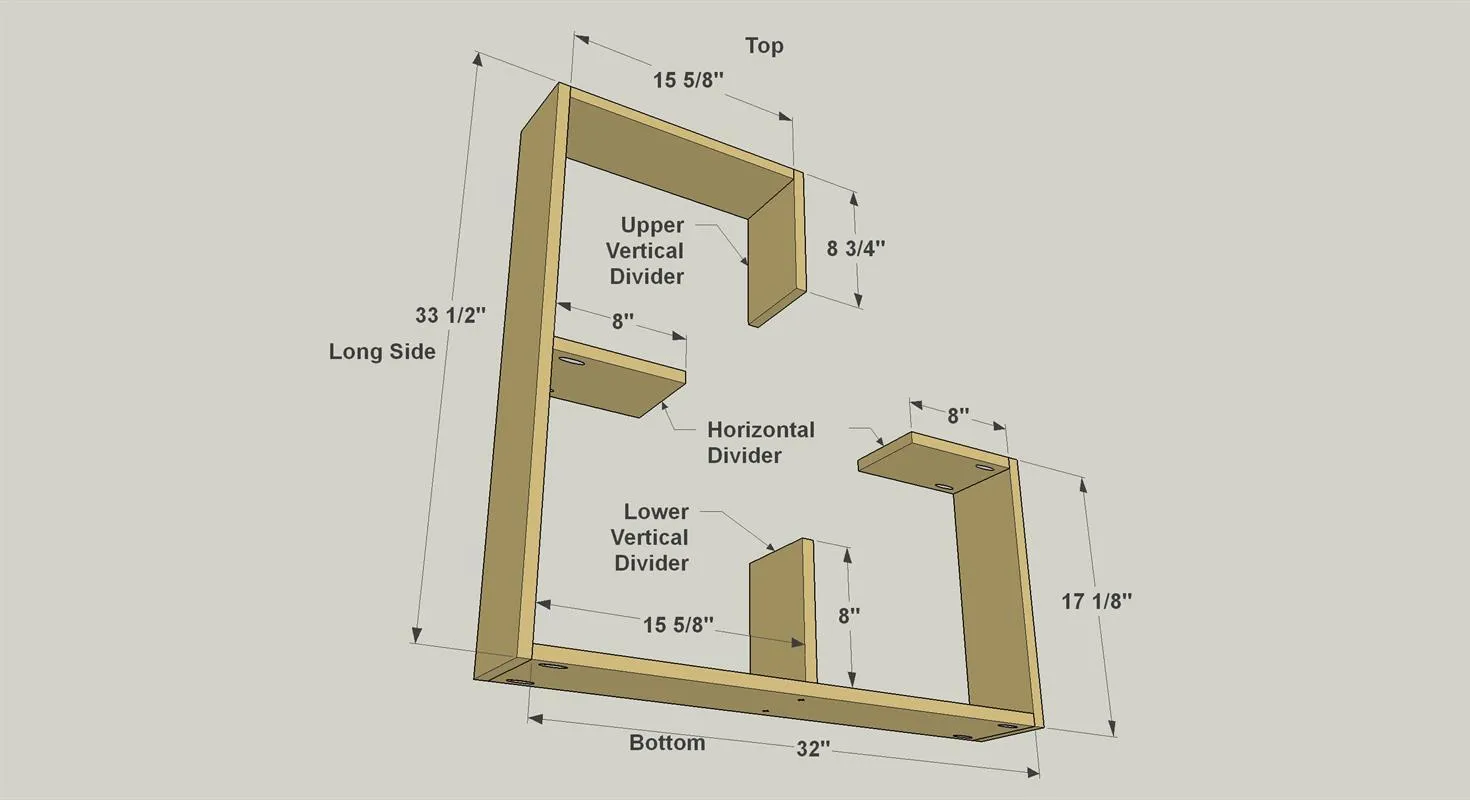
- Assemble the Outside Box using 1 1/4" pocket hole screws, as shown. To attach the Lower Vertical Divider, first clamp it in position, as shown.
- Then, using the holes in the Long Bottom as guides, drill 3/32" pilot holes into the Lower Vertical Divider.
- Attach the Lower Vertical Divider to the Long Bottom using #8 x 2" wood screws.
3Make the Inside Box Parts
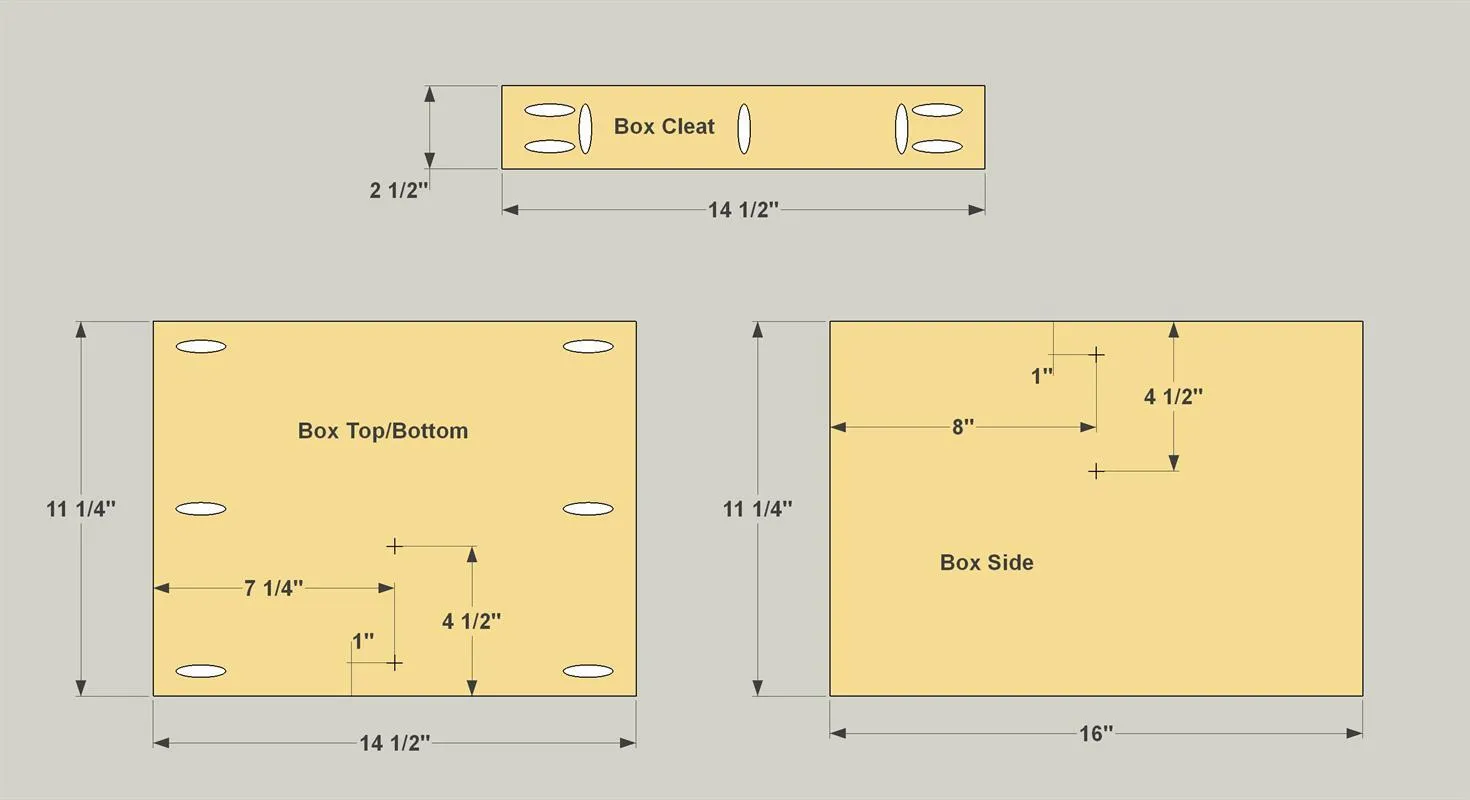
- Now you can make the parts for the inside box, as shown in the cutting diagram.
- Cut one Box Top, one Box Bottom, and two Box Sides from a 1x12 board.
- Then cut one Box Cleat from a 1x3 board. With your pocket hole jig set up for 3/4" material, drill pocket holes where shown.
- Also drill 3/16" holes in the Top, Bottom, and Sides where shown.
4Assemble the Inside Box
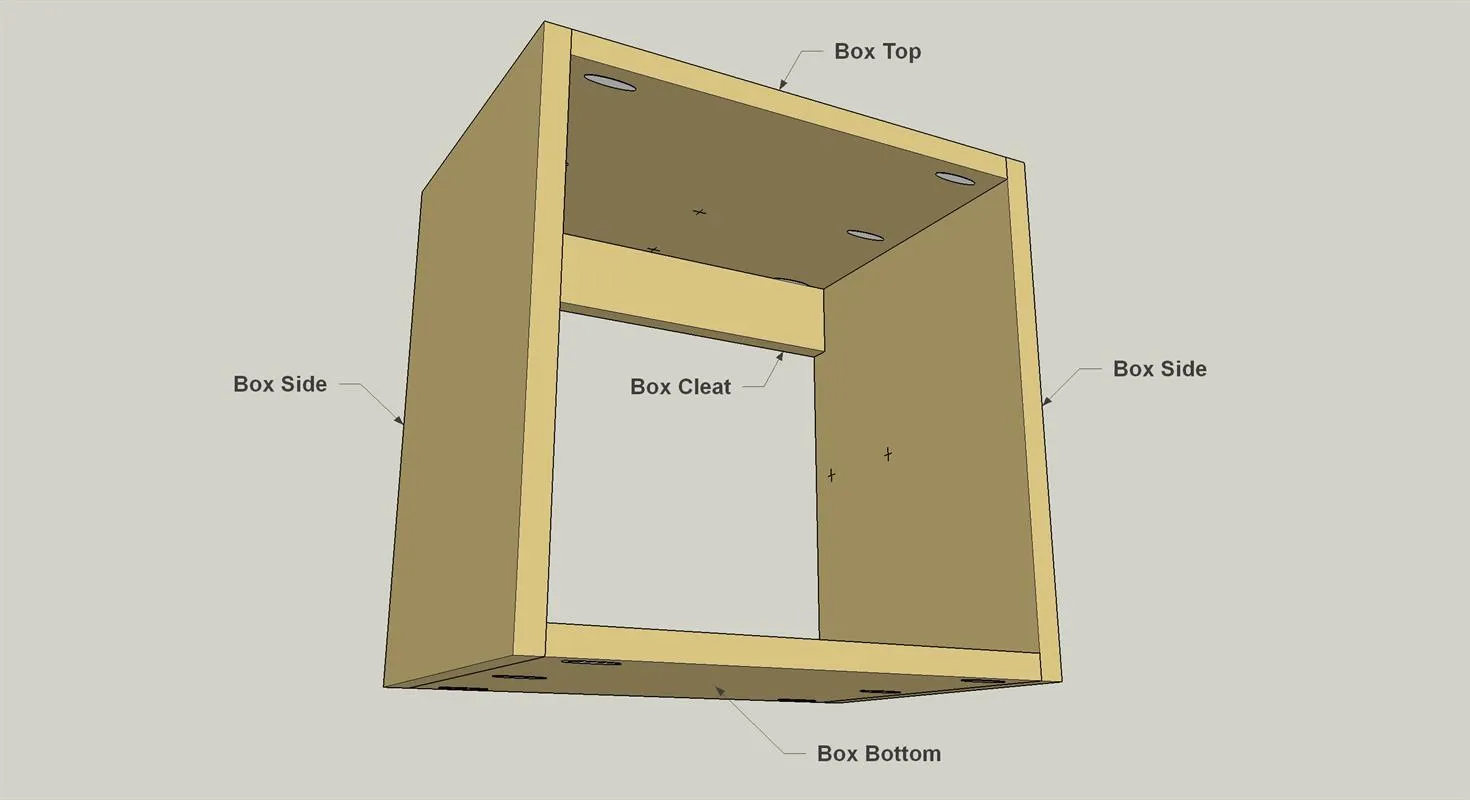
Assemble the inside box using 1 1/4" Pocket Hole Screws, as shown.
5Bring the Boxes Together
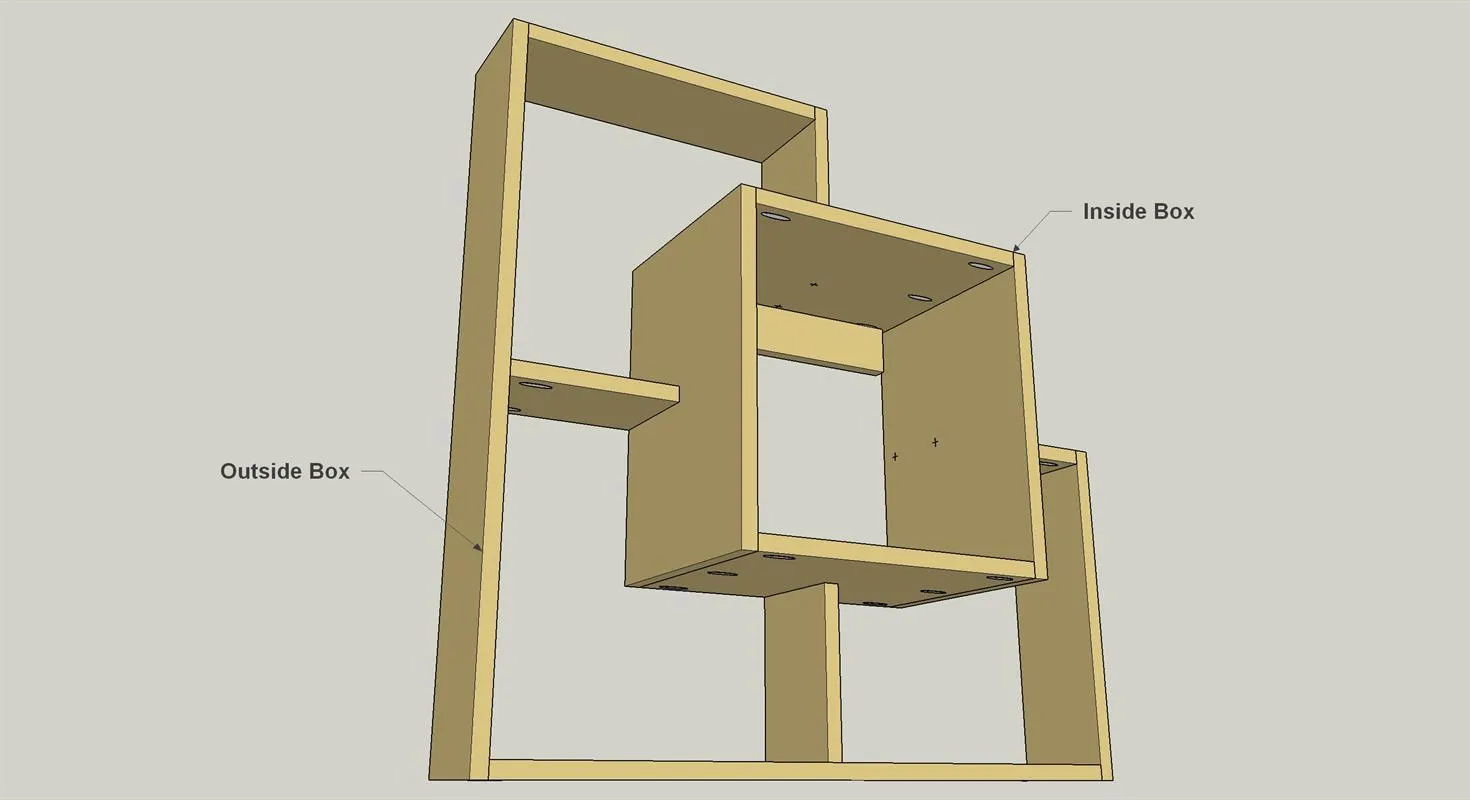
- Set the inside box in position within the outside box, making sure that it’s sitting square.
- Then, using the holes in the Top, Bottom, and Side as guides, drill 3/32" pilot holes into the Horizontal and Vertical Dividers in the outside box.
- Then attach the inside box using #8 x 2" wood screws.
6Hang Your Display Shelves
With everything complete, you can apply the stain or paint of your choice. Or, try a combination of both to give the project some extra pop. When you’re ready to mount your display shelves to the wall, there are lots of options. One that works great is called a “Hangman” system. The 18" version is a good choice, but it’s a bit too long. Just cut it to length with a hacksaw, mount the pieces to the cleat and wall according to the instructions, and you’re set.