Notch
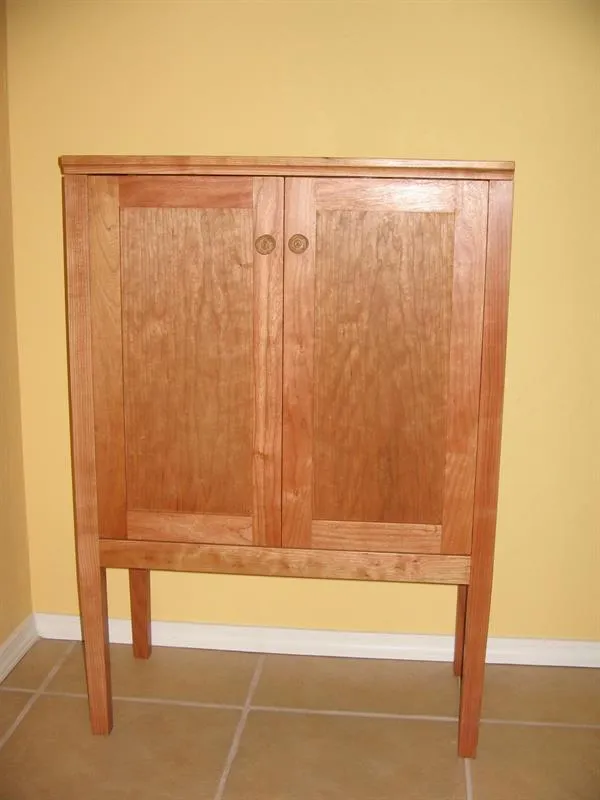
NotchContemporary Cherry Liquor Cabinet
Step-by-step build — 21 steps. Also available as a print sheet.
1Introduction
Please be sure to read through complete instructions before you begin any work on this project. It is also a good idea to dry fit the components before adding glue and doing final assembly.
2Cut Cherry Boards
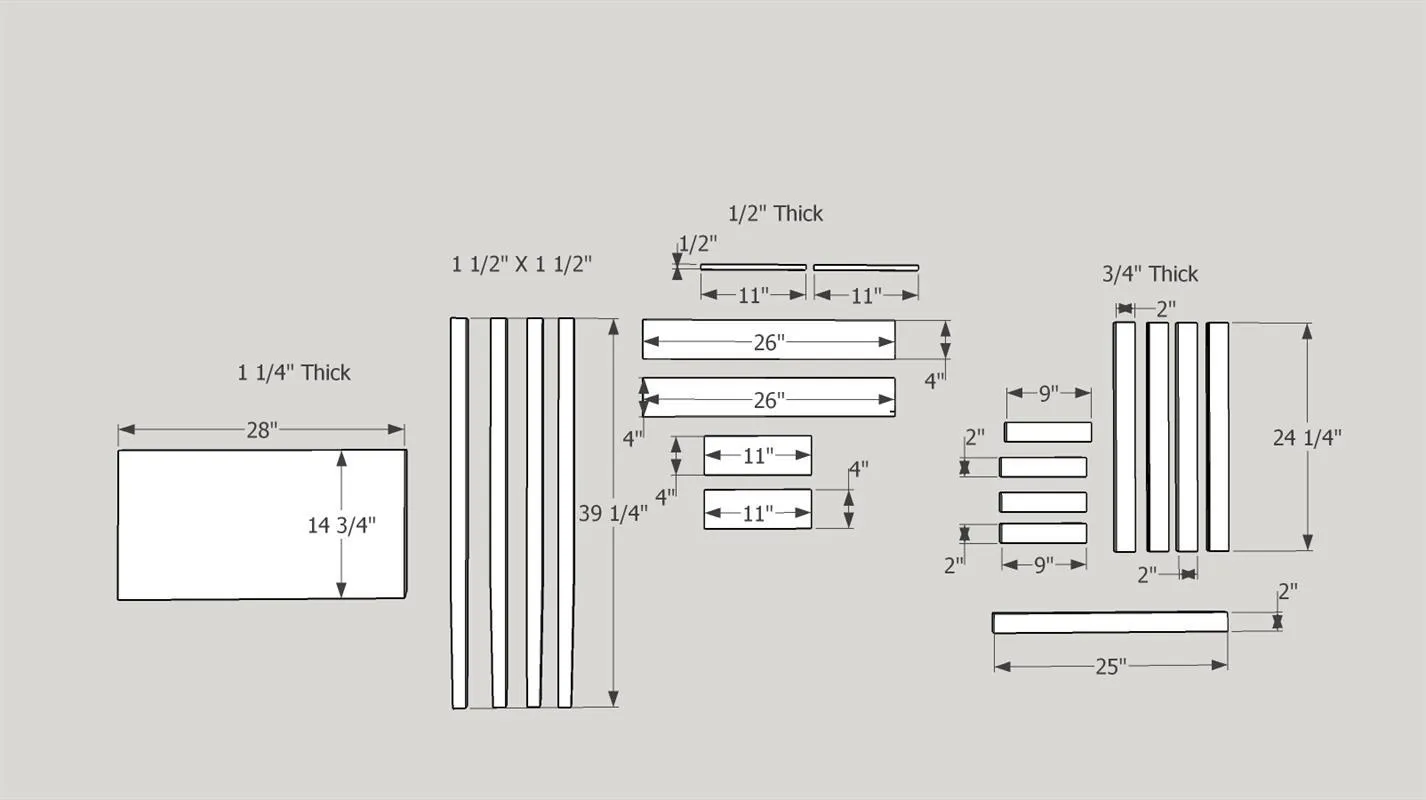
Using the dimensions in the parts/cut list, cut the pieces required for assembly. Please note that the top is cut from 6/4 Cherry and requires gluing up. If you can only obtain dimensional lumber, the thickness of the top can be reduced from 1 1/4" to 3/4". Cut the legs to the dimensions listed. I recommend using 8/4 cherry so that the legs are one solid piece. If you can only obtain 3/4" dimensional lumber, legs cut from laminated boards will work. Smooth with 100 - 150 grit sandpaper.
3Cut 3/4" Plywood
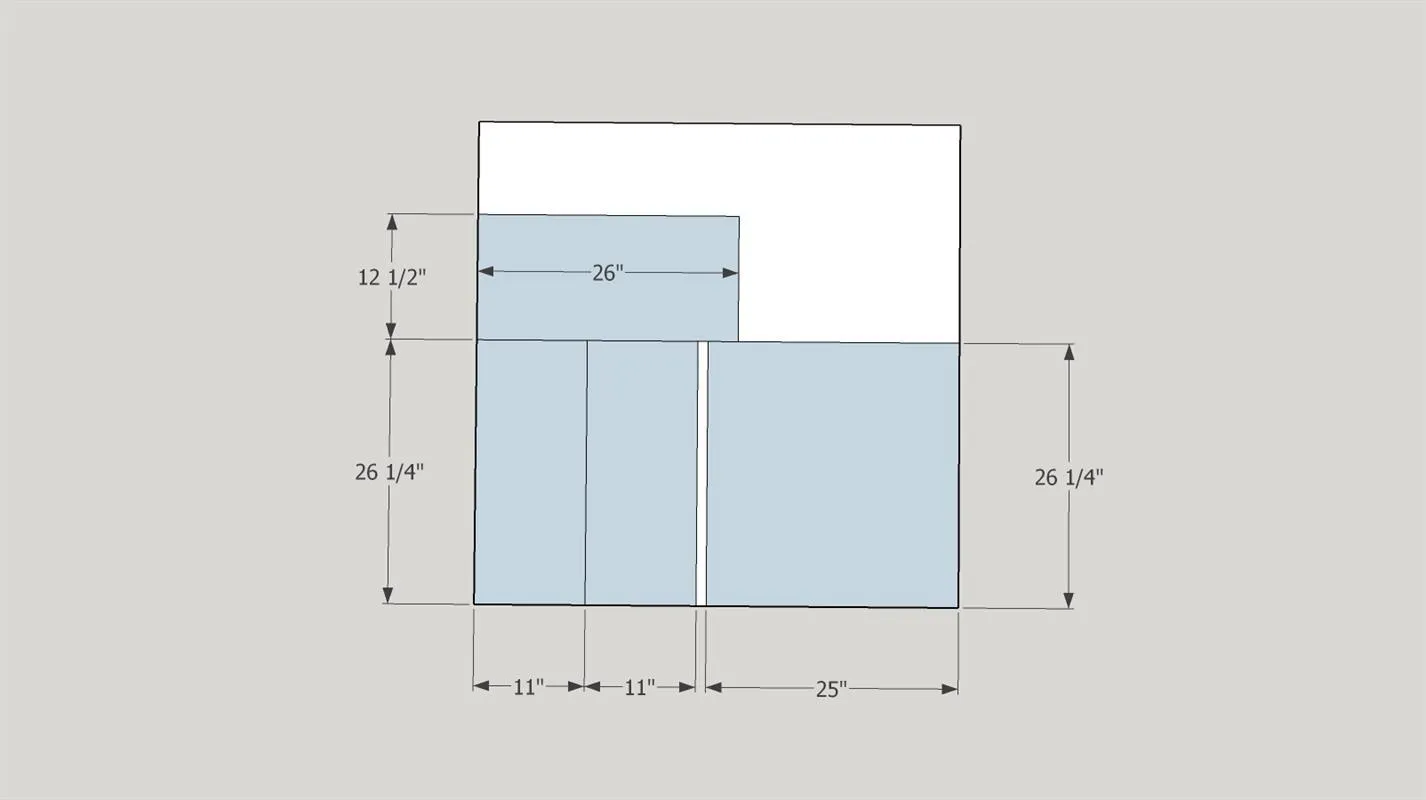
Cut the four 3/4" cherry plywood carcass components as listed in the cuts/parts list. Smooth with 150 grit sandpaper.
4Cut 1/4" Plywood
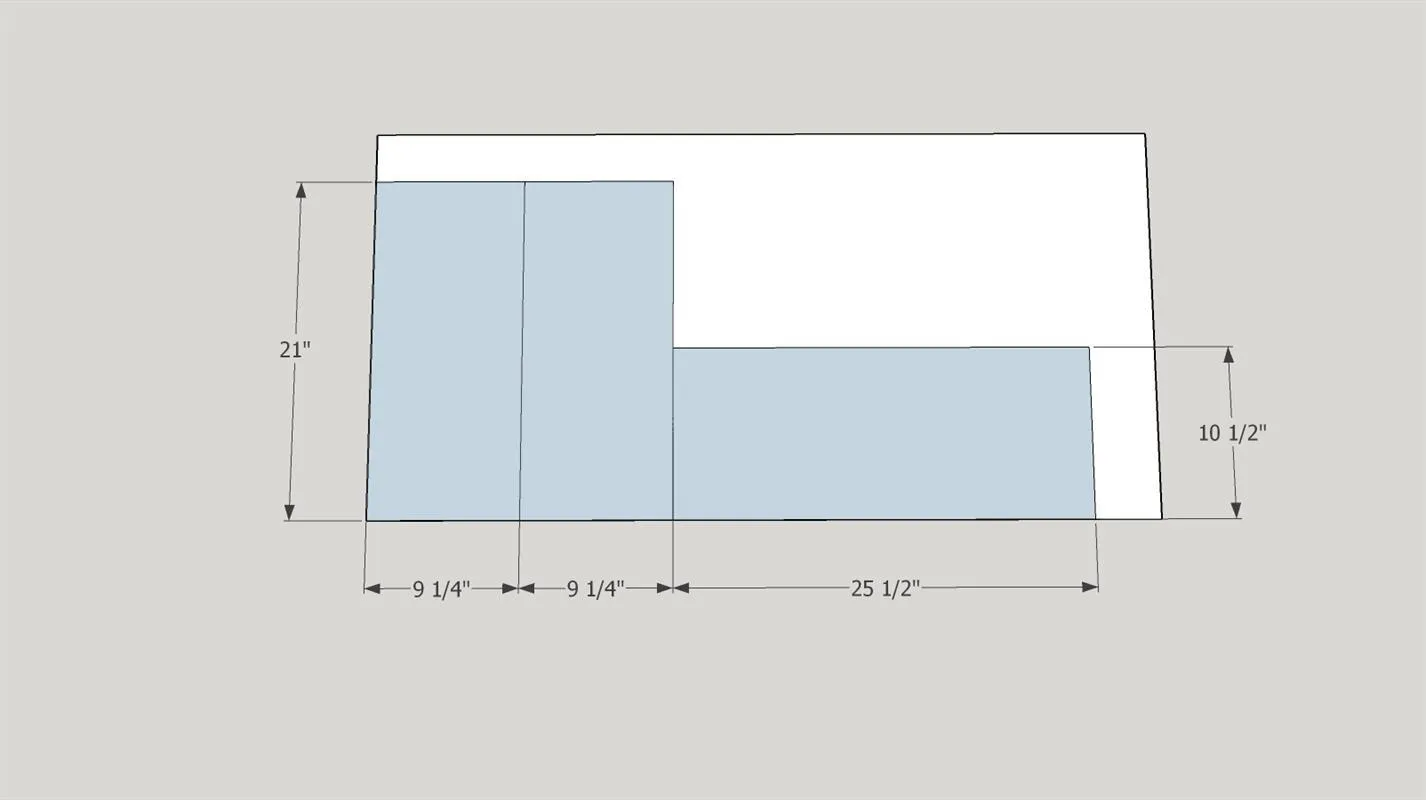
Cut 1/4" cherry plywood as listed in the Cut/Parts List. Smooth with 150 grit sandpaper.
5Taper Legs
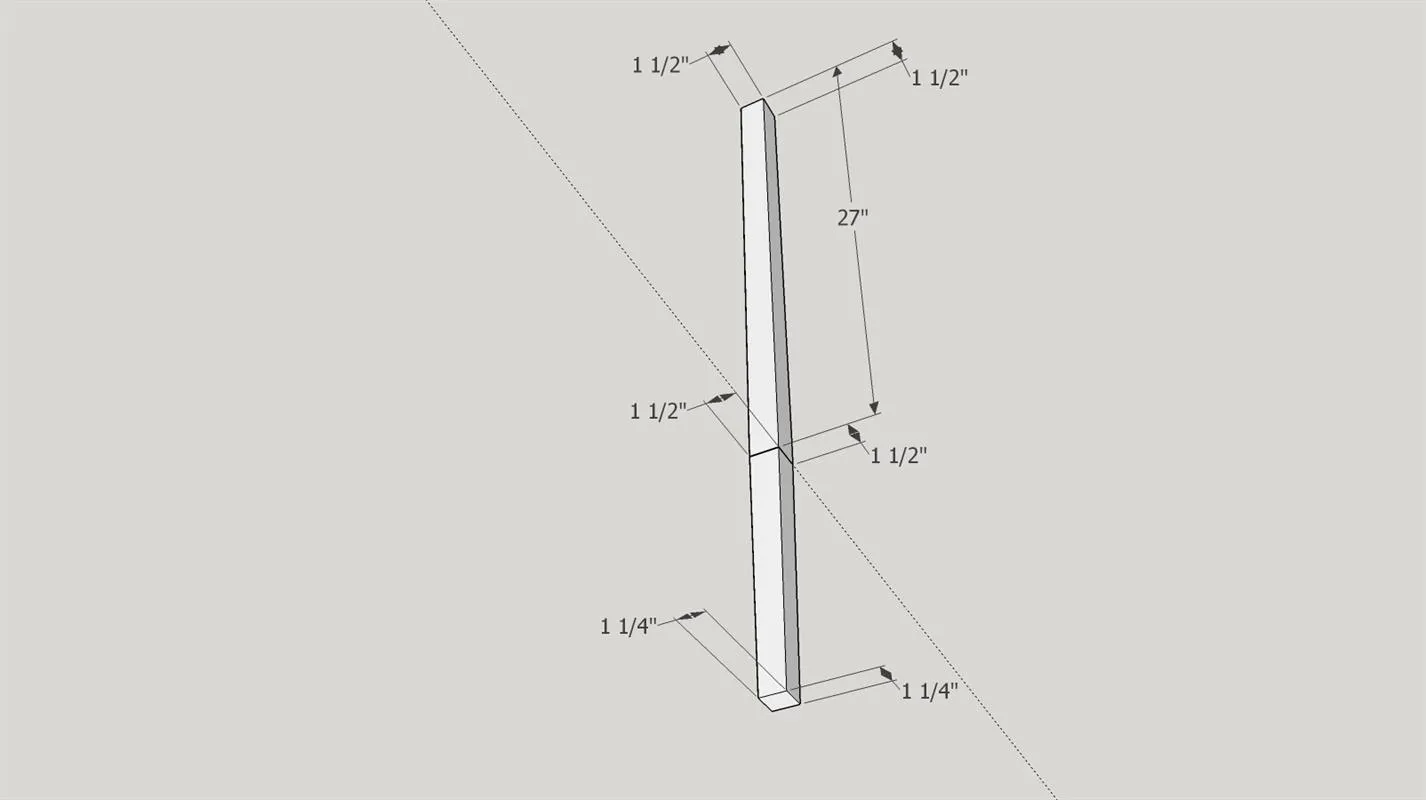
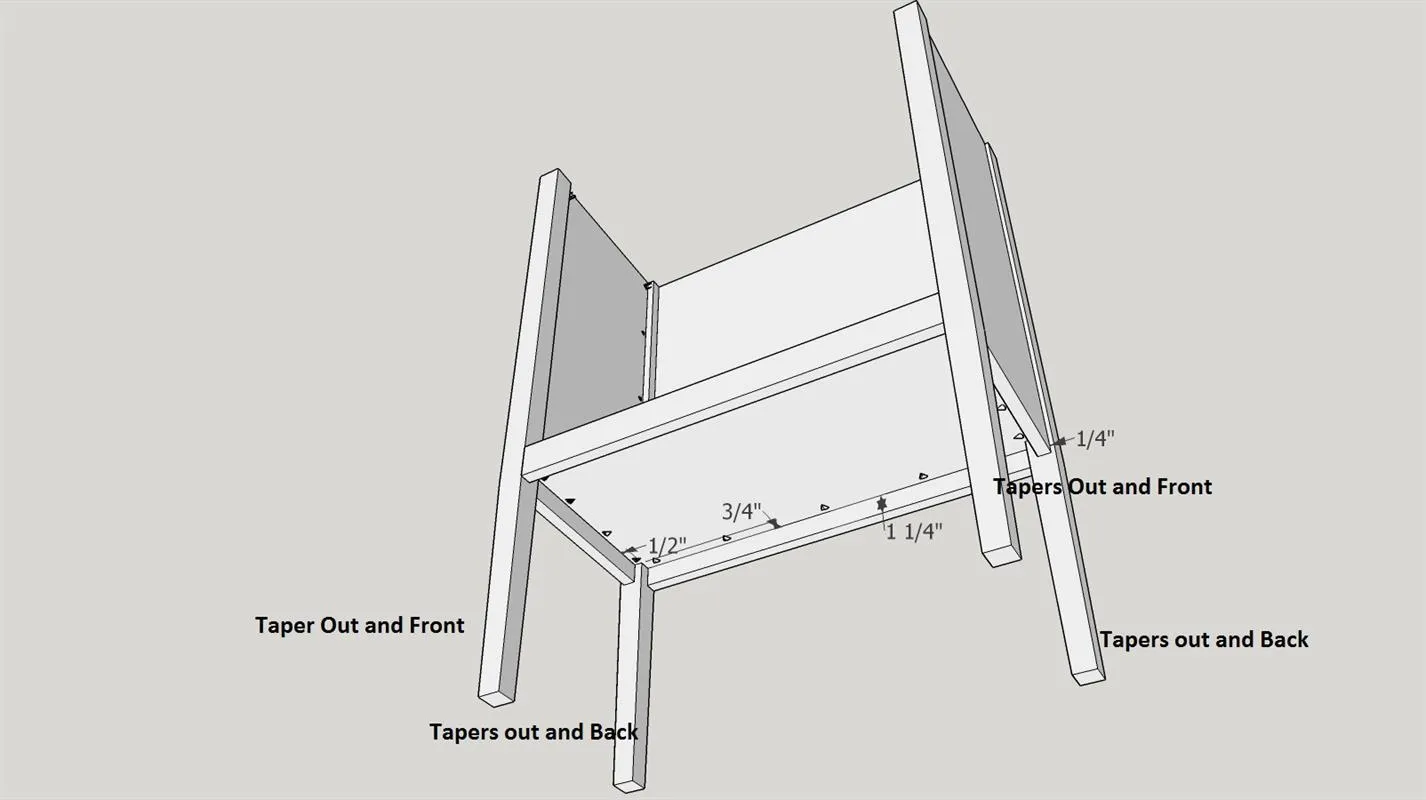
Taper two sides of each leg 1/4" starting 27 inches from the top. Mark the legs so you can tell which of the two sides are tapered. I use a table saw with a jig to cut the tapers. A band saw can also be used. If you need information concerning tapers there are many videos available on the internet that demonstrate how to do this.
6Add Pocket Holes to 3/4" Ply Pieces
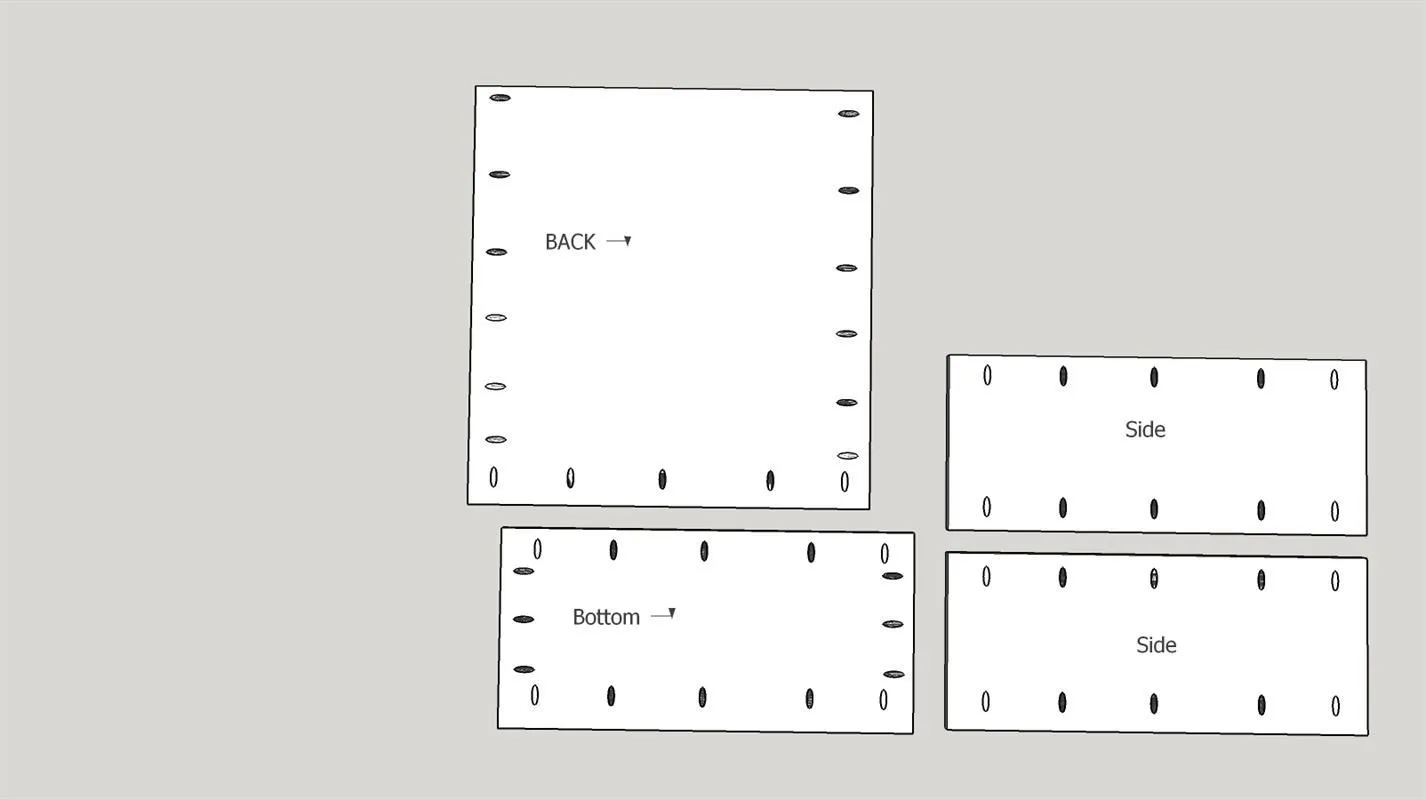
Using a Kreg pocket jig (set to 3/4" for all holes in this design) put pocket holes in the bottom, back and sides as shown. It is a good idea to mark where the holes will be to prevent mistakes.
7Cut Corners of Plywood Bottom
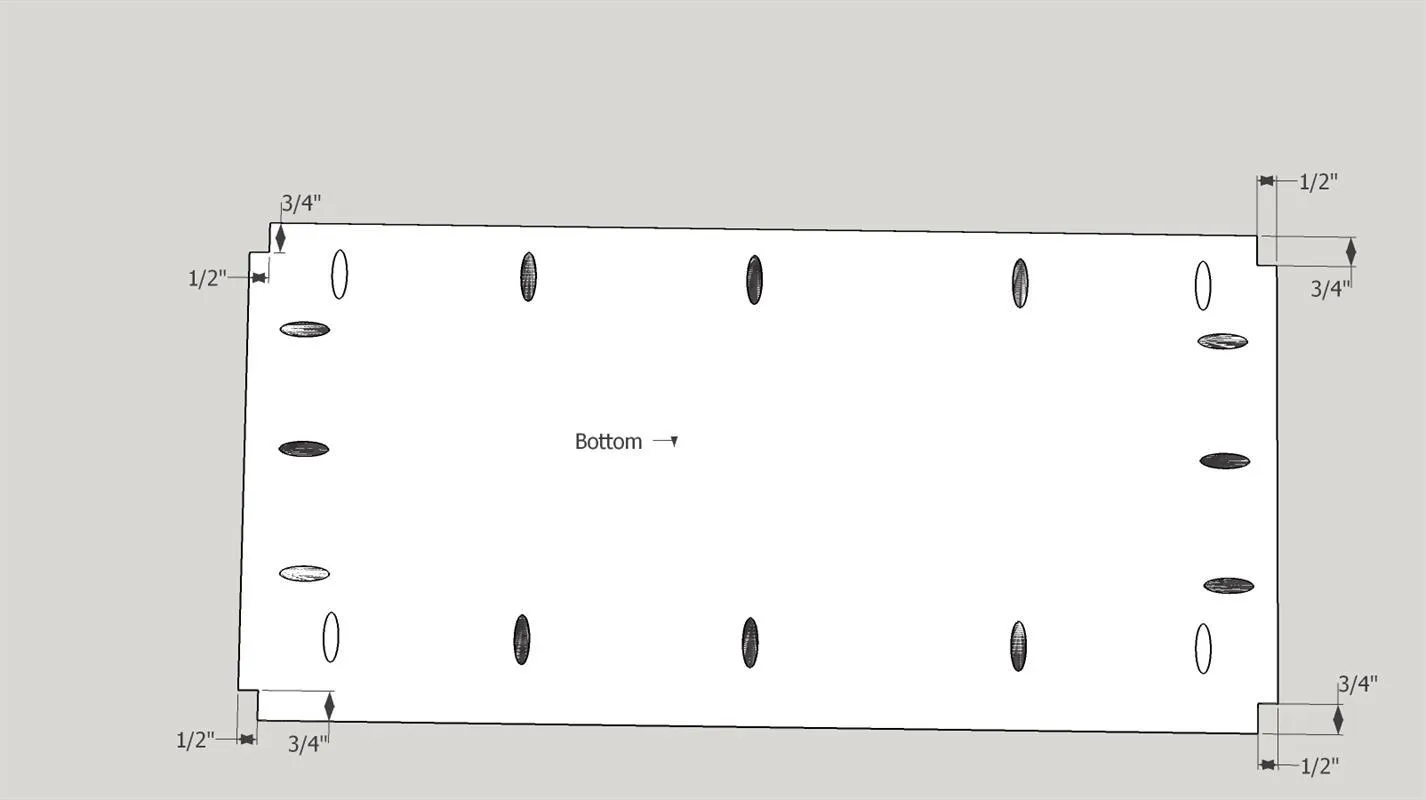
Using either a band saw or a jig saw cut the four corners of the bottom to fit around the legs. See diagram for details.
8Edge Band Tops of Sides and Back
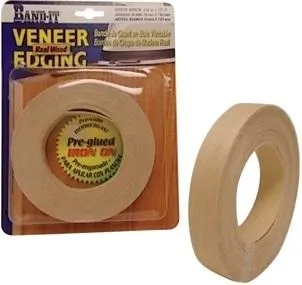
- Attach wood veneer edge banding to the tops of the two plywood sides and back. I used cherry banding with heat activated glue. I used an old electric iron to heat the edging.
- Once it has cooled cut and sand away any excess veneer. Alternatively you can frame the tops with thin strips of wood which can be glued and pin nailed in place.
9Assemble Carcass
Using fine Kreg 1 1/4" pocket hole screws and Titebond I wood glue assemble the sides, back, bottom, legs and front rail to form main carcass. The side pocket holes should face inward, the back holes should face backward and the bottom holes should face down. The tapers on the legs should face out and to the front on the front legs and out and to the back on the back legs.
10Finish Top Assembly
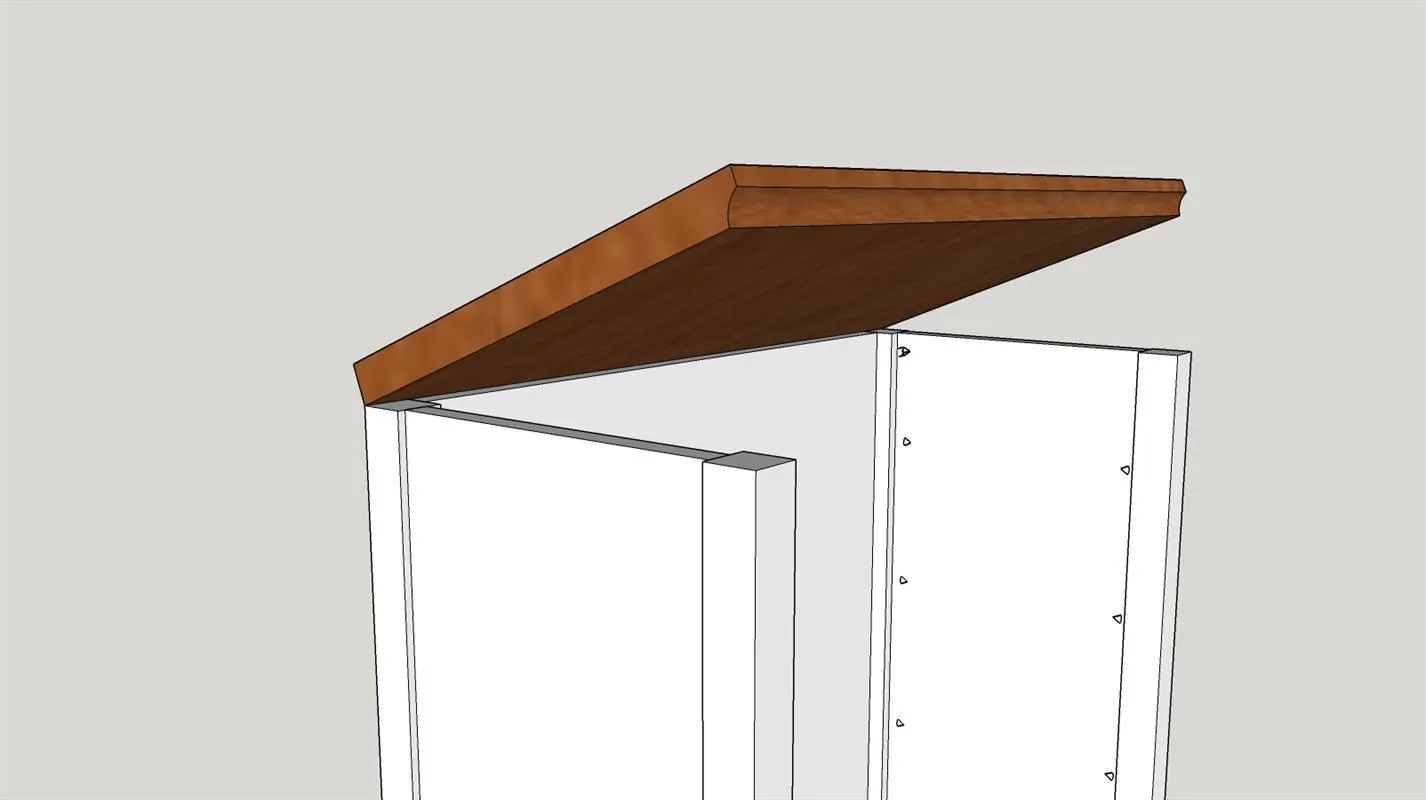
Using a cove bit in a router table cut a cove in the front edge of the top. If you used a 3/4" thick top instead of the 1 1/4" top just smooth the edges. Attach the top to the case using 2 inch hinges at the rear.
11Door Rails
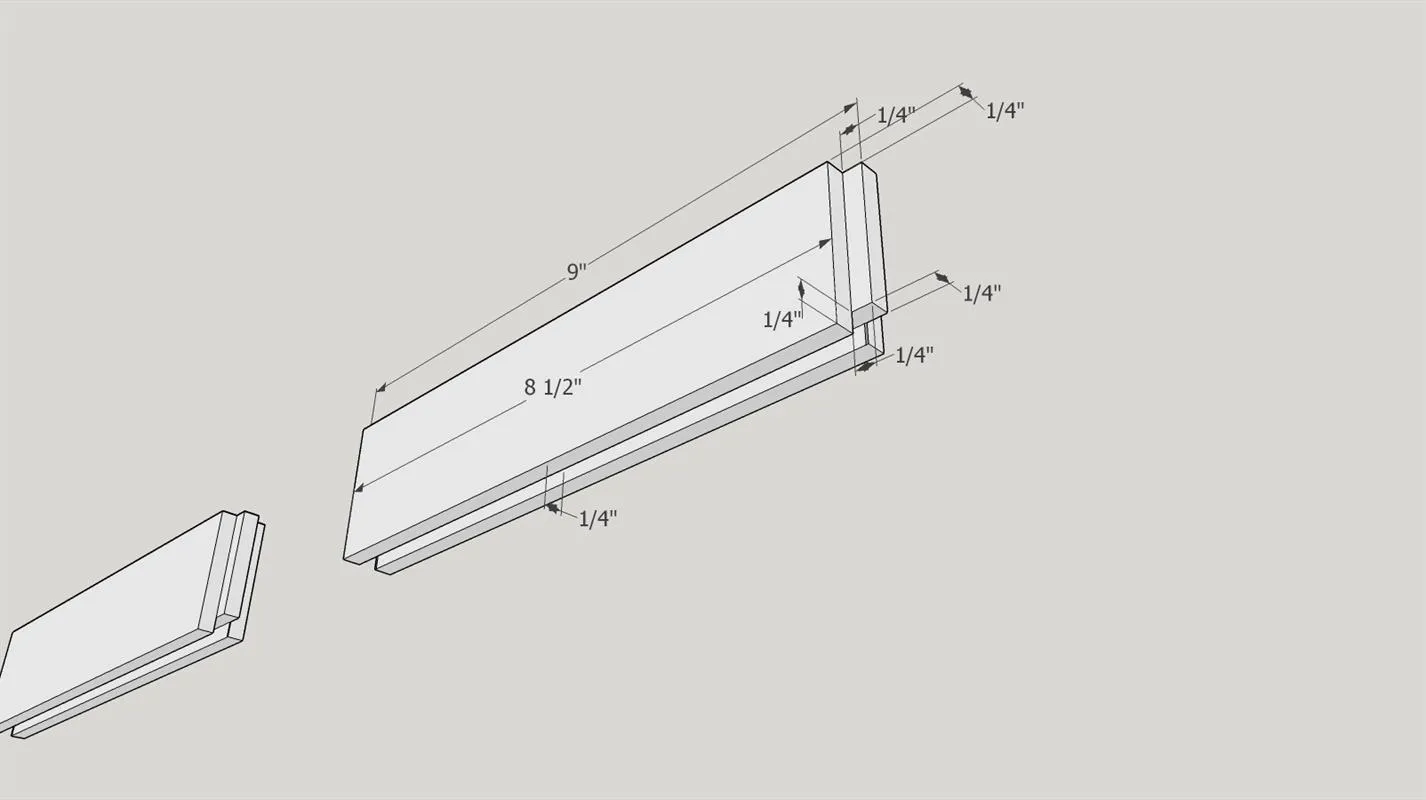
Use a Freud (99-036) Adjustable Tongue and Groove Bit set mounted in a Kreg router table to cut the tongues and grooves in the four door rails cut in step two. The bits are adjusted to cut 1/4" X 1/4" grooves and 1/4" X 1/4" tongues. Alternatively the tongues and grooves can be cut on a table saw. Finish sand with 150 grit sandpaper.
12Door Stiles
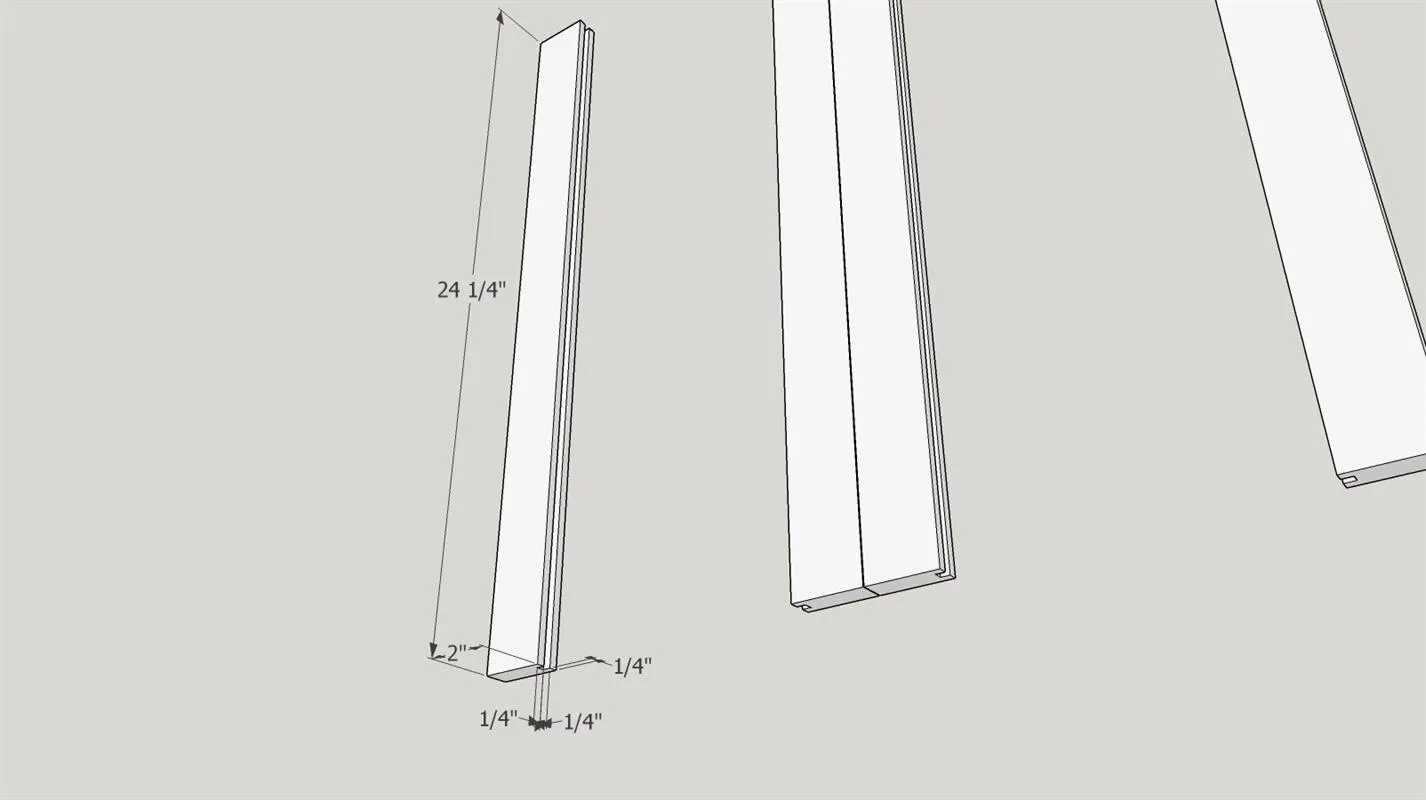
Use a Freud (99-036) Adjustable Tongue and Groove Bit set mounted in a Kreg router table to cut the grooves in the four door stiles cut in step two. The bits are adjusted to cut 1/4" X 1/4" grooves. Alternatively the grooves can be cut on a table saw. Finish sand with 150 grit sandpaper.
13Assemble Doors
- Using two door rails, two door stiles and a door panel, cut in step 4, assemble the doors.
- Place wood glue at each corner where the door rail tongues meet the door stiles and along the outer edge of the door panels.
- Clamp in place ...make sure the doors are square and if necessary readjust and re-clamp.
- Repeat this process for the second door assembly.
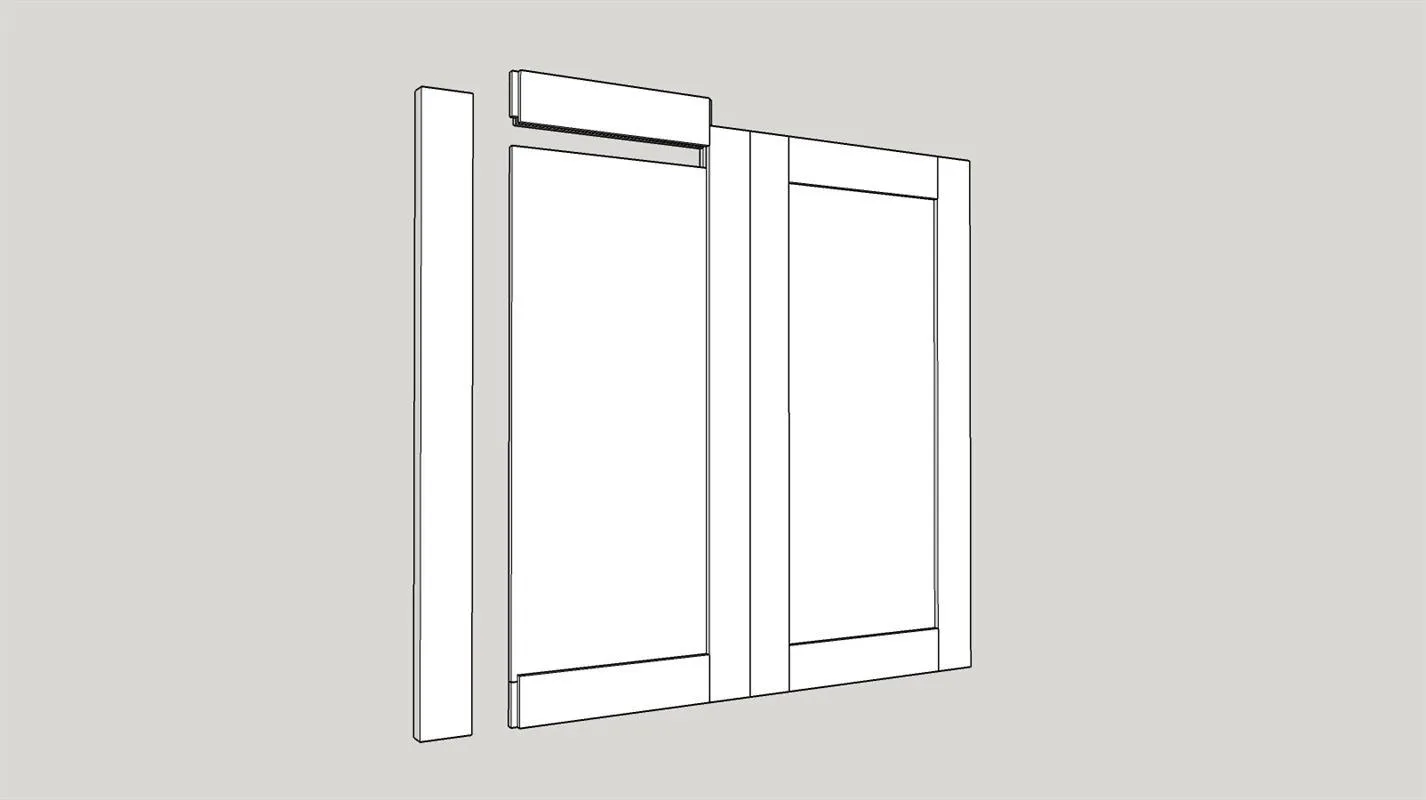
14Attach Door Hinges
- Place the doors in the opening.
- Mark each door so you can keep track of its position (example:left door - LD, right door - RD) Use this positioning to drill the holes for the Euro style hinges. If the fit is tight, set up the table saw and take 1/32" off of each side. Reassemble and make sure that the doors have adequate clearance to open. On the inside of each door mark the spots where each hinge will be positioned.
- Remove the doors and use a drill press with a 1 3/8" forstner bit to drill the 4 hinge holes with the dimensions recommended by the manufacturer of the hinges.
- Fasten the hinge cups in place. Reposition the doors.
15Attach Doors
On the inside of the cabinet mark the position of the hinge mounting plates. Depending on the type of hinge you use you may have to add a spacer board to the side panel to maintain proper hinge spacing. Pre drill small holes for the screws that hold the mounting plates. Attach mounting plates as per the hinge manufacturer's instructions. After the doors are mounted use the various hinge adjustments to properly set the side to side and top to bottom distances on both doors.
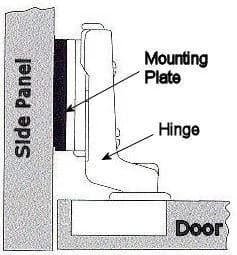
16Cut Box Corner Joints
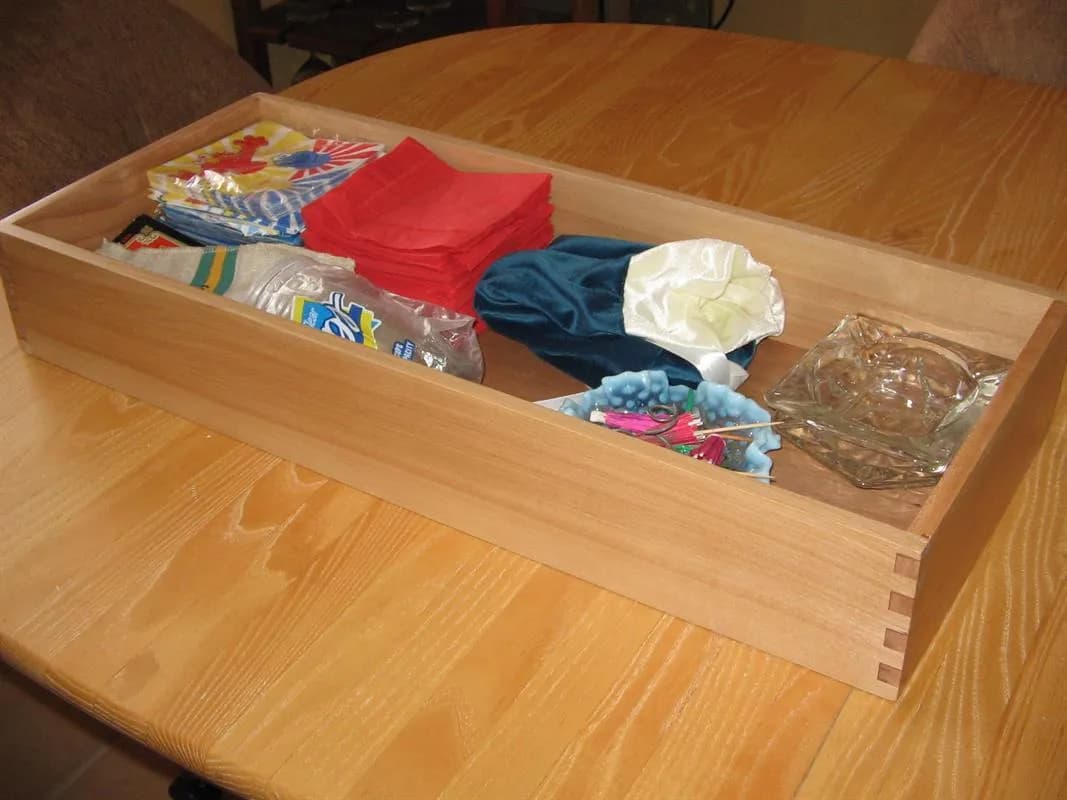
Using either a table saw with a 1/2" dado blade set to 1/2" high or a router table with the appropriate bit, cut box joints in the corners of both sides, the front and the back of the 1/2" thick boards that will make up the tray. I used the table saw method with a home made box joint jig design that I found on the internet. After the box joints are completed cut a 1/4" X 1/4" groove 1/4" up from the bottom in all four boards.
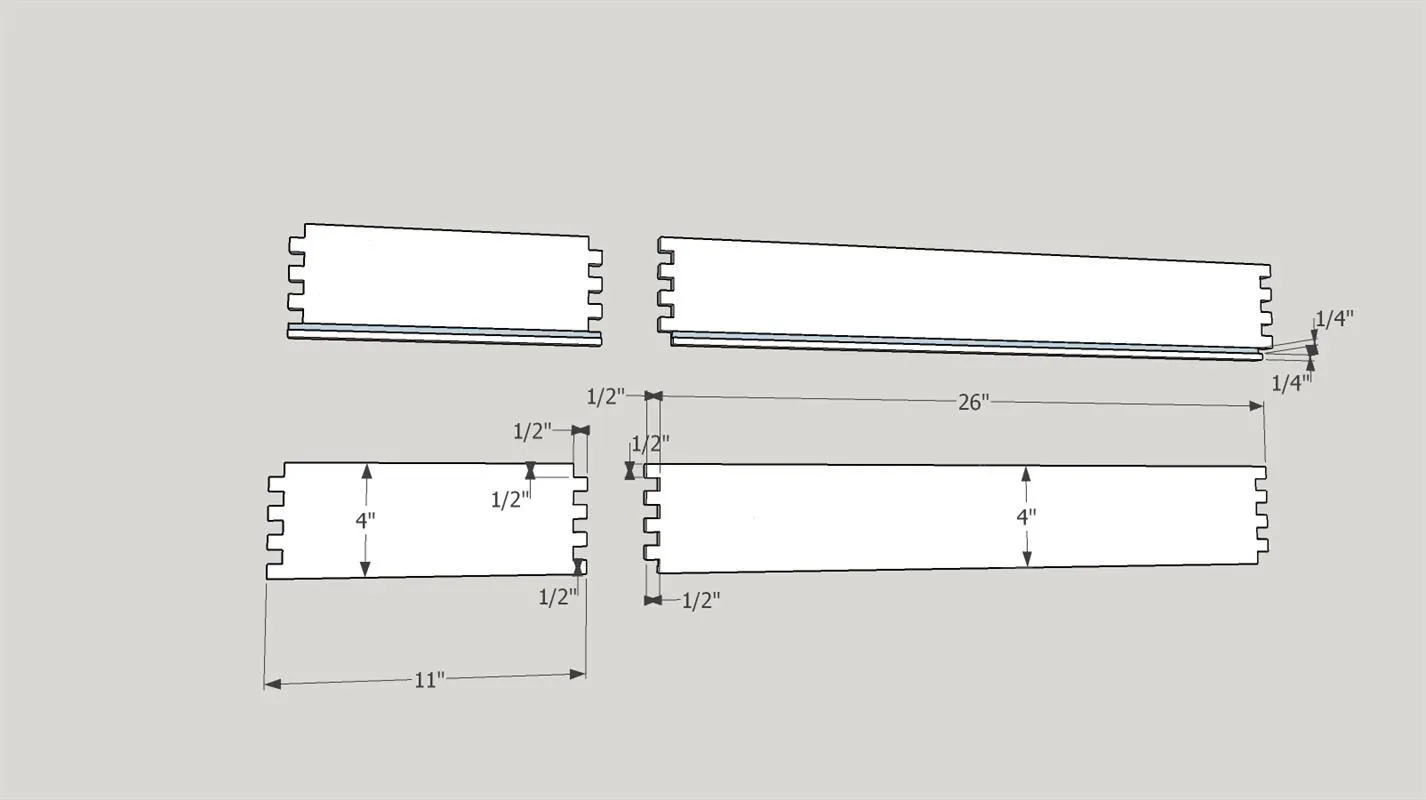
17Assemble Tray
Using Titebond I wood glue on the joints at the ends of each board and in the grooves assemble the tray using the front, back, sides and bottom. Clamp in place and check for square. If it is not square, loosen clamps, readjust and reclamp.
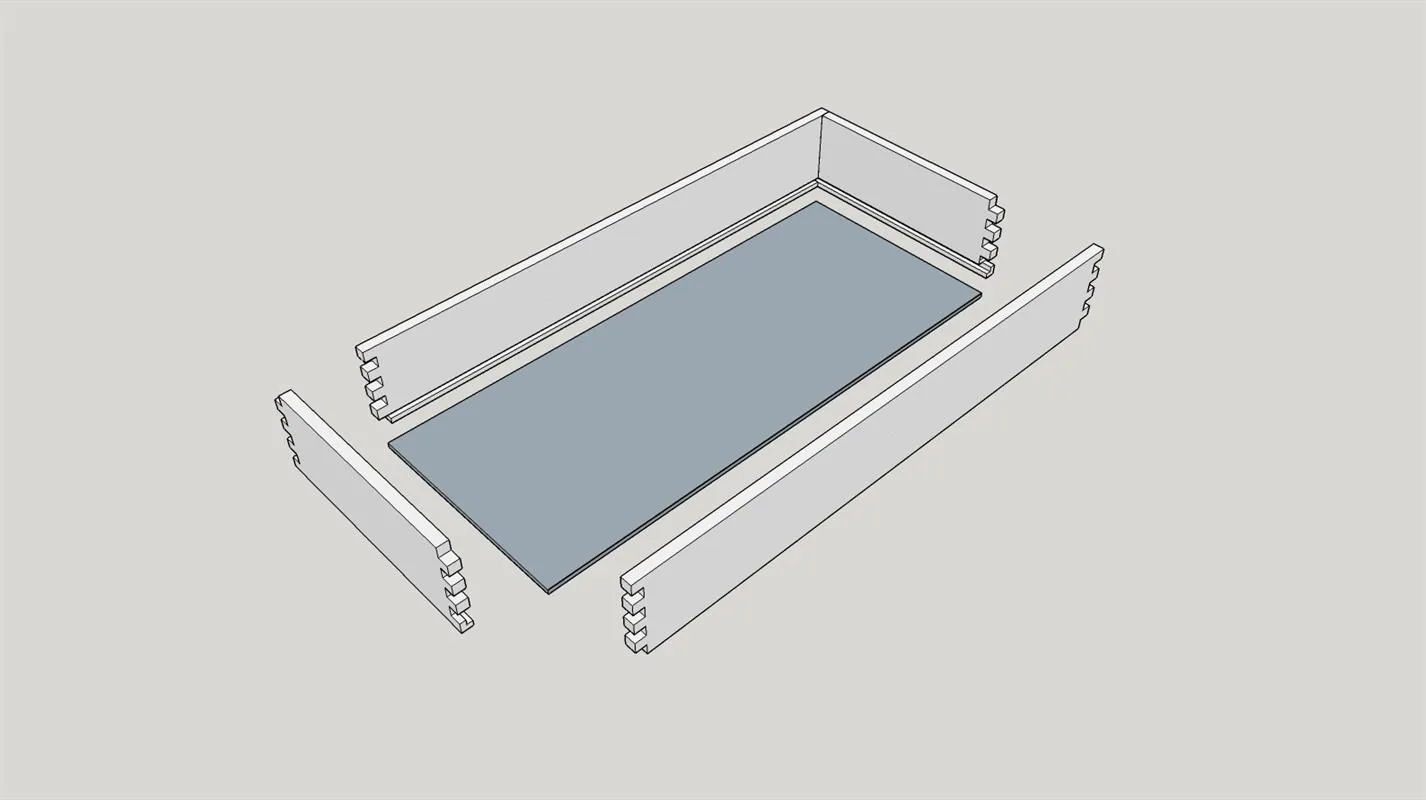
18Finish Cabinet and Add Door Pulls
- Now that the build is complete use 220 sandpaper to do a once over on all surfaces in preparation for the finish.
- Clean well to remove all dust. (I use compressed air and clean dry rags.) I gave the inside and outside of liquor cabinet 2 coats of boiled linseed oil and allowed it to dry for 7 days.
- Then I gave it three coats of Minwax Tung Oil following manufacturers instructions. After the finish has dried add drawer pulls. I used wood screws to attach sparkling wine corks from Laetitia Vineyards in Arroyo Grande, CA.
19Finish Tray
When the glue is dry on the tray use 220 sandpaper to do a once over on all surfaces in preparation for the finish. Clean well to remove all dust. (I use compressed air and clean dry rags.) I used Minwax Polycrylic Satin finish, three coats as per manufacturers instructions.
20Door Stop
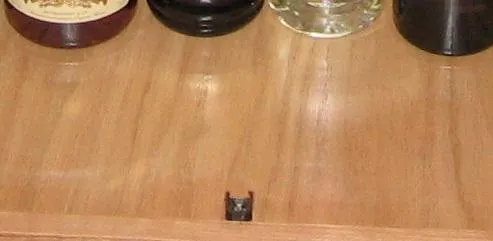
Add door stop at the middle bottom of the cabinet to insure that the doors close properly.
21Add Tray Holders
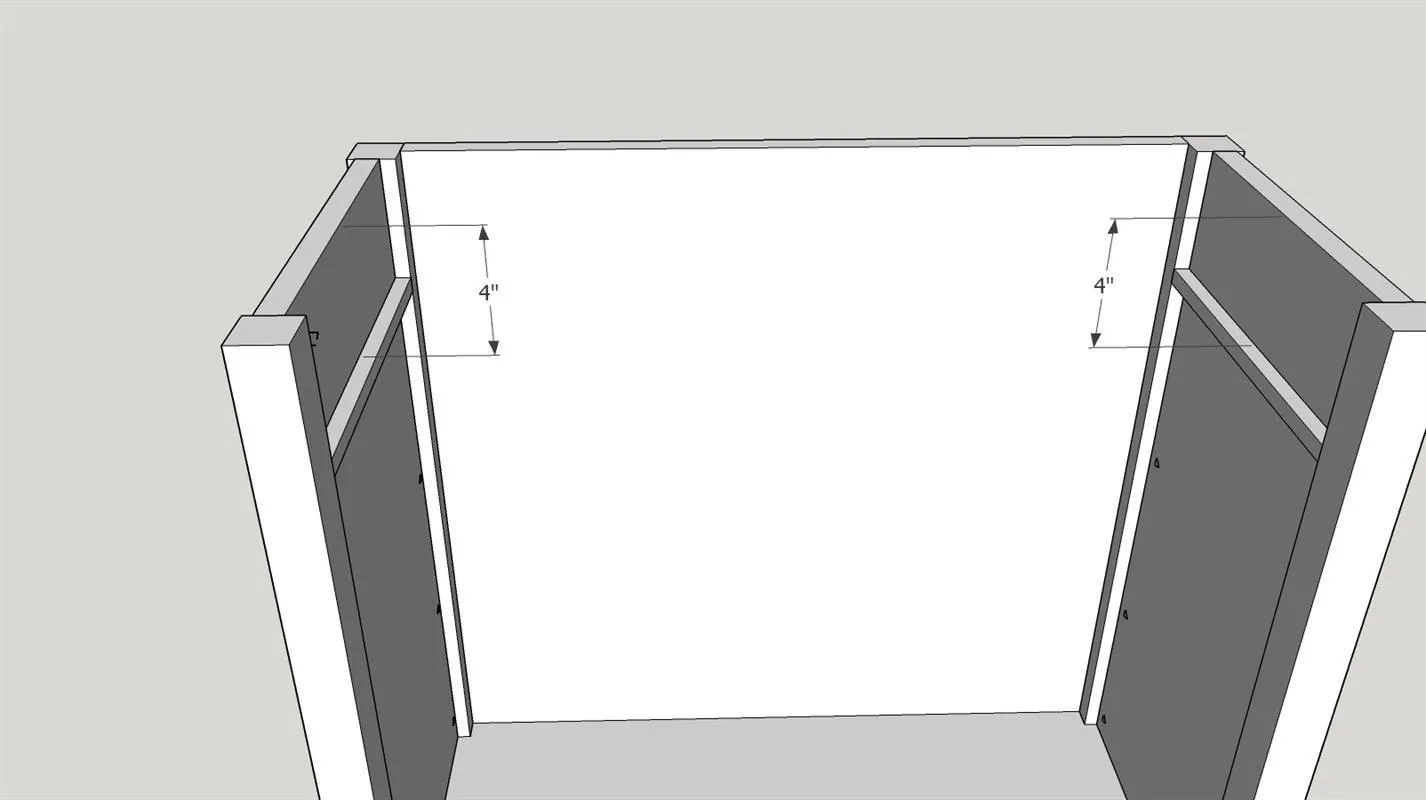
Using titebond I wood glue and 1" brad nails attach the two tray holders to the inner sides of the cabinet carcass.