 Notch
Notch- Difficulty
- Intermediate
- Time
- 5.5–10.8 hours
- Cost
- $$$
About this build
Turn a basic closet into an organized closet by adding a center cabinet with drawers and shelves. This simple closet organizer can be added to any closet with a shelf. It sits under the shelf and allows you to split the closet into two sections for hang bars and/or add more shelves for storage.
Tools
Essential
- Brad Nailer
- Circular Saw
- Drill / Driver
- Miter Saw
- Pocket Hole Jig
- Random Orbit Sander
- Table Saw
Optional / nice to have
- Bar / Pipe Clamps
- Combination Square
- Tape Measure
Materials
| Item | Qty |
|---|---|
| Board, 1x2 96" | 3 board |
| Plywood, 3/4" Thick Full Sheet | 1 board |
| Plywood, 1/2" Thick Half Sheet | 1 board |
| Plywood, 1/4" Thick Half Sheet | 1 board |
| 1 1/4" pocket hole screws | 52 each |
| Wood glue | 1 each |
| 1 1/4" finish nails | 25 each |
| 12" drawer slides | 4 each |
| Drawer pulls | 4 each |
| Edge banding | 1 each |
| 1" pocket hole screws | 32 each |
| 2 1/2" cabinet screws | 8 each |
Overall cost: $$$. Lumber prices vary by region, species, and season, so we give a band rather than a figure we would only be pretending to know.
Cut list
| Part | Qty | T × W × L |
|---|---|---|
| Cabinet sides | 2 | 3/4" × 14" × 44" |
| Cabinet bottom/shelf | 2 | 3/4" × 14" × 20" |
| Back support | 2 | 3/4" × 3" × 20" |
| Large drawer front | 2 | 3/4" × 7" × 20" |
| Small drawer front | 2 | 3/4" × 5" × 20" |
| Face frame stiles | 2 | 3/4" × 1" × 44" |
| Face frame rails | 6 | 3/4" × 1" × 18" |
| Large drawer box sides | 4 | 1/2" × 5" × 13" |
| Large drawer box front/back | 4 | 1/2" × 5" × 16" |
| Small drawer box sides | 4 | 1/2" × 3" × 13" |
| Small drawer box front/back | 4 | 3/4" × 3" × 16" |
| Drawer box bottoms | 4 | 1/4" × 13" × 17" |
What to buy
Buy 13 boards at 8 ft.
3/4" × 14"
2 boards
3/4" × 7"
1 board
3/4" × 5"
1 board
3/4" × 3"
2 boards
3/4" × 1"
3 boards
1/2" × 5"
2 boards
1/2" × 3"
1 board
1/4" × 13"
1 board
Assumes 8 ft stock, a 1/8" saw kerf, and buying each part at its own width. Change the board size or kerf on the full board plan →
Instructions
1Build the cabinet
- Set your Kreg pocket hole jig for 3/4" thick material.
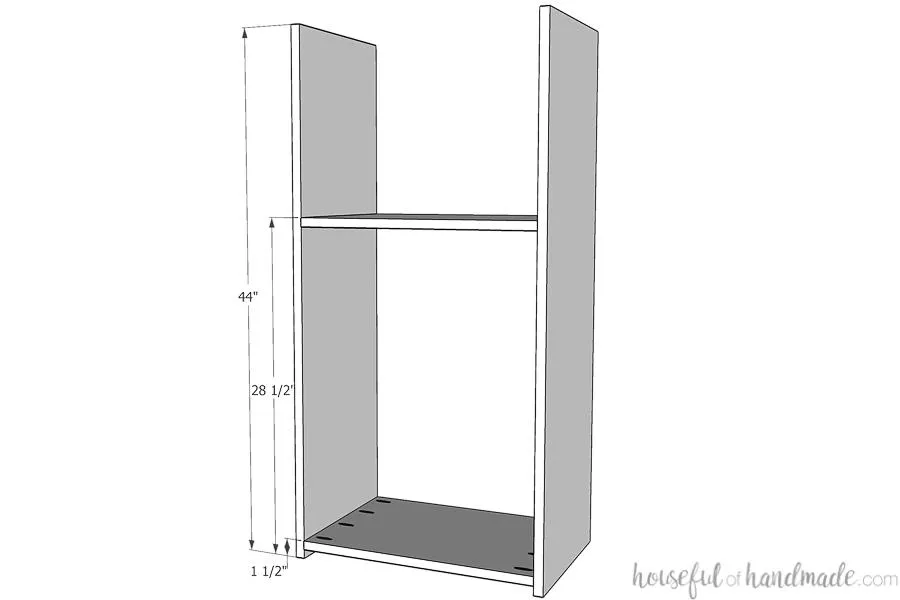
- Drill 4 pocket holes on each side (the 14" wide section) of the cabinet shelf and bottom. Use wood glue and 1 1/4" pocket hole screws to attach the bottom to the cabinet sides so the top of the bottom board is 1 1/2" above the bottom of the sides.
- Then attach the cabinet shelf so the top is 28 1/2" up from the bottom of the cabinet sides. Make sure the cabinet is square.
2Add back supports
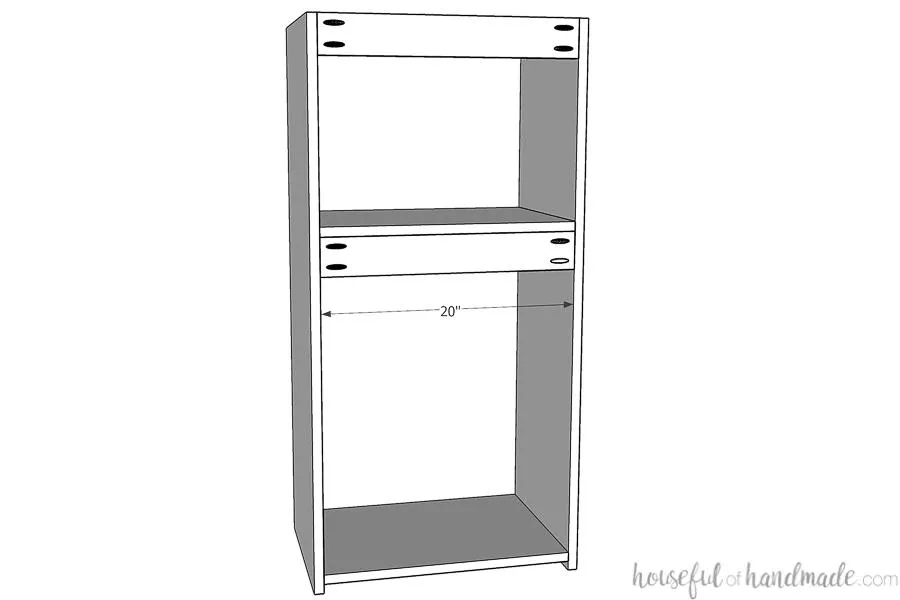
- Add pocket holes to both sides of the back support pieces. Using wood glue and 1 1/4" pocket hole screws, attach one support flush with the back of the cabinet just under the cabinet shelf. For the second support, attach it to the top back of the cabinet box. If your closet organizer is being installed under a shelf that has a board supporting it, notch out the top back of your cabinet to fit around it.
- Then attach the back support so it is flush with the top of the cabinet and the notched out section.
3Build the face frame
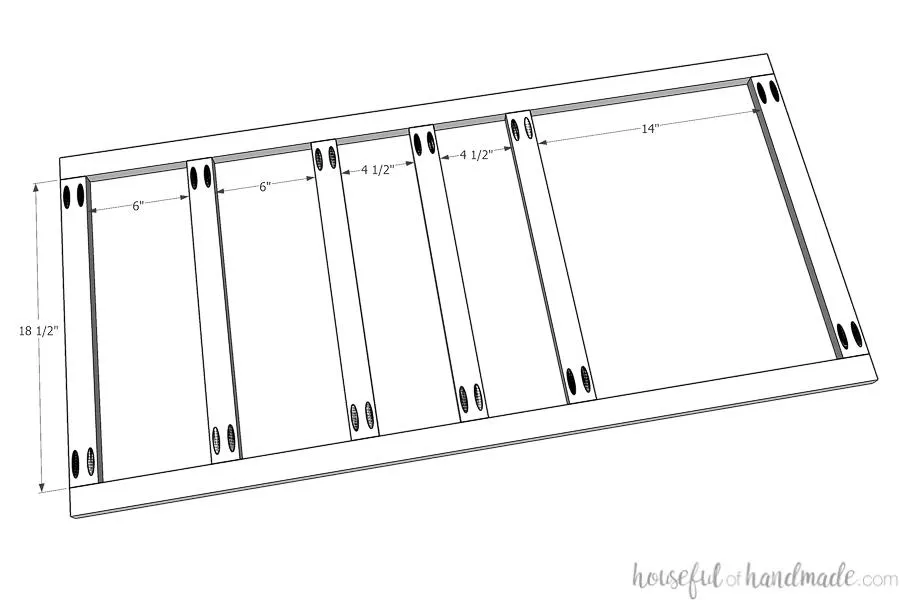
- Drill 2 pocket holes on each side of the face frame rails.
- Position them according to the drawing. Use face clamps to hold them flush with the face frame stiles while securing with wood glue and 1 1/4" pocket hole screws.
4Attach the face frame
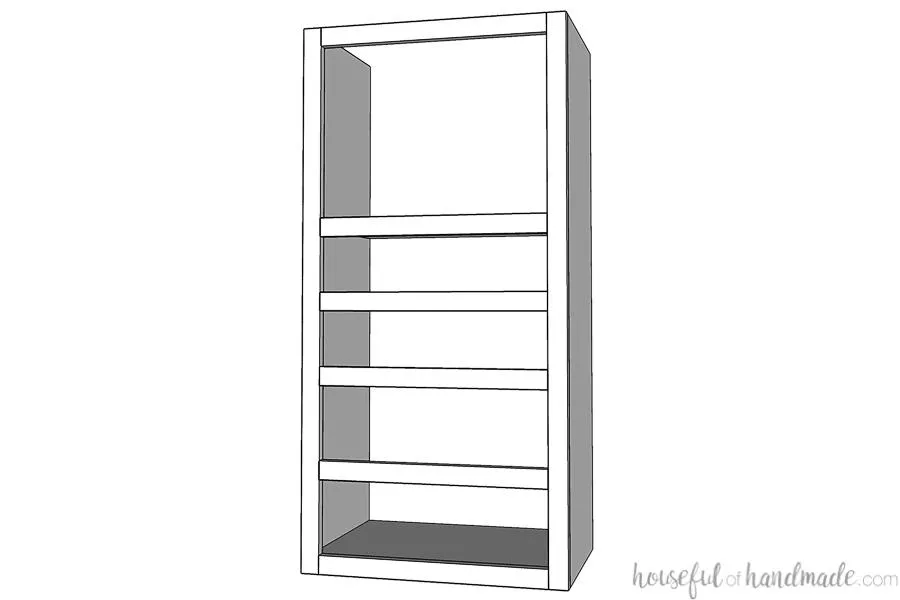
- Place wood glue on the top of the cabinet box.
- Line the face frame up so the top is flush with the top and the top of the shelf/bottom boards are flush with the top of the coordinating face frame rails. Secure it with finish nails into the cabinet box.
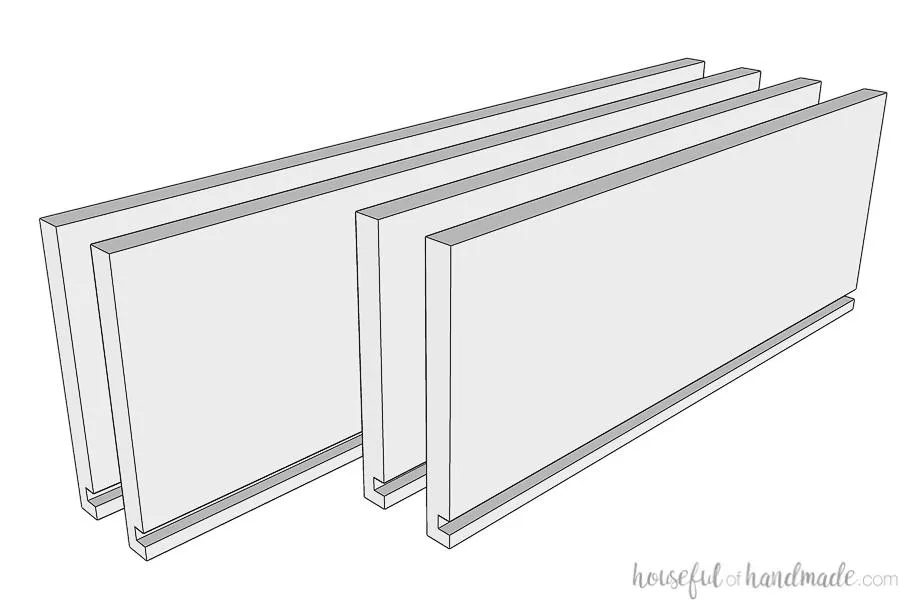
5Add groove to drawer box boards
- To add the groove for my drawer bottoms, I prefer to use my table saw, but you could use a router too. For the table saw, I set the fence 1/4" away from the blade and set the blade to 1/4" tall.
- Then run the drawer box front/back and side boards through.
- Then move the table saw fence a blade width further away from the blade and run the boards through again.
- Repeat until the groove is the same width as the thickness of you 1/4" plywood.
6Build drawer box
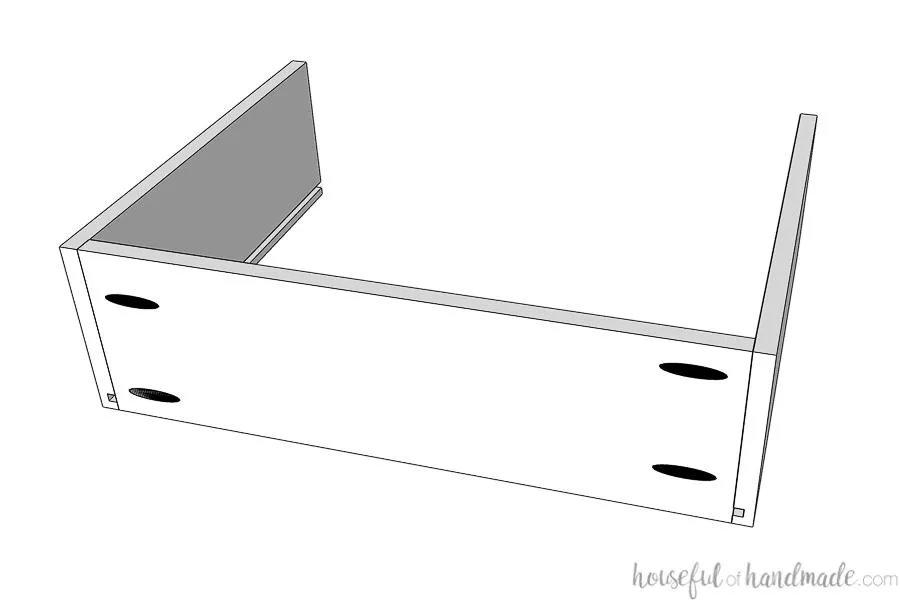
- Set the pocket hole jig for 1/2" thick material.
- Drill 2 pocket holes on the end of each of the drawer box front/back pieces (both large and small). Make sure to drill the holes on the opposite side of the board as the groove so your pocket holes are on the outside of your drawer, keeping them hidden. Secure two drawer box side boards to the ends of each drawer box front with wood glue and 1" pocket hole screws.
- Repeat for all drawers.
7Add the drawer bottoms
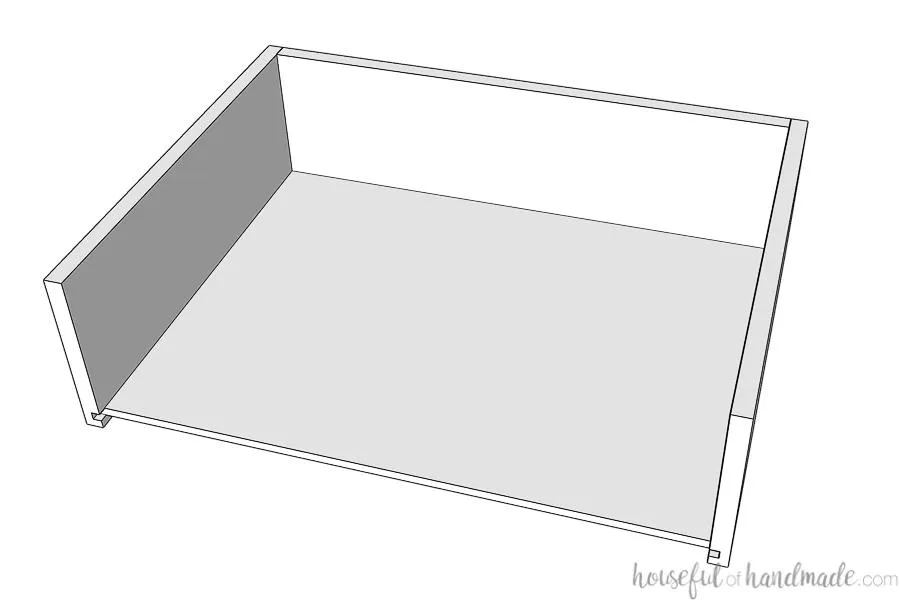
Slide the drawer box bottom pieces into the groove.
8Finish the drawer boxes
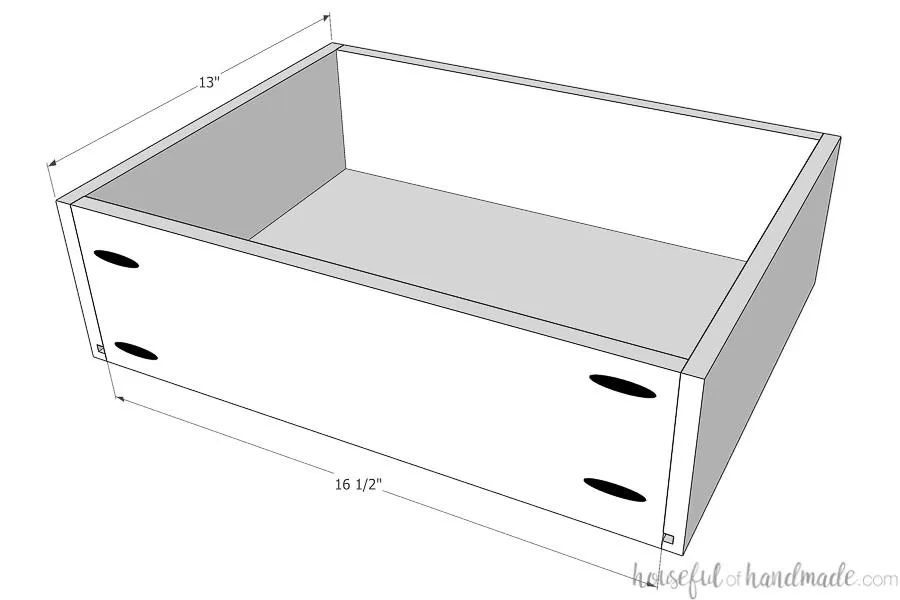
Attach the drawer box backs to close up the drawer boxes. Make sure the bottom sits into the groove. Secure with glue and 1" pocket hole screws.
9Finish the drawer fronts
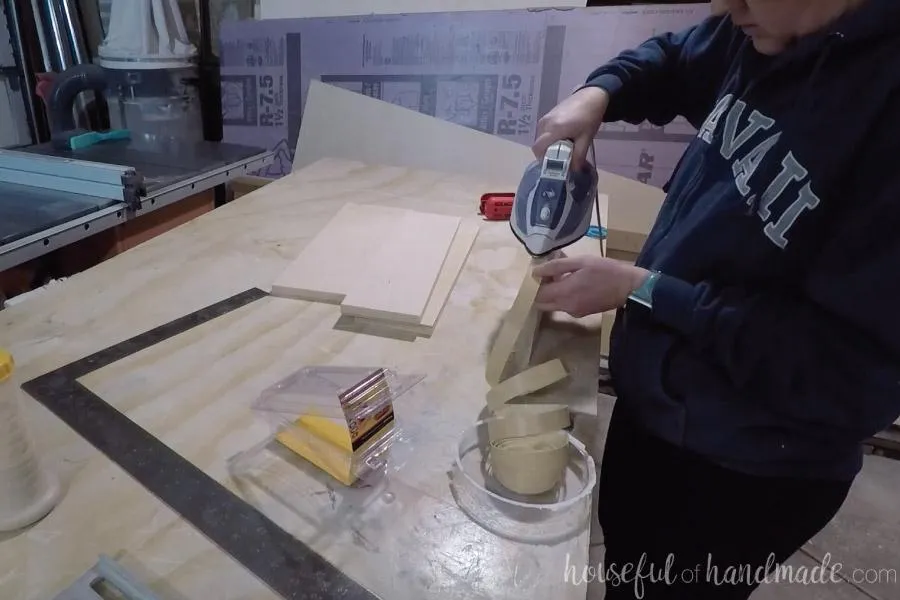
To finish off the drawer fronts, add edge banding to the edges of the large and small drawer fronts cut from the 3/4" plywood. Trim the excess flush with the plywood.
10Prep to install
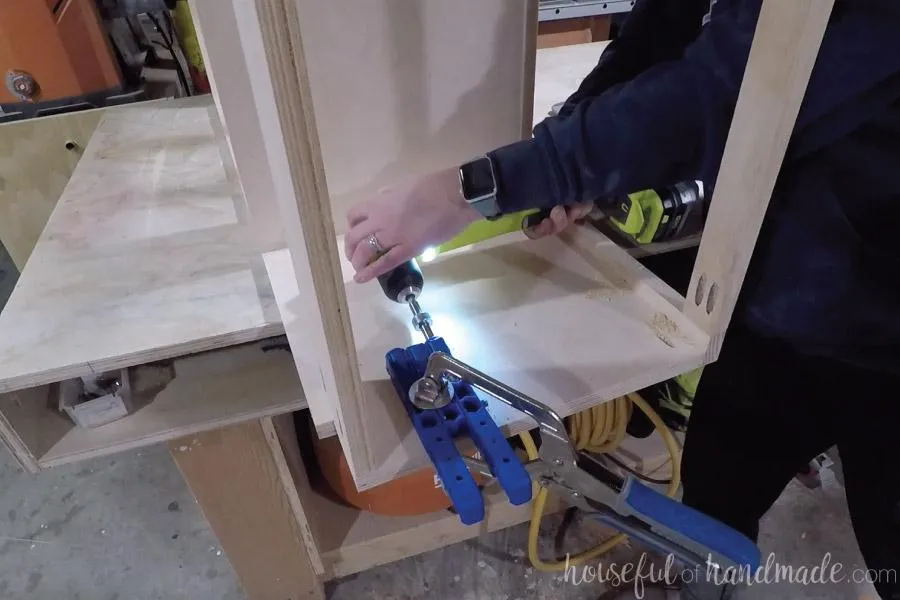
- Set your Kreg jig for 3/4" material.
- Drill 2 pocket holes on the inside top of the cabinet (facing up) to attach the cabinet to the shelf above. These pocket holes are not meant to hold up the entire weight of the cabinet, but to help hold it flush to the shelf above it for install.
11Install drawers
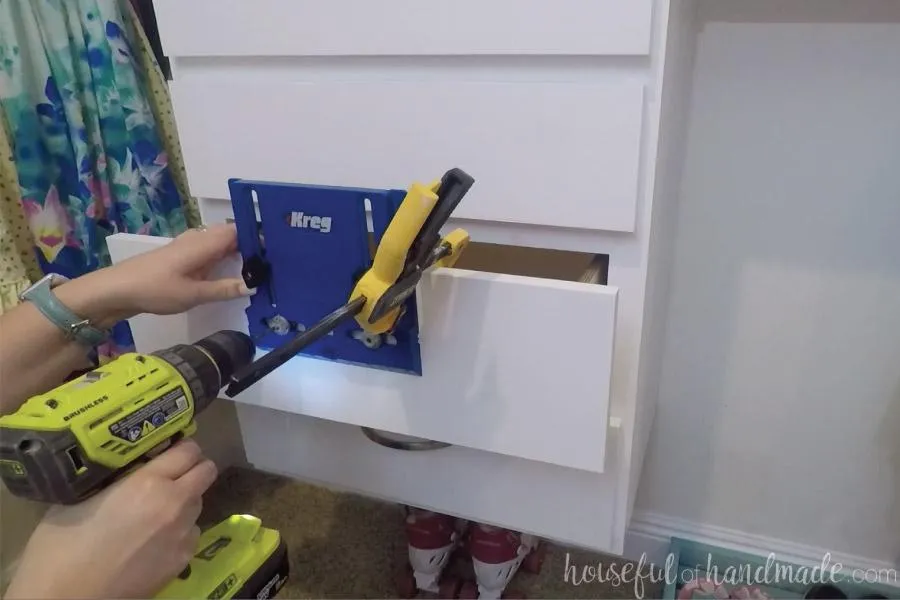
- Install drawer slides using the Kreg drawer slide jigs. You will need to use drawer slide clips for face frame cabinets or add a piece of scrap 3/4" thick wood inside the cabinet to make the back of the slide flush with the face frame. The drawers are sized for slides that require 1/2" clearance on each side.
- Clamp the drawer fronts onto the front of the drawers. Secure the drawer front with screws or finish nails in from the inside.
- Then use the cabinet hardware jig to add drawer pulls Make sure the screws go through the drawer front and the drawer box.
12Add shelf (optional)
If you want to, you can use some of the scraps of 3/4" plywood to cut 1 or 2 shelves for the open upper area. Use the shelf pin jig to add shelf pin holes to the top and then cut shelves to fit. Line the front with edge banding for a finished look. We are keeping the area open to create a vanity area for my daughter.
13Finish & Enjoy!
Sand and finish your closet organizer. We added an additional shelf to one side of it and split the hang bar to have a longer section for dresses and shorter section for shirts. You can follow along on our complete closet makeover at Housefulofhandmade.com!

14Install closet organizer
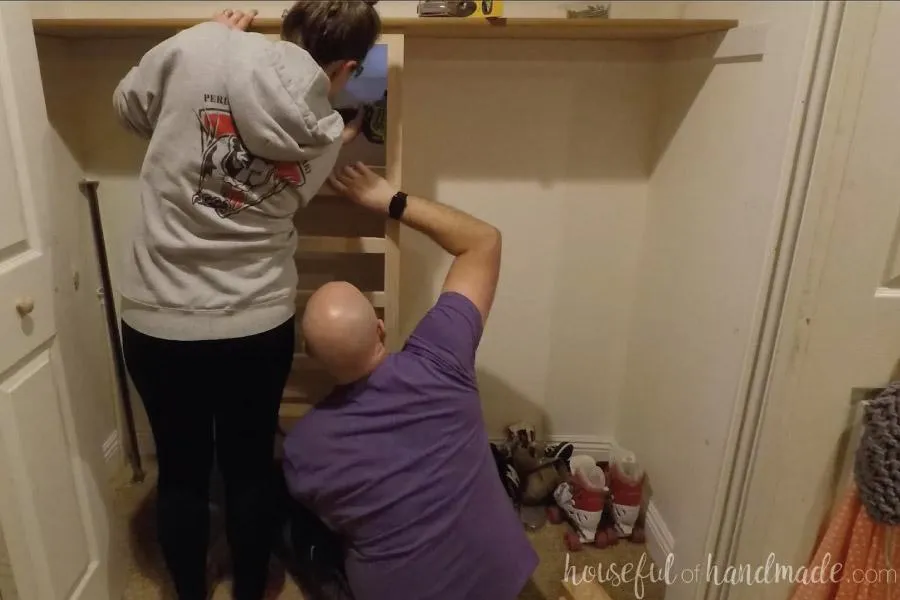
- Hold your closet organizer up against the shelf.
- Check for plum and level. Use shims if needed to get level. Using 1 1/4" pocket hole screws (for a 3/4" thick closet shelf), attach the front of the cabinet to the underside of your closet shelf with the pocket holes drilled in the top of the cabinet.
- Then using 2 1/2" long cabinet screws, attach the cabinet to the wall into the studs through the back support pieces. Make sure to secure the cabinet to the wall through both the back support pieces.
Tags
- Bedroom
- Intermediate
Reviews & builds
No reviews yet
Sign in to review this plan or share your build.
No reviews yet. Be the first to build this.