Notch
NotchChristmas Card Tree
Step-by-step build — 8 steps. Also available as a print sheet.
1Cutting the boards
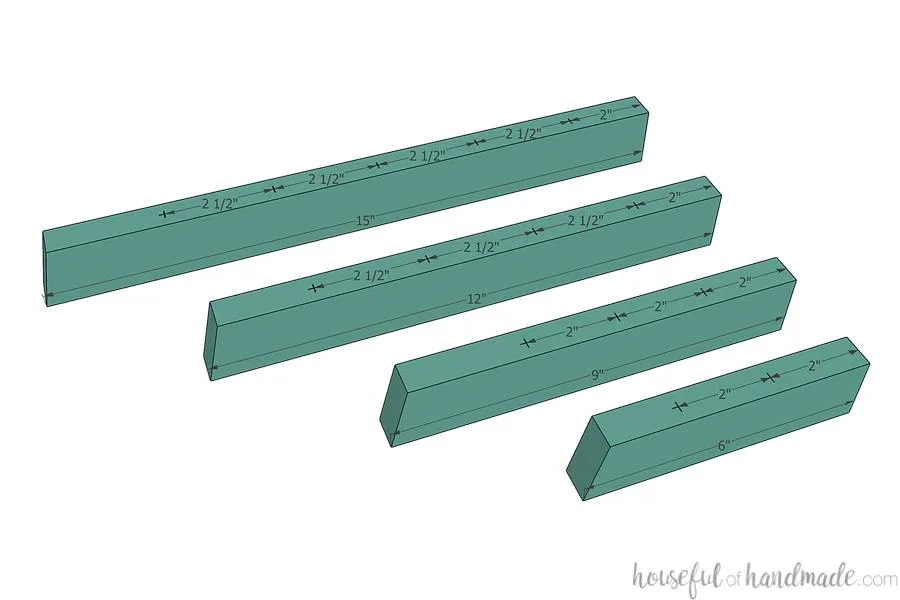
When cutting the boards, cut the trunk so there is a point at the top. I used a 50 degree angle (the highest my saw would go) on my miter saw to get a steep angle. For the base boards, cut one end at a 45 degree angle. For the limb boards, cut one end at a 15 degree angle.
2Drill holes for card holder rings
Measure and mark where to drill holes to insert the ring loops to hold the cards. Use a drill bit the same size as the metal on the ring loops to drill a 3/4" deep hole in the side of the boards. It is much easier to do this before attaching the limbs (I did not and it required branding the limbs to make them straight since my holes were tilted toward the front).
3Attach limbs to one side
- Set your picket hole jig for 3/4" thick material and drill 2 pocket holes on the angled side of each limb board. Make sure to mirror which way the angle is so the pocket holes all end up on the back of the tree.
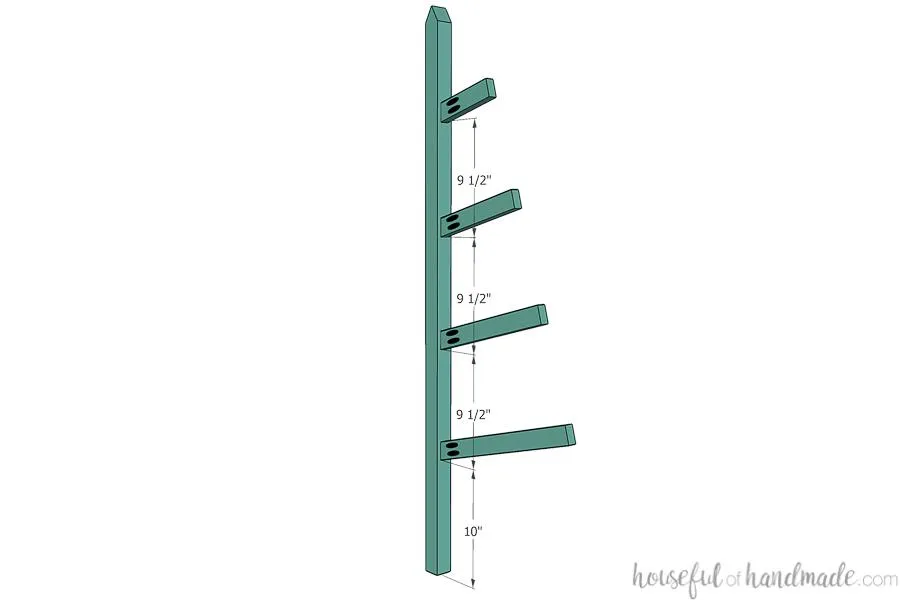
- Measure 10" up from the bottom of the trunk board.
- Attach the large limb so the bottom of the angled cut is at this mark and centered on the 2x2 trunk. Secure with wood glue and 1 1/4" pocket hole screws.
- Attach the rest of the limbs so they are 9 1/2" up from the bottom of the previous one.
4Attach limbs to the other side
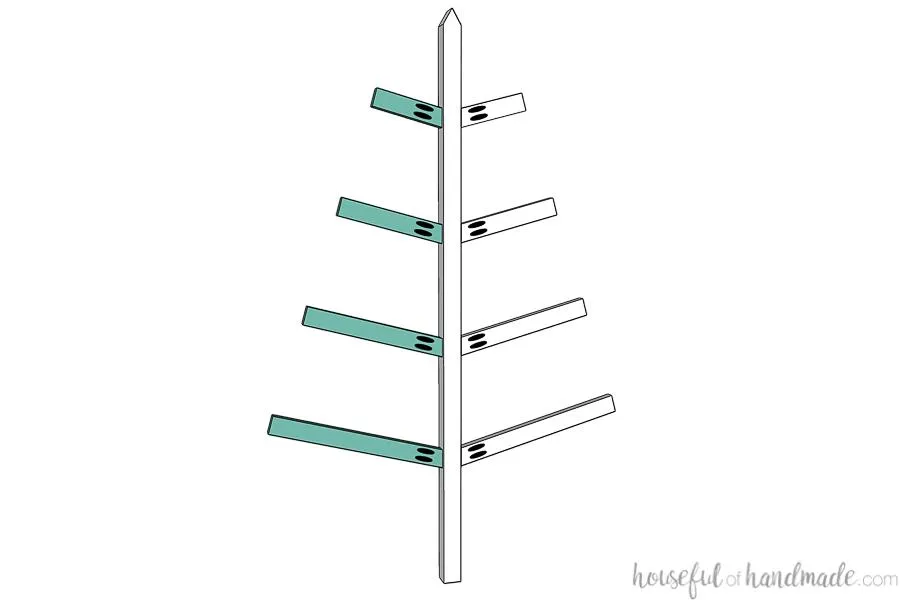
Repeat for the other side of the tree. Make sure all the limbs mirror each other and the limbs angle up.
5Attach the base
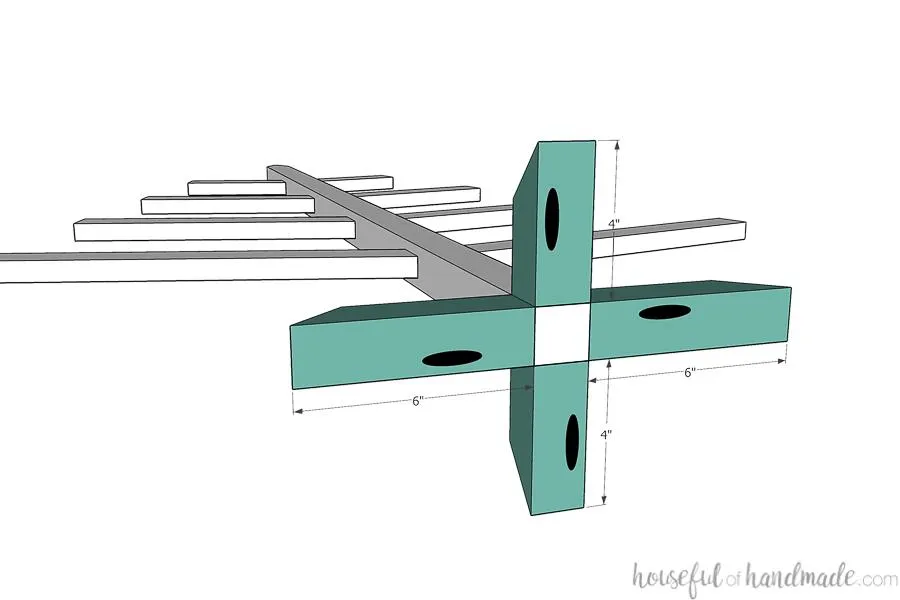
- Set your pocket hole jig for 1 1/2" thick material and drill one pocket hole in the bottom of each of the base boards. Offset them to one side so the screws don't all hit each other in the trunk board.
- Attach the two side base pieces to the sides of the trunk and the front/back pieces so they stick out the front and back. Secure with 2 1/2" pocket holes and wood glue.
6Sand & Finish
Sand and stain/paint your Christmas tree. I used my sander to slightly round over the angle at the top of the trunk and the base boards.
7Attach card holder rings
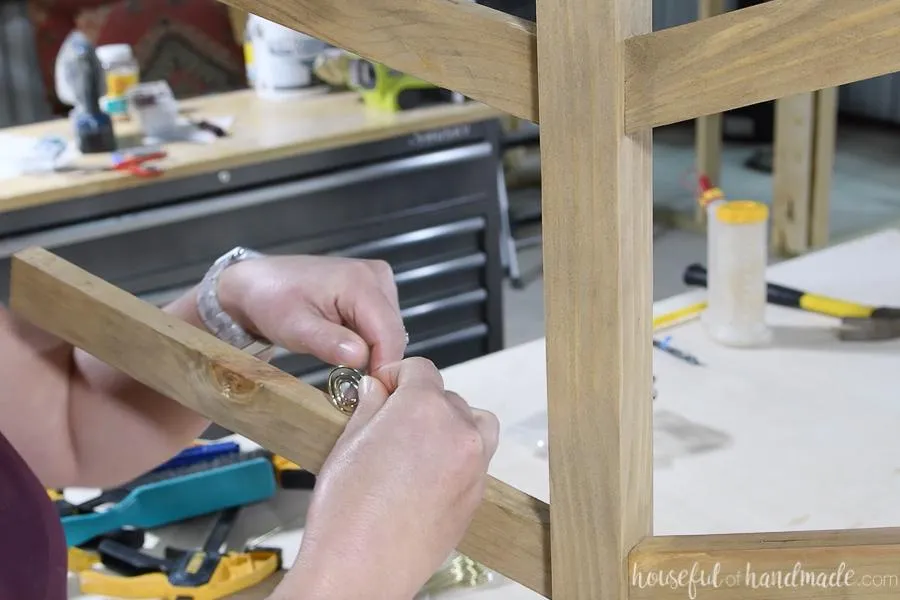
Clip the stem of the card holder rings to about 3/4" long if needed (mine were longer to use for cake toppers too). Place a dot of super glue gel on the stem and place it in the holes drilled for them earlier.
8Enjoy!
After the glue is dry, it is time to load up all your Christmas cards. And make sure to come visit me at Housefulofhandmade.com for more things to make this Christmas (I have already been building decor this year!).