 Notch
NotchCat Litter Box Cabinet
Step-by-step build — 13 steps. Also available as a print sheet.
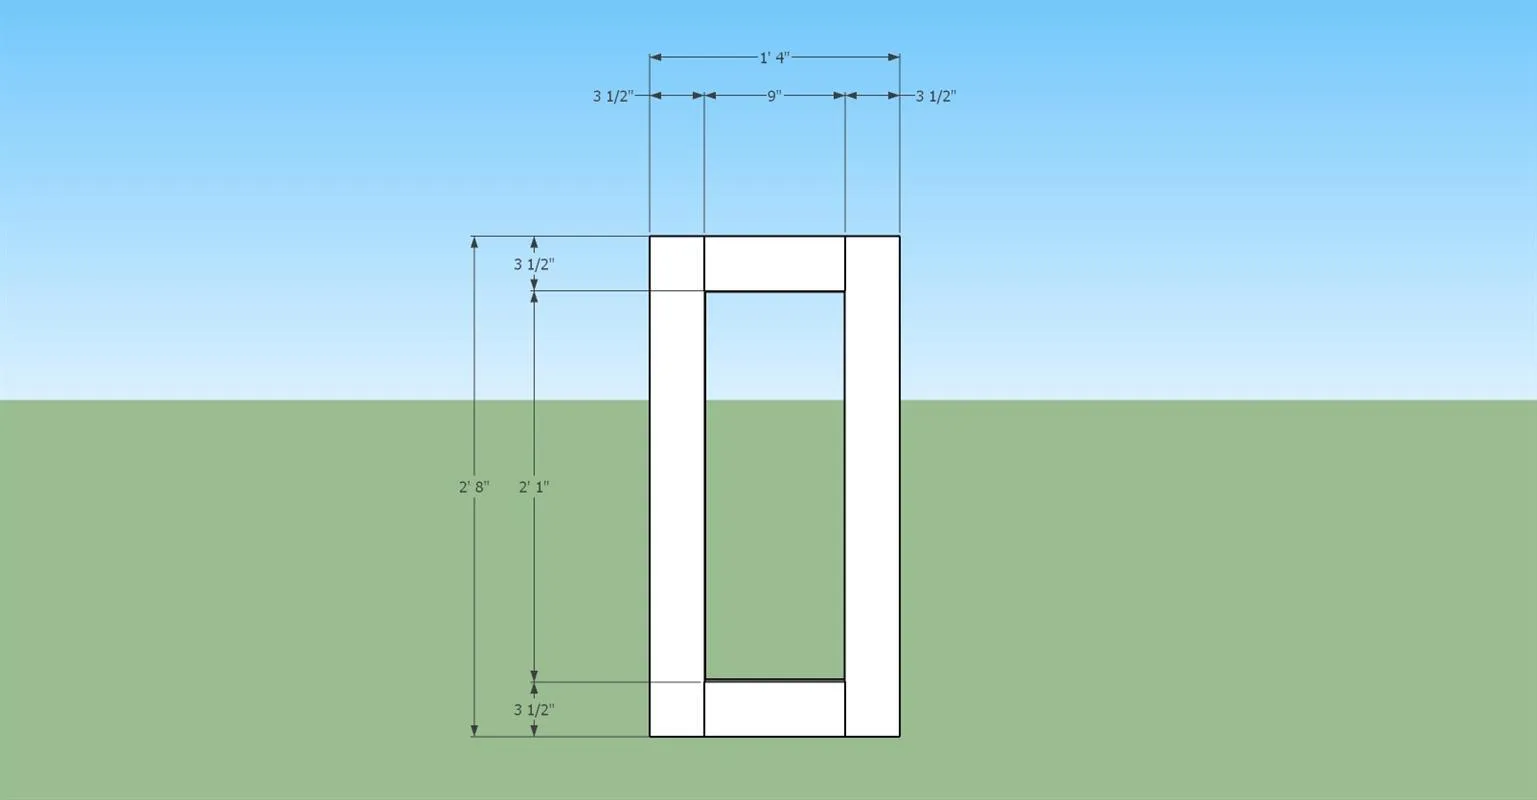
1Right side panel
Cut and assemble the right side panel utilizing 1 1/4" pocket hole screws
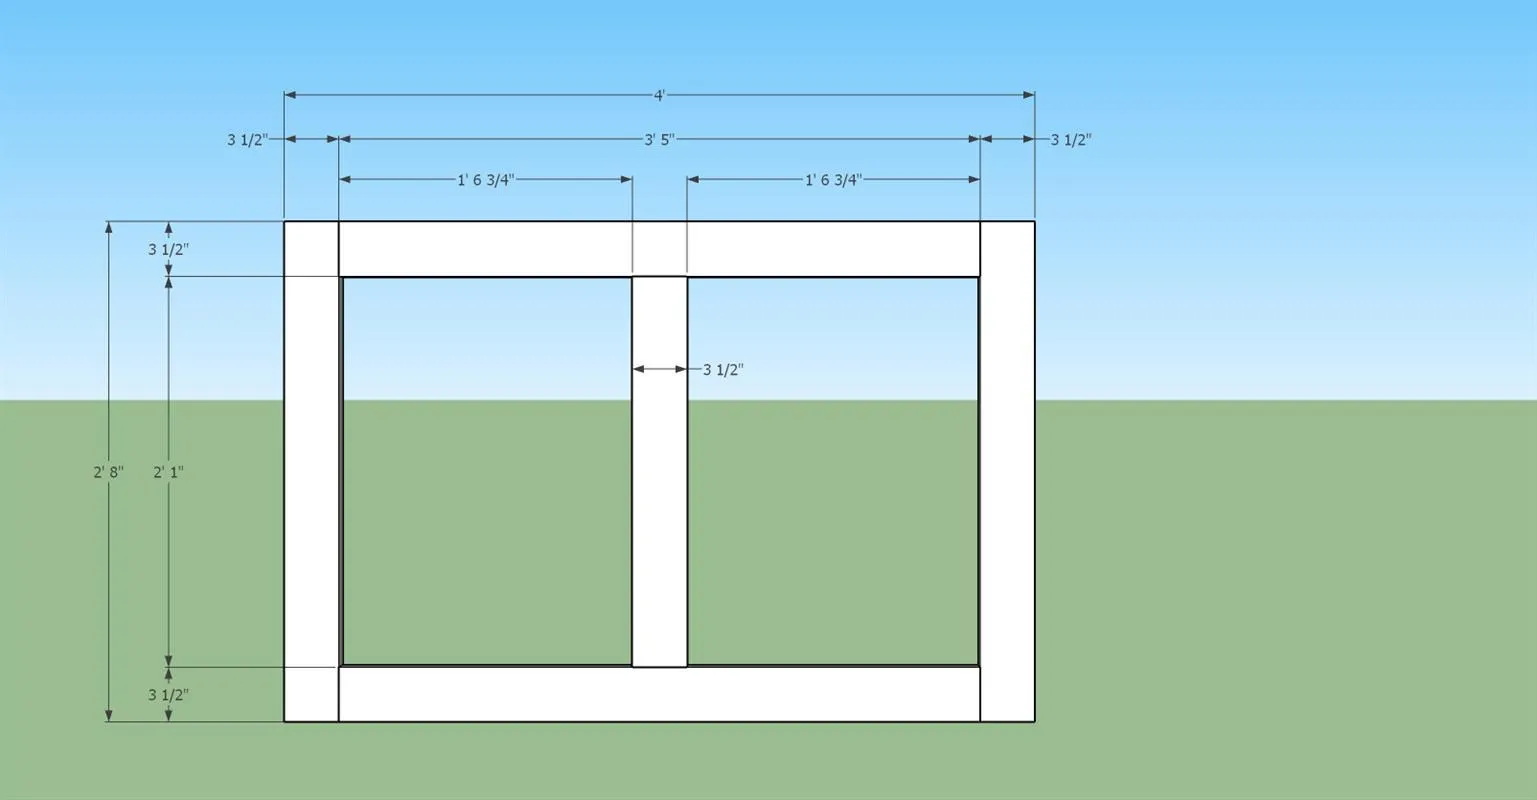
2Rear panel
Cut and assemble the rear panels utilizing 1 1/4" pocket hole screws
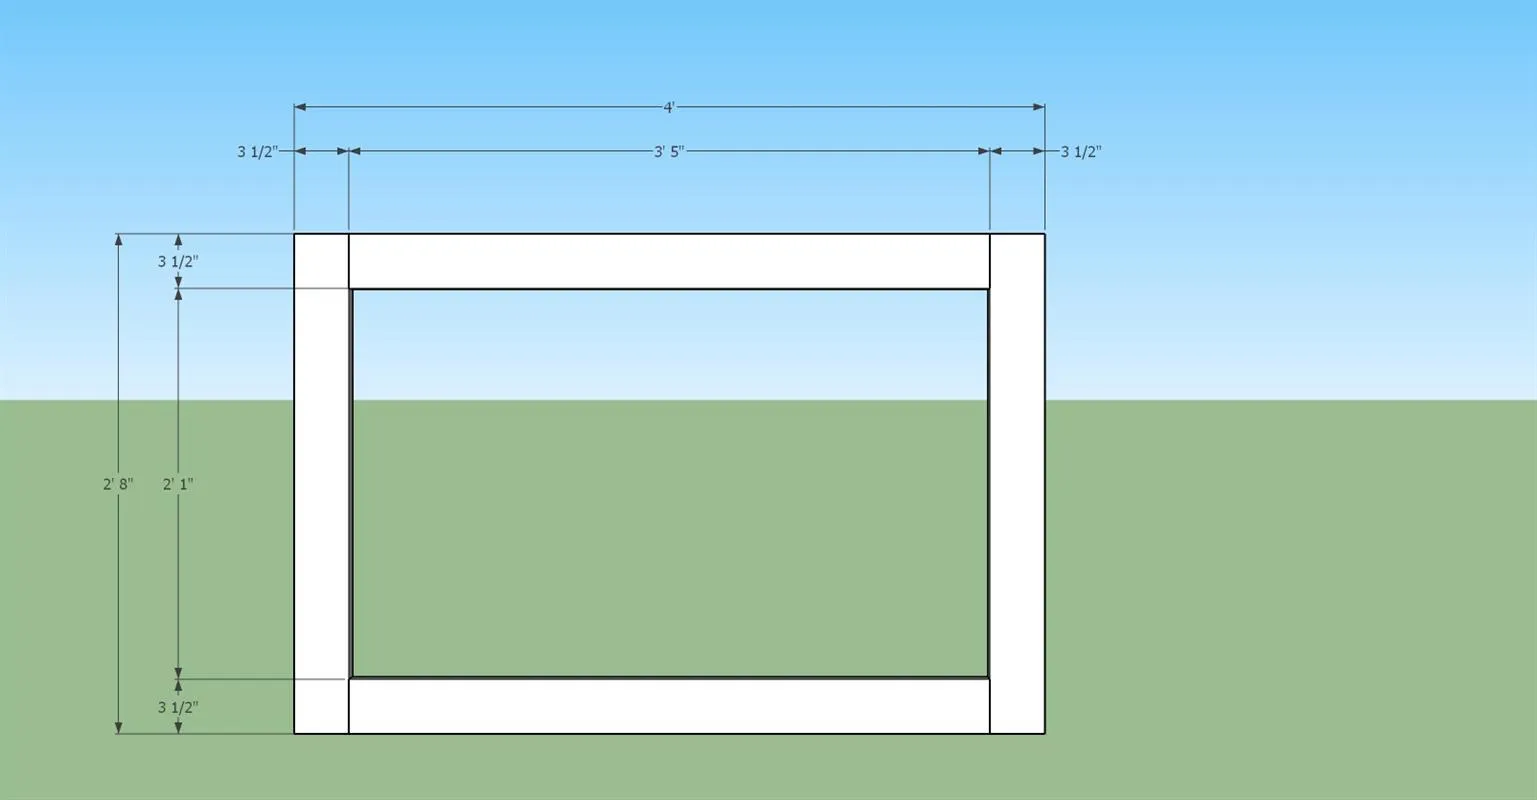
3Front panel
Cut and assemble the front panel utilizing 1 1/4" pocket hole screws
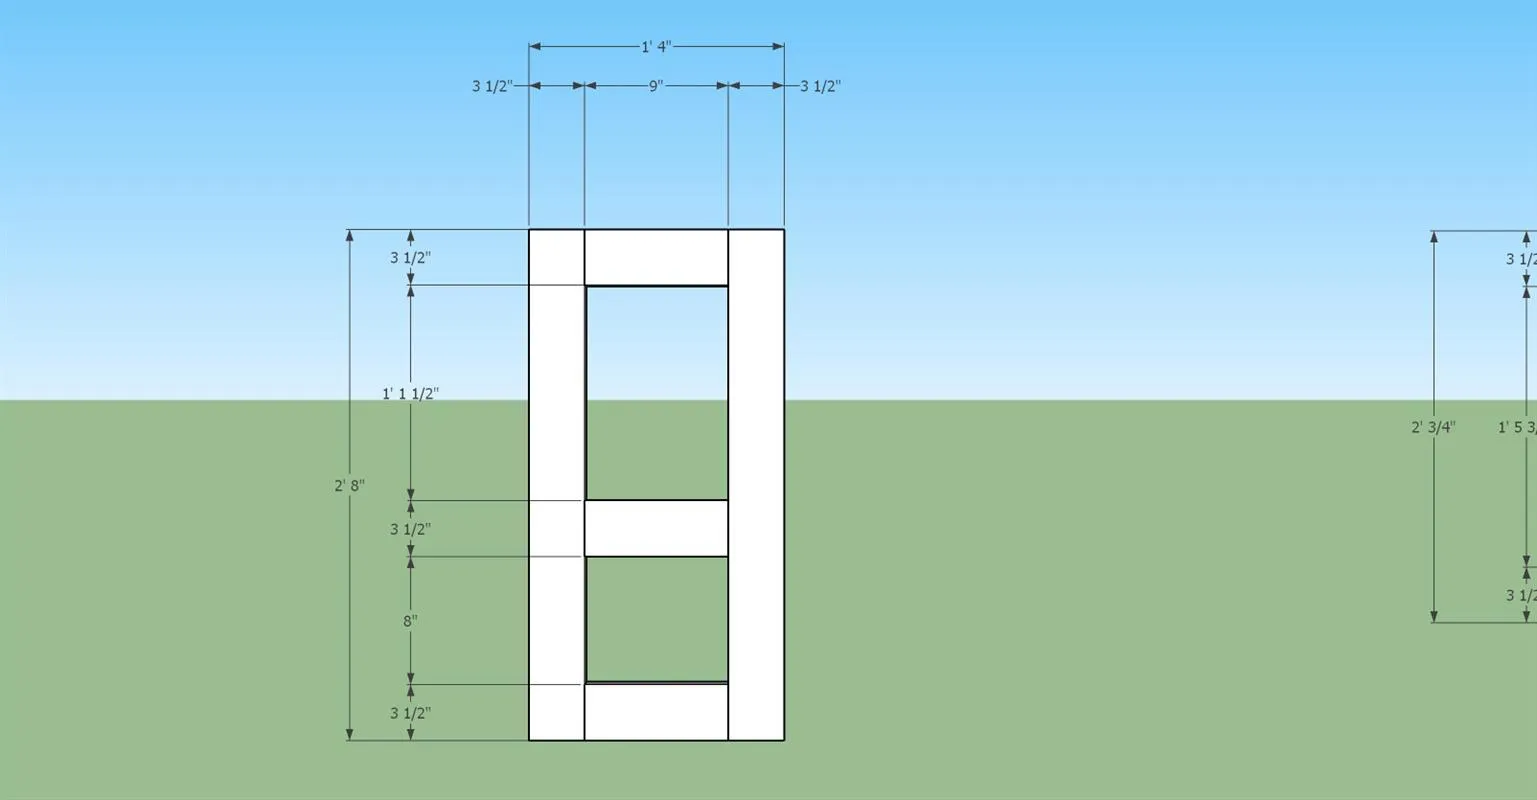
4Left side panel
Assemble the left side panel utilizing 1 1/4" pocket hole screws If you do not need the opening for cat access, eliminate the middle cross piece.
5Assemble all componets
Assemble all panels utilizing 1 1/4" pocket hole screws.
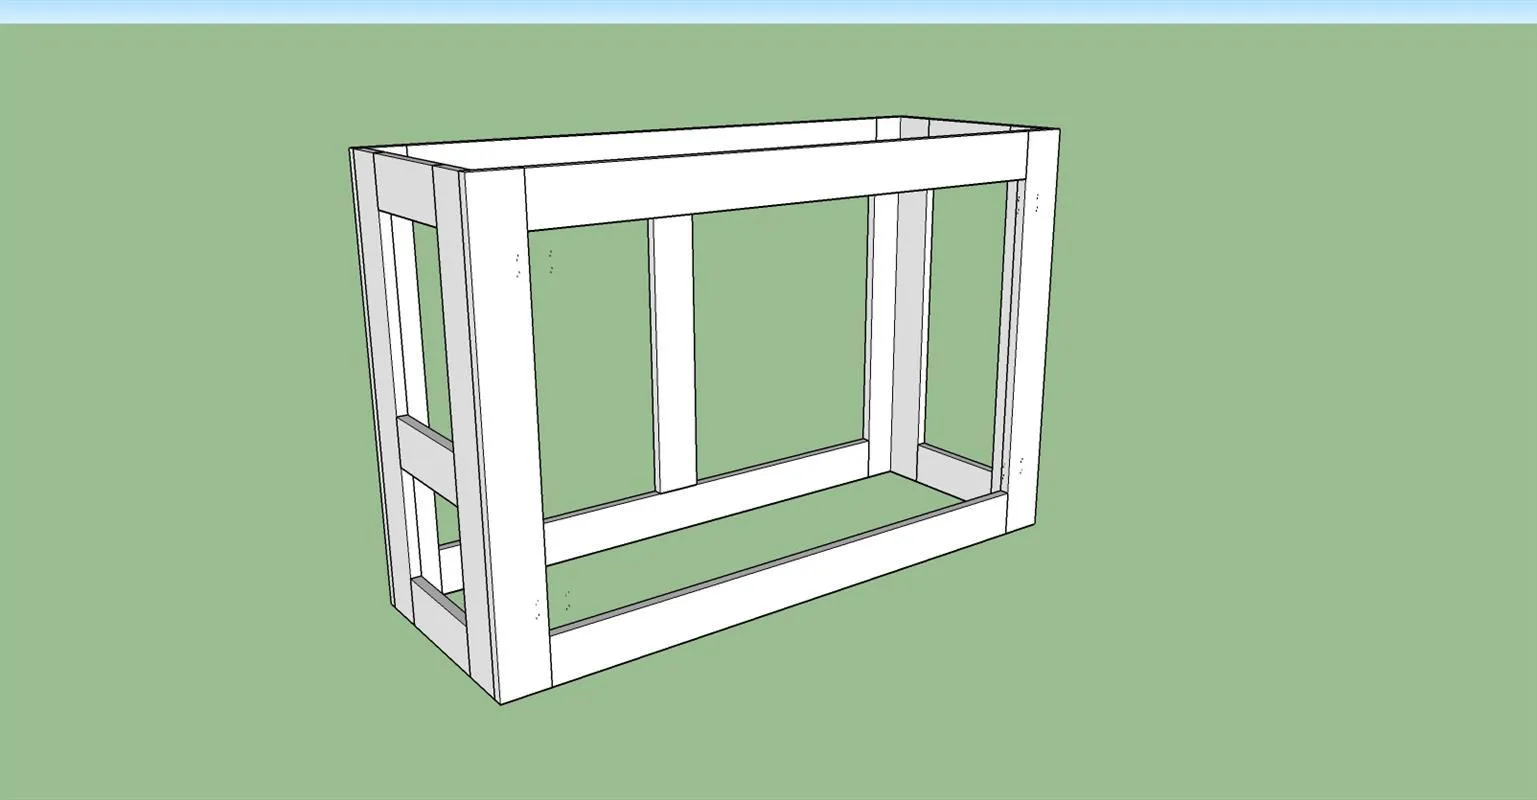
6Install the bottom plywood
Cut the bottom plywood and install with 1 1/4" pocket hole screws. Locate the panel 2" up from the bottom.
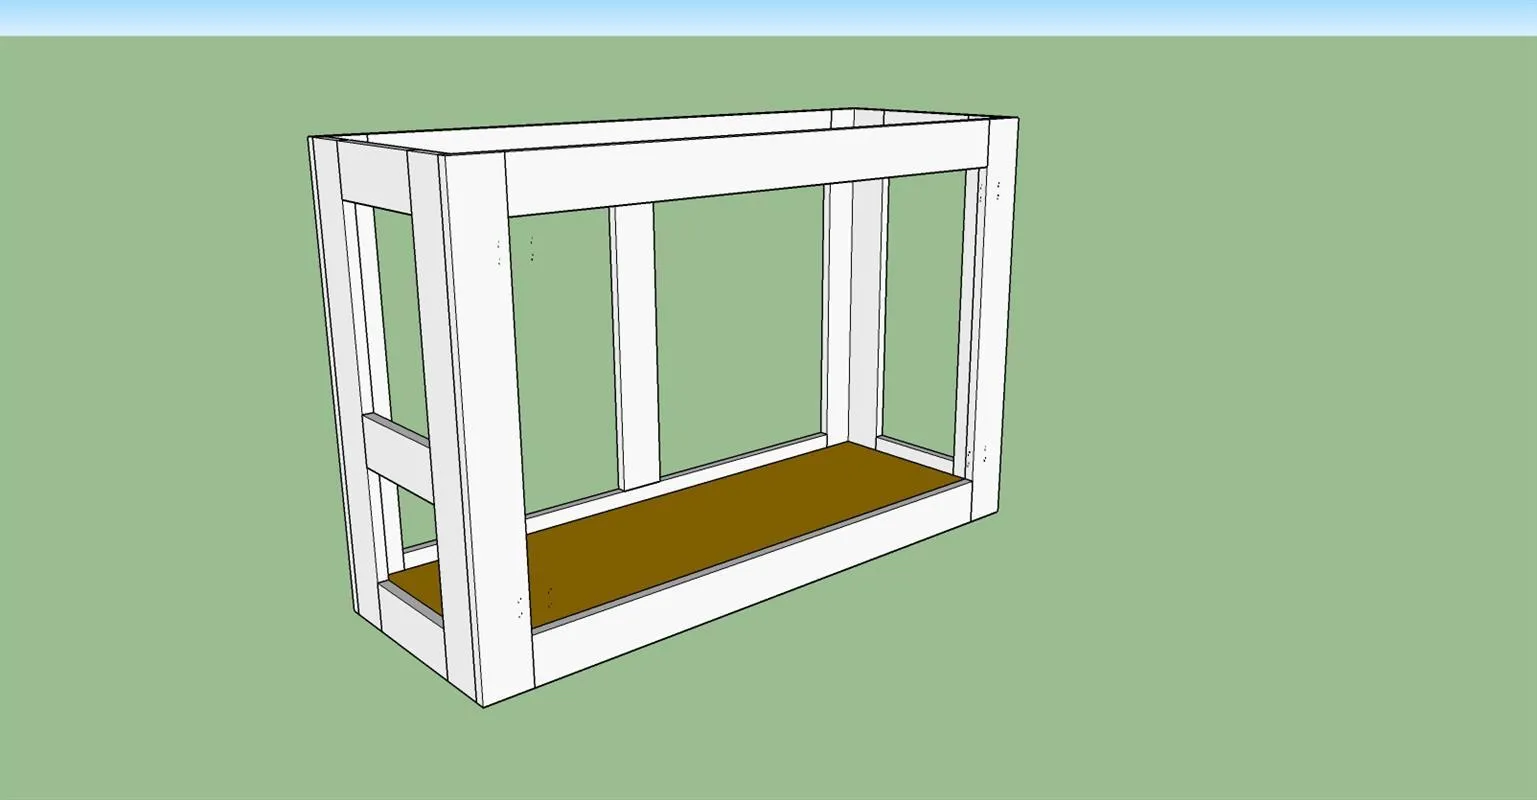
7Install plywood
Cut and install side and rear plywood/beadboard panels utilizing your nail gun. Install the interior divider panel in a location that works for you with 1 1/4" pocket hole screws. If you do not need the cat access, the left plywood/beadboard panel size will be the same size as the right panel. You can also eliminate the interior divider panel.
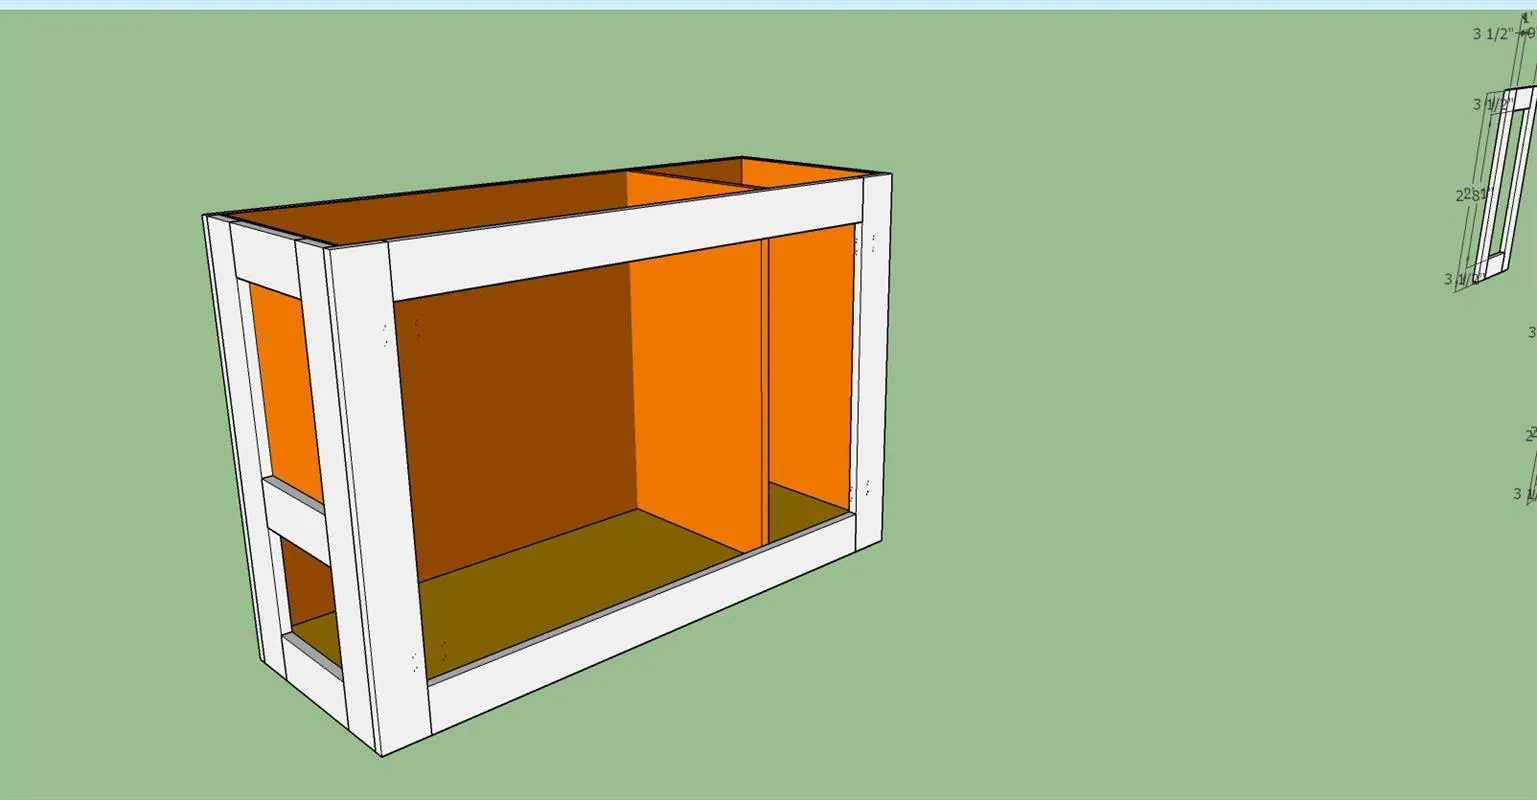
8Construct the doors
Cut the door parts and assemble with 1 1/4" pocket hole screws. Route a 1/4" recess in the back of the door panels to accept the plywood/beadboard infill.
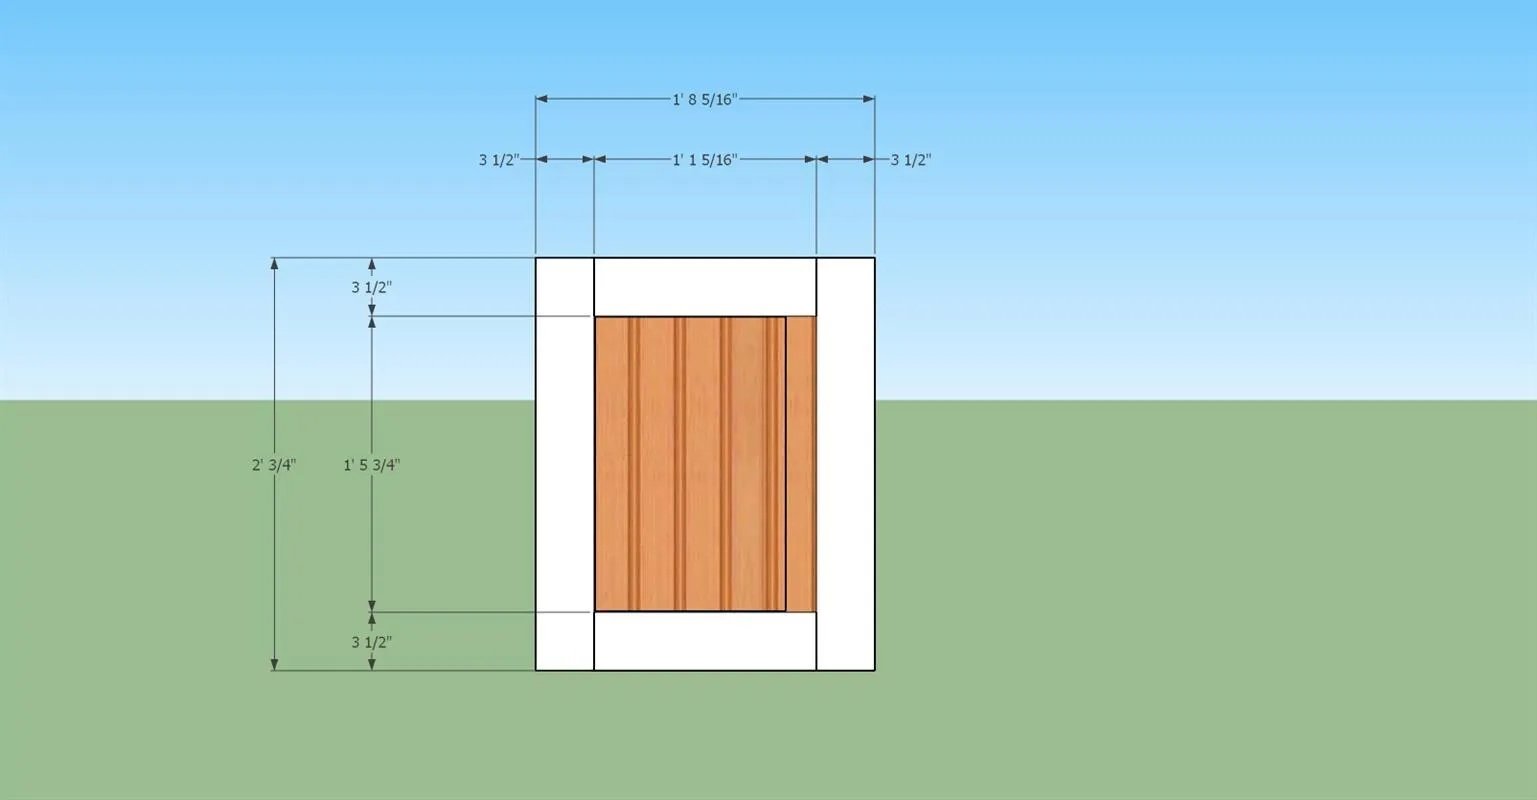
9Install doors
Install the doors as shown utilizing your choice of hardware
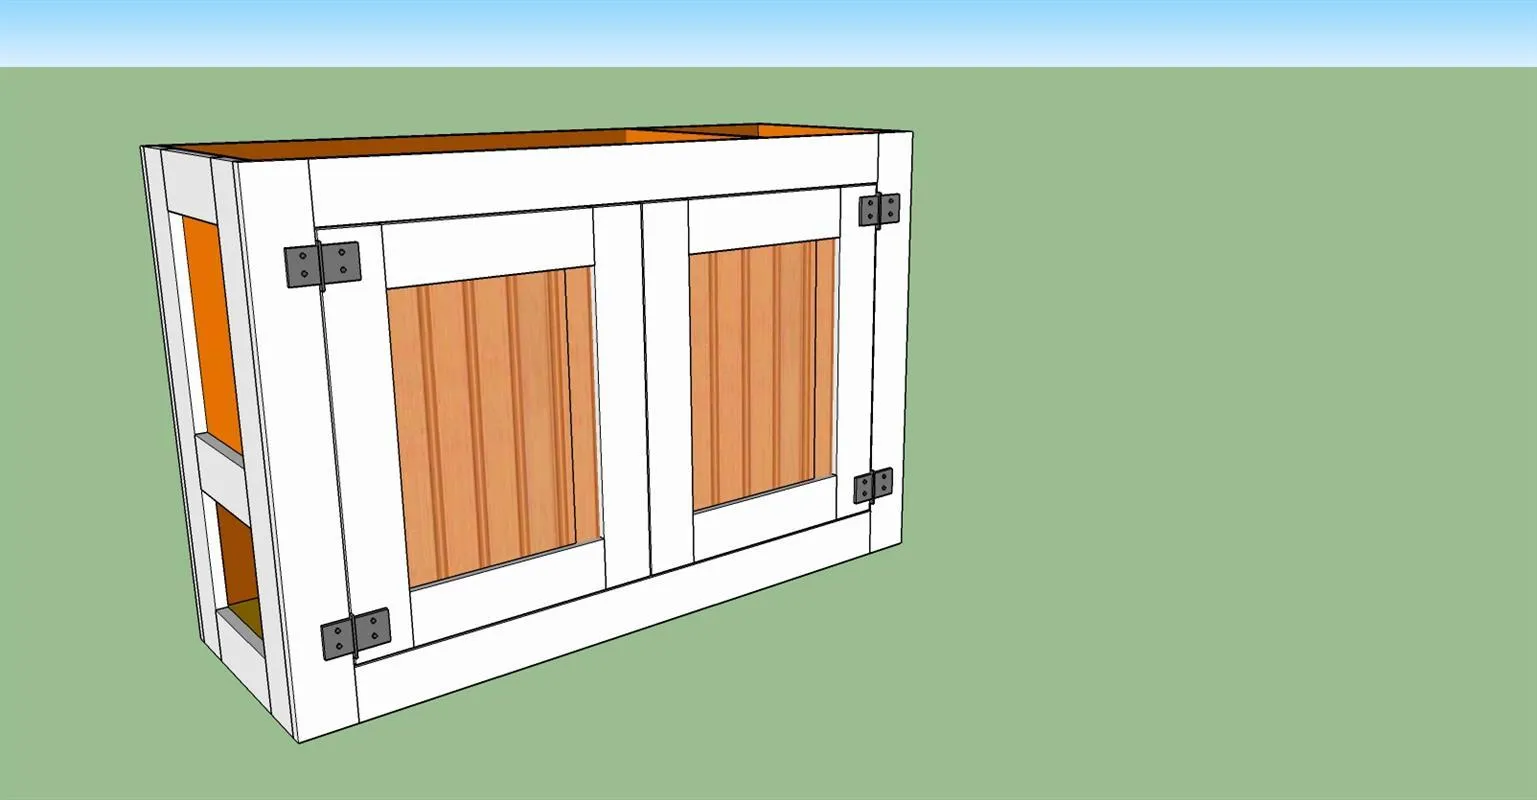
10Install the base trim.
Utilize your nail gun to install the base trim.
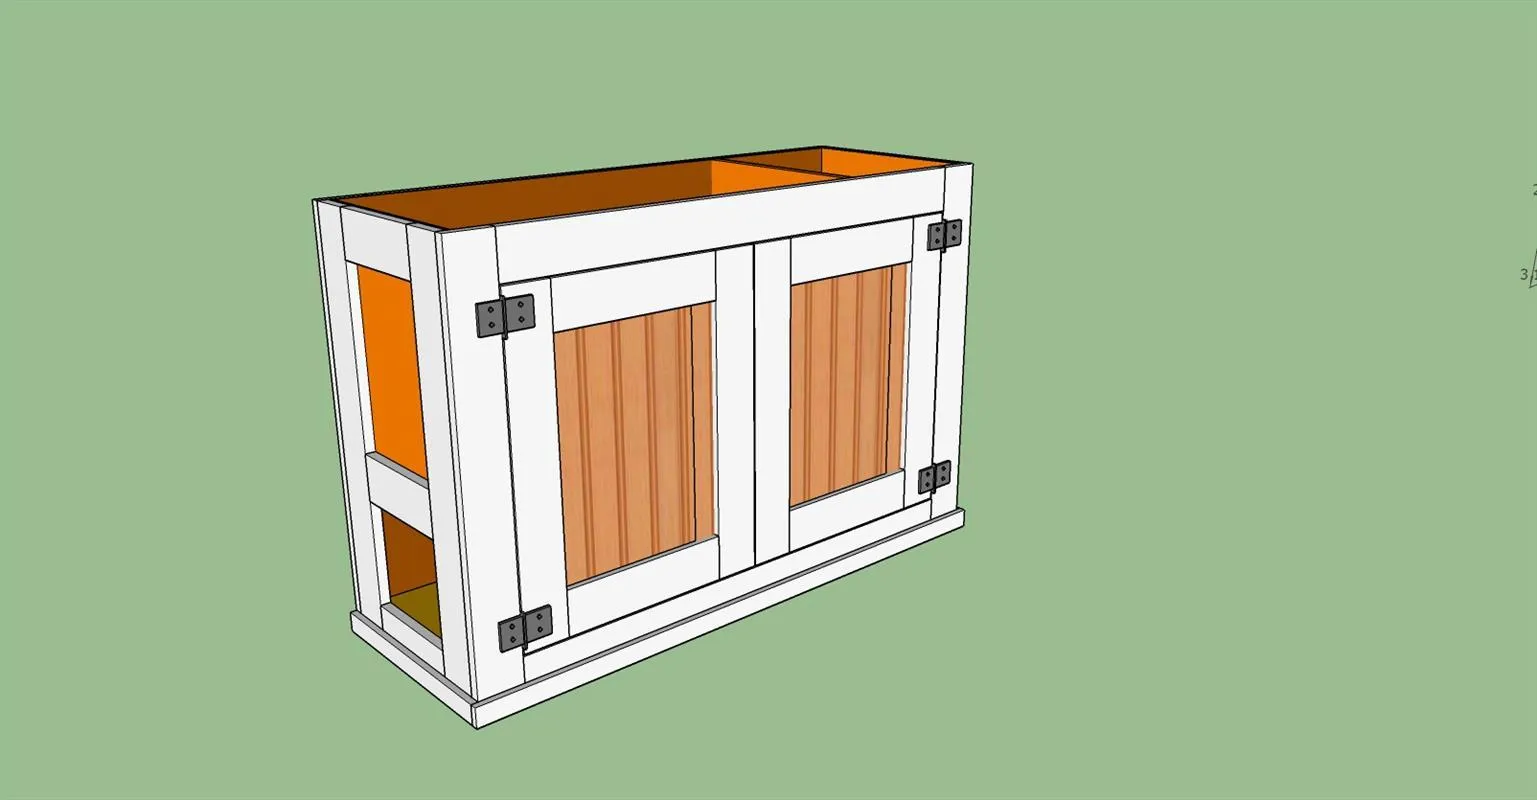
11Construct the top
Choose the type of wood you would like to utilize and cut to size to allow a 1 1/2" overhang on the sides and front. I utilized poplar boards that I joined, cut to width, sanded and routed a decorative edge on the sides and front.
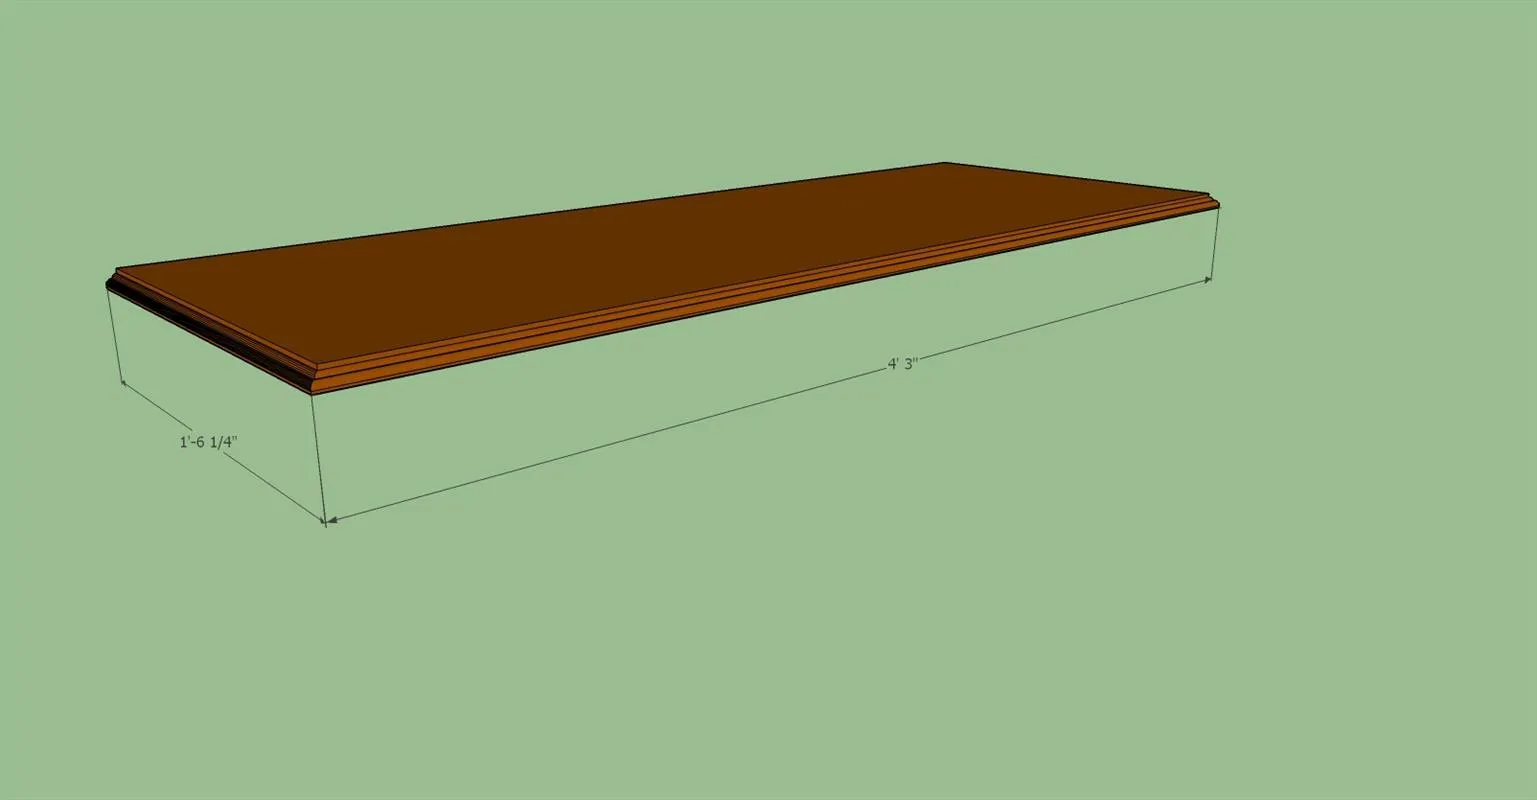
12Install the top
Choose the type of wood you would like to utilize and cut to size to allow a 1 1/2" overhang on the sides and front. I utilized poplar boards that I joined, cut to width, sanded and routed a decorative edge on the sides and front.
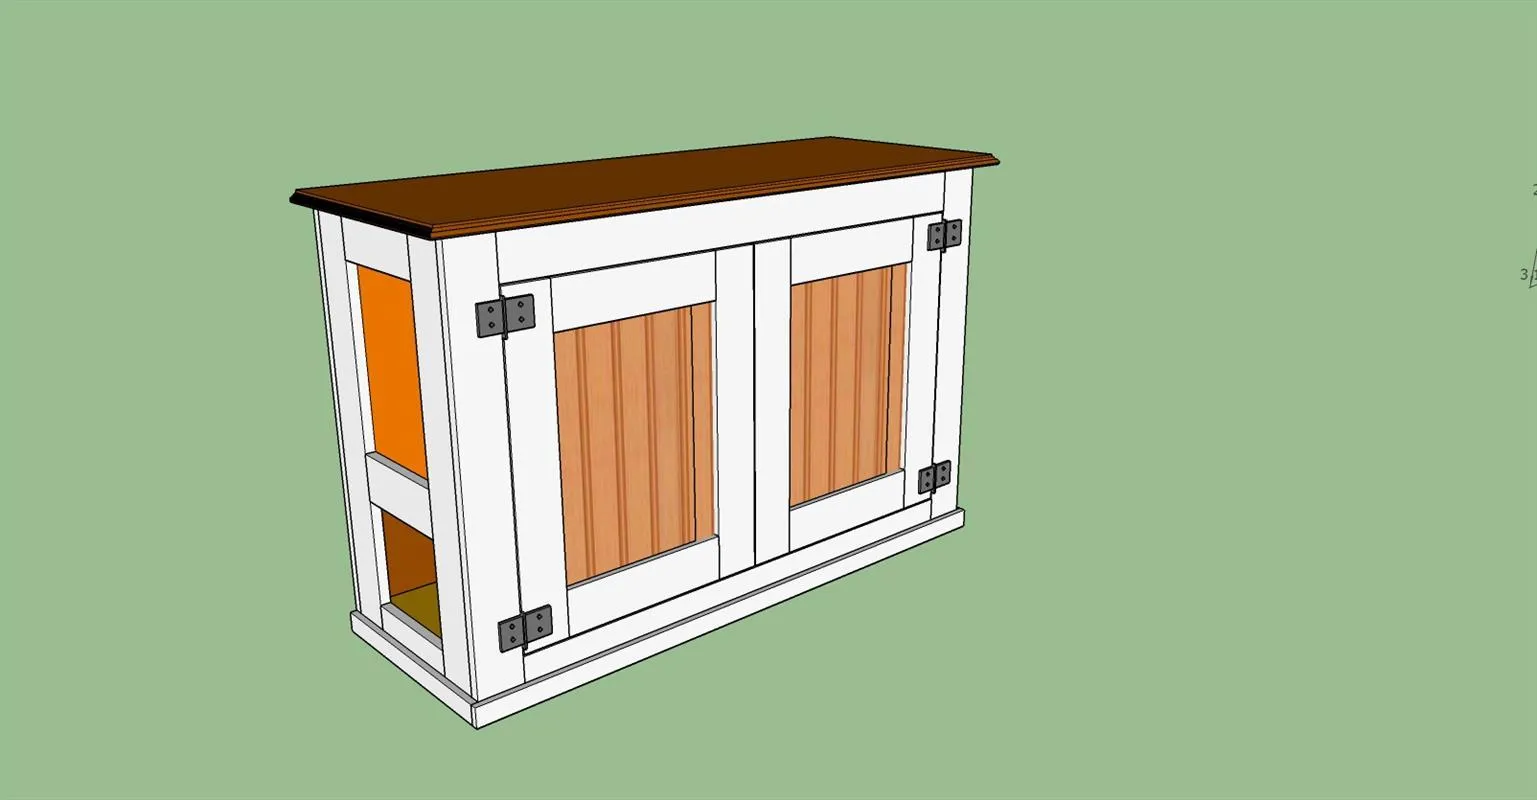
13Finish the cabinet
Finish the cabinet by painting or staining per your preference