 Notch
- Difficulty
- Advanced
- Time
- 6.5–12.8 hours
- Cost
- $$$
About this build
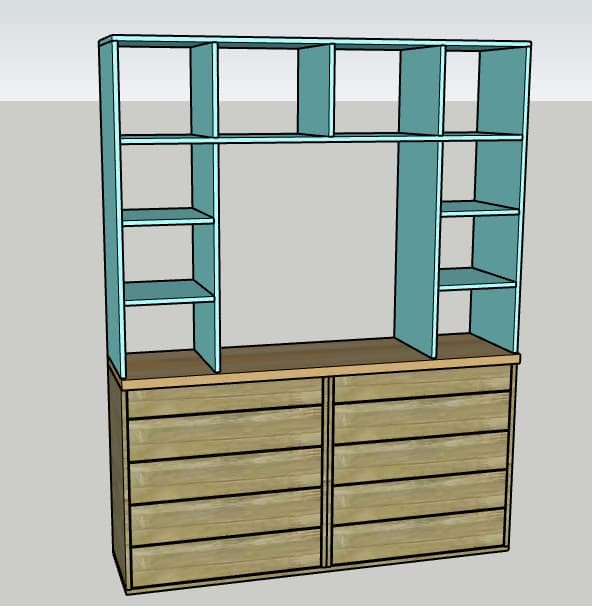
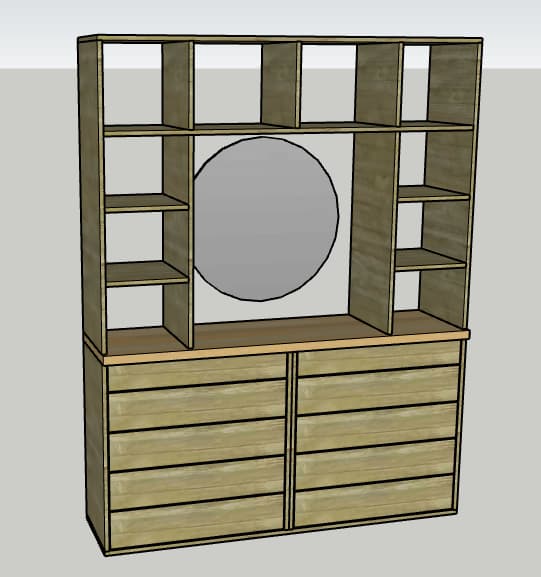
Have the perfect space in your closet for a built in dresser vanity with loads of storage? Look no further than this plan. After you build this project, you'll have 10 drawers, cubbies for storage and a great work surface with room for a mirror.
Tools
Essential
- Drill / Driver
- Miter Saw
- Pocket Hole Jig
- Random Orbit Sander
- Router Table
- Table Saw
Optional / nice to have
- Tape Measure
Materials
| Item | Qty |
|---|---|
| Plywood, 4' x 8' x 3/4" | 3 board |
| Plywood, 4' x 8' x 1/4" | 1 board |
| Boards, 1 1/2" x 3 1/2" x 8' | 2 board |
| Butcher Block (or 1 additional sheet of plywood), 6' | 1 board |
| Baseboard, 6" | 1 board |
| Box of 1 1/4" pocket hole screws (see tools list) | 1 each |
| Sets of 14" drawer slides | 10 each |
| Drawer pulls of choice | 10 each |
| Box of 1" brad nails | 1 each |
| Wood glue | 1 each |
Overall cost: $$$. Lumber prices vary by region, species, and season, so we give a band rather than a figure we would only be pretending to know.
Cut list
| Part | Qty | T × W × L |
|---|---|---|
| Skinny Drawer Sides | 4 | 3/4" × 3" × 14" |
| Skinny Drawer Front/Back | 4 | 3/4" × 3" × 27" |
| Skinny Drawer Faces | 2 | 3/4" × 4" × 29" |
| Drawer Sides | 16 | 3/4" × 5" × 14" |
| Drawer Front/Back | 16 | 3/4" × 5" × 27" |
| Drawer Faces | 8 | 3/4" × 6" × 29" |
| Drawer Bottoms | 10 | 1/4" × 14" × 28" |
| Dresser Bottom | 1 | 3/4" × 15" × 62" |
| Dresser Dividers | 2 | 3/4" × 15" × 30" |
| Dresser Sides | 2 | 3/4" × 15" × 30" |
| Dresser Top | 1 | 1" × 16" × 62" |
| Cubby Outsides | 2 | 3/4" × 15" × 46" |
| Cubby Top | 1 | 3/4" × 15" × 62" |
| Upper Cubby Bottom | 1 | 3/4" × 15" × 60" |
| Side Cubby Insides | 2 | 3/4" × 15" × 33" |
| Cubby Dividers | 7 | 3/4" × 13" × 15" |
| Front and Back Base | 2 | 1" × 3" × 62" |
| Base Middle Supports | 4 | 1" × 3" × 12" |
What to buy
Buy 28 boards at 8 ft.
1" × 16"
1 board
1" × 3"
2 boards
3/4" × 15"
5 boards
3/4" × 13"
2 boards
3/4" × 6"
3 boards
3/4" × 5"
8 boards
3/4" × 4"
1 board
3/4" × 3"
2 boards
1/4" × 14"
4 boards
Assumes 8 ft stock, a 1/8" saw kerf, and buying each part at its own width. Change the board size or kerf on the full board plan →
Instructions
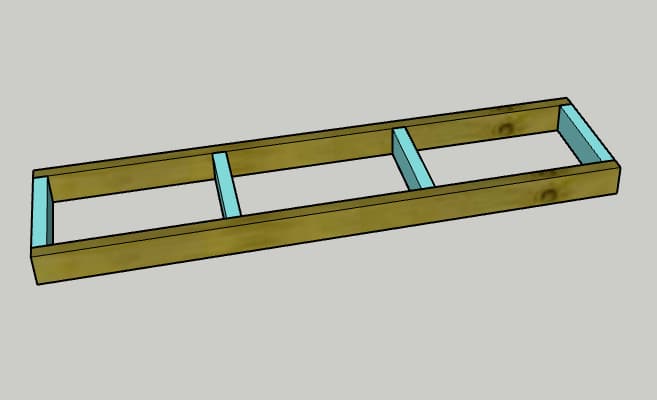
1Assemble 2x4 Base
- Drill two pocket holes on each 3 1/2" end of the Base Middle Supports. Using wood glue and pocket hole screws, attach two Base Middle Supports to the inside of the Front and Back Bases, all the way flush with the edges.
- Attach the remaining two Base Middle Supports the same way, spread evenly between the others.
2Assemble Dresser Body
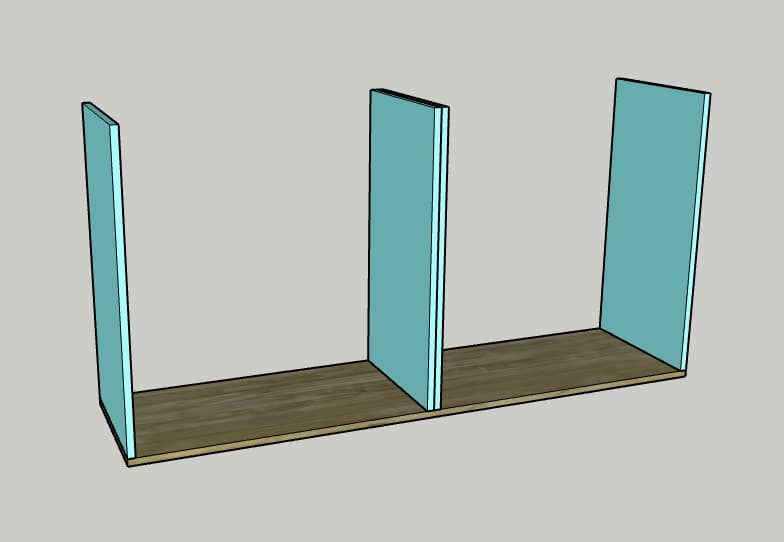
Drill two pocket holes on each 15 1/2" side of the Dresser Sides and Dresser Dividers. Using wood glue and nails, attach the Dresser Bottom to the 2x4 base created in step one. Using wood glue and pocket hole screws, attach the two Dresser Sides on the top of the Dresser Bottom, all the way flush with the edges. Use wood glue and clamps to attach the two Dresser Dividers together with the pocket holes facing out. Using wood glue and pocket hole screws, attach the Dresser Dividers to the Dresser Bottom at the center point.
3Attach Butcher Block Top
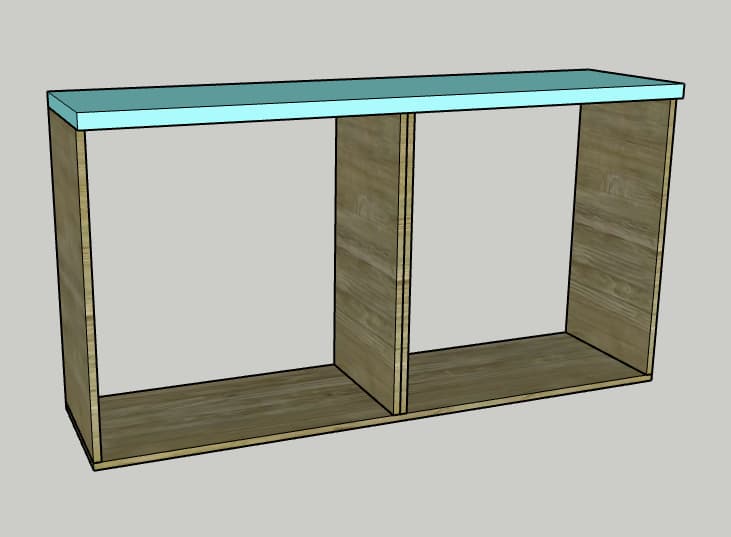
If you don't have access to a butcher block slab, glue two pieces of 3/4" plywood together with the dimensions listed in the cut list. Using wood glue and pocket hole screws, attach the Dresser Top to the base unit. Attach with pocket hole screws on the two Dresser Sides and two Dresser Dividers.
4Build Skinny Drawers
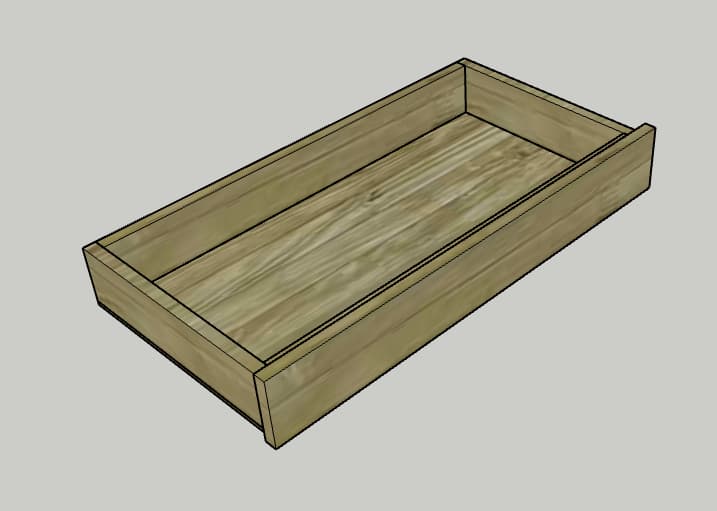
- Drill two pocket holes in each 3 1/2" end of the Skinny Drawer Fronts/Backs. Using wood glue and pocket hole screws, attach two Skinny Drawer Front/Back pieces to the inside of two Skinny Drawer Sides to form a rectangle. Using wood glue and 1" brad nails, attach a Drawer Bottom to the underside of the drawer box. Using wood glue and clamps, attach a Skinny Drawer Face to the front of the drawer box, flush along the bottom and centered on the drawer.
- Repeat for a second skinny drawer.
5Build Drawers
- Drill two pocket holes in each 5 1/2" end of the Drawer Fronts/Backs. Using wood glue and pocket hole screws, attach two Drawer Front/Back pieces to the inside of two Drawer Sides to form a rectangle. Using wood glue and 1" brad nails, attach a Drawer Bottom to the underside of the drawer box. Using wood glue and clamps, attach a Skinny Drawer Face to the front of the drawer box, flush along the bottom and centered on the drawer.
- Repeat for seven more drawers.
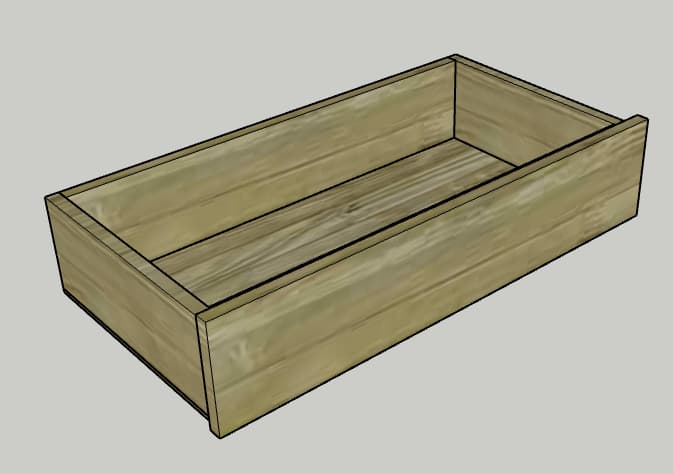
6Insert Drawers
Insert drawer slides into base of the dresser and align with drawer boxes. There should be 1/4" gap at the top and bottom of each side and between each drawer.
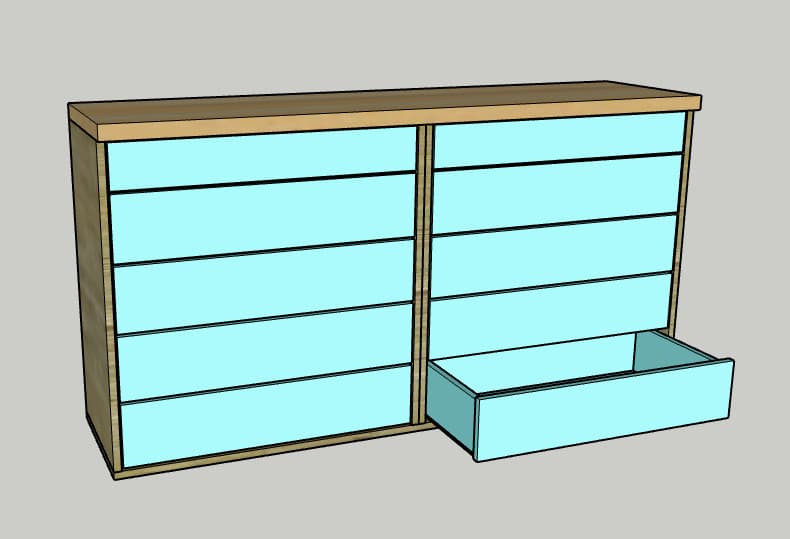
7Assemble Upper Cubbies
Drill two pocket holes into each 15 1/2" end of the Cubby Outsides, Upper Cubby Bottom, and three Cubby Dividers. Using wood glue and pocket hole screws, attach the Cubby Outsides to the Cubby Top flush on the edge. Using wood glue and pocket hole screws, attach two Cubby Dividers to the underside of the Cubby Top with 13" from each Cubby Outside. Using wood glue and pocket hole screws, attach the remaining Cubby Divider centered between the other two, with approximately 16 1/4" between each. Using wood glue and pocket hole screws, attach the Upper Cubby Bottom to the dividers and sides.
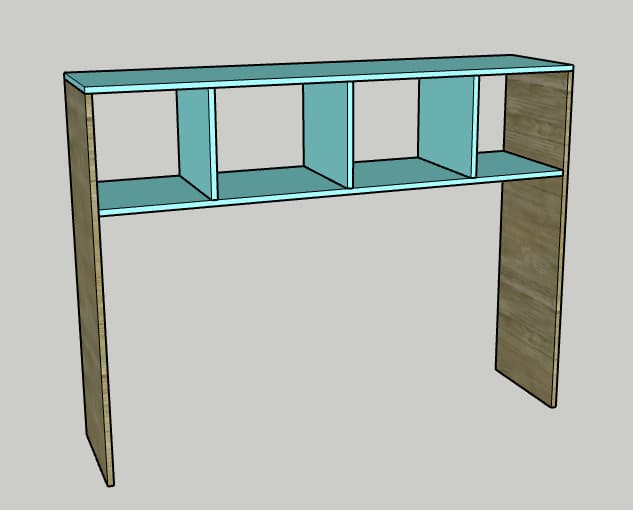
8Assemble Side Cubbies
- Drill two pocket holes into each 15 1/2" end of the Side Cubby Insides and four remaining Cubby Dividers. Using wood glue and pocket hole screws, attach the two Side Cubby Insides to the underside of the Upper Cubby Bottom, 13" from the Cubby Outsides and aligned directly underneath the Cubby Dividers above. Using wood glue and pocket hole screws, attach two Cubby Dividers to the Side Cubby Insides and Cubby Outsides with 13" in between.
- Repeat for the other side.
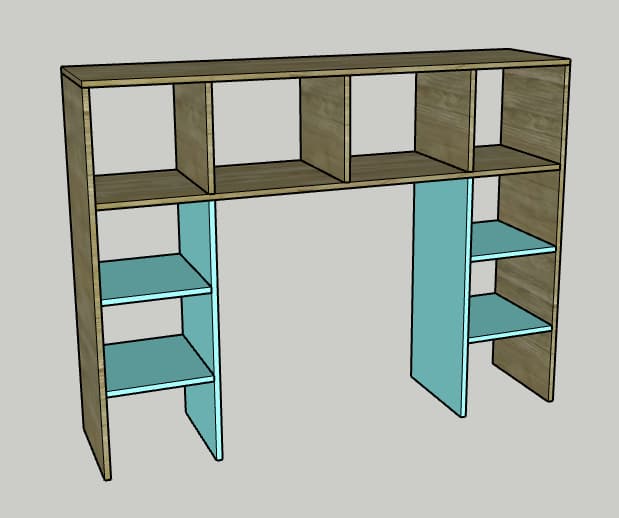
9Attach Cubbies to Base
Using wood glue and pocket hole screws, attach the cubby unit to the Dresser Top. It should be flush on the outside and back of the Dresser Top. Add a piece of baseboard molding across the bottom to cover the 2x4 base. Ensure the unit is attach to the studs in the wall for safety purposes, using brackets.
10Accessorize
Fill the drawers and cubbies to your heart's content. Add a mirror up to 28" in diameter between the cubbies.
11Enjoy!
Enjoy your handiwork and tag @CharlestonCrafted on Instagram with a picture!
Tags
- Built Ins and Cabinets
- Advanced
Reviews & builds
No reviews yet
Sign in to review this plan or share your build.
No reviews yet. Be the first to build this.