Notch
NotchBuilt-In Closet Organizer
Step-by-step build — 14 steps. Also available as a print sheet.
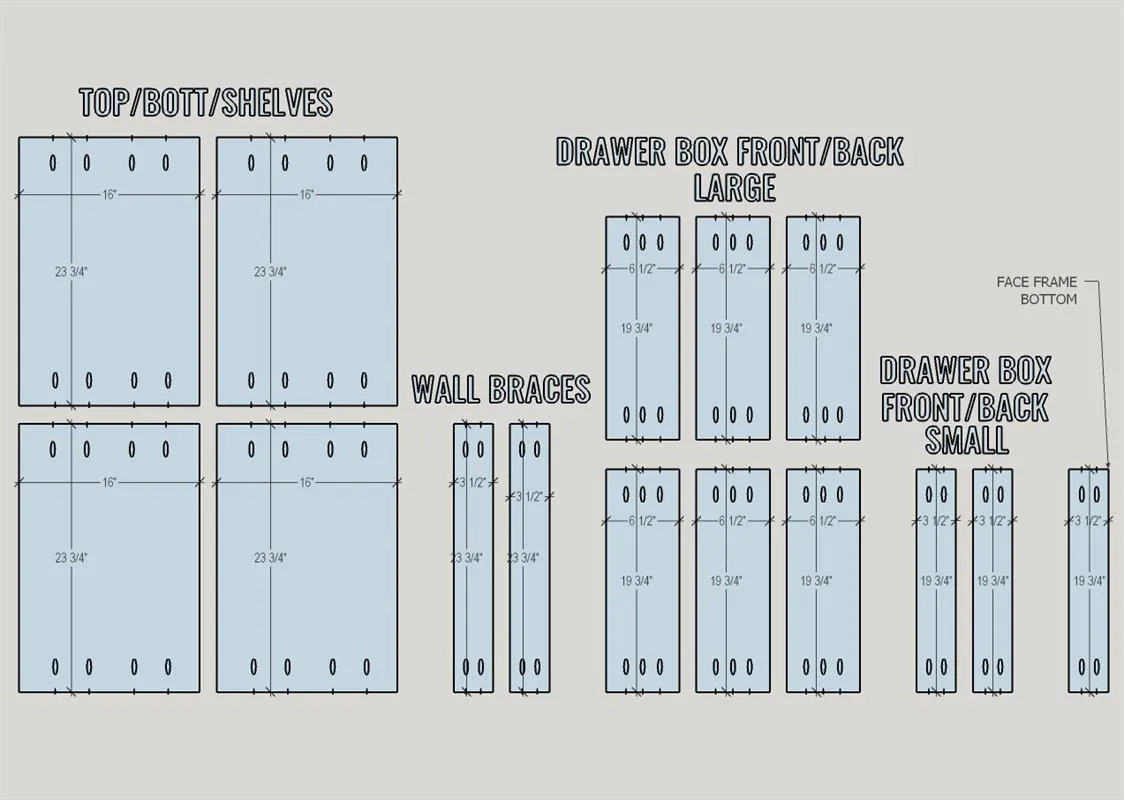
1Pocket Holes - Plywood Pieces
Drill pocket holes in the parts on the attached diagram in the approximate locations shown.
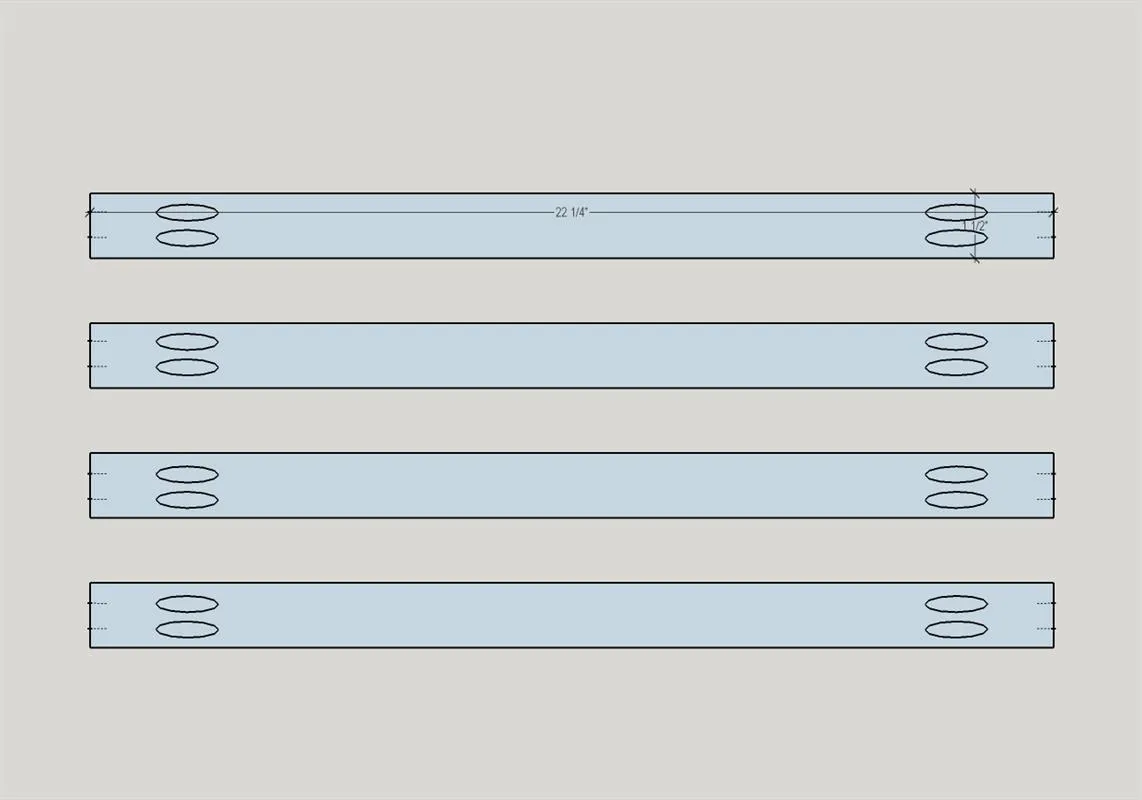
2Pocket Holes - Face Frame
Drill pocket holes in the parts on the attached diagram in the approximate locations shown.
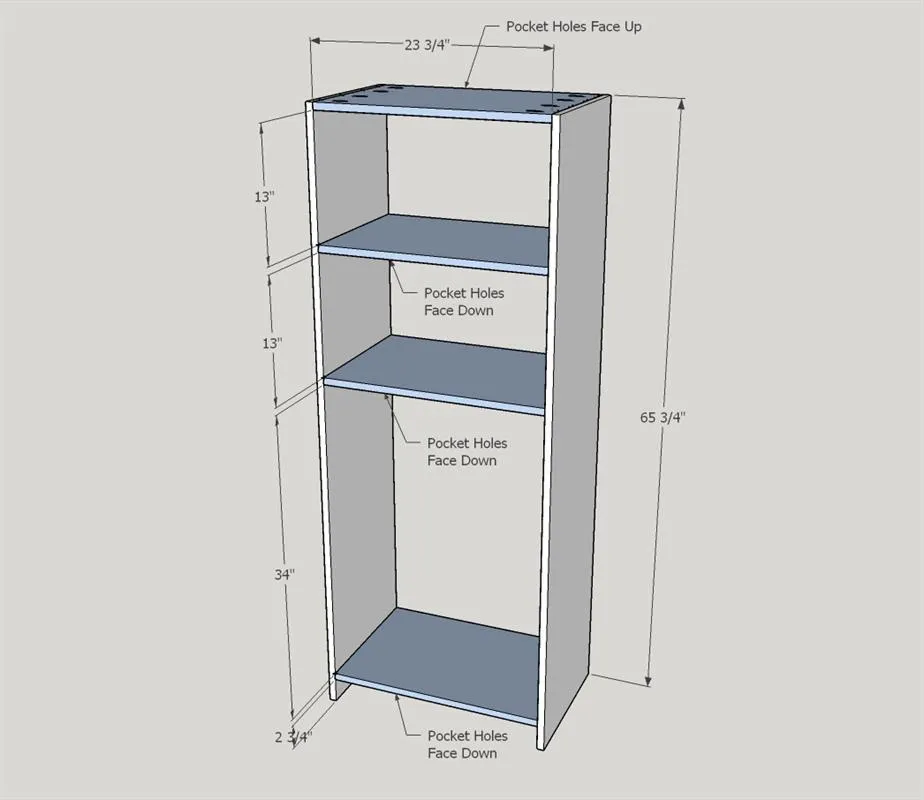
3Build the Box
Assemble the main box as per the diagram, paying attention to which way the pocket holes are to face. Use wood glue and 8 x 1 1/4" pocket hole screws on each board to secure all of the TOP/BOTT/SHELVES boards to the SIDES as shown.
4Add Back Wall Braces
- Add WALL BRACES at the back of the box. One at the top with 4 x 1 1/4" pocket hole screws and another under the second shelf with 4 x 1 1/4" pocket hole screws.
- Attach to the wall into at least one stud using 2 1/2" construction screws (you can do this step later if you are not ready to install into position yet).
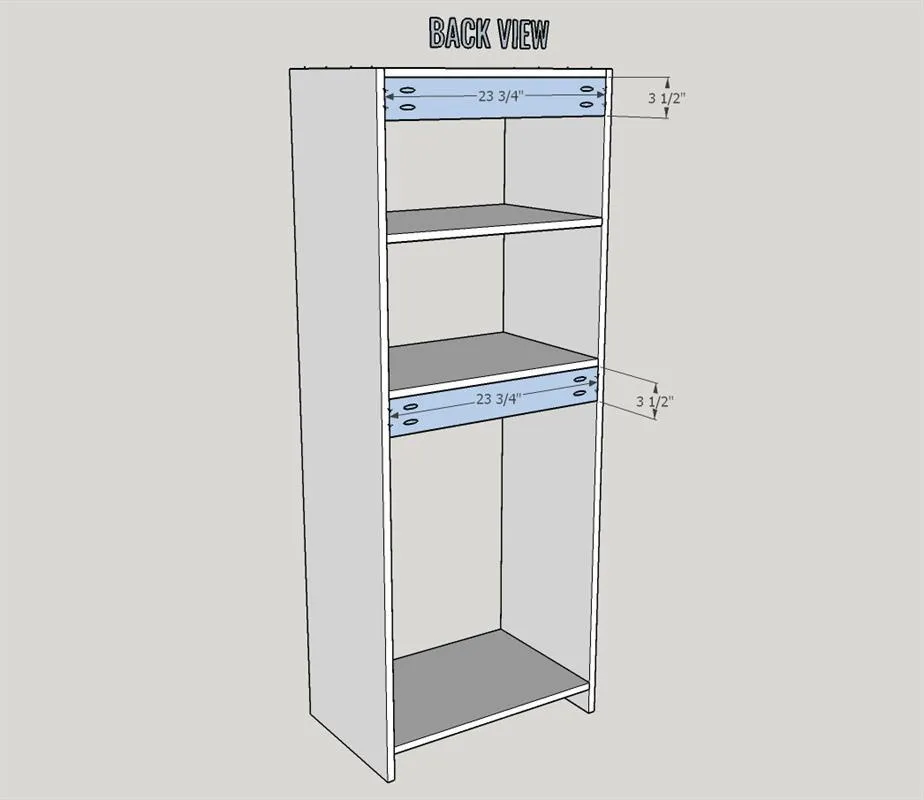
5Build Face Frame
- Build the face frame according to the diagram.
- Take special care to make sure that each of the openings is square. Secure each of the FACE FRAME HORIZONTAL pieces to the FACE FRAME VERTICAL pieces in the locations shown using wood glue and 1 1/4" pocket hole screws.
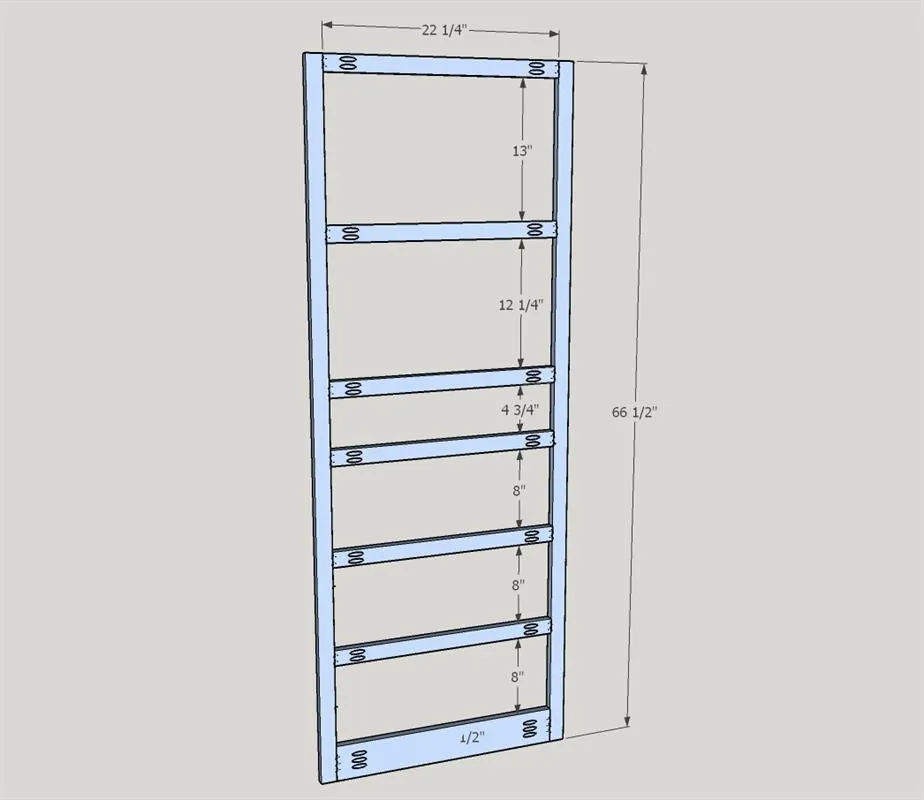
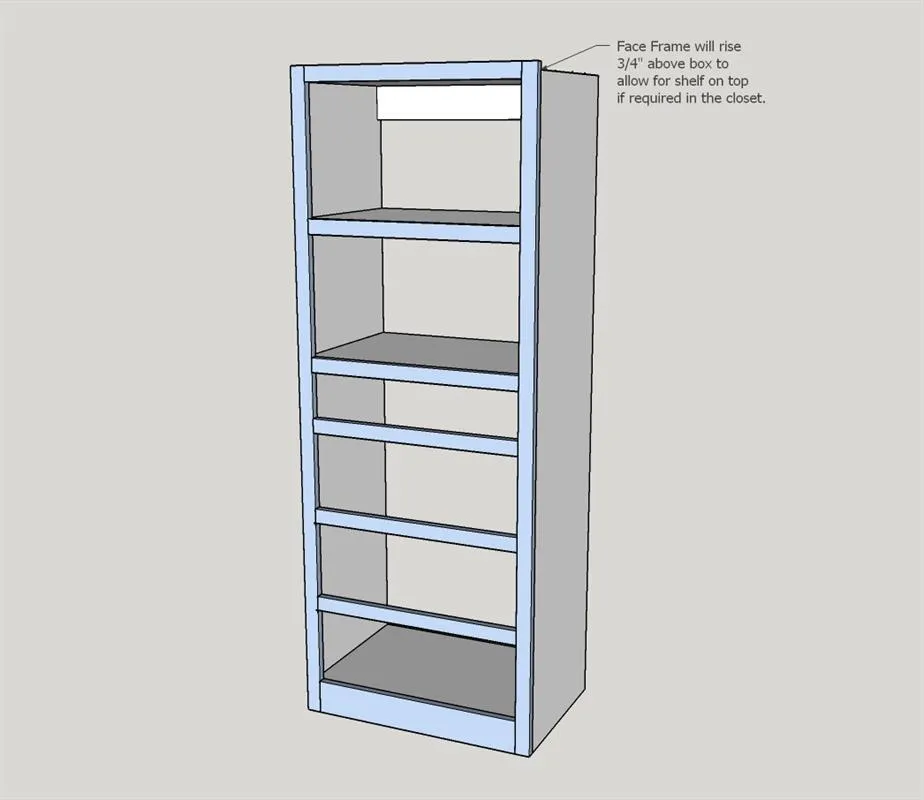
6Attach Face Frame to Box
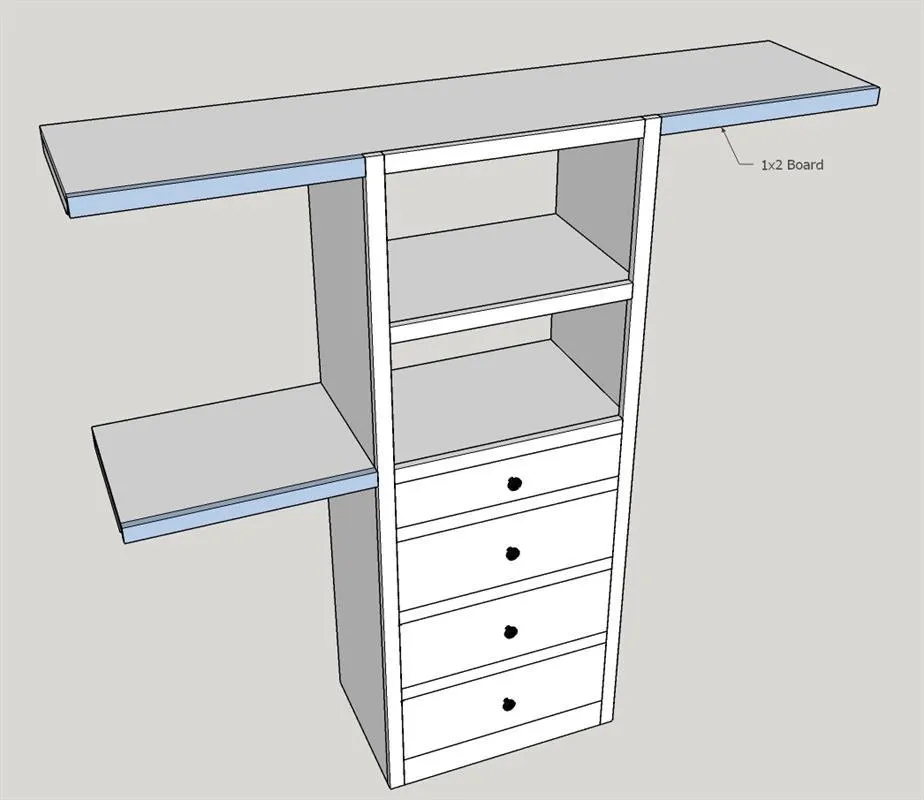
Attach the face frame to the box with wood glue and 1 1/4" brad nails. The face frame will exceed the top of the box by 3/4" to allow for a top shelf (if desired) at the top of the closet.
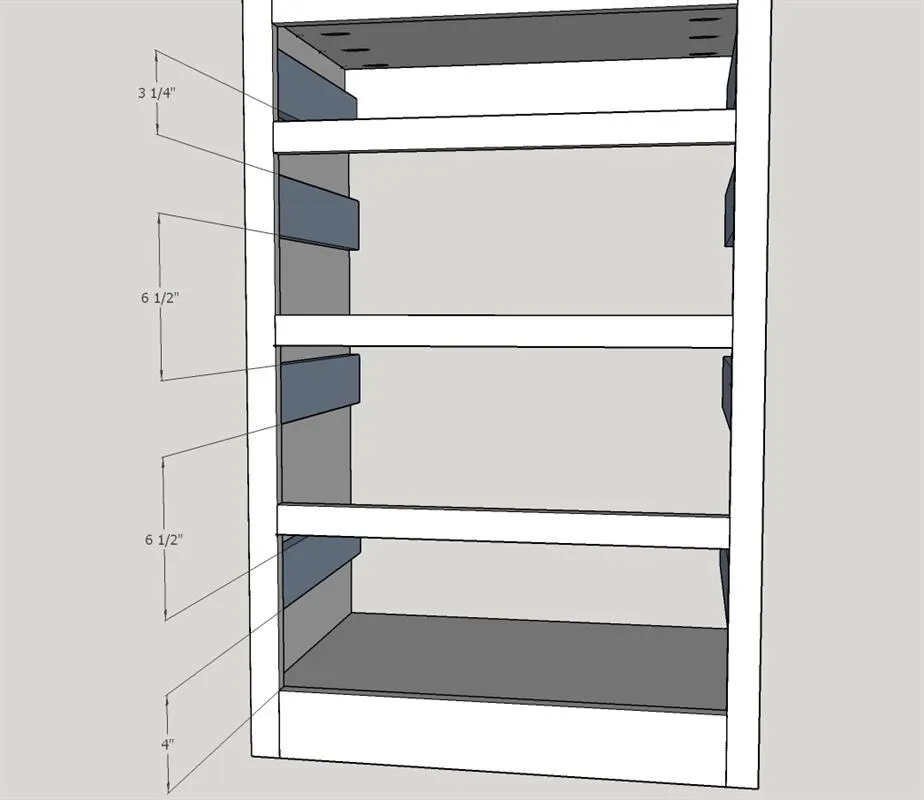
7Attach Drawer Slide Mounts
- Attach DRAWER SLIDE MOUNTS at the locations shown. They should be attached flush up to the inside of the face frame.
- Attach with wood glue and 1 1/4" brad nails.
8Build Drawers
- Build the small top drawer using the DRAWER BOX FRONT/BACK (SM) and DRAWER SIDES (SM).
- Attach using wood glue and 1 1/4" pocket hole screws.
- Build the 3 large boxes using the DRAWER BOX FRONT/BACK (LG) and DRAWER SIDES (LG).
- Attach using wood glue and 1 1/4" pocket hole screws.
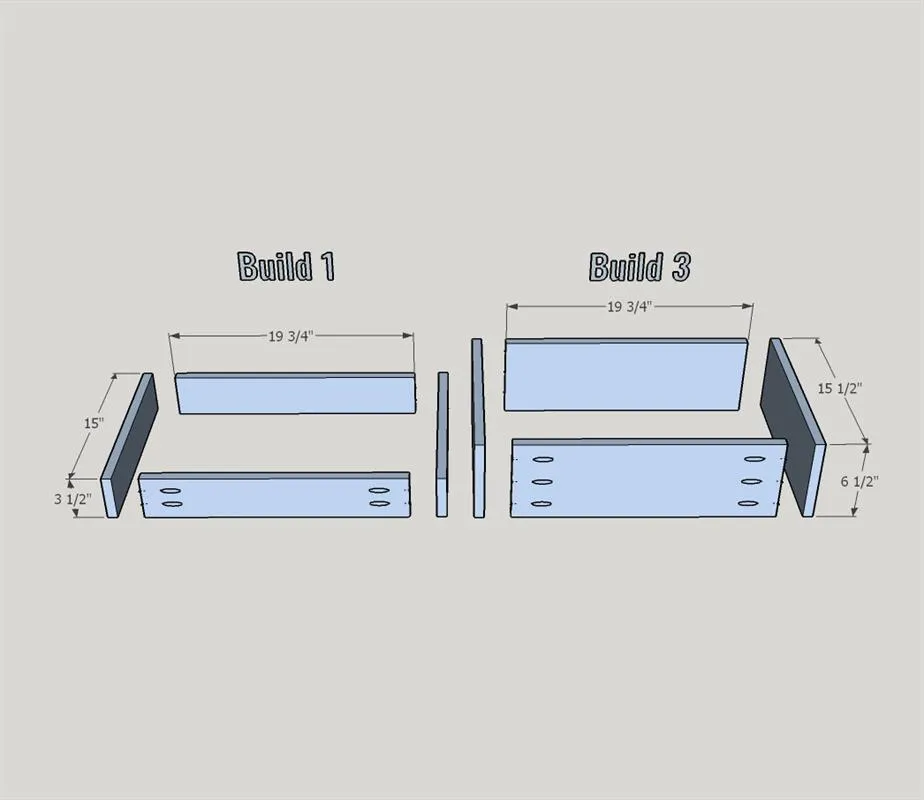
9Attach Drawer Bottoms
Attach DRAWER BOTTOMS (SM) & (LG) respectively using wood glue and 1 1/4" brad nails.
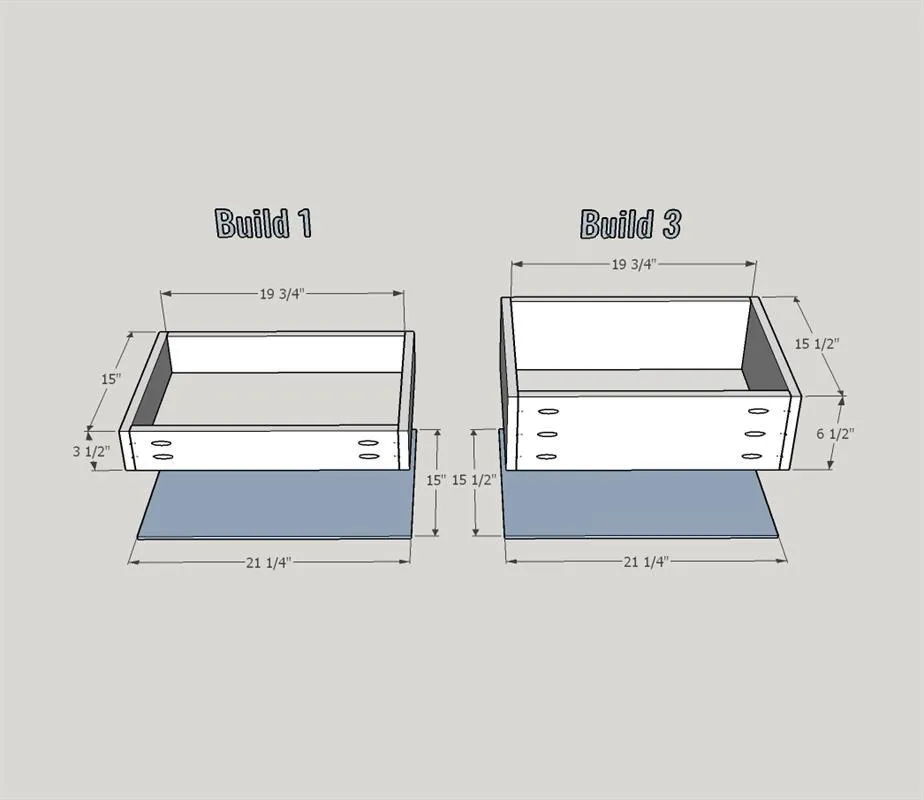
10Install Drawer Slides
Install ball-bearing drawer slides on each DRAWER SLIDE MOUNT and the corresponding drawer using a Kreg Drawer Slide Jig. Note, the 14" ball bearing slide will be on the top drawer.
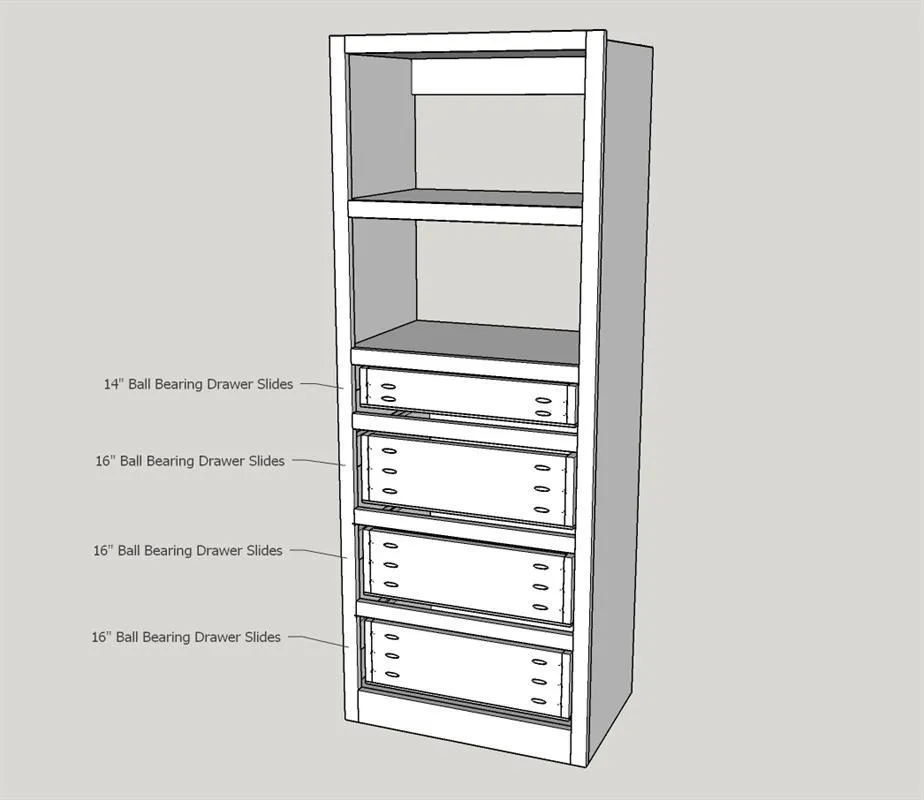
11Install Drawer Fronts
A trick I use to get accurate spacing around my drawers is to put double-sided tape on the drawer box and place it into position. Then open it and use 2 1 1/2" pocket hole screws to screw through the inside of the drawer and into the drawer front.
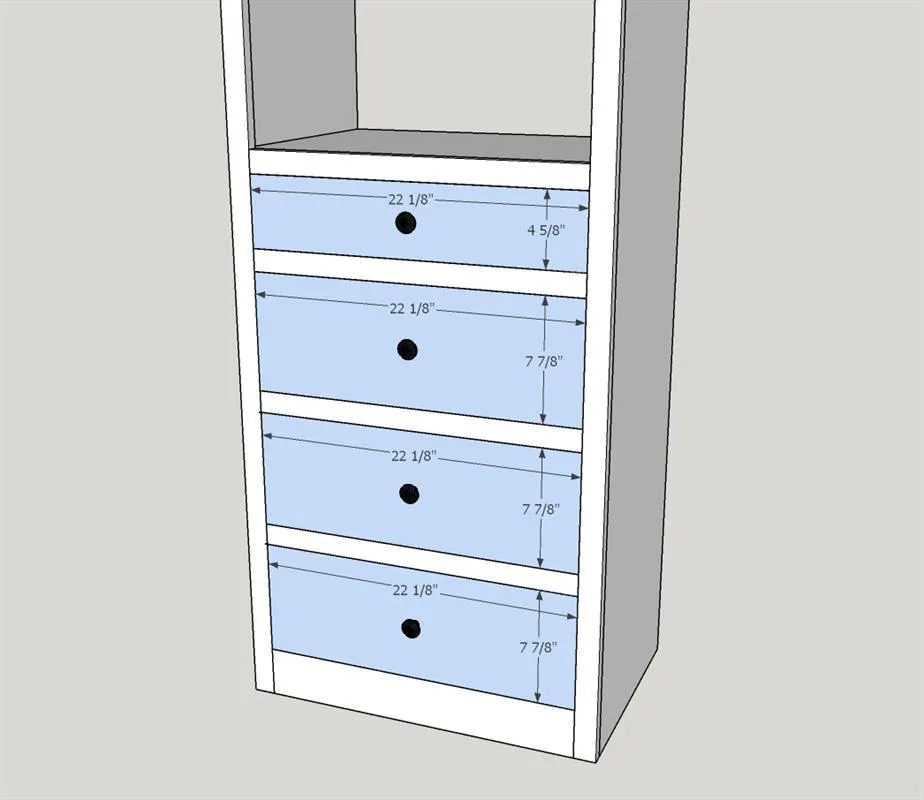
12Top & Mid Shelf Step #1 (Optional)
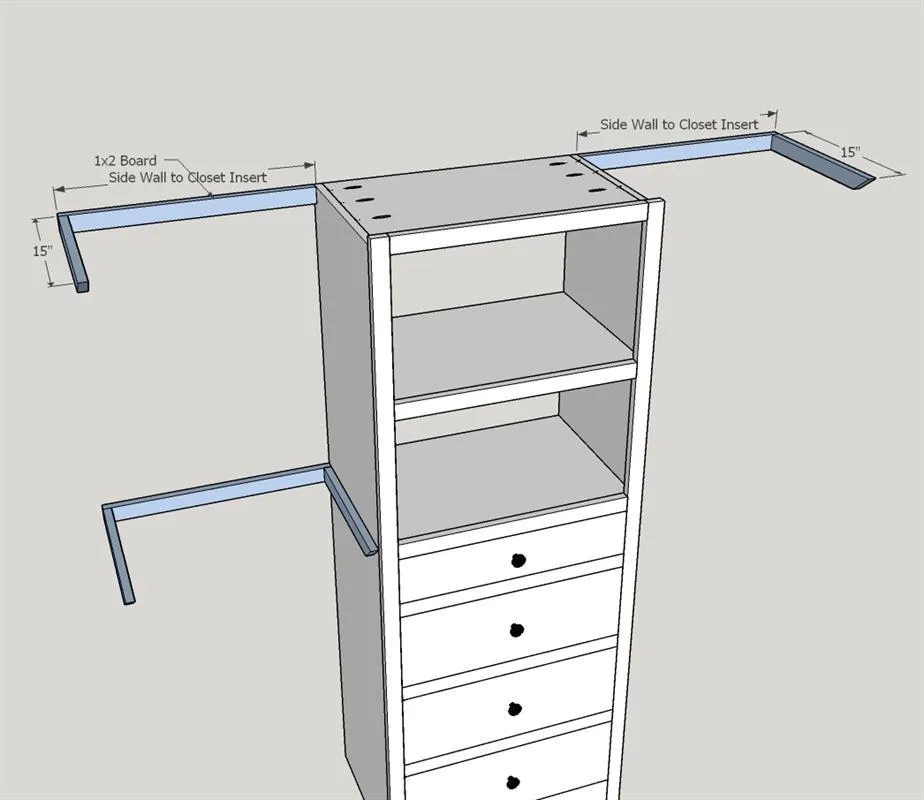
(NOTE: This lumber is not included in Parts/Cut List or Wood Product List as it is optional) To add a shelf on the top and middle, simply use 1x2 boards to create a ledge around the back and side of your closet. Start from the side of the unit to the side wall of the closet. Follow it around with a second piece that measures 15" and cut a 45° angle on the end.
13Top & Mid Shelf Step #2 (Optional)
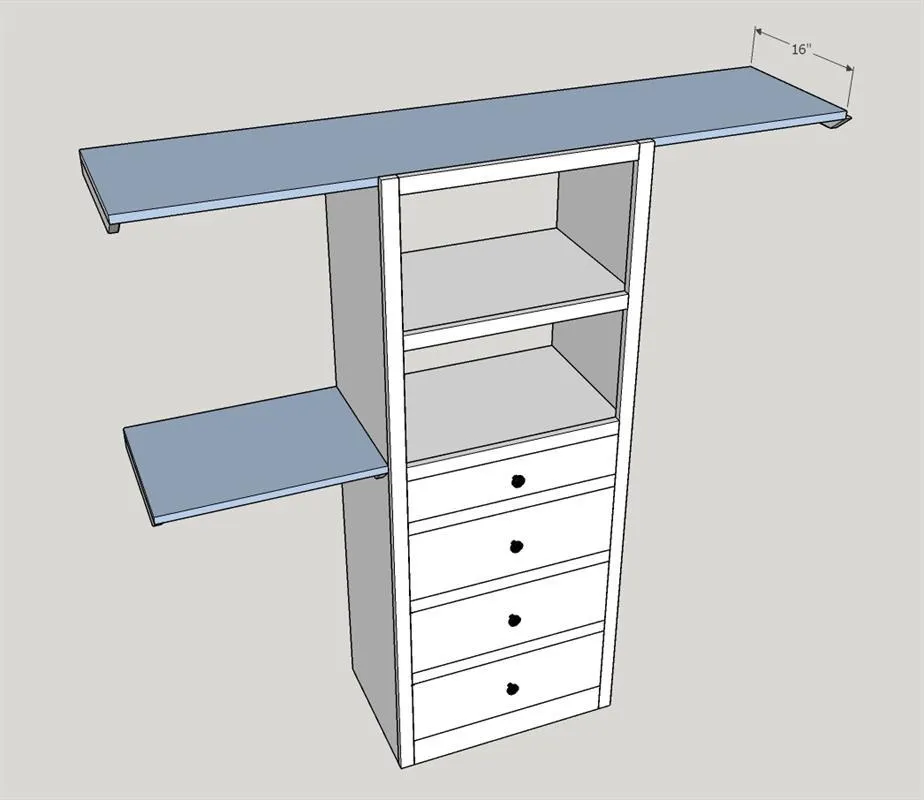
(NOTE: This lumber is not included in Parts/Cut List or Wood Product List as it is optional) Using 16" wide shelf board. Cut to size and insert on top of the wall supports. Secure into the wall supports with 1 1/4" brad nails in several locations.
14Top & Mid Shelf Step #3 (Optional)
(NOTE: This lumber is not included in Parts/Cut List or Wood Product List as it is optional) Attach trim to the edge of shelving using 1x2" boards using wood glue and 1 1/4" brad nails.