 Notch
- Difficulty
- Advanced
- Time
- 6.8–13 hours
- Cost
- $$$$
About this build
Build your own built in bookshelf for a fraction of the cost! Organize your favorite books, family games, and decor. Or hide all your kids’ toys in the bottom shelves! Customize it to fit your space and needs.
Tools
Essential
- Brad Nailer
- Circular Saw
- Drill / Driver
- Miter Saw
- Pocket Hole Jig
- Random Orbit Sander
- Router
- Table Saw
Optional / nice to have
- Bar / Pipe Clamps
- Tape Measure
Materials
| Item | Qty |
|---|---|
| Board, 1x12 96" | 10 board |
| Board, 1x2 96" | 4 board |
| Board, 1x3 96" | 7 board |
| Plywood, 1/4" Thick Full Sheet | 2 board |
| Overlay Hinges | 12 each |
| Cabinet Handles | 6 each |
| Shelf Pins | 18 each |
Overall cost: $$$$. Lumber prices vary by region, species, and season, so we give a band rather than a figure we would only be pretending to know.
Cut list
| Part | Qty | T × W × L |
|---|---|---|
| Vertical Outer Carcass | 2 | 1" × 12" × 94" |
| Top Shelf Dividers | 2 | 1" × 12" × 69" |
| Top | 1 | 1" × 12" × 72" |
| Bottom Carcass | 1 | 1" × 12" × 70" |
| Bottom Shelf | 1 | 1" × 12" × 70" |
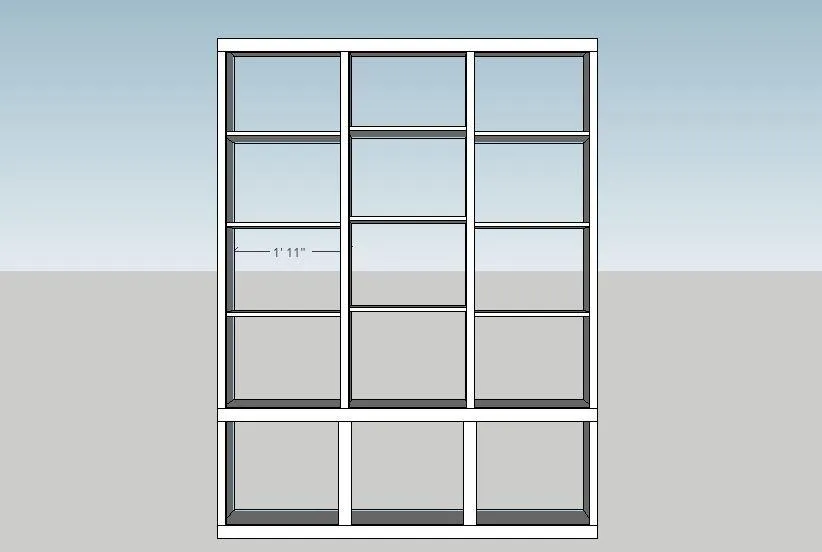
| Shelves | 9 | 1" × 12" × 22" |
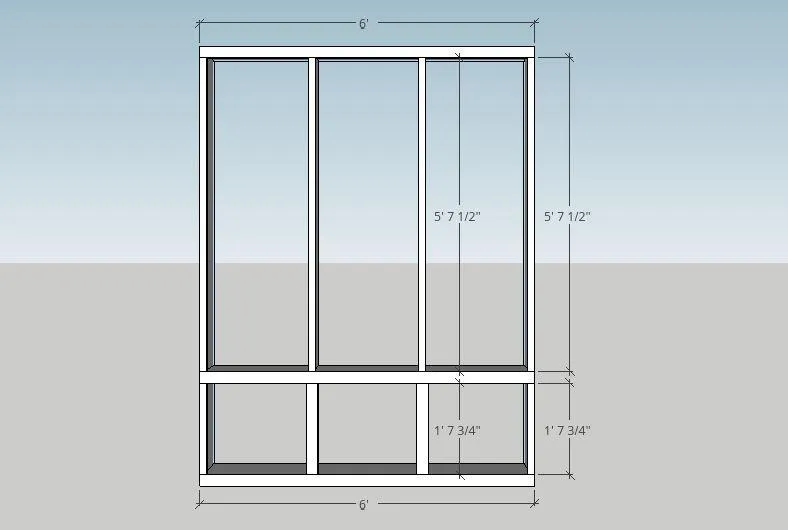
| Top Vertical Face Frame | 4 | 1" × 2" × 67" |
| Bottom Vertical Face Frame | 2 | 1" × 2" × 19" |
| Bottom Vertical Face Frame | 2 | 1" × 3" × 19" |
| Horizontal Face Frame | 3 | 1" × 3" × 72" |
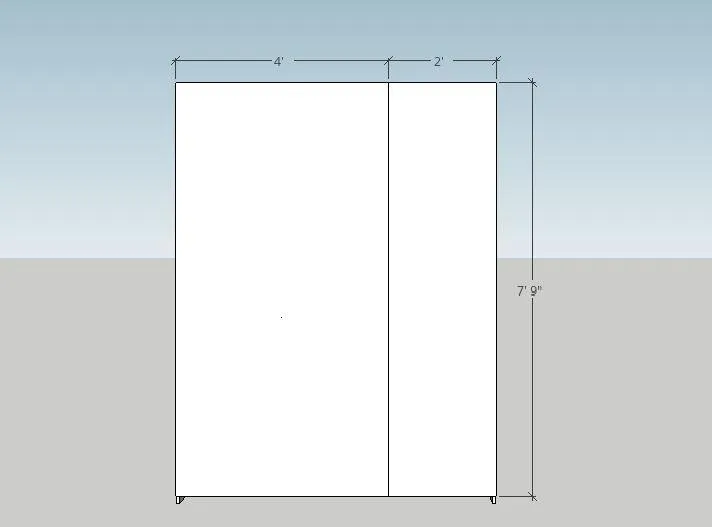
| Back | 1 | 1/4" × 48" × 93" |
| Back | 1 | 1/4" × 24" × 93" |
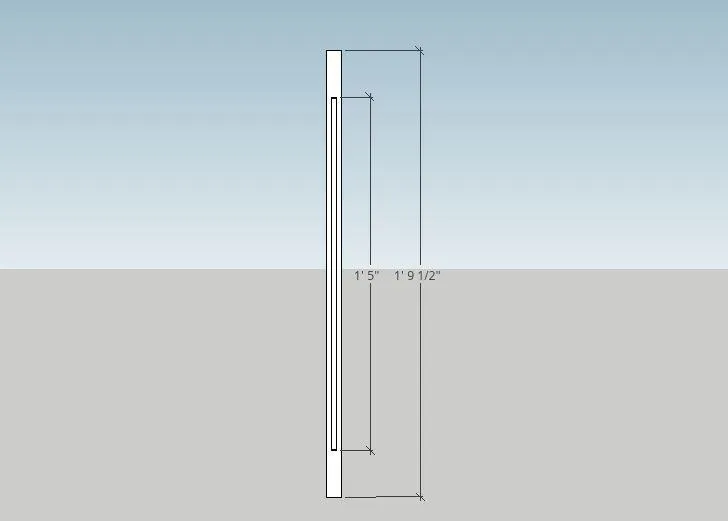
| Cabinet Door Slats | 12 | 1" × 3" × 21" |
| Cabinet Door Rails | 12 | 1" × 3" × 5" |
| Cabinet Door Panel | 6 | 1/4" × 6" × 17" |
What to buy
Buy 23 boards at 8 ft.
1" × 12"
8 boards
1" × 3"
7 boards
1" × 2"
4 boards
1/4" × 48"
1 board
1/4" × 24"
1 board
1/4" × 6"
2 boards
Assumes 8 ft stock, a 1/8" saw kerf, and buying each part at its own width. Change the board size or kerf on the full board plan →
Instructions
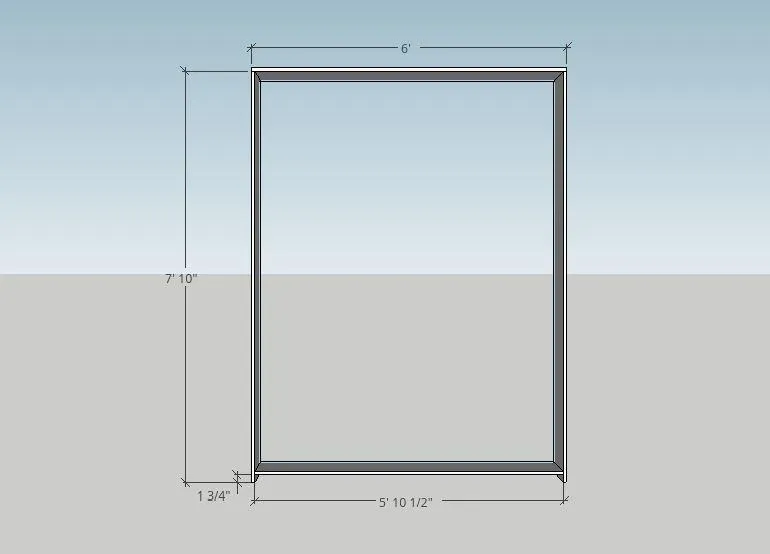
1Carcass
- Start by building the outer carcass of the bookshelf. Use wood glue and 1 1/4" pocket hole screws to attach the bottom shelf to the vertical side 1 x 12s.
- Place pocket holes along the bottom of the shelf to hide them.
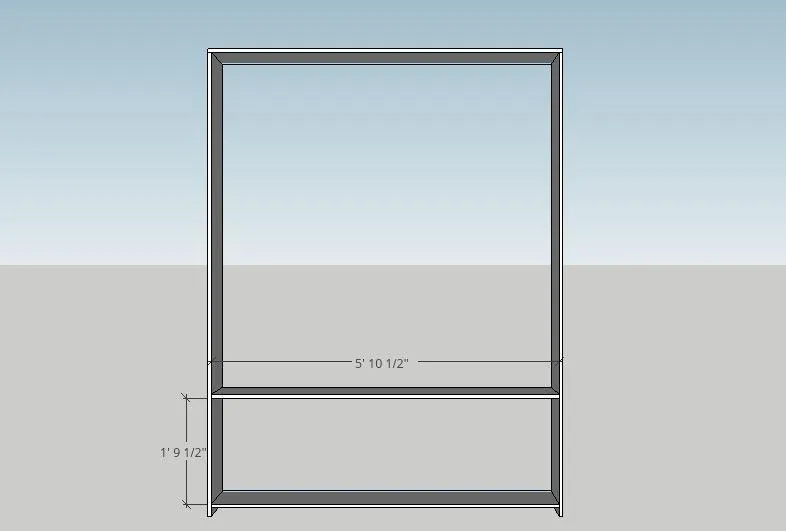
2Bottom Shelf
Position the bottom shelf according to the dimensions shown and attach with wood glue and 1 1/4" pocket hole screws.
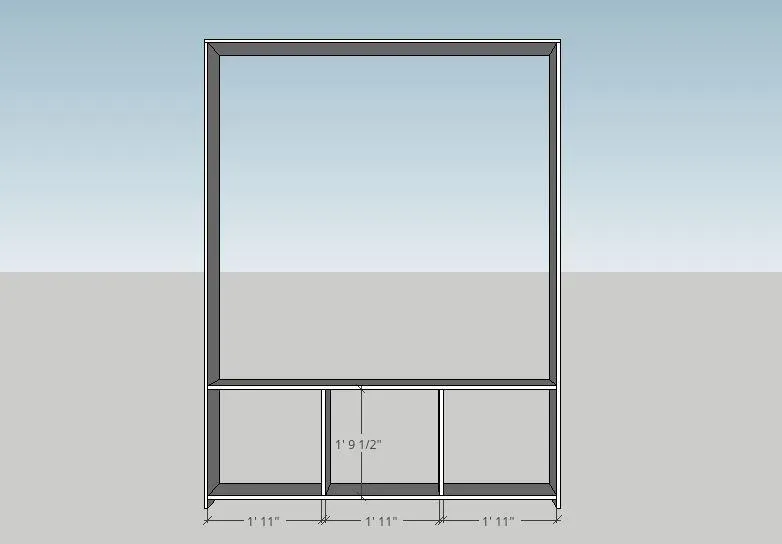
3Cabinet Dividers
- Insert cabinet dividers between the bottom shelf and base of the bookshelf as shown.
- Attach with 1 1/4" pocket hole screws and wood glue on the top and bottom of each divider.
- Place 2 pocket holes on the top and 2 pocket holes on the bottom to ensure a solid joint.
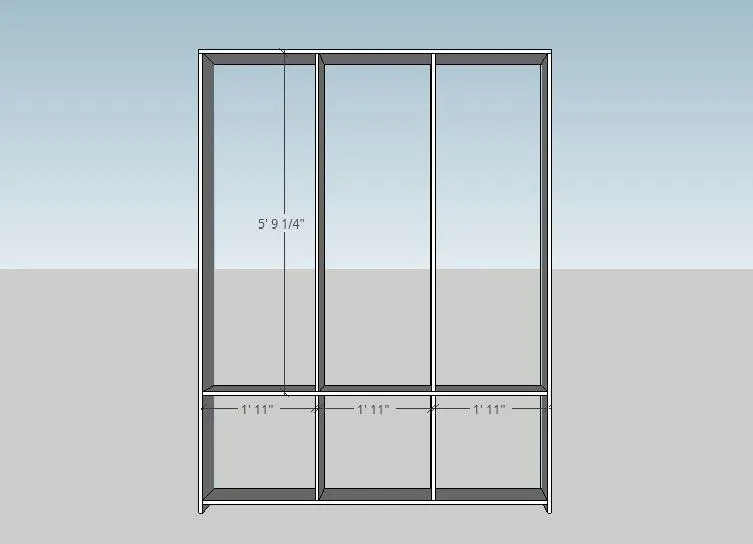
4Top Dividers
- Position the top dividers as shown and attach with 1 1/4" pocket hole screws and wood glue. Again, use 2 pocket holes on the top and 2 on the bottom of each divider for a strong joint.
- Once you've added all the dividers, drill shelf pins along the height of each divider where you want shelves. I used a Kreg Shelf Pin jig and drilled three sections of shelf pin holes along each divider for a total of 9 shelves. You can choose to attach the shelves with pocket holes, but shelf pins allow you to move the shelves around.
5Face Frame
Attach the face frame to the bookshelf using wood glue and 1 1/2" finish nails. I built the face frame before attaching it to the bookshelf to make sure it's a solid frame. To make sure everything lines up, assemble the bookshelf, measure the bookshelf, and then assemble the face frame according to those measurements. This takes care of any discrepancies in measurements. OR! I assembled the bookshelf in our living room. Since the shelf was lying on the floor for assembly anyway, I arranged the face frame pieces on top of it and put them together there. If you assemble the face frame prior to putting it on the carcass, attach each piece with 1 1/4" pocket hole screws (in the back) and wood glue.
6Back
Attach the back to the bookcase with 1" finish nails. Since the bookshelf is so large, use 2 sections of 1/4" plywood.
7Shelves
Insert the shelves into place.
8Cabinet Doors (a
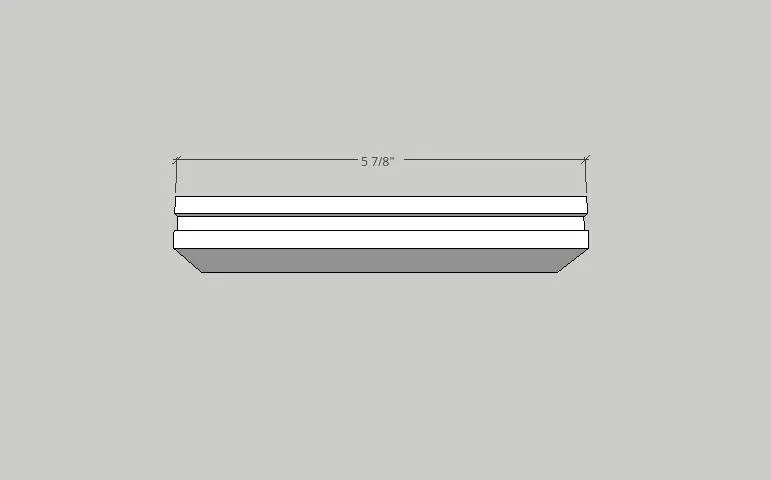
Cut a 1/4" groove centered along the length of each cabinet door slat. Start the groove 2 1/4" from the top and end it 2 1/4" from the bottom, as shown.
9Cabinet Doors (b
Cut a 1/4" groove along the full length of each cabinet door rail.
10Cabinet Doors (c
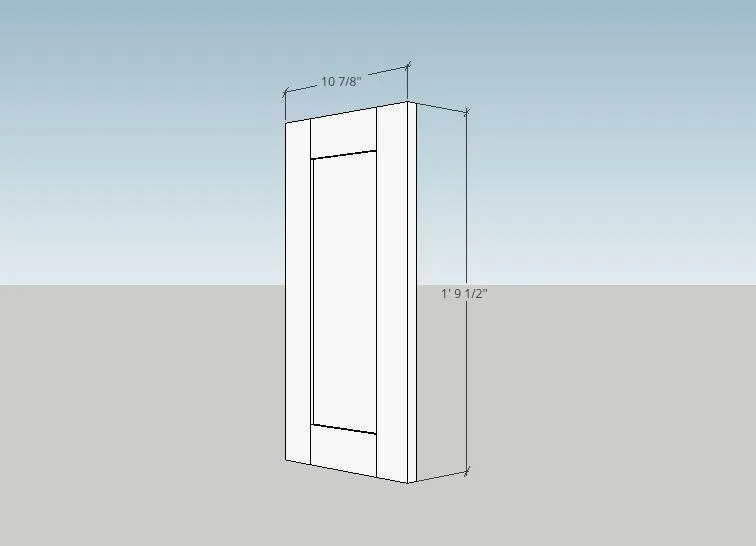
- Insert the cabinet door panel into place. Use wood glue inside the grooves of the slats and rails to hold the panel.
- Attach the rails to the slats with 1 1/4" pocket hole screws and wood glue.
- Place pocket holes on the back of the door to hide them.
11Final
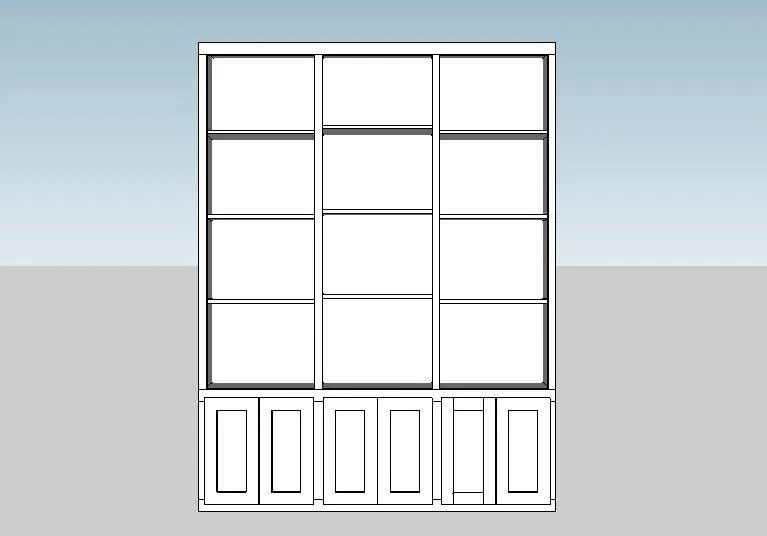
Attach the cabinet doors to the bookshelf. I used overlay hinges from Menards and spaced the doors with about a 1/8" gap. Spacing and placement depends on your hinges.
12Crown Molding
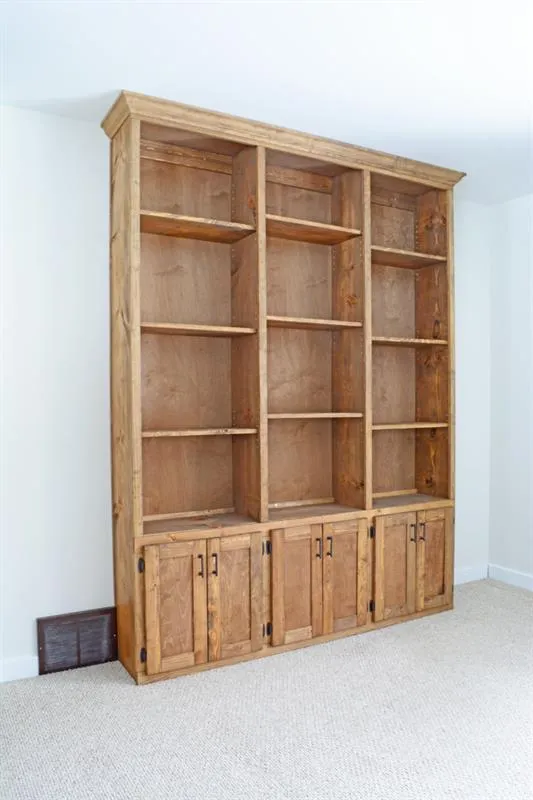
If desired, add crown molding along the top of the bookshelf to finish it off. Measure and cut the crown once the bookshelf is installed to ensure accurate measurements.
Tags
- Book
- Advanced
Reviews & builds
No reviews yet
Sign in to review this plan or share your build.
No reviews yet. Be the first to build this.