Notch
NotchBookcase with toy storage and animal zoo
Step-by-step build — 13 steps. Also available as a print sheet.
1Drill pocket holes and cut bevels
Drill the following pocket holes on the following pieces: Bookcase (2) Sides- Drill 3 pocket holes on one end (3) Lower Shelves- Drill 3 pocket holes on each end (2) Cube Dividers- Drill 2 pocket holes on 2 opposing sides (1) Book Divider- Drill 2 pocket holes on each 14" side (2) Vertical Dividers- Drill 3 pocket holes on each end (2) Center Shelves- Drill 2 pocket holes on 2 opposing sides (1) Base Front Trim- Cut opposing 45 degree bevels on short ends (2) Base Side Trim- Cut a 45 degree bevel on one short end of each Animal Zoo (4) Posts- Drill 2 pocket holes on each short end (4) Top/Bottom Sides- Drill 2 pocket holes on each short end (2) Middle Front/Back- Drill 2 pocket holes on each short end (2) Middle Sides- Drill 2 pocket holes on each short end
2Build frame
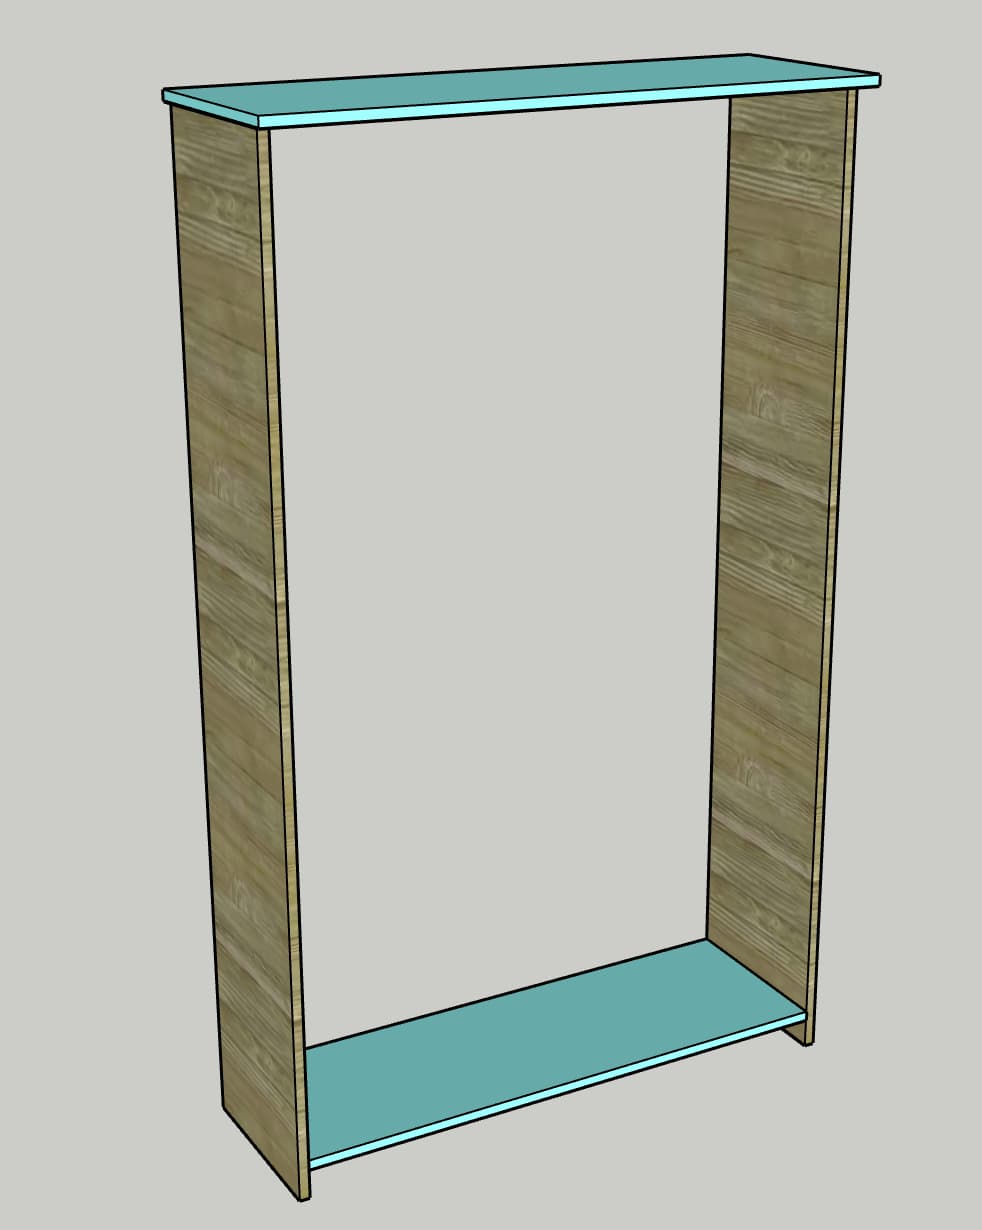
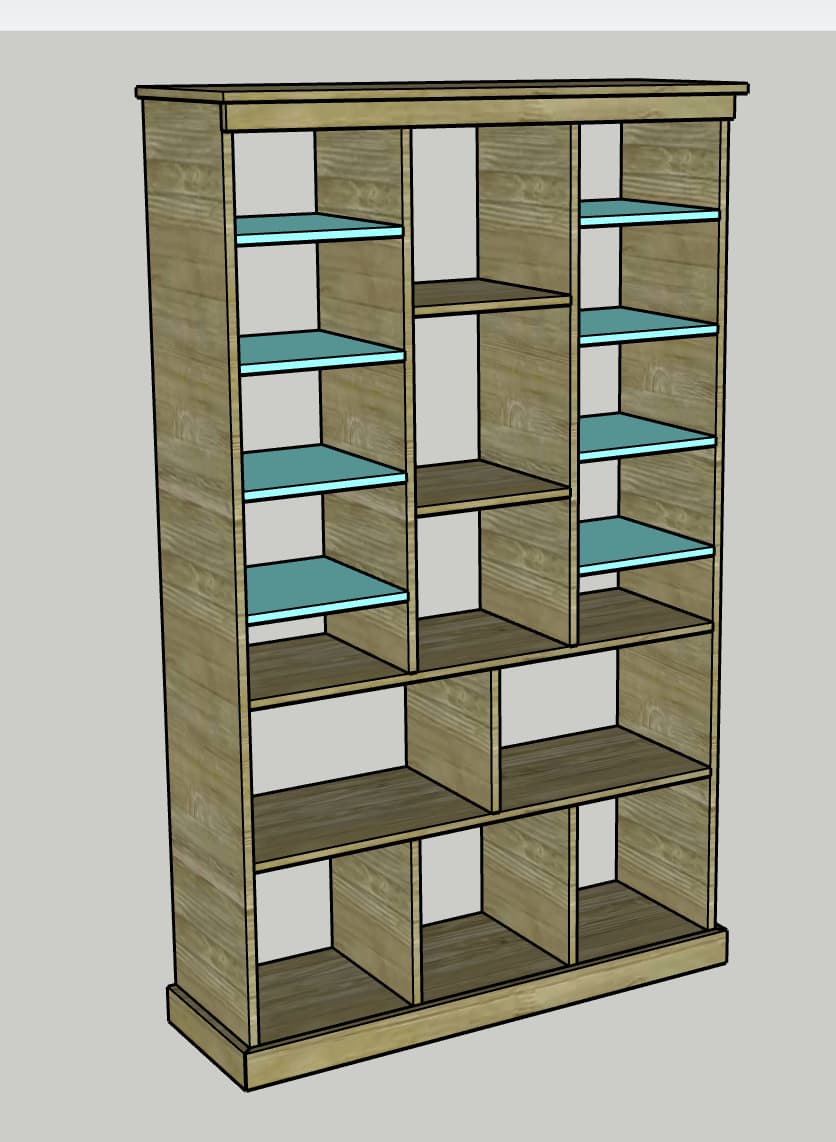
Using wood glue and pocket hole screws, attach a Lower Shelf between the two Sides so that the top of the Lower Shelf is 3" up from the bottom. Using wood glue and pocket hole screws, attach the Sides to the Top. The Top should be flush along the back with a 1/2" overhang on each side and a 1 1/2" overhang on the front.
3Add lower shelves
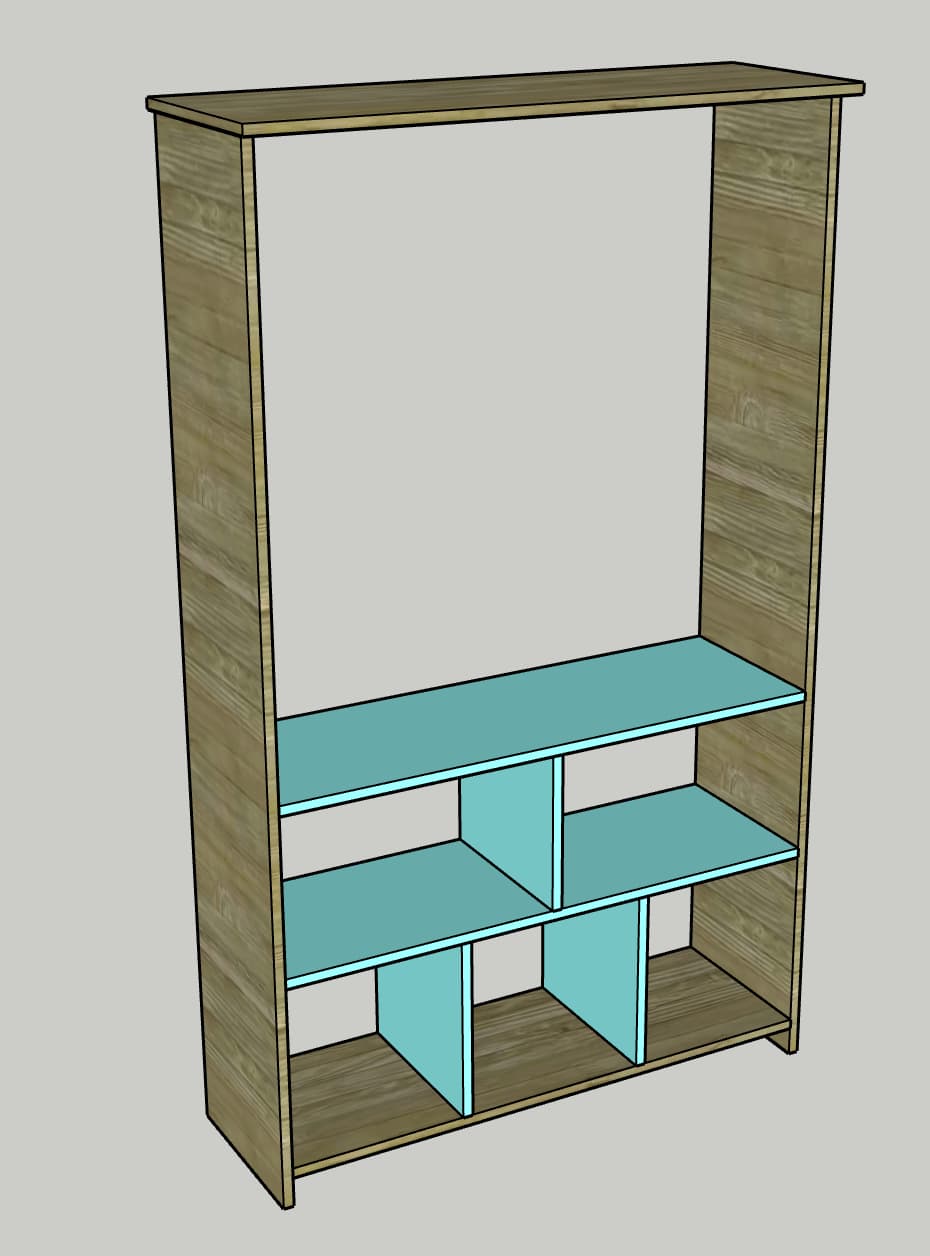
- Using wood glue and pocket hole screws, attach a Lower Shelf 14" up from the bottom one, using the Cube Dividers as spacers.
- Then, using wood glue and pocket hole screws, attach the Cube Dividers between the two shelves 13 1/2" from the Sides. Using wood glue and pocket hole screws, attach the final Lower Shelf 12" above the second one, using the Book Divider as a spacer.
- Then, Using wood glue and pocket hole screws, attach the Book Divider directly centered between the Sides.
4Add center dividers
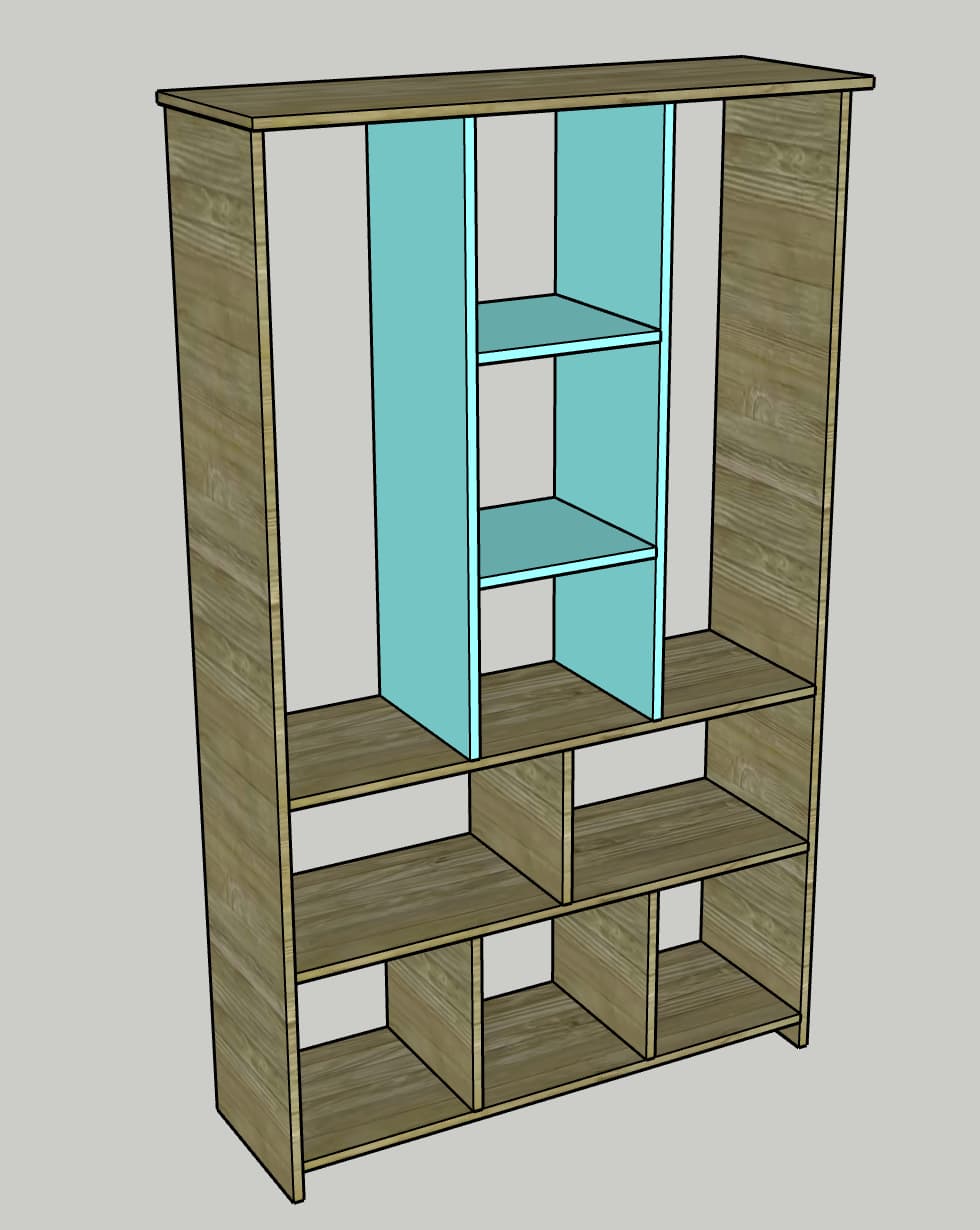
Using wood glue and pocket hole screws, attach the Center Shelves between the Vertical Dividers so their tops are 13" and 28" from the bottom of the Vertical Dividers. Next, take this unit and attach it between the Top and the Lower Shelf and 13 1/2" from each Side, using wood glue and pocket hole screws.
5Attach trim
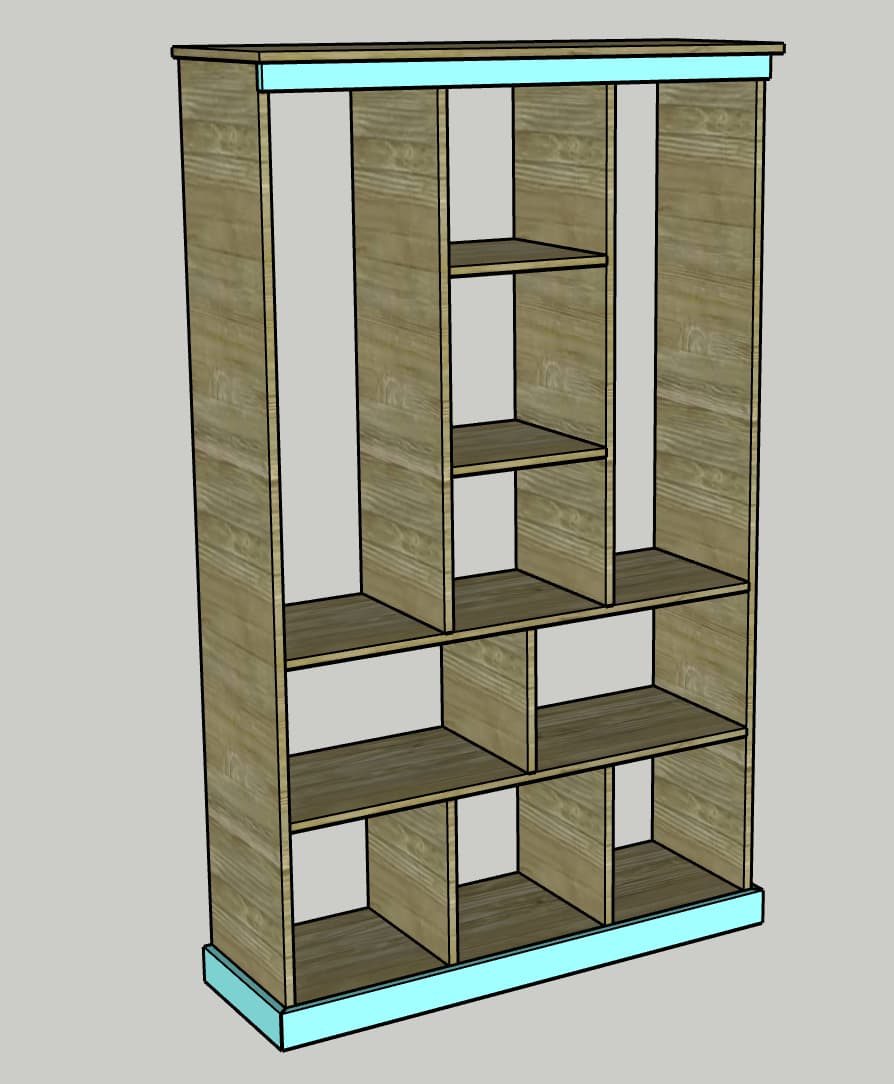
Using wood glue and nails, attach the Top Trim under the lip of the Top. Using wood glue and nails, attach the Lower Front Trim flush along the bottom and the top edge of the lowest Lower Shelf. Using wood glue and nails, attach the two Lower Side Trim pieces to the outside edge of the Sides, aligned with the Lower Front Trim.
6Drill shelf pin holes
Using a Kreg Shelf Pin jig, drill shelf pin holes up and down both sides of the two long sections of the bookcase, following instructions on the jig.
7Drill animal zoo holes
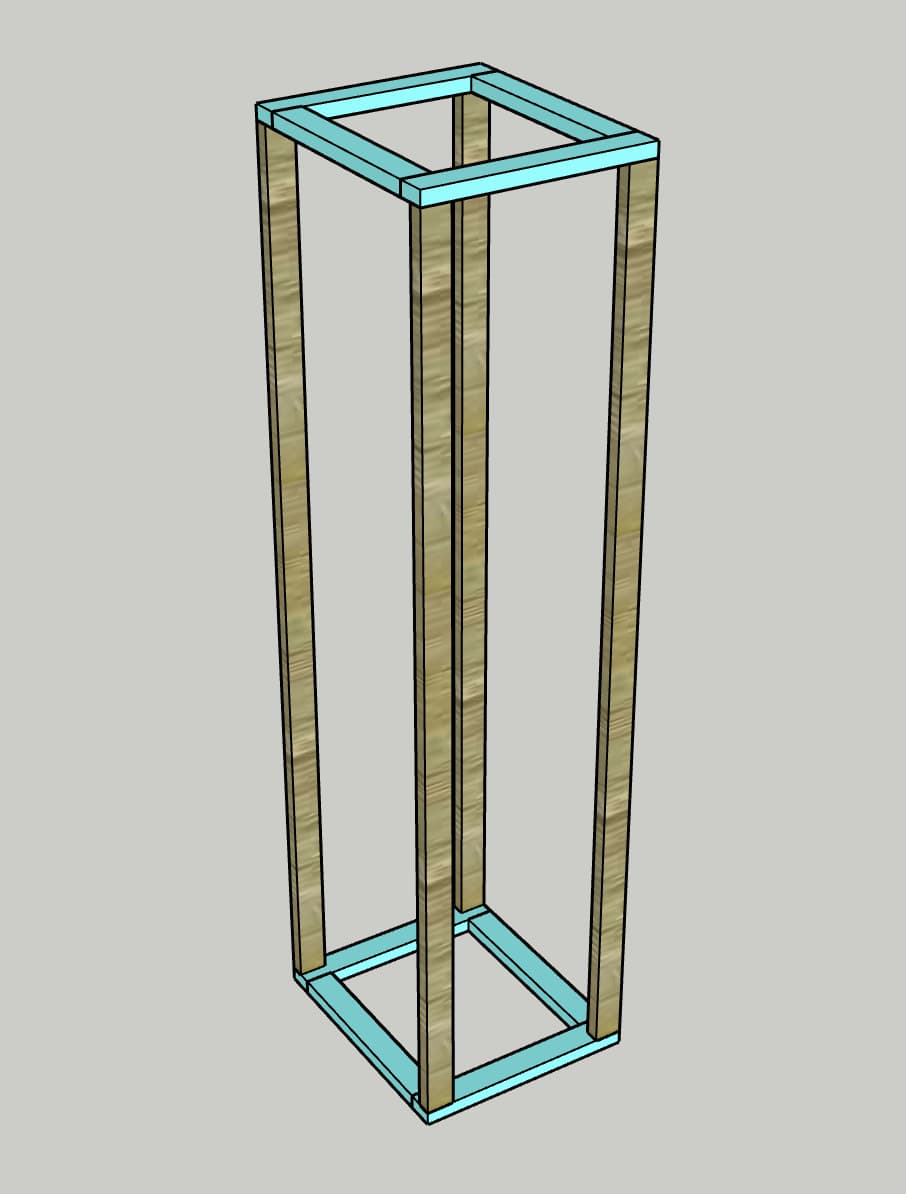
Align the Top/Bottom Front and Back with the Middle Front and Back and align the Top/Bottom Sides with the Middle Sides. Using a 3/8" drill bit, drill four evenly spaced holes across the center of the boards.
8Assemble animal zoo frame
Using wood glue and pocket hole screws, attach the Top/Bottom Sides to the Top/Bottom Front/Back and repeat for a second square. Using wood glue and pocket hole screws, attach the four Posts in the corners of the bottom square, the attach the top square on the other end the same way. Finally, use wood glue and nails to attach the Spacer flush with the top on the side with no holes drilled.
9Attach center supports
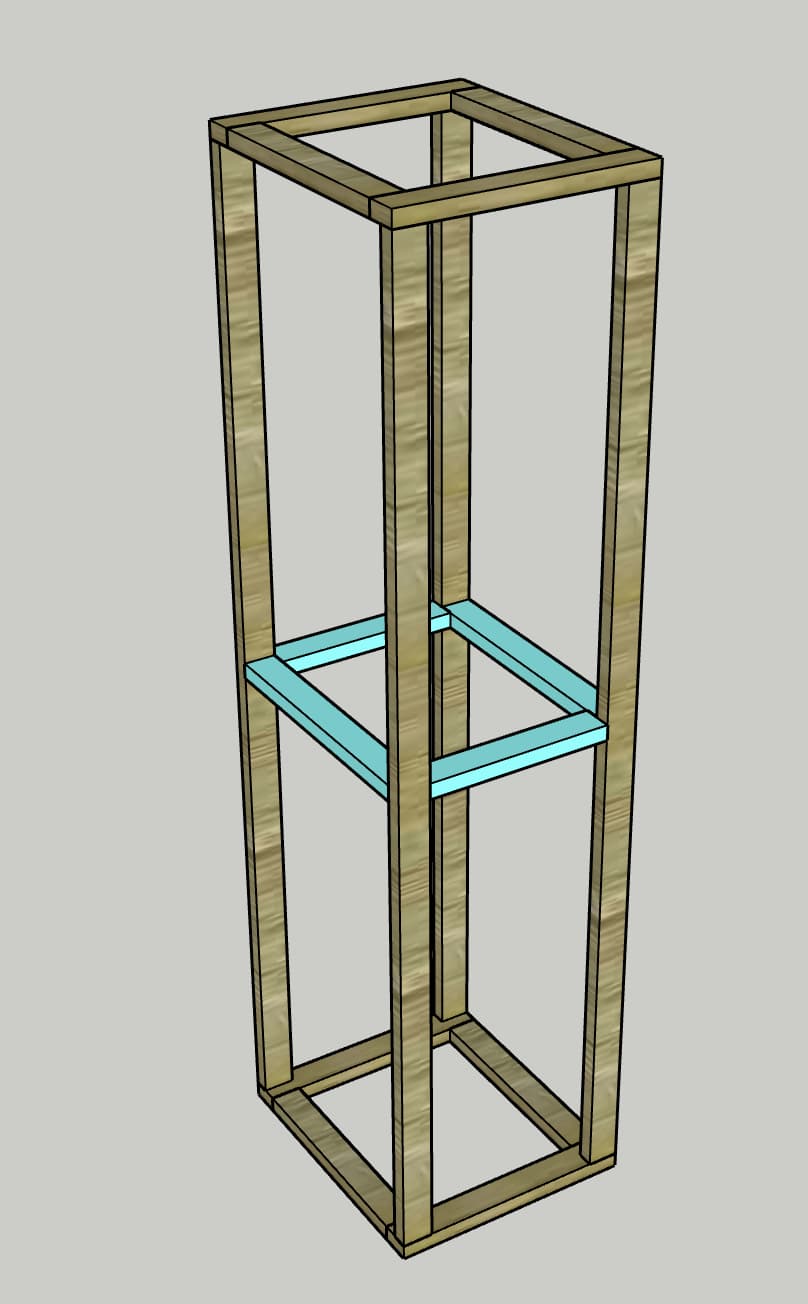
Using wood glue and pocket hole screws, attach the Middle Sides between the posts in their center. Using wood glue and pocket hole screws, attach the Middle Front and Back to the posts and Sides.
10Paint or stain
Now fully assembled, take this opportunity to paint or stain your pieces as you’d like.
11Animal zoo hardware
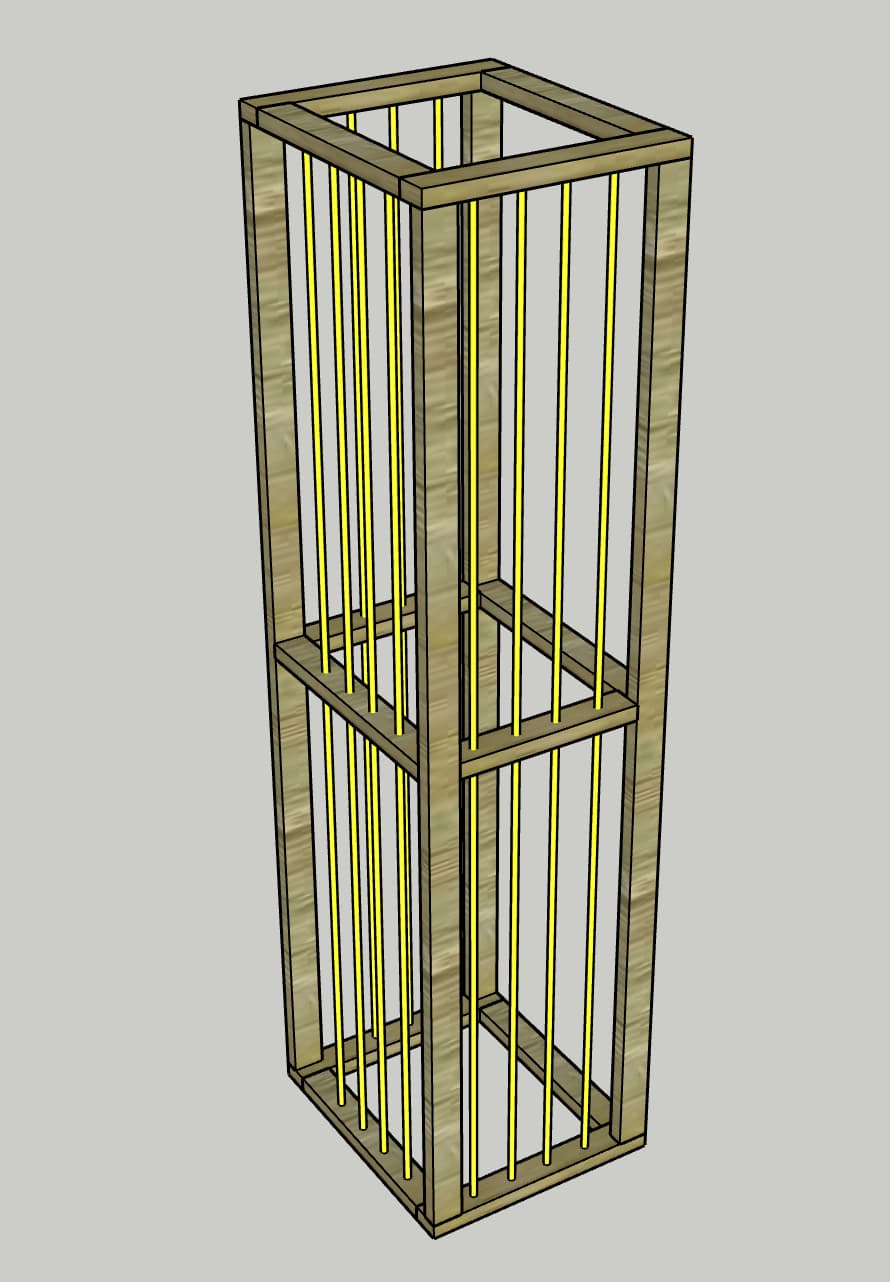
- String up the bungee cord through the holes.
- Start at the bottom corner hole on one side and go up and down the holes on that side, ending on the opposite bottom corner. Tie off a knot, then pull the bungee very tight through the whole thing and tie it off at the starting hole.
- Repeat for the other two bungee sides.
- Next, attach keyhole brackets to the Spacer and bottom of the Posts on the same side.
- Align and drill screws into the side of the bookcase and hang the zoo on the bookcase.
12Accessorize
- Add cube storage, books, toys or whatever you want to the bookcase!
- Slide in Kreg Shelf Pins at the appropriate heights for where you want your remaining shelves.
- Fill the animal zoo from the top with all your kid’s stuffed animals and pull them through the bungees when you need them!
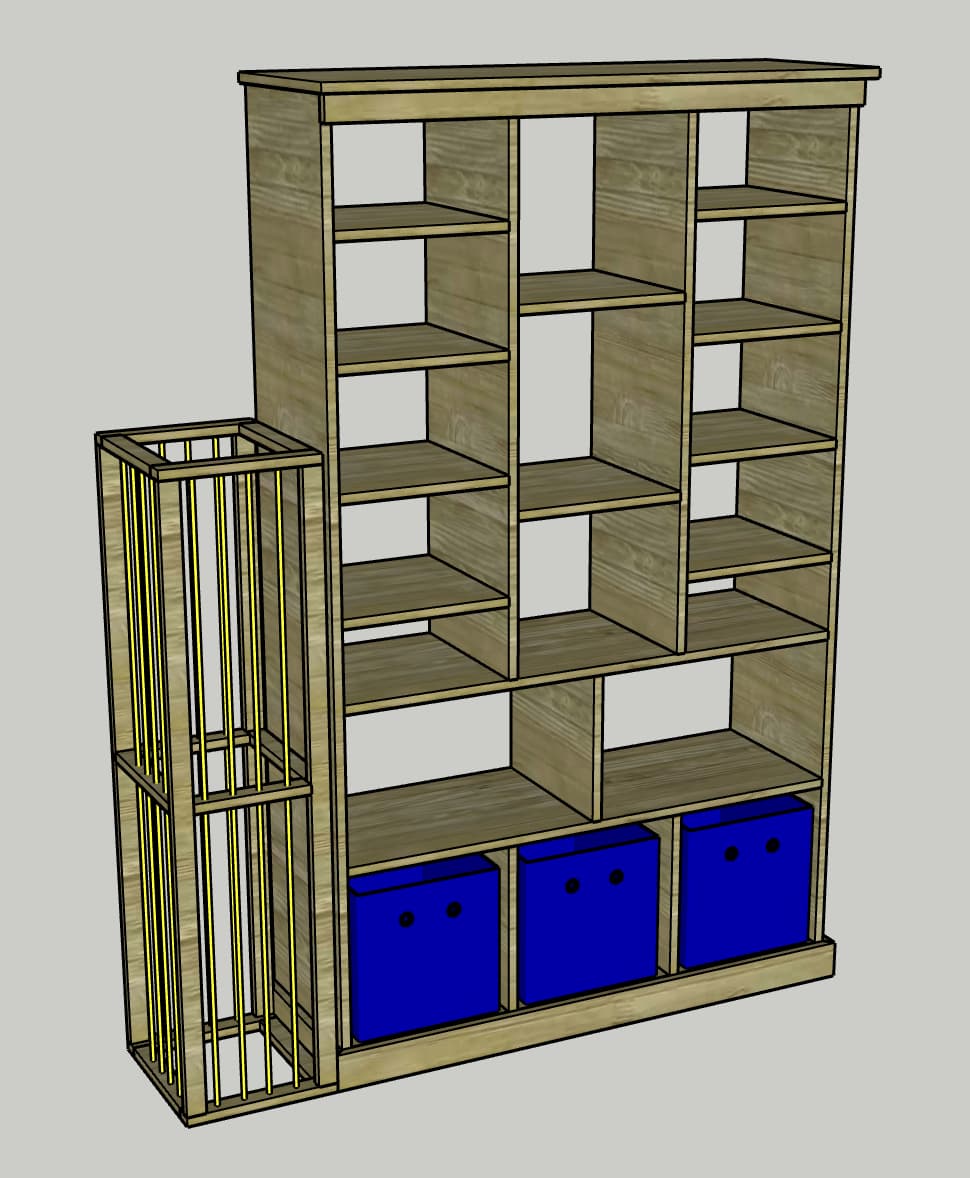
13Enjoy!
Enjoy your handiwork and tag @CharlestonCrafted on Instagram with a picture!