 Notch
Notch- Difficulty
- Easy
- Time
- 3–5.8 hours
- Cost
- $
About this build
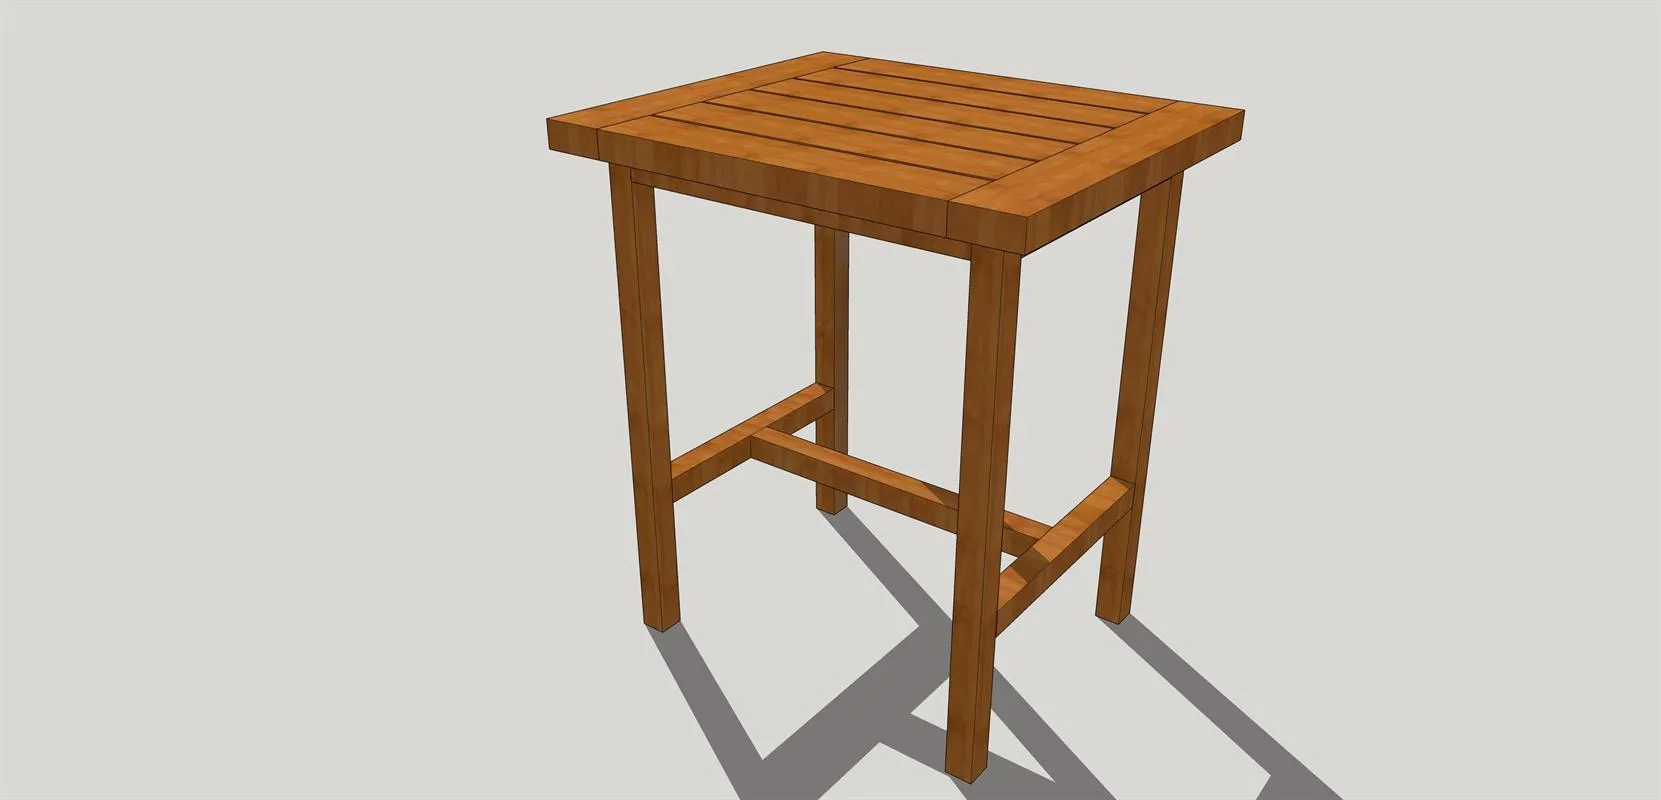
This stylish bistro table is a perfect addition to any outdoor space. Not only is it a quick build, it is one that can be built using pretty much any material, so it is budget friendly as well.
Tools
Essential
- Drill / Driver
- Impact Driver
- Miter Saw
- Pocket Hole Jig
- Random Orbit Sander
- Router
- Router Table
Optional / nice to have
- Bar / Pipe Clamps
- Tape Measure
Materials
| Item | Qty |
|---|---|
| Board, 2x4 96" | 2 board |
| Board, 2x2 96" | 3 board |
| 2-1/2" Kreg pocket screw | 52 each |
| Wood Glue | 1 each |
Overall cost: $. Lumber prices vary by region, species, and season, so we give a band rather than a figure we would only be pretending to know.
Cut list
| Part | Qty | T × W × L |
|---|---|---|
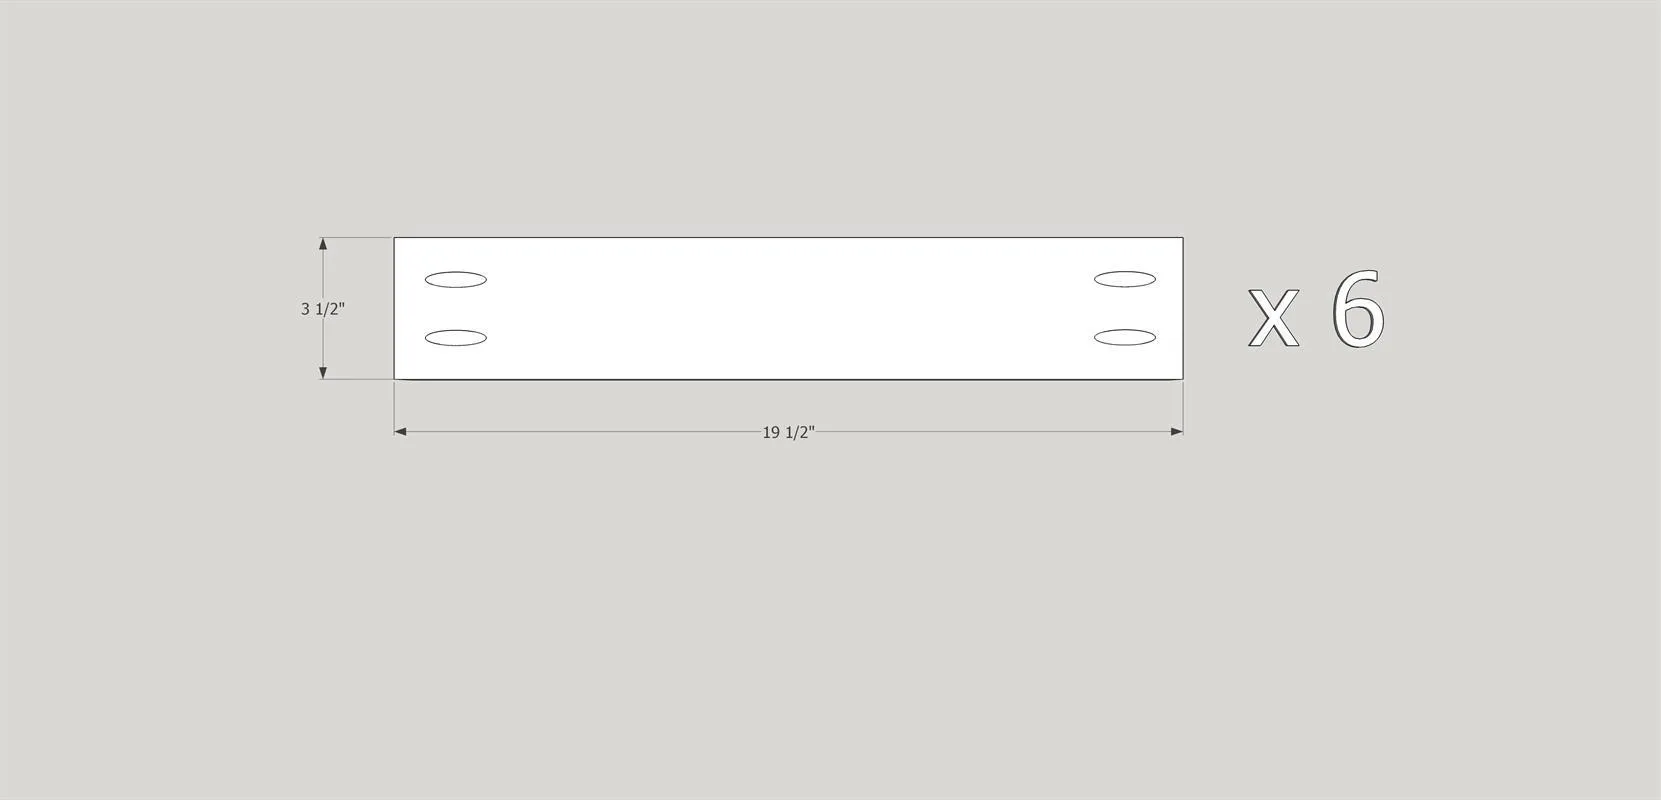
| Table Top - Main | 6 | 1" × 3 1/2" × 19 1/2" |
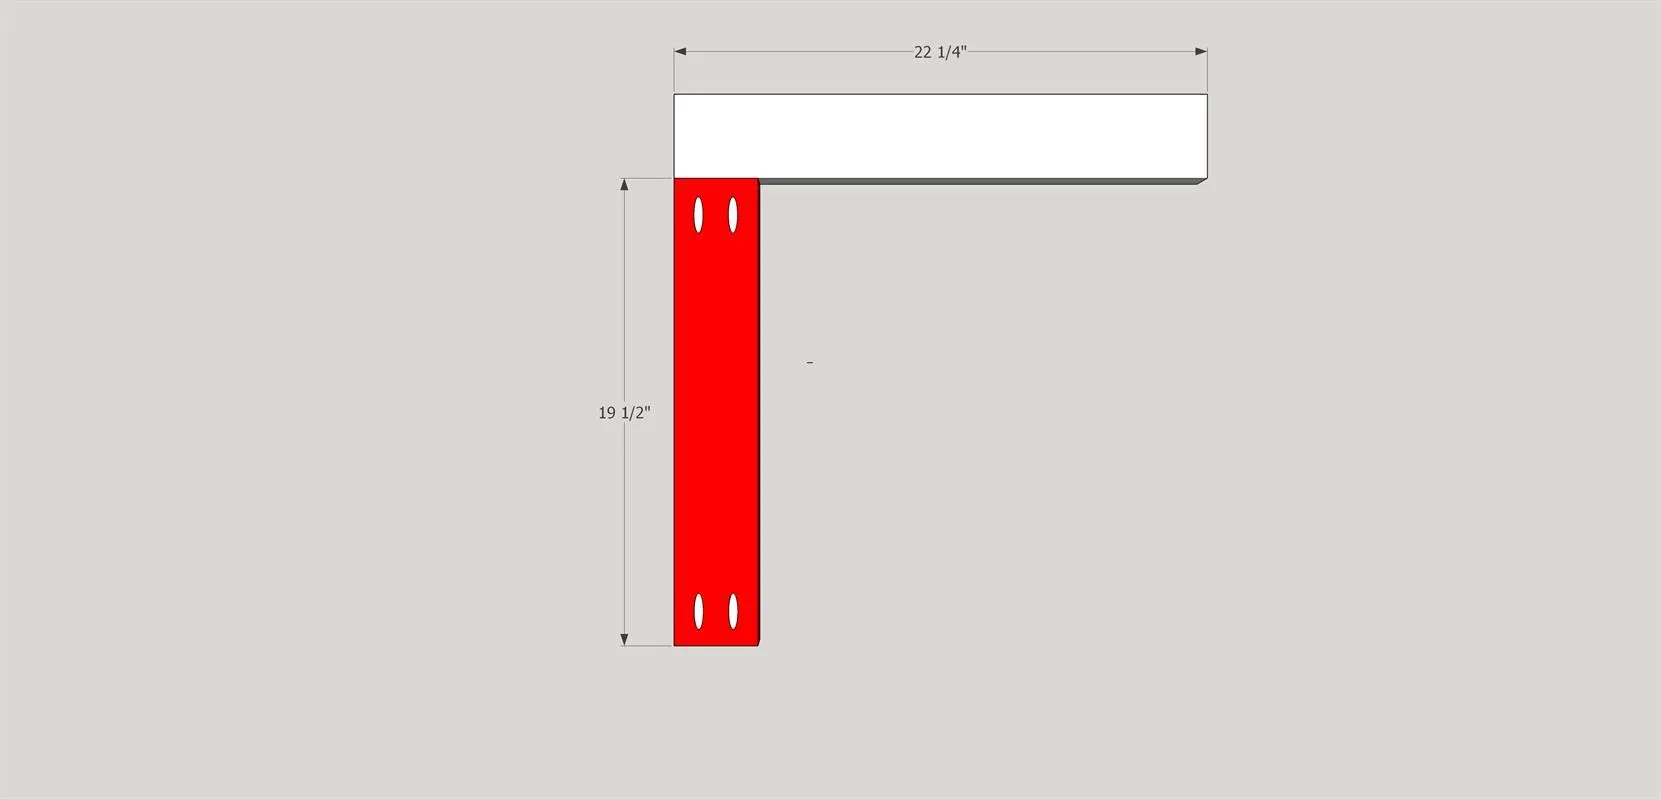
| Table Top - Ends | 2 | 1 1/2" × 3 1/2" × 22 1/4" |
| Legs | 4 | 1 1/2" × 1 1/2" × 28 1/2" |
| Base Support | 3 | 1 1/2" × 1 1/2" × 19 1/2" |
| Base Supports | 4 | 1 1/2" × 1 1/2" × 15 1/4" |
What to buy
Buy 6 boards at 8 ft.
1 1/2" × 3 1/2"
1 board
1 1/2" × 1 1/2"
3 boards
1" × 3 1/2"
2 boards
Assumes 8 ft stock, a 1/8" saw kerf, and buying each part at its own width. Change the board size or kerf on the full board plan →
Instructions
1Table Top Prep
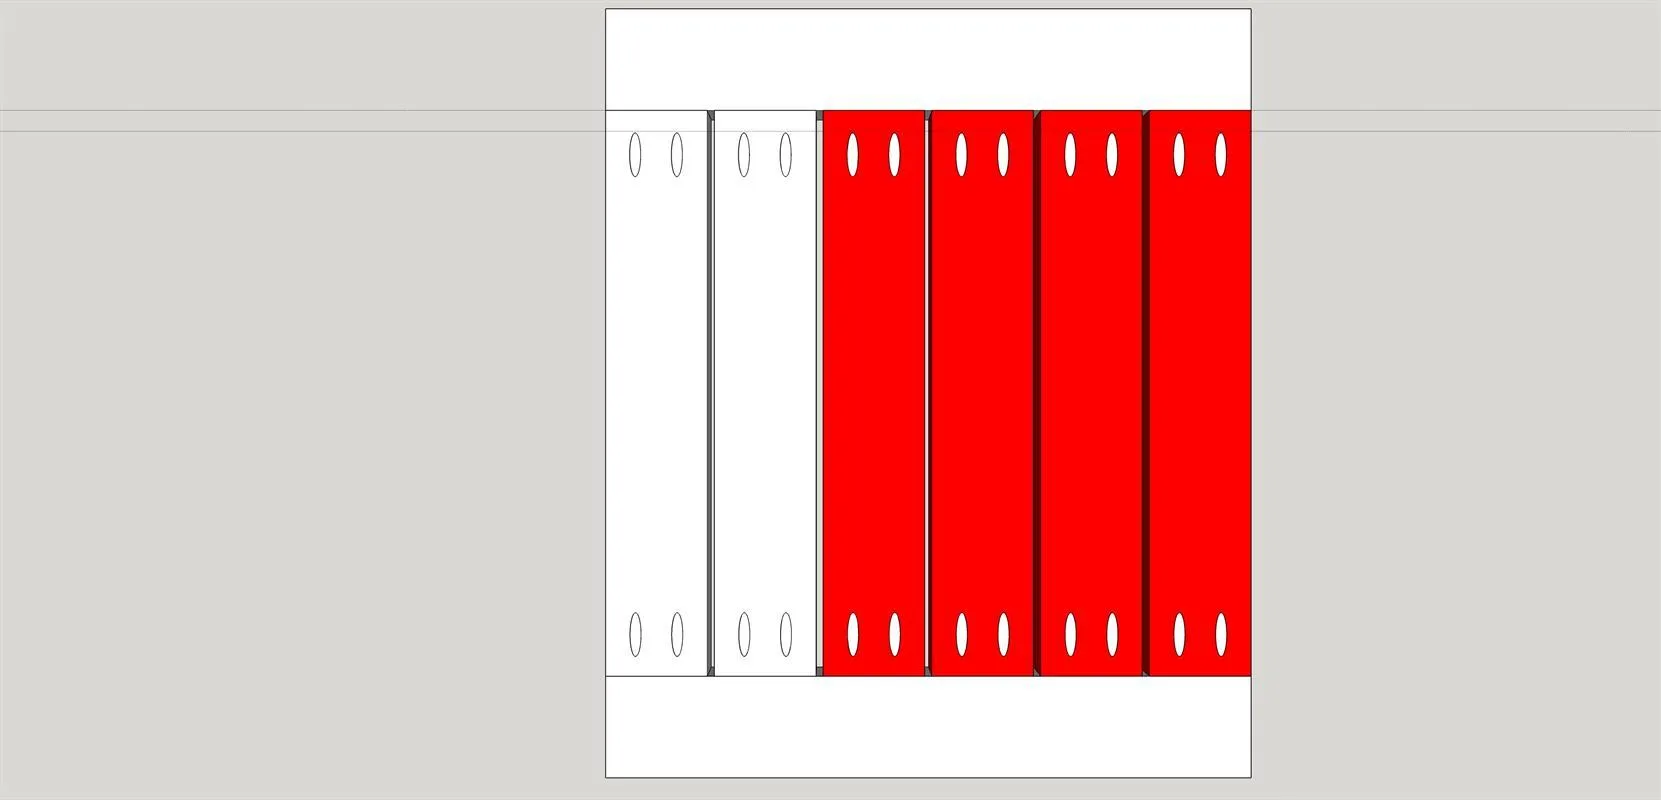
Let's prep the main section of our table top. . Taking the 6 ea pieces (Part 1 - Parts/Cut List) - drill these for pocket holes* - these holes will need to go on the bottom -make sure you are aligning your boards with "best" side up (opposite of the side you are drilling). *Make sure the setting on your Kreg pocket hole jig is set for the right thickness, as well as the collar on the drill bit.
2Table Top Assembly - Part 1
Time to start assembling the top. We will be doing this with the face down. Start with (1)ea table top end (part 2) and (1) of the table top main. See the attached image / Note all table top assembly steps are assembled upside down.
3Table Top Assembly - Part 2
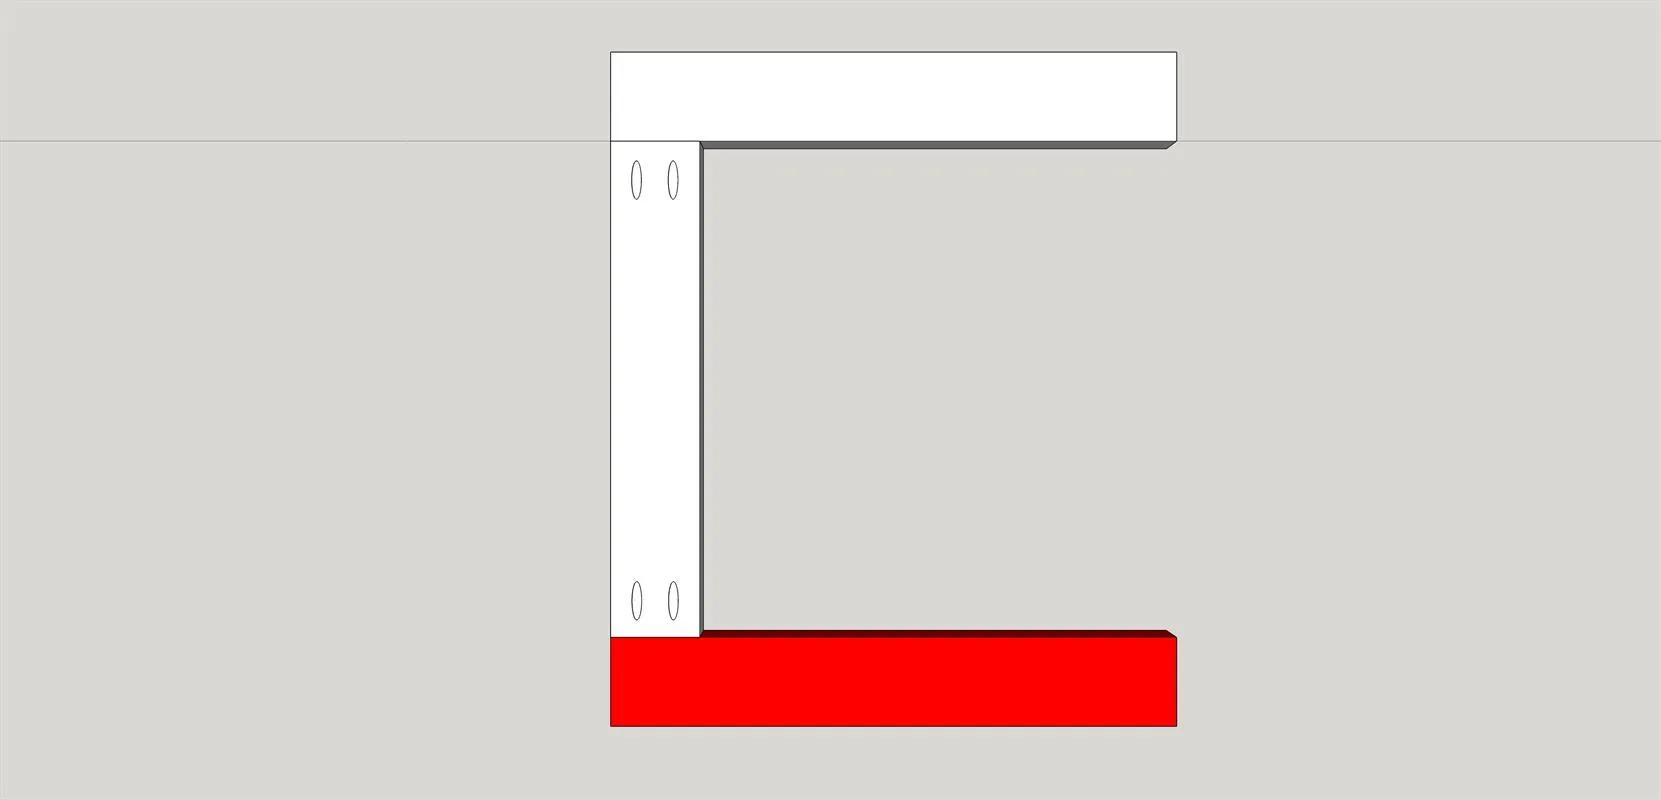
Attach the other table top end piece on the opposite side of the previous step.
4Table Top Assembly - Part 3
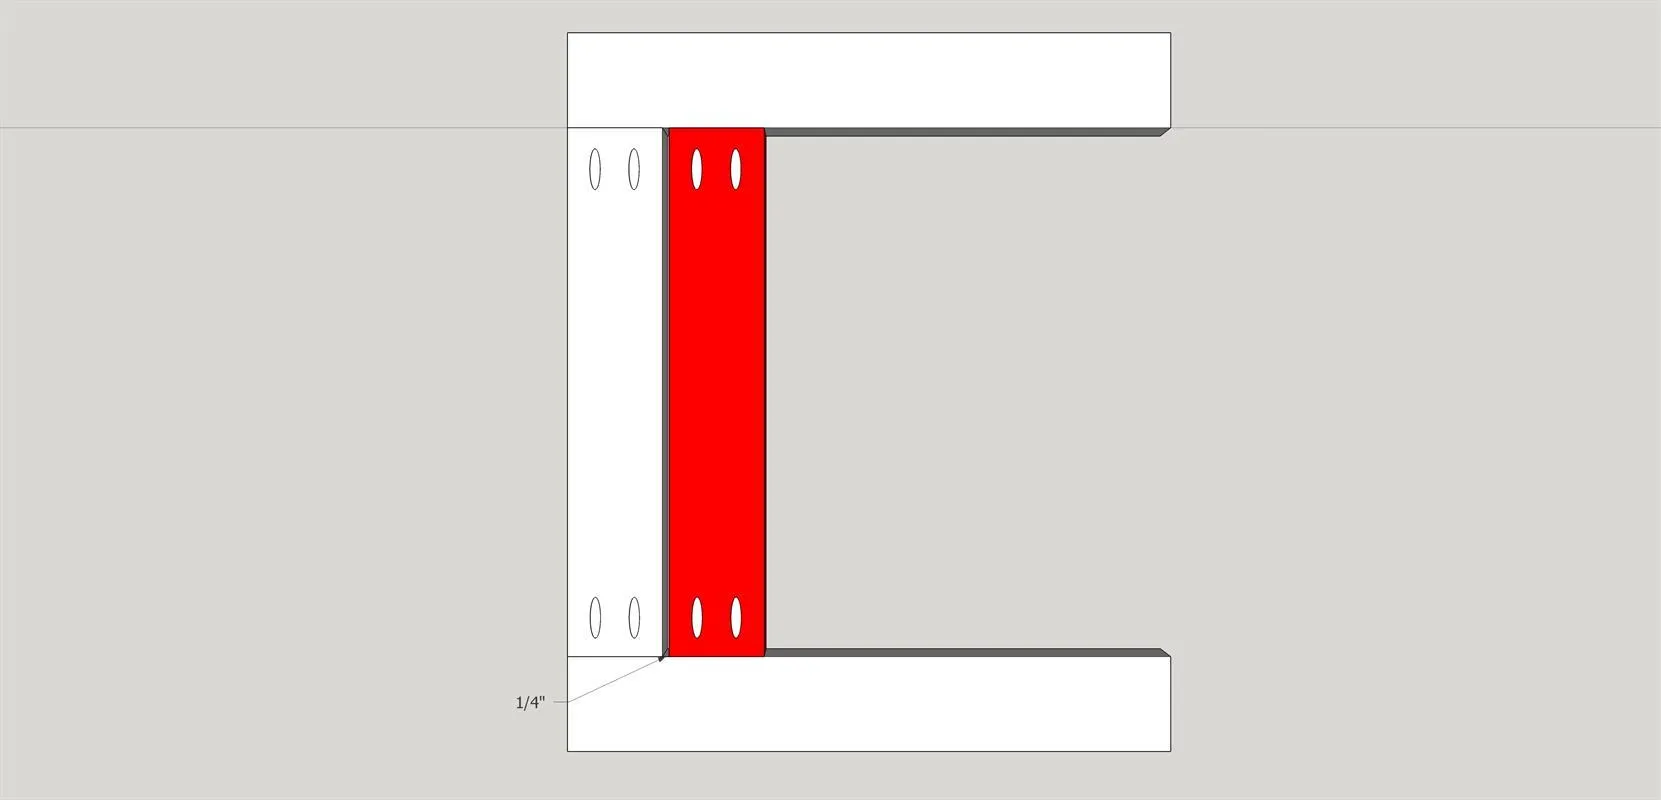
Add the next table top main board (part 1). This will need to be spaced 1/4" apart from the end board. The easiest way to accomplish that, is to make/find (2)ea 1/4" blocks. Use those as spacers - save these as we'll use those in the next step.
5Table Top Assembly - Part 4
Add the remaining table top pieces to the top. Make sure that you keep the 1/4" spaces between the boards.
6Table Base Assembly - Part 1
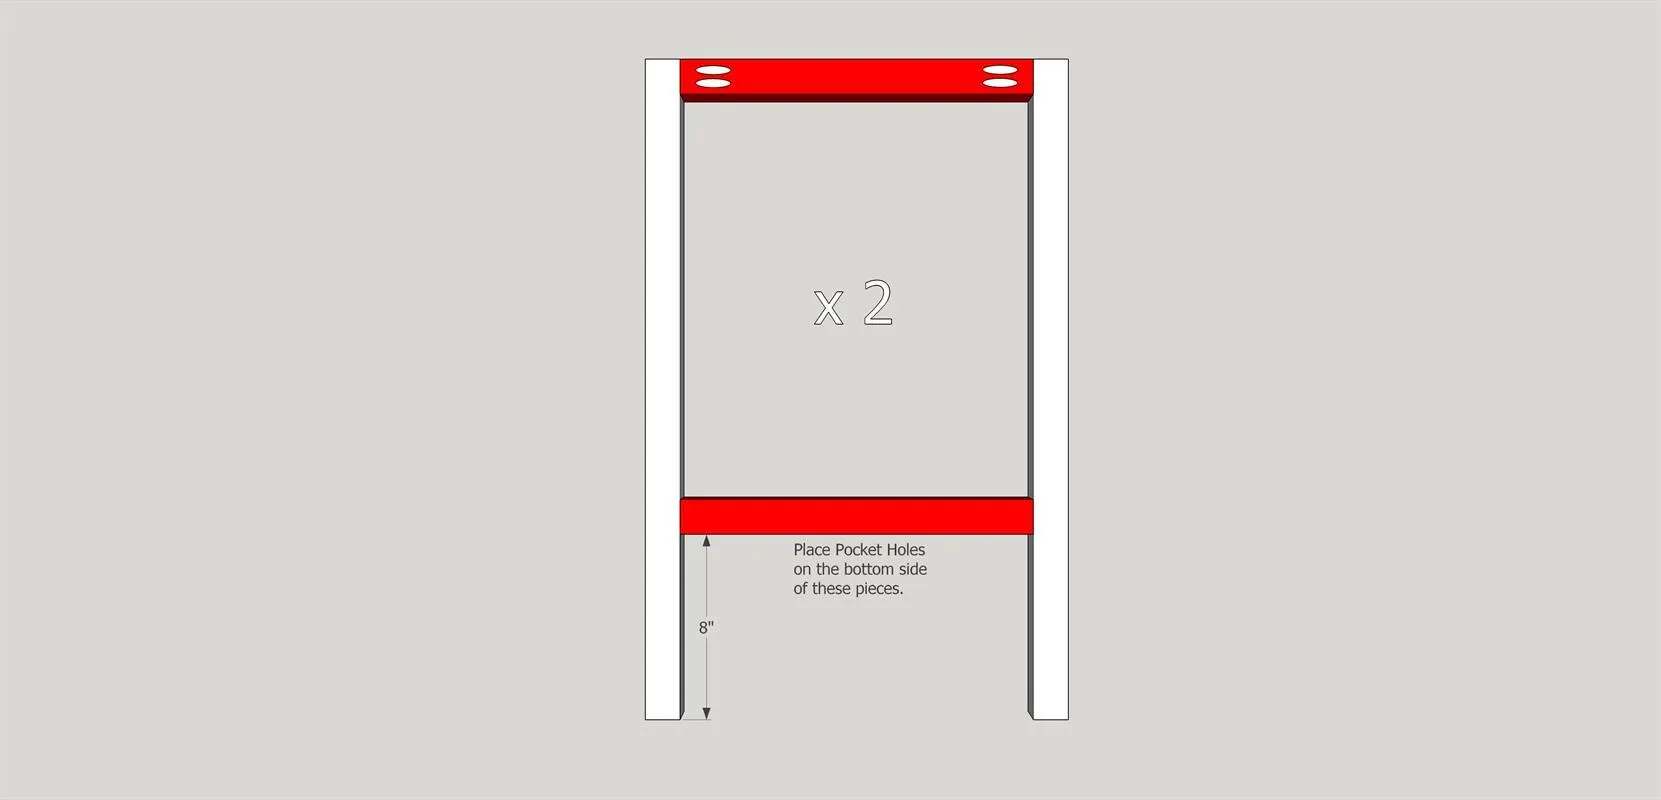
Time to assemble the base. Using (2)ea Part 3 (legs) and (2)ea Part 5 (supports). Please note the bottom support pocket holes face down to remain unseen once final assembly is complete. Repeat this step again so you have 2 frames.
7Table Base Assembly - Part 2
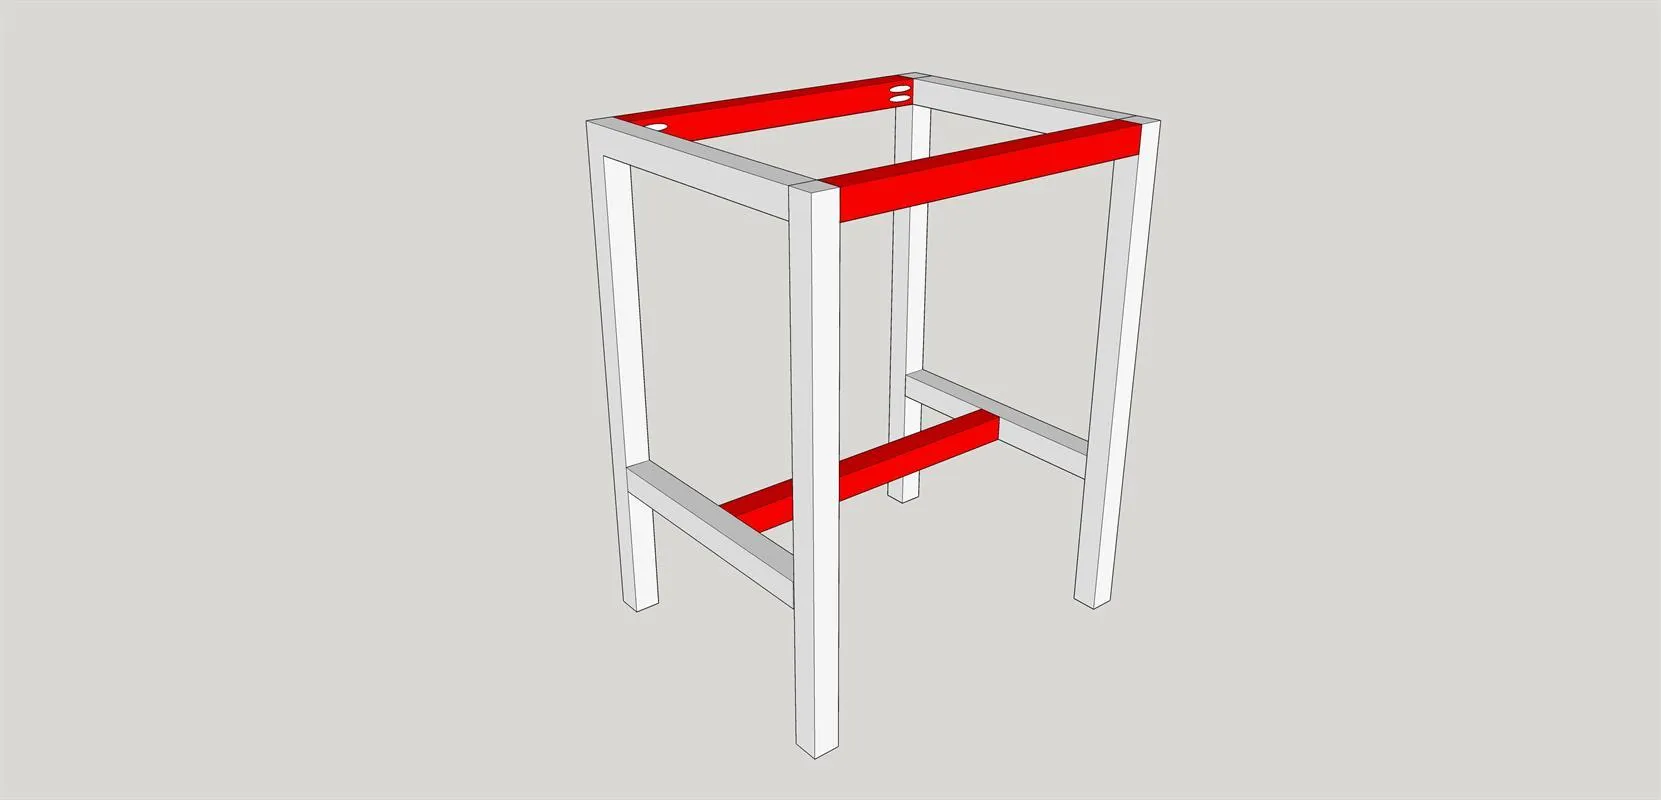
Time to connect the 2 halves of the base we just assembled. You will do that with (3)ea part 4 (supports). The upper 2 supports will have the pocket holes facing in. Then the bottom support that will be centered as pictured below. That support will have the pocket holes facing down to hide them when finished.
8Final Assembly
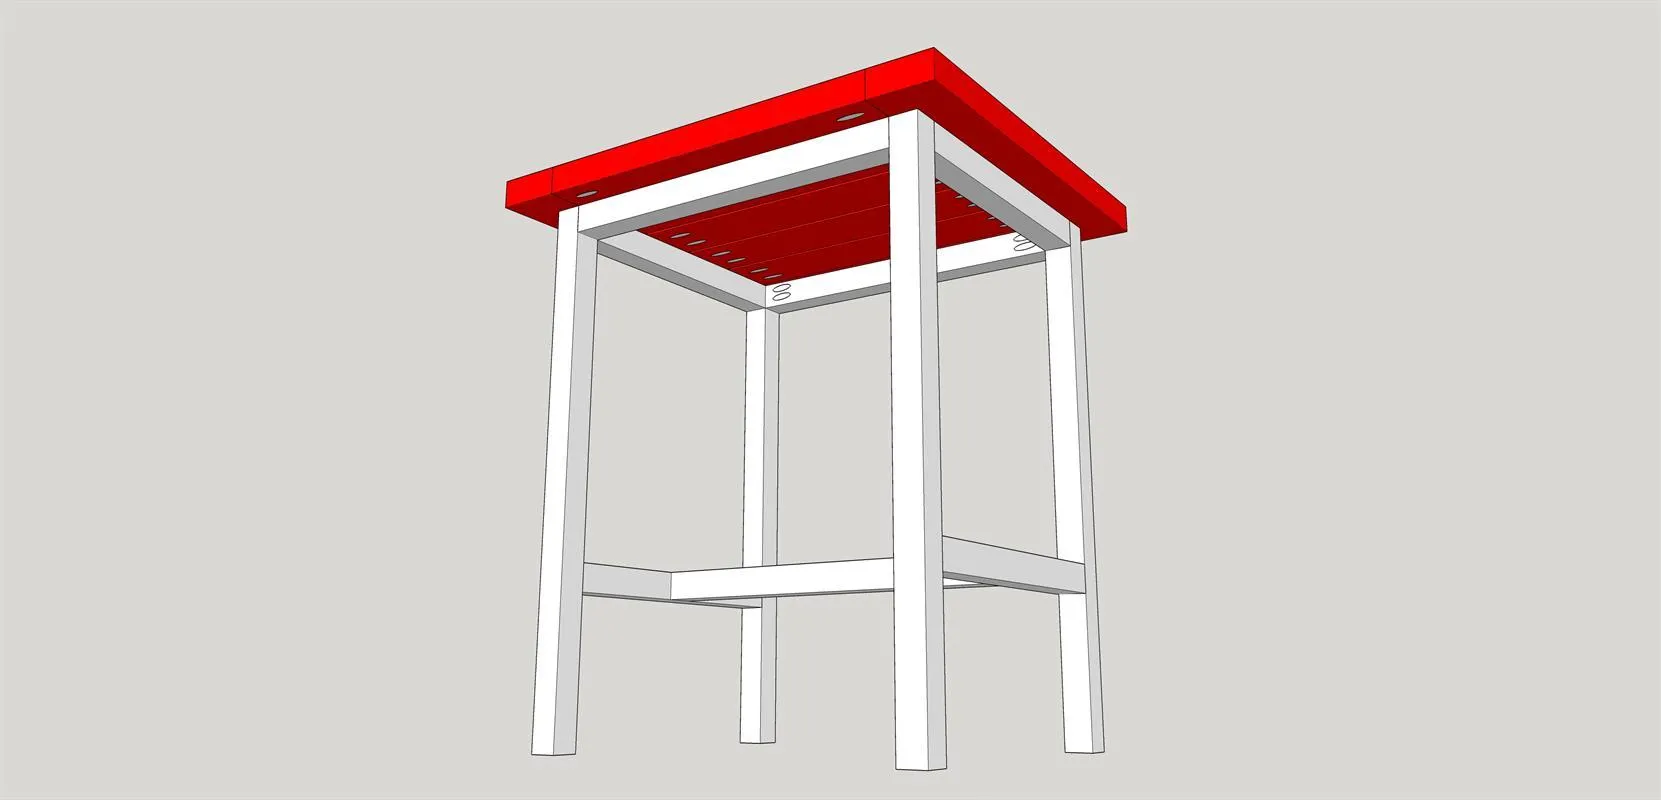
With the base now assembled, we are going to attach the top to the base. The easiest way to do this is with the top on a work surface, face down. We are attaching the top through the upper supports on the base. *Please note you will want to drill a 1/4" clearance through those supports only. This will allow for wood movement. Attach using a #8 x 2" wood screw.
9Finish the project
Time to apply a finish to the project. Depending on the material you are using, you can apply a stain & poly, or you could paint and distress it (make sure to use a suitable product for outdoors). Be creative! Once the finish is applied, it's time to enjoy your new Bistro table!
Tags
- Outdoor Living
- Beginner
Reviews & builds
No reviews yet
Sign in to review this plan or share your build.
No reviews yet. Be the first to build this.