 Notch
- Difficulty
- Intermediate
- Time
- 3–5.5 hours
- Cost
- $$
About this build
Bend a piece of plywood into a useful lap tray. Using Kreg's Accu-cut Saw Guide, make kerf cuts (parallel cuts that don't run all the way through the wood), and then bend the ends of the tray to make the vertical legs.
Tools
Essential
- Circular Saw
Optional / nice to have
- Bar / Pipe Clamps
- Combination Square
- Tape Measure
Materials
| Item | Qty |
|---|---|
| Plywood, 3/4" Thick Quarter Sheet | 1 board |
| Wood Glue | 1 each |
Overall cost: $$. Lumber prices vary by region, species, and season, so we give a band rather than a figure we would only be pretending to know.
Cut list
| Part | Qty | T × W × L |
|---|---|---|
| Tray | 1 | 3/4" × 14" × 40 1/2" |
What to buy
Buy 1 board at 8 ft.
3/4" × 14"
1 board
Assumes 8 ft stock, a 1/8" saw kerf, and buying each part at its own width. Change the board size or kerf on the full board plan →
Instructions
1Cut the Tray to Size
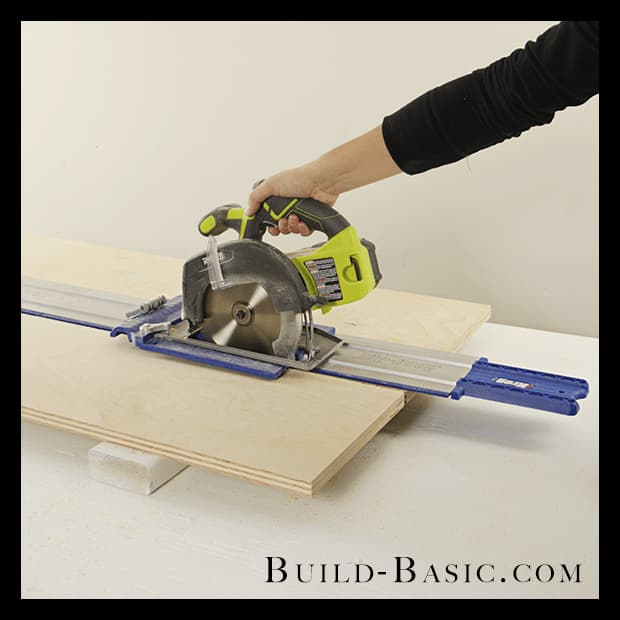
- Mark a 14" x 40½" outline on a piece of ¾-inch plywood, aligning the longest "sides" of the tray outline to run with the grain.
- Attach the saw to the footplate of a Kreg Accu-cut Saw Guide.
- Place the track alongside the first cut line.
- Set the saw onto the track, aligning the grooves in the footplate with the ridges on the track. Un-plug the circular saw or remove the battery.
- Adjust the blade depth to reach about ¼-inch below the thickness of the plywood. Plug-in or replace the battery in the saw, and then complete the cut.
- Repeat to cut the second line.
2Mark the Kerf Cuts
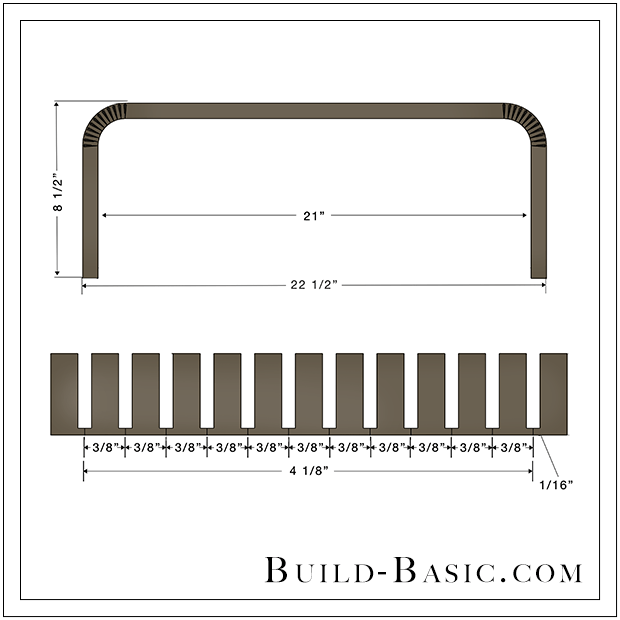
Using a speed square, mark a line 8 inches from each end of the board. Working inward from each line, mark 11 additional lines spaced 3/8-inches apart.
3Prep for the Kerf Cuts
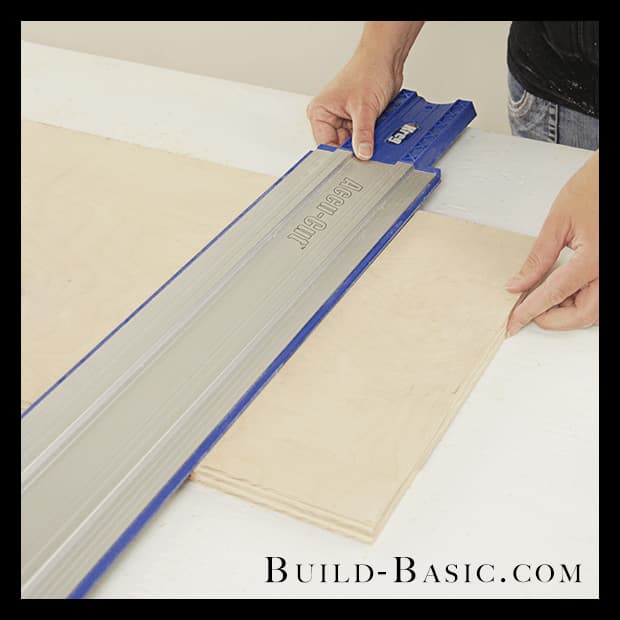
- Place the circular saw on the Accu-cut track alongside an edge of the board.
- Adjust the blade so that it reaches 1/16-inch less than the thickness of the board. Make a test cut on a scrap piece of plywood to check the blade depth.
- Align the track with the outermost line on one side. Support the end of the track with a scrap piece of plywood to prevent the track from tipping during the cut.
4Cut the Kerfs
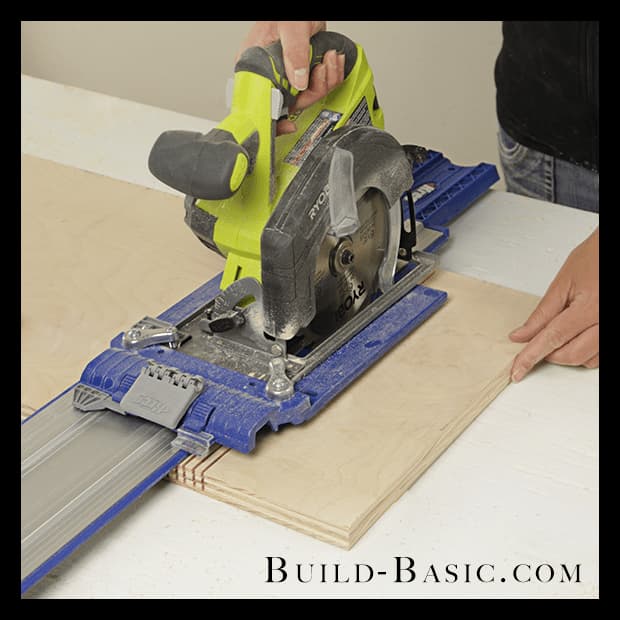
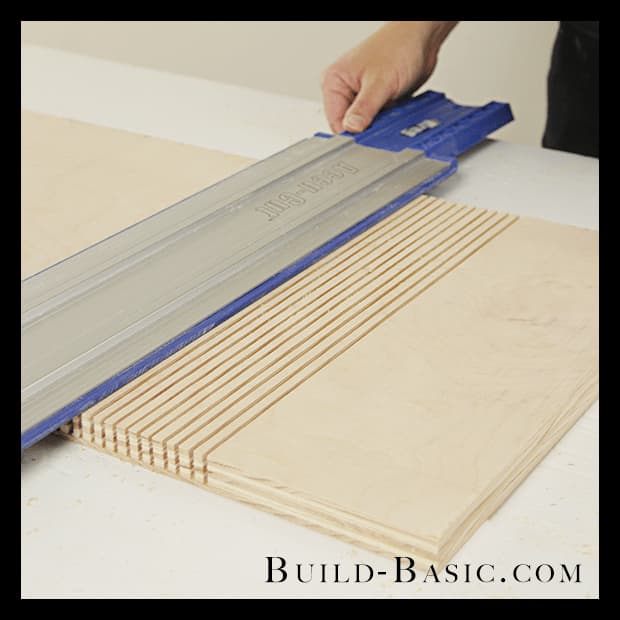
- Place the circular saw onto the track. Make sure the saw blade is centered on the marked line, and then make the first cut.
- Once the cut is complete, move the track, and then complete the second cut.
5Finish the Kerf Cuts
Continue making the parallel kerf cuts until there are twelve kerf cuts on each end of the board.
6Wet the Plywood
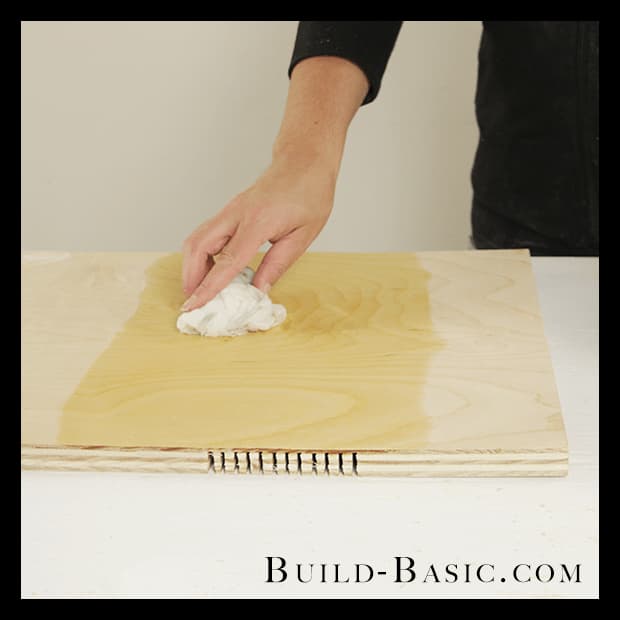
This is not mandatory, but I found it helpful (and to reduce splitting and cracking) when I wet the opposite of the plywood kerf cuts before bending the plywood.
7Bend the Plywood
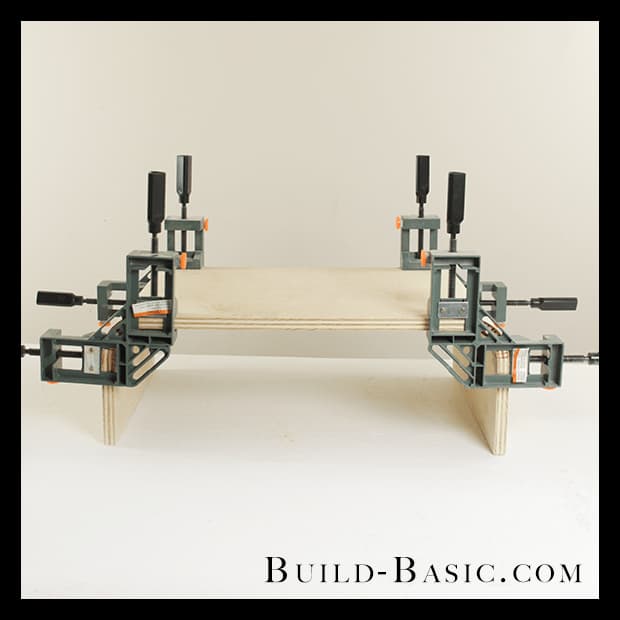
Clear the grooves of sawdust. Load the kerf cuts with wood glue. Bend the plywood ends up 90-degrees. Clamp the parts in place on a table or using corner clamps, as shown here. Allow the glue to fully dry before removing the clamps.
8See More Projects
Follow Build Basic on BuildSomething.com and check out www.build-basic.com for more building plans and tool tutorials!
Tags
- Office
- Intermediate
Reviews & builds
No reviews yet
Sign in to review this plan or share your build.
No reviews yet. Be the first to build this.