Notch
NotchBarn Door Cabinet with Drawers
Step-by-step build — 11 steps. Also available as a print sheet.
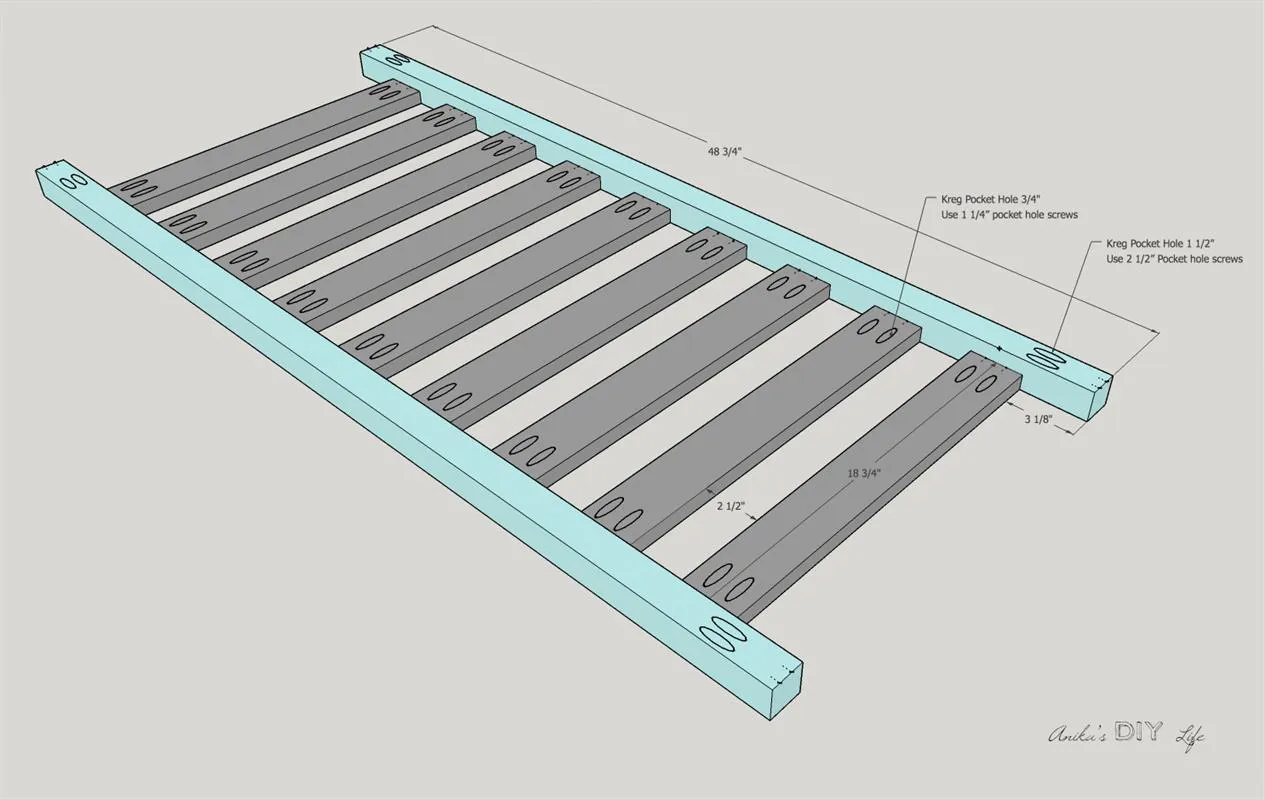
1Make bottom rack
Create the bottom rack by attaching nine 1"x3" boards to the 2" x 2" rails. The spacing between them is 2 1/2" and I used a scrap piece of 1"x3" to space them out.
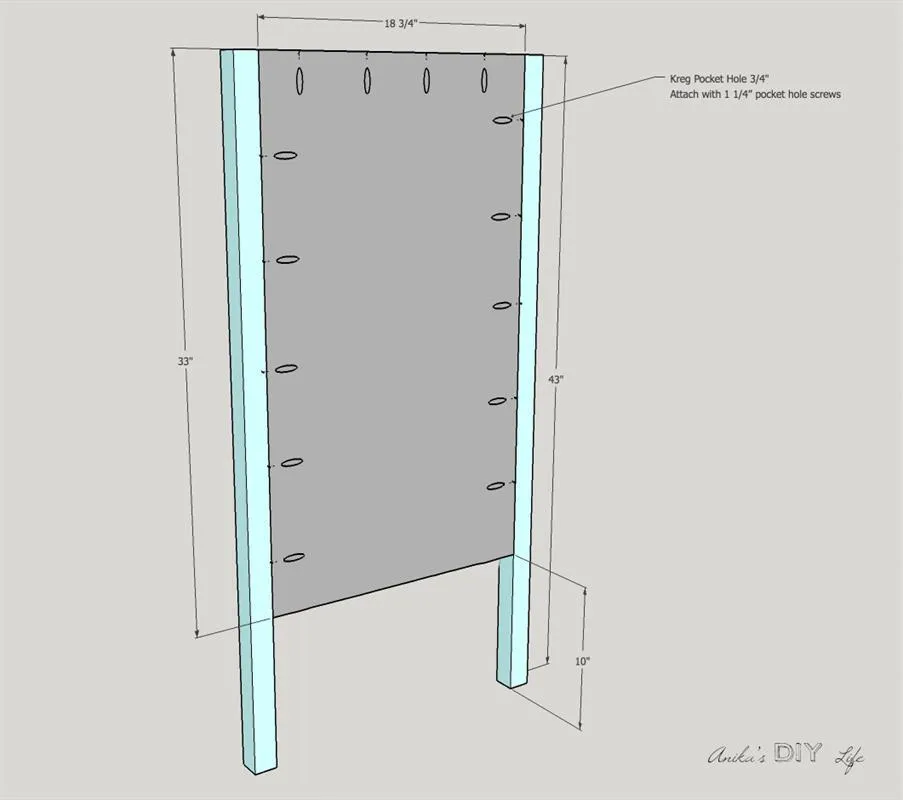
2Build 2 Sides
Build sides by attaching the 3/4" plywood to the 2x2 legs using pocket hole screws and wood glue. Make 2 of these.
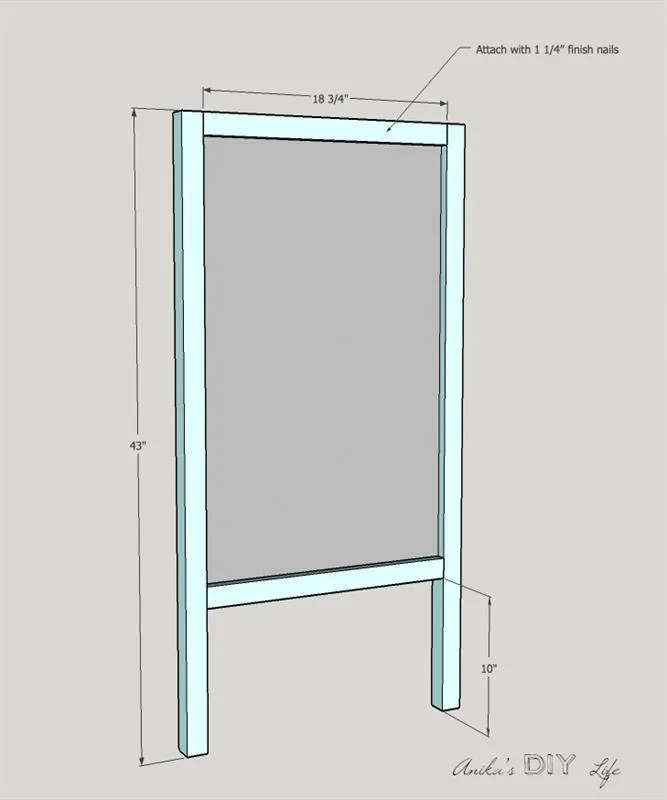
3Add trim to sides
On the other side of the pieces built in step 2, attach the 1x2 trim to cover the raw edges of plywood using wood glue and finish nails.
4Attach Shelf and bottom rack
- Attach the bottom rack (from step 1) and the bottom shelf to the sides using wood glue and pocket hole screws. It is easiest to do this by laying it on one side.
- Once the shelf and bottom rack are attached, add the 1x2 bottom shelf trim using finish nails and wood glue.
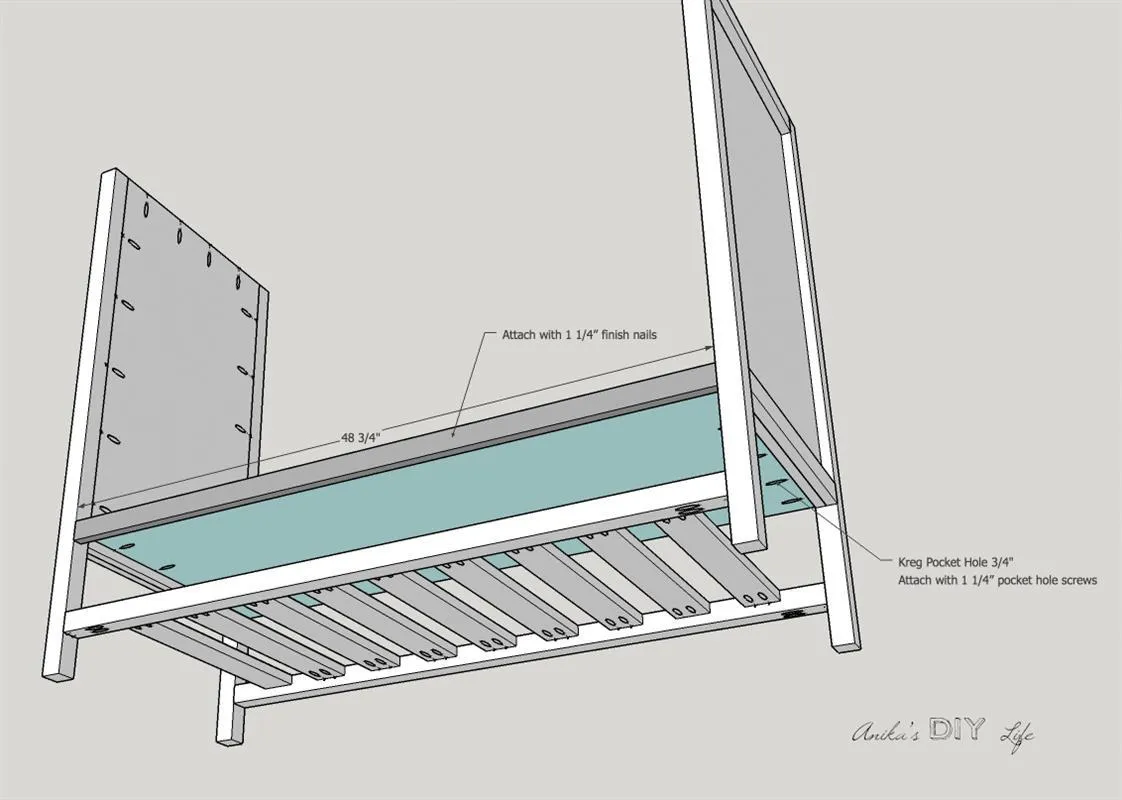
5Attach center divider
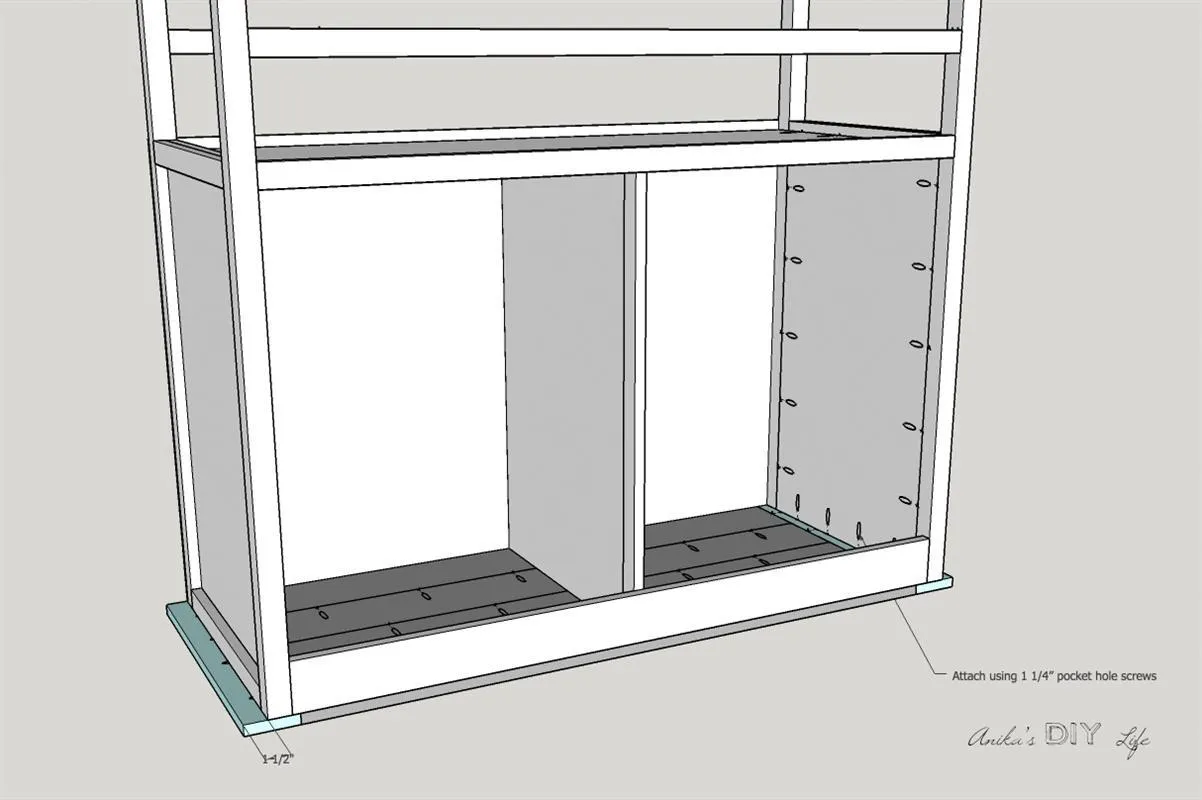
- Attach the center divider to the bottom shelf at 24" from both sides using pocket hole screws.
- Attach the center divider trim through the pocket holes in the plywood too.
- Once attached, it is a good time to make the shelf pin holes for an adjustable shelf on one side of the cabinet. The Kreg Shelf Pin Jig is perfect for this.
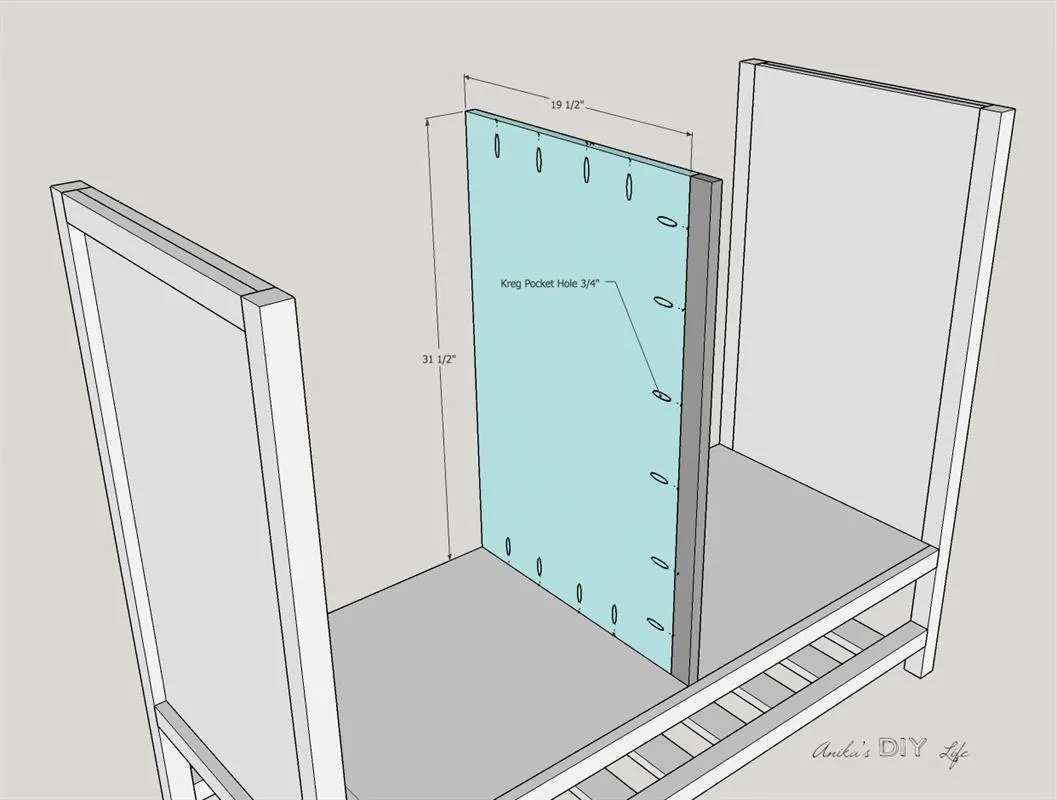
6Attach top rail
Attach the 1 x 4 rail to the front of the cabinet using pocket hole screws. You can also add pocket hole screws through the 1x2 center divider trim to attach to the 1x4.
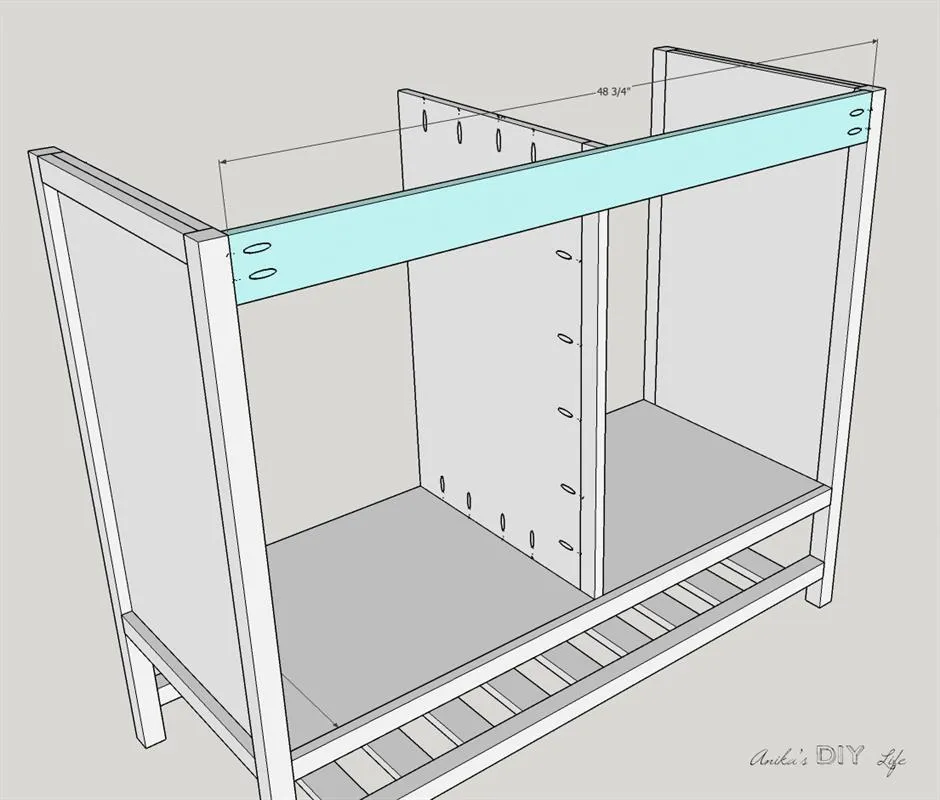
7Build Top
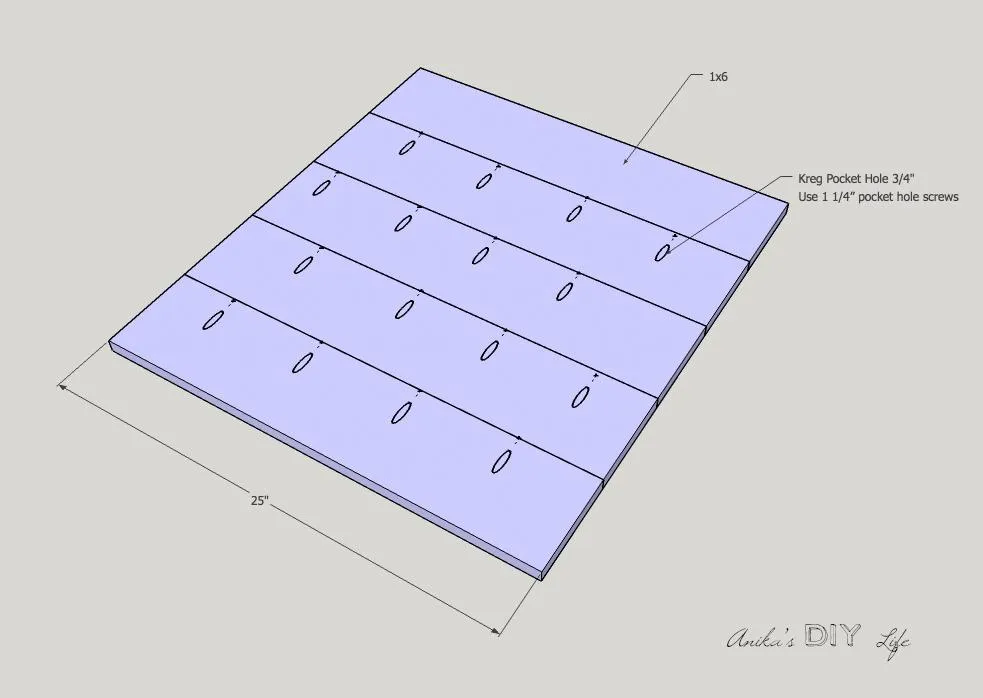
Build the top by joining the 1x6 slats using pocket hole screws and wood glue. Attach the side 1x4 trim to finish off the sides.
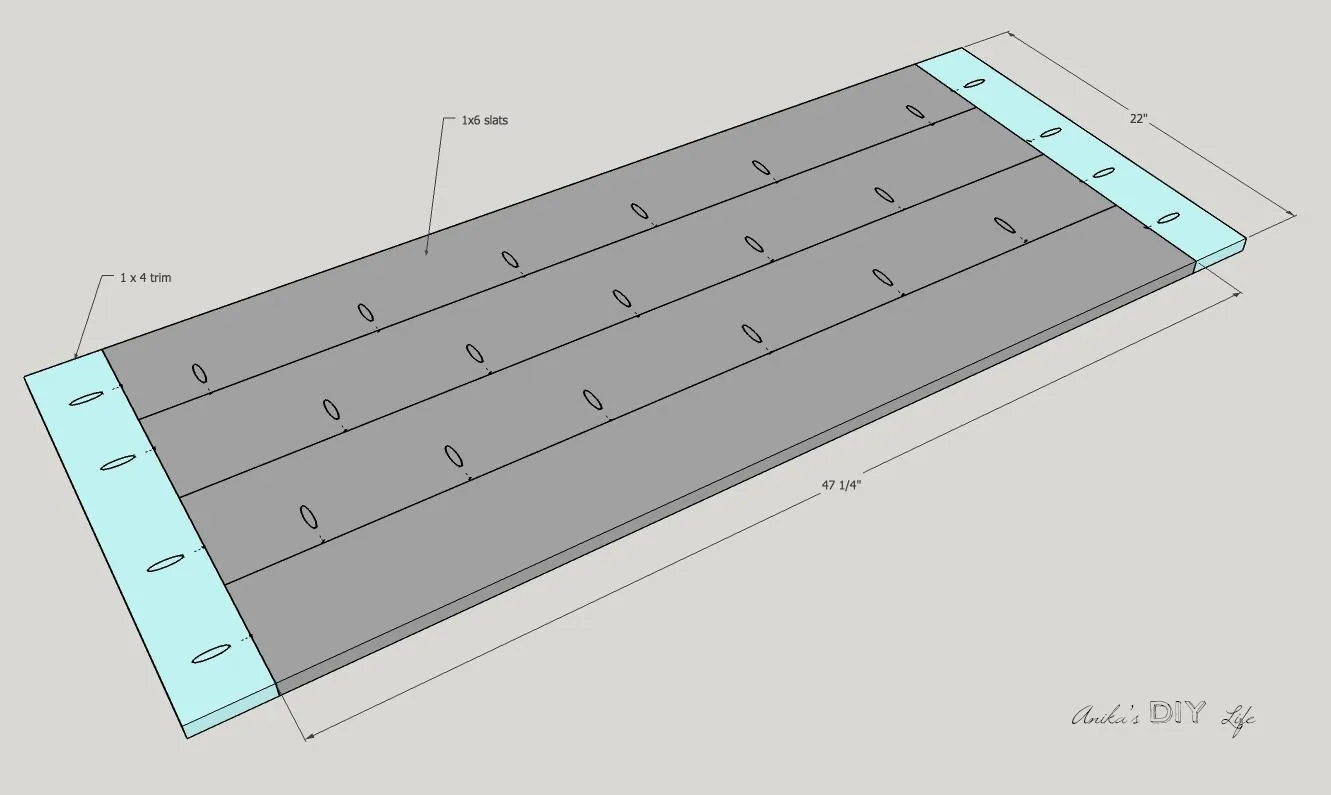
8Attach top
Attach the top to the cabinet. It is best to lay the cabinet on top of the top and then add the pocket hole screws through the sides and the center divider. Use wood glue.
9Make drawers and install
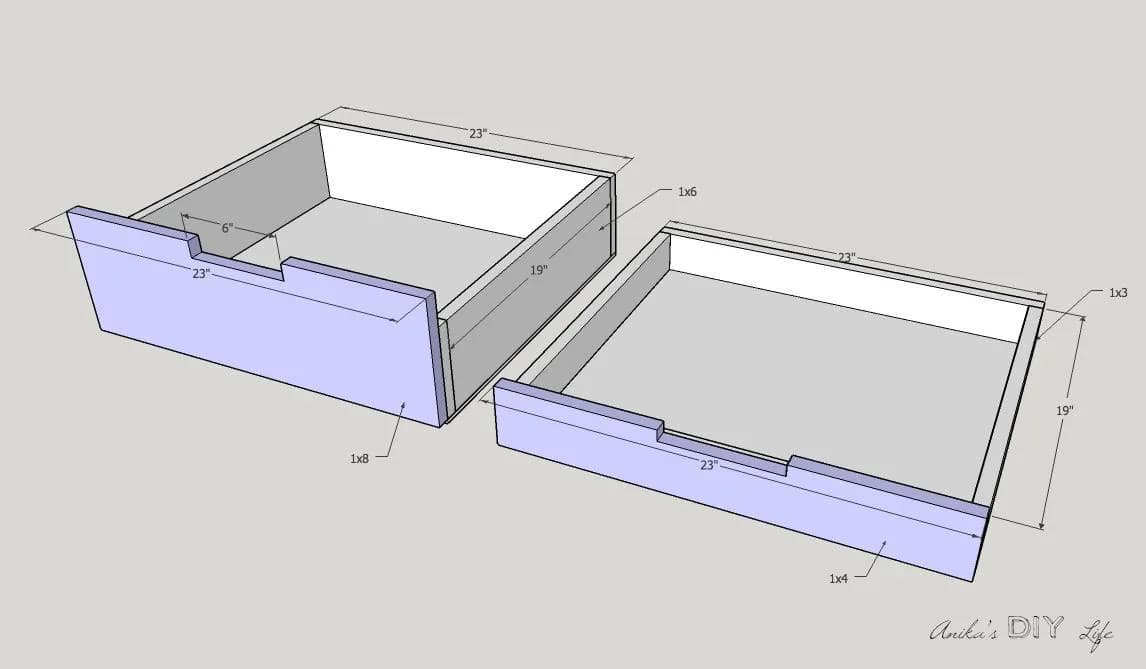
Build the drawers using the dimensions in the schematics. There are 3 drawers with 1x6 boards and 1x8 drawer face and 1 drawer with 1x3 boards and 1x4 drawer face. Install the drawers on one side of the cabinet using 16" drawer slides. The Kreg Drawer slide jig makes it really easy and quick to install them.
10Attach back
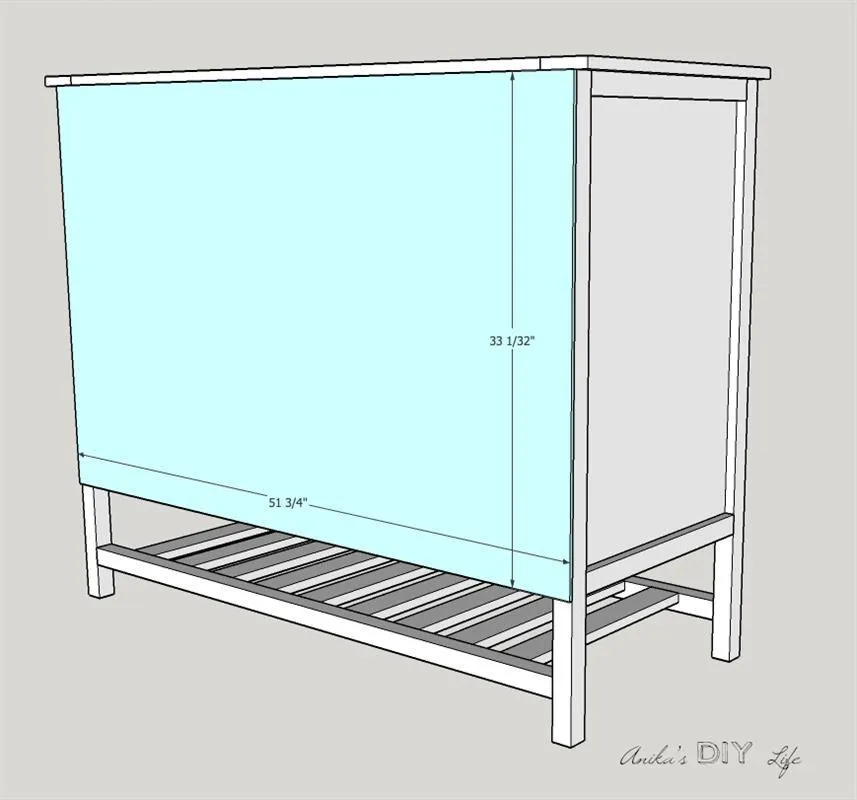
Attach the 1/4" plywood back to the cabinet using wood glue and finish nails.
11Build door and install
- Build the door by attaching 1x6 boards together using pocket hole screws. You can leave the door as is if you like. I decided to attach a few scrap 1x6 and 1x3 boards to my door to give it a 3-D look. Install the barn door hardware per instructions. I made my own barn door hardware.
- Check out all the details in the blog post. Link is under the "Extras" tab