 Notch
Notch- Difficulty
- Intermediate
- Time
- 3.3–6.3 hours
- Cost
- $$
About this build
This is a beautiful way to add form to any area without losing function. It serves as a beautiful display, coupled with hidden storage for shoes/toys/games etc...
Tools
Essential
- Circular Saw
- Drill / Driver
- Pocket Hole Jig
- Random Orbit Sander
Optional / nice to have
- Bar / Pipe Clamps
- Combination Square
- Tape Measure
Materials
| Item | Qty |
|---|---|
| Plywood, 3/4" Thick Full Sheet | 1 board |
| 3/4" overlay hinges | 2 each |
| Magnetic Catch | 1 each |
| Wood Veneer Banding | 1 each |
Overall cost: $$. Lumber prices vary by region, species, and season, so we give a band rather than a figure we would only be pretending to know.
Cut list
| Part | Qty | T × W × L |
|---|---|---|
| False Bottom (A) | 1 | 3/4" × 18" × 28" |
| Top Partial Back (B) | 1 | 3/4" × 19" × 28" |
| Bottom (C) | 1 | 3/4" × 18" × 28" |
| Top (D) | 1 | 3/4" × 9" × 29" |
| Bottom Shelf (E) | 1 | 3/4" × 9" × 28" |
| Sides (G) and (H) | 2 | 3/4" × 18" × 36" |
What to buy
Buy 4 boards at 8 ft.
3/4" × 19"
1 board
3/4" × 18"
2 boards
3/4" × 9"
1 board
Assumes 8 ft stock, a 1/8" saw kerf, and buying each part at its own width. Change the board size or kerf on the full board plan →
Instructions
1Cut Boards
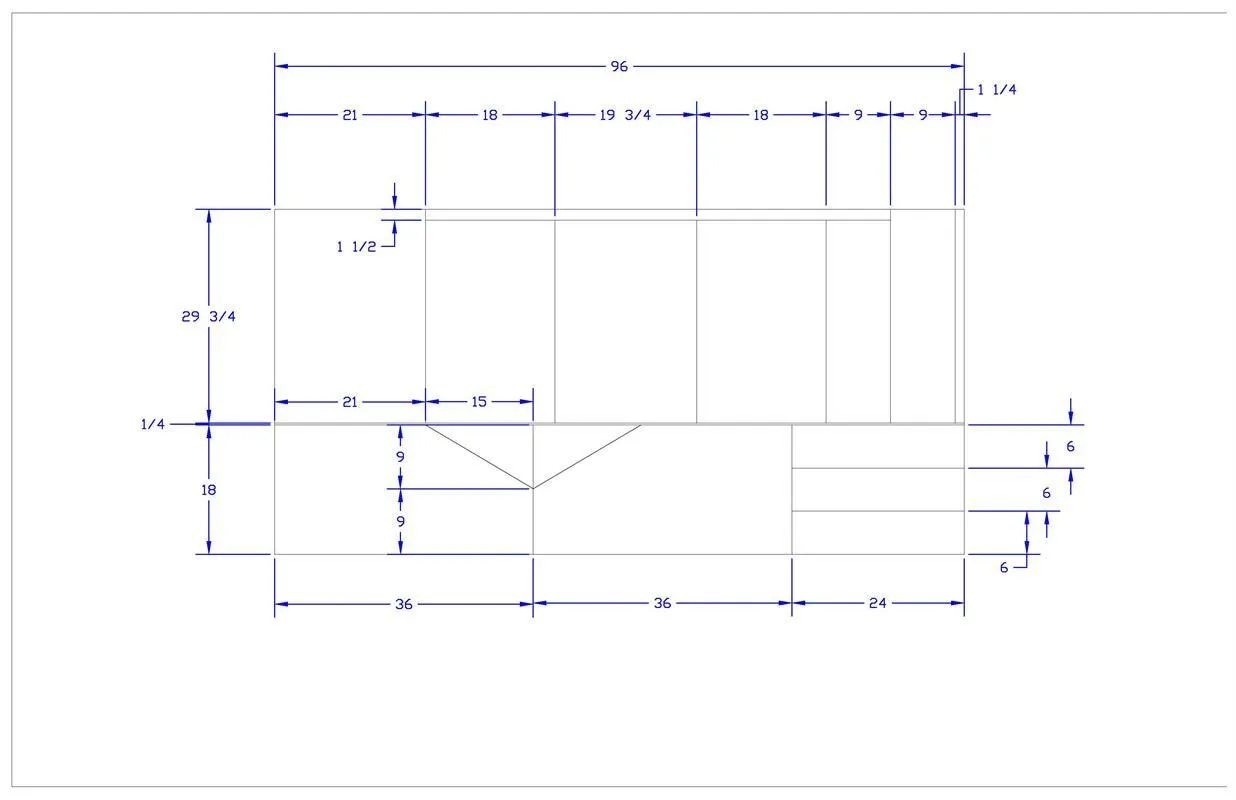
Use the cut diagram to get cut dimensions.
2Building a Board (Optional)
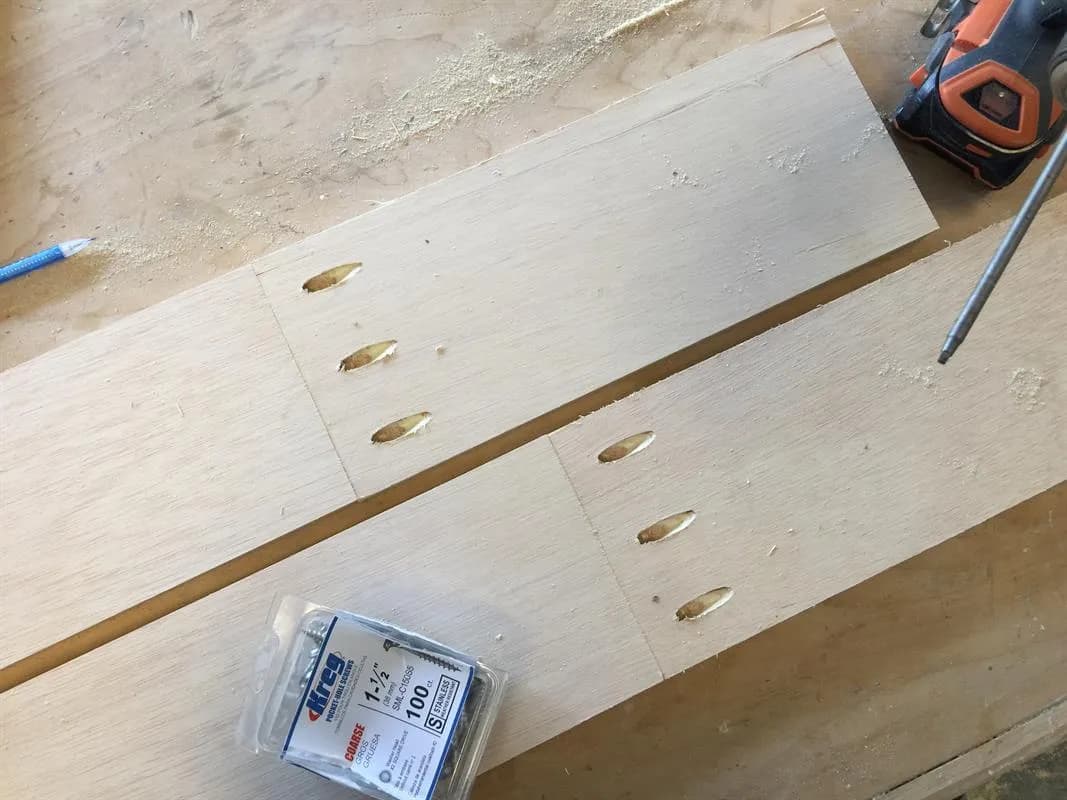
Due to the nature of this project (1 sheet challenge) I am utilizing every square inch of my 4'x 8' board. In these plans I am using some of the cut-offs to create the back of the lower shelves to prevent stored items from falling out the back. If you would like, you can replace these pieced together cutoffs using a 1x4" standard board (2) @ 28 1/4". However you can use the remnant boards (F) to serve this purpose, you will just need to joint them together using a Kreg Pocket Hole Jig.
3Attach Backs to Shelves/Bottom
- Drill pocket holes on the underside boards, on both the short sides, and one of the long sides of boards (C) and (E).
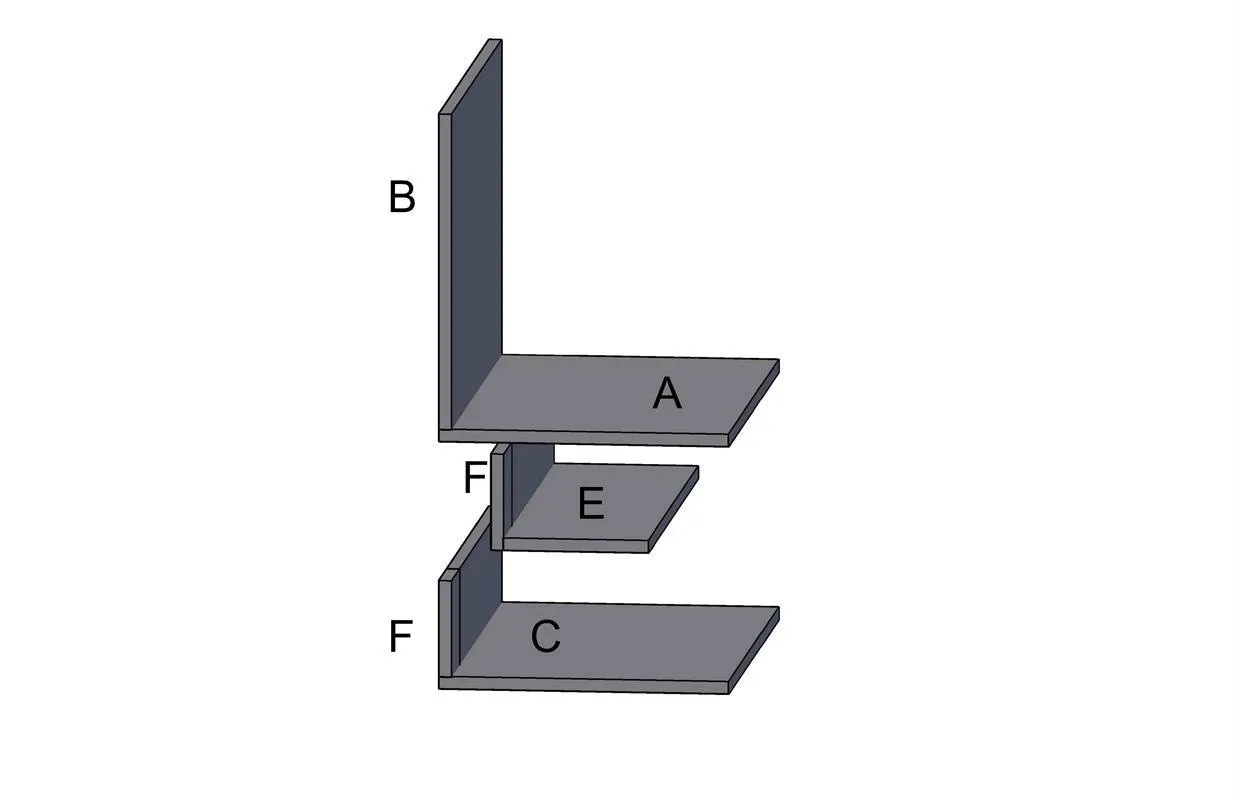
- Next attach the "backs" (F) to the topside of boards.
- Attach it to the far side (There should not be Kreg Pocket Holes on the underside of attached back board.) (F). Using a Kreg Pocket Hole Jig drill pocket holes around the perimeter of boards (B) and (A). The pocket holes will be on the backside/underside.
- Attach board the partial back (B) to the false bottom (A).
4Mark Sides
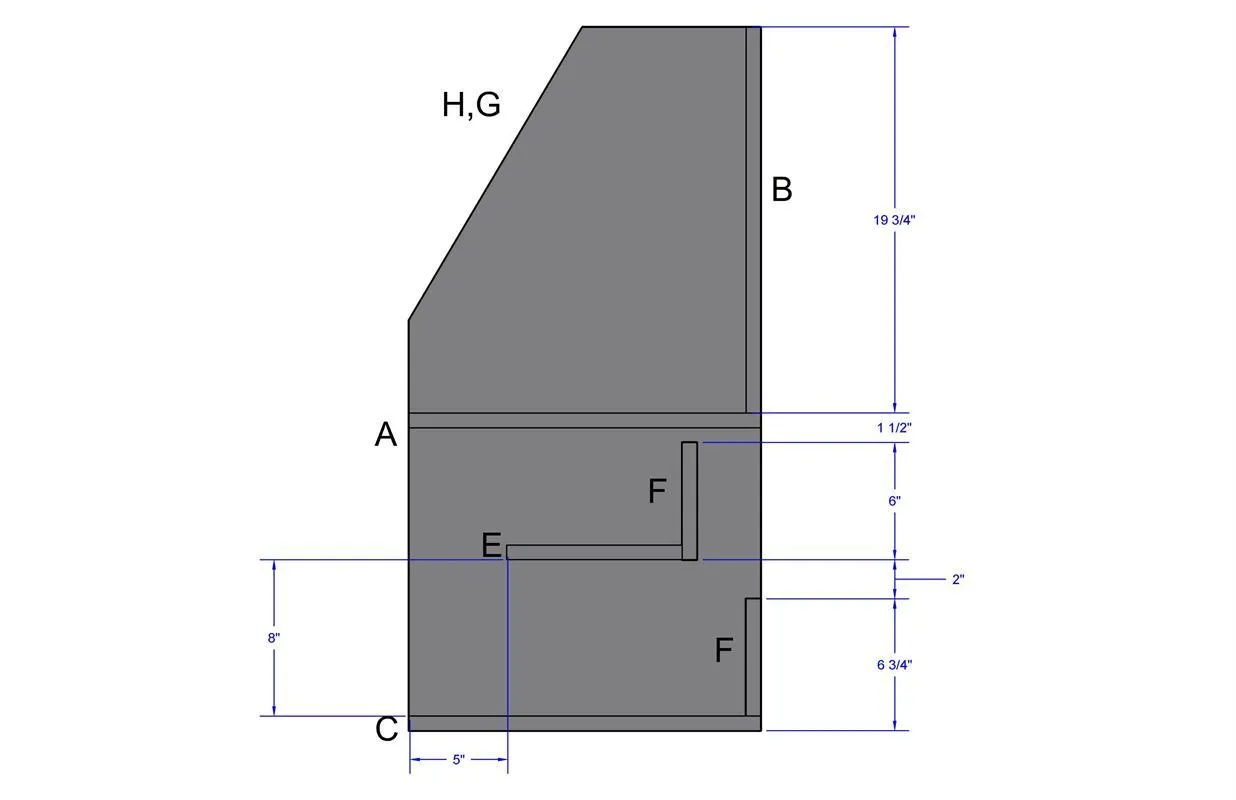
Mark placement of the shelves (A) w/attached back (E) w/attached partial back and (C) w/attached partial back.
5Install Shelves/Bottom
Using the marks from Step 5. install shelves (A) w/attached back (E) w/attached partial back and (C) w/attached partial back. Attach all shelves using the pre-drilled pocket holes (Step 3.) Using 1-1/4" Kreg Screws.
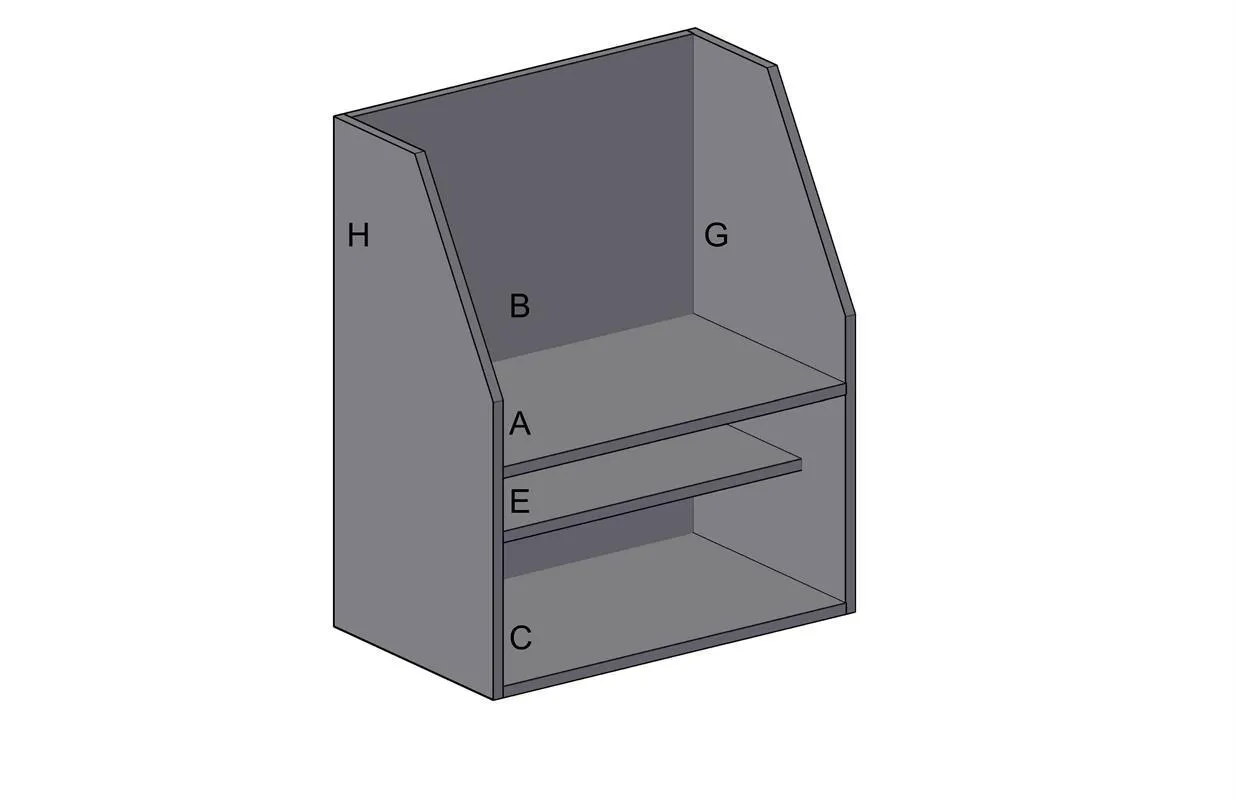
6Attach Top
Using the holes on the top backside of (B) attach the top (D) using 1 1/4" Kreg Screws and wood glue around the perimeter. I then reinforced the remaining edges with 2" 18g. finishing nails.
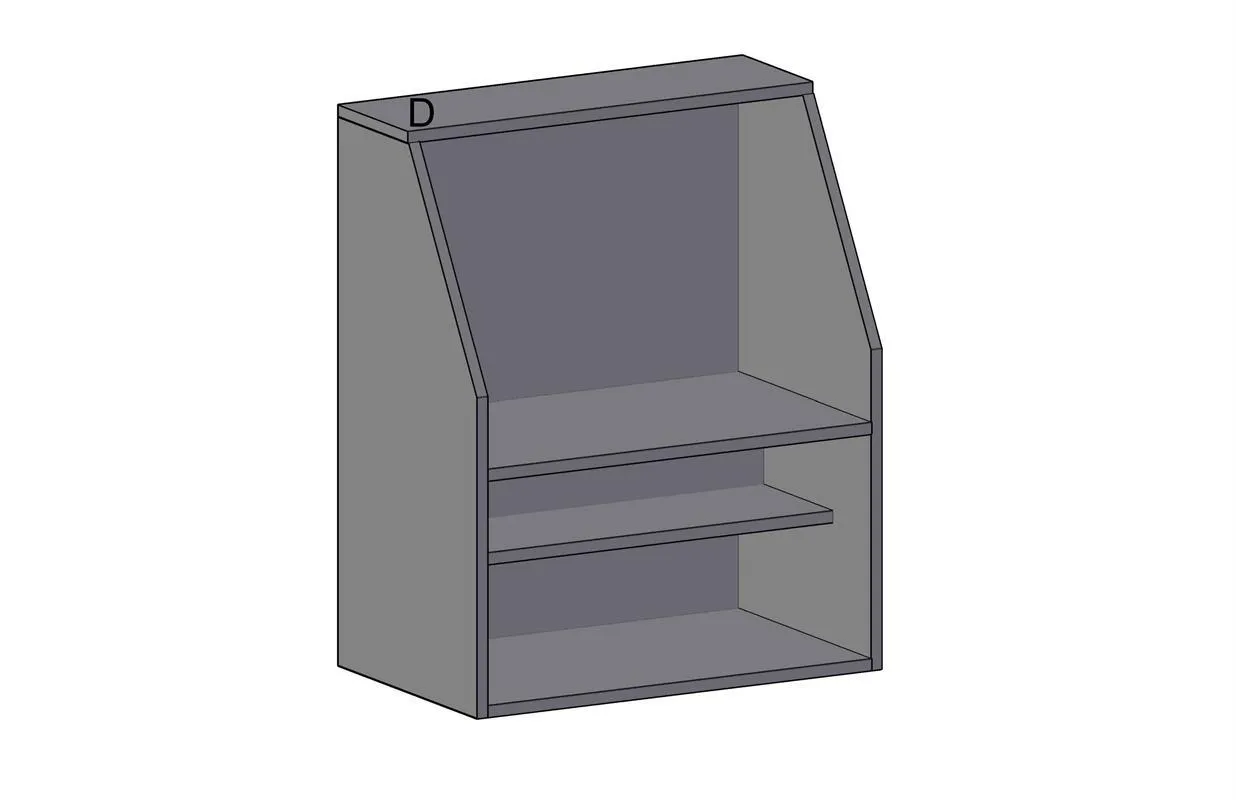
7Add Front Door
Attach the door using 3/4" overlay hinges. Install magnetic catch centered on the interior. (Underside of board A)
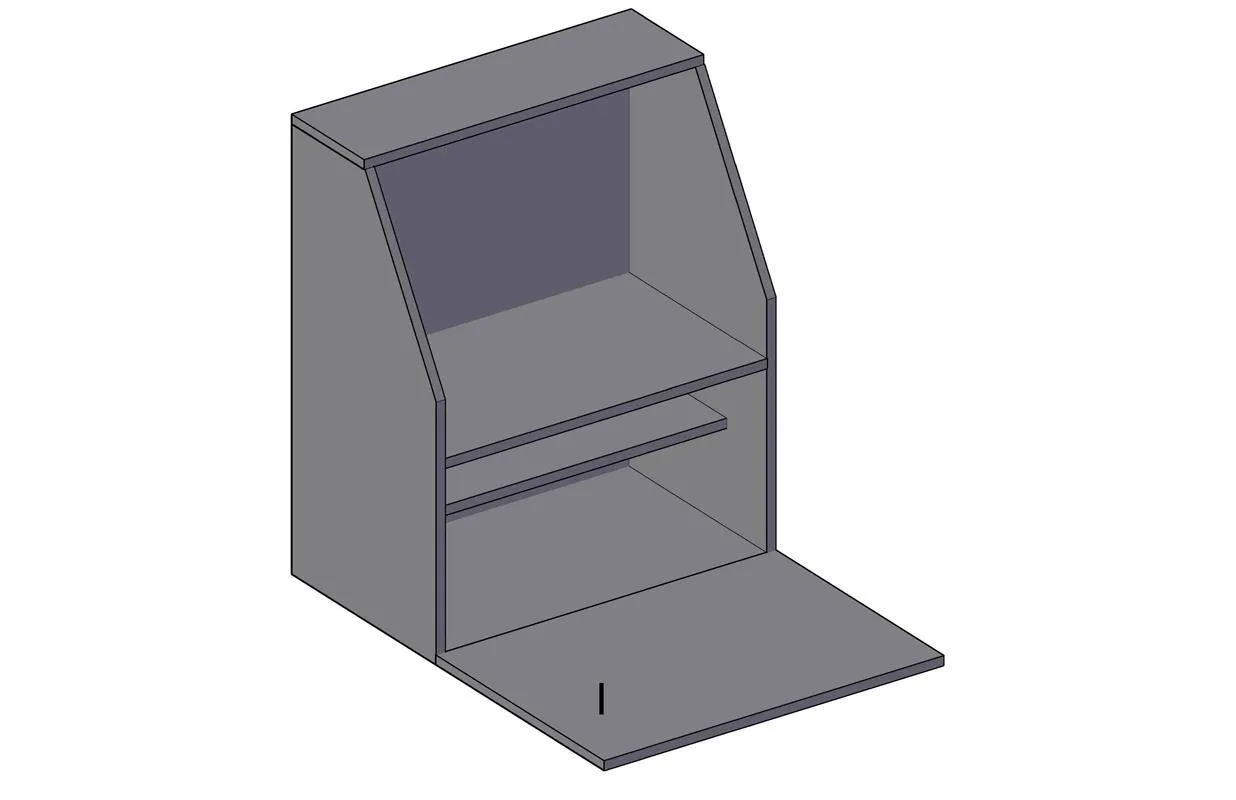
8Optional: Charatcter
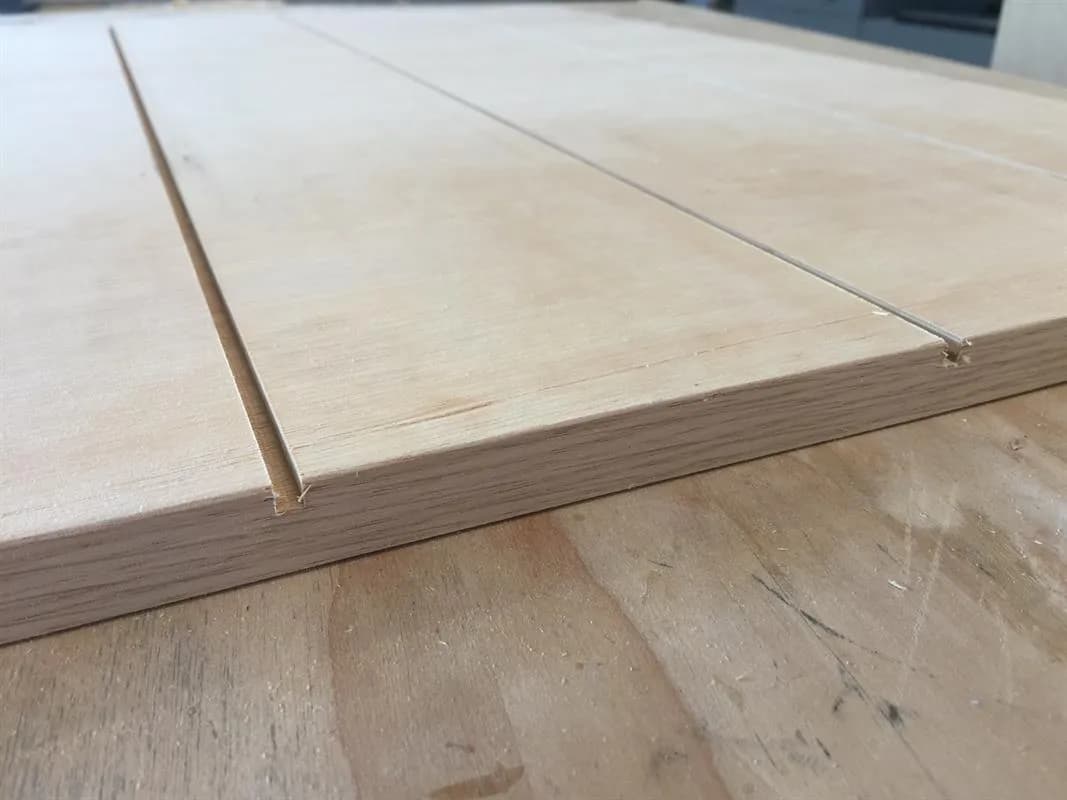
I added wood veneer banding to the exposed edges of plywood. I also used a table saw to cut 1/4" grooves in the front of my front door (I) to give it the appearance of planks. I also used the 1 1/2" wide cutoffs to create a lip on the top shelf.
Tags
- Entryway
- Intermediate
Reviews & builds
No reviews yet
Sign in to review this plan or share your build.
No reviews yet. Be the first to build this.