 Notch
- Difficulty
- Easy
- Time
- 3.3–6.5 hours
- Cost
- $$
About this build
This 5-in-1 Kids Art Station includes a dry erase board, magnetic chalkboard, art paper roll holder, kids art display, and an art supply organizer. It is easy to build and will provide hours of fun!
Tools
Essential
- Circular Saw
- Drill / Driver
- Jigsaw
- Miter Saw
- Pocket Hole Jig
- Random Orbit Sander
- Staple Gun
Materials
| Item | Qty |
|---|---|
| Board, 2x2 96" | 2 board |
| Board, 1x4 96" | 2 board |
| Board, 1x2 96" | 2 board |
| Plywood, 3/4" Thick 24" | 1 board |
| 1 1/4" pocket hole screws | 50 each |
| 1 1/4" finish nails | 50 each |
| 3/8" staples | 25 each |
Overall cost: $$. Lumber prices vary by region, species, and season, so we give a band rather than a figure we would only be pretending to know.
Cut list
| Part | Qty | T × W × L |
|---|---|---|
| Legs | 4 | 1" × 1" × 48" |
| Long aprons | 4 | 3/4" × 3 1/2" × 19" |
| Short Aprons | 4 | 3/4" × 3 1/2" × 13" |
| Shelf long apron | 2 | 3/4" × 1 1/2" × 19" |
| Shelf short apron | 2 | 3/4" × 1 1/2" × 13" |
| Chicken wire frame support | 2 | 3/4" × 1 1/2" × 29" |
| Art paper roll edge | 1 | 3/4" × 1 1/2" × 22" |
| Art shelf | 1 | 3/4" × 3 1/2" × 22" |
| Art shelf lip | 1 | 3/4" × 1 1/2" × 22" |
| Bottom shelf | 1 | 3/4" × 16" × 22" |
What to buy
Buy 9 boards at 8 ft.
1" × 1"
4 boards
3/4" × 16"
1 board
3/4" × 3 1/2"
2 boards
3/4" × 1 1/2"
2 boards
Assumes 8 ft stock, a 1/8" saw kerf, and buying each part at its own width. Change the board size or kerf on the full board plan →
Instructions
1Build front and back frames
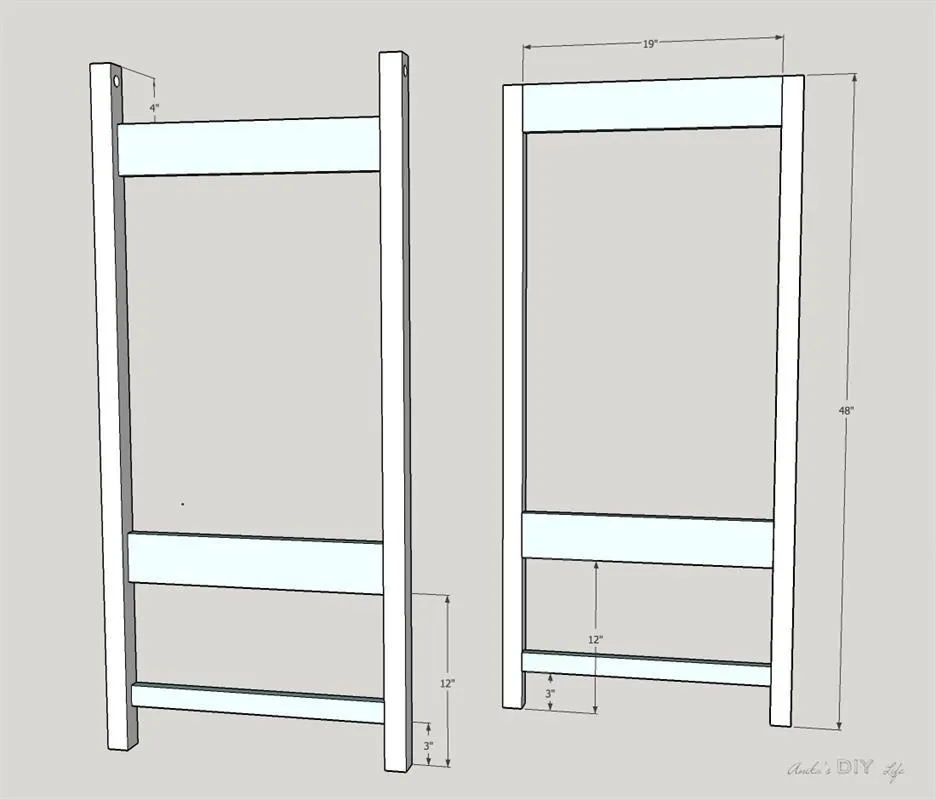
Drill 7/8" holes through the two of the legs for the art paper roll holder. Build the two front and back frames by attaching the long aprons and long shelf supports as shown using pocket holes and wood glue.
2Build chicken wire frame
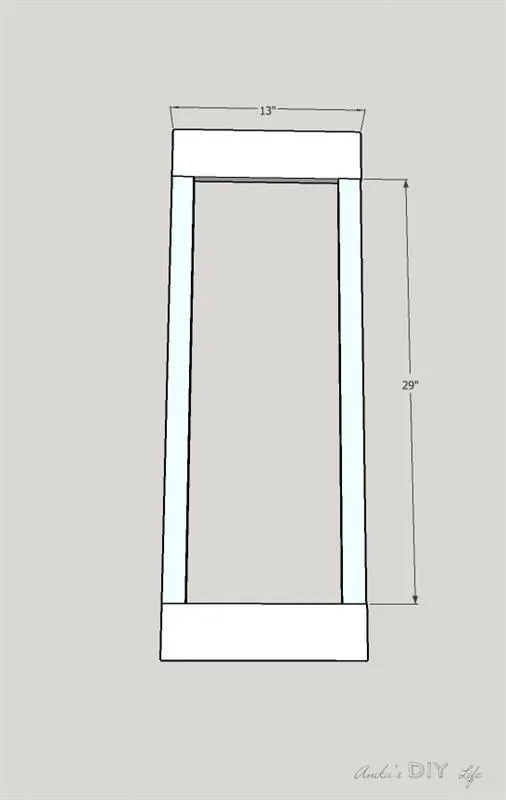
Build a frame for the chicken wire using the 1x2 chicken wire supports and 1x4 short aprons. The 1x2's are attached to the 1x4's by pocket hole screws and wood glue.
3Build the art center frame
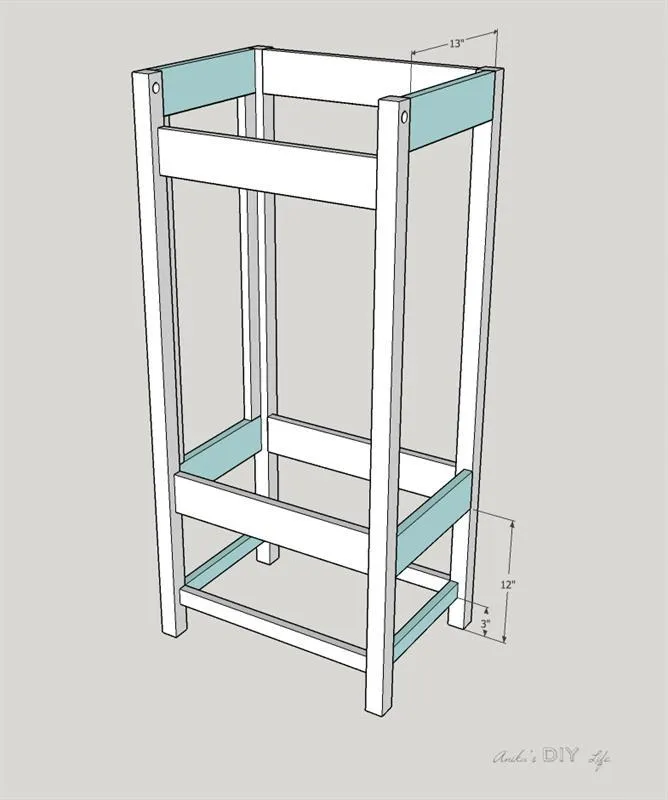
Connect the front and back frames together by adding the chicken wire frame and the remaining short aprons and shelf supports to create the overall art center frame.
4Add chalkboard and dry erase board
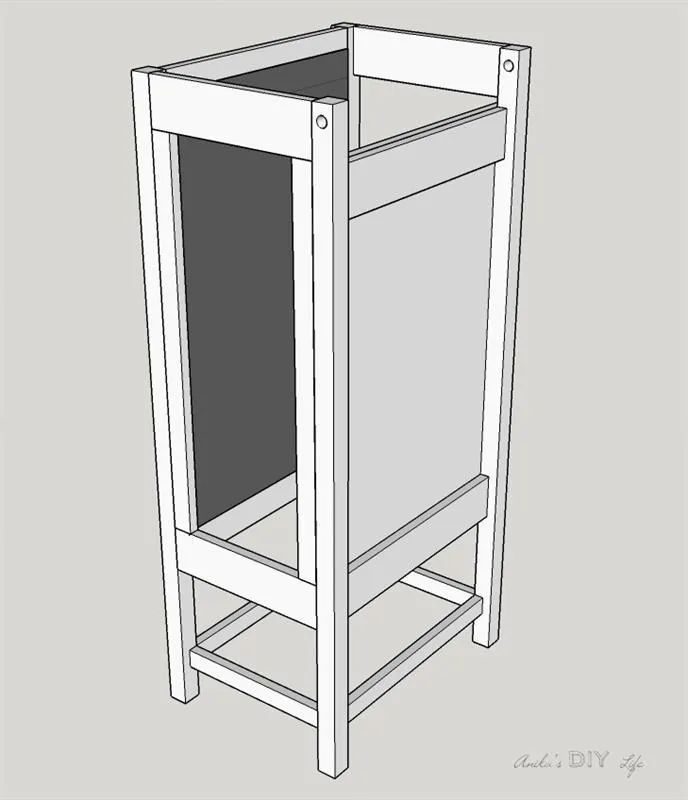
Paint or stain the frame in color of your choice. Then attach a magnetic chalkboard and the dry erase board on the front and back frames using a staple gun.
5Add Chicken wire and pegboard
Attach the chicken wire to the chicken wire frame using a staple gun. On the opposite end attach the pegboard organizer.
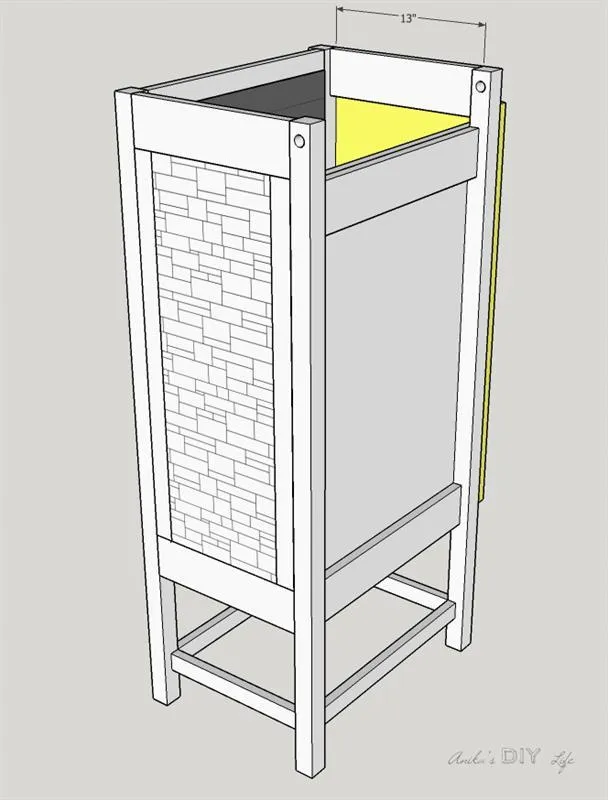
6Cover up raw ends
The sharp raw edges of the chicken wire and the magnetic chalkboard will be visible and accessible above the dry erase board. Cover these up by gluing and nailing 1 x4 aprons to the three visible sides.
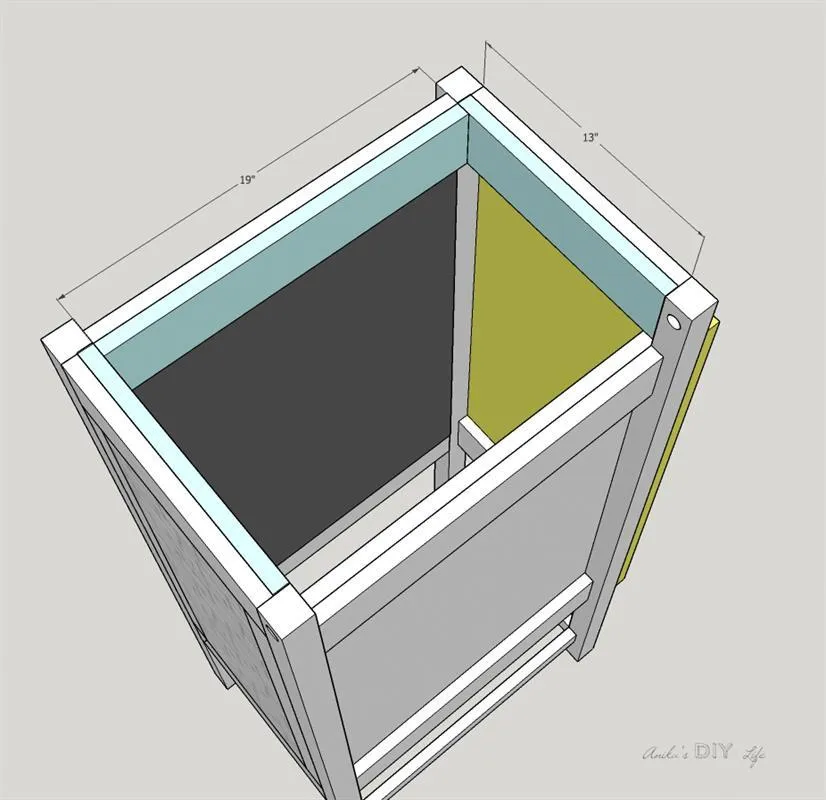
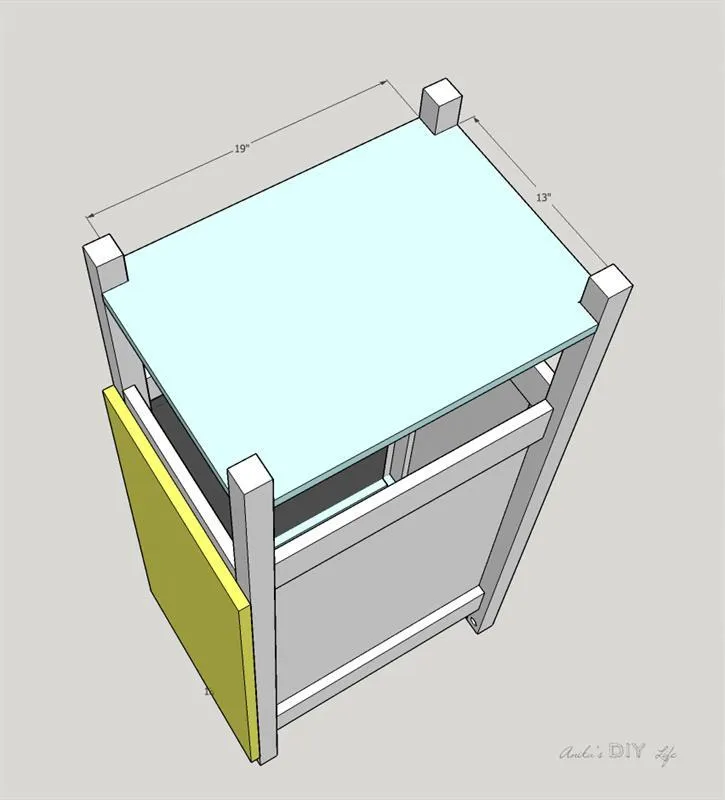
7Add shelf
- Cut out 1 1/2" corners on the 3/4" plywood to create the shelf.
- Attach it to the art center from the underside. This creates a shelf with a lip so the supplies do not fall off when the art center is moved.
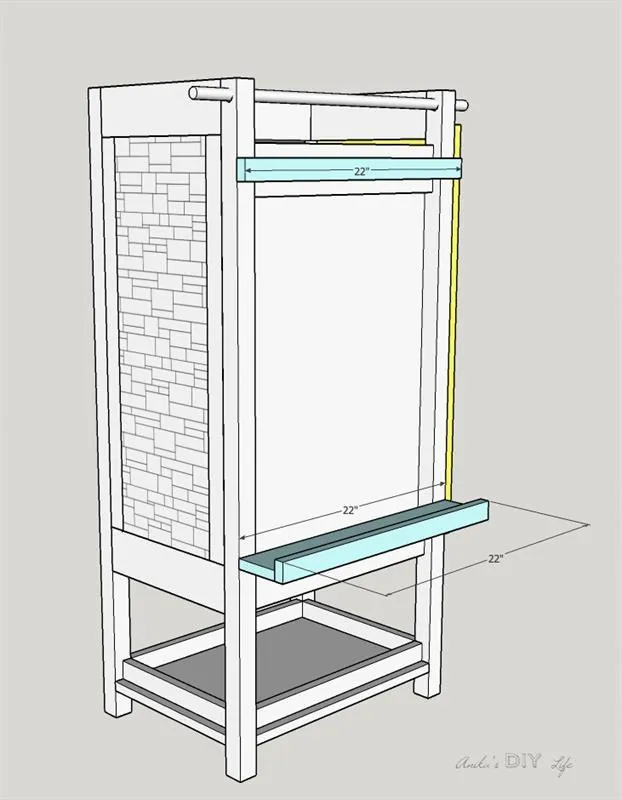
8Attach art paper roll holder
- Attach the 1x2 board in front of the top long apron using finish nails and glue to create a board for the paper roll to pass under. For the bottom shelf, first attach the 1x2 lip to the 1x4 shelf using finish nails and wood glue.
- Next, attach the 1x4 to the 2x2 legs using pocket hole screws on the bottom and glue. The pocket holes are only made on the ends of the 1 x4 where is meets the 2x2 legs.
9More Details
You can add locking casters to the bottom of the art center to make it moveable from one room to another. I opted to add felt pads so it is easy to turn around but not too easy for the kids to play with it. For more tips and tricks to make this art center, and more pictures of the project, please visit www.anikasdiylife.com
Tags
- Arts and Crafts
- Beginner
Reviews & builds
No reviews yet
Sign in to review this plan or share your build.
No reviews yet. Be the first to build this.