 Notch
- Difficulty
- Advanced
- Time
- 6.8–13.3 hours
- Cost
- $$$
About this build
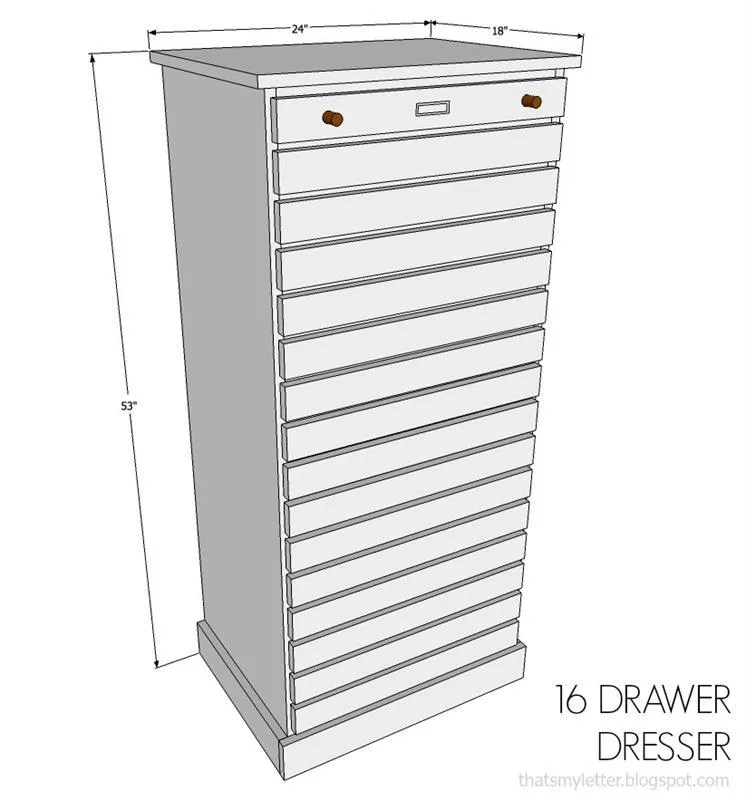
The perfect tall storage cabinet with 16 slim drawers for all sorts of things: papers, office supplies, linens, make up, socks or undergarments, hair supplies, and on and on. Perfect for the bedroom, office, dining room, hallway, really any room.
Tools
Essential
- Brad Nailer
- Circular Saw
- Drill / Driver
- Miter Saw
- Pocket Hole Jig
- Random Orbit Sander
Optional / nice to have
- Bar / Pipe Clamps
- Combination Square
- Tape Measure
Materials
| Item | Qty |
|---|---|
| Plywood, 3/4" Thick Full Sheet | 1 board |
| Plywood, 1/4" Thick Full Sheet | 2 board |
| Board, 1x2 96" | 24 board |
| Board, 1x4 72" | 1 board |
| Board, 1x3 96" | 4 board |
| 1 1/4" pocket hole screws | 50 each |
| 1 1/4" wood screws | 12 each |
| 2" finish nails | 100 each |
| 1 1/4" finish nails | 100 each |
| 3/4" finish nails | 100 each |
Overall cost: $$$. Lumber prices vary by region, species, and season, so we give a band rather than a figure we would only be pretending to know.
Cut list
| Part | Qty | T × W × L |
|---|---|---|
| Sides | 2 | 3/4" × 17" × 52" |
| Top & base | 2 | 3/4" × 17" × 21" |
| Top | 1 | 3/4" × 18" × 24" |
| Drawer dividers | 15 | 3/4" × 1 1/2" × 21" |
| Drawer supports | 30 | 3/4" × 1 1/2" × 2" |
| Drawer sides | 32 | 3/4" × 1 1/2" × 17" |
| Drawer front & back | 32 | 3/4" × 1 1/2" × 4" |
| Base molding front | 1 | 3/4" × 3 1/2" × 24" |
| Base molding sides | 2 | 3/4" × 3 1/2" × 17" |
| Drawer fronts | 16 | 3/4" × 2 1/2" × 2" |
| Drawer bottom | 16 | 1/4" × 17" × 20" |
| Backing | 1 | 1/4" × 22" × 52" |
What to buy
Buy 22 boards at 8 ft.
3/4" × 18"
1 board
3/4" × 17"
2 boards
3/4" × 3 1/2"
1 board
3/4" × 2 1/2"
1 board
3/4" × 1 1/2"
12 boards
1/4" × 22"
1 board
1/4" × 17"
4 boards
Assumes 8 ft stock, a 1/8" saw kerf, and buying each part at its own width. Change the board size or kerf on the full board plan →
Instructions
1Dimensions
16 drawer dresser measures 53"h x 24"w x 18"d. These measurements allow you to make the carcass from one sheet of plywood.
2Step 1
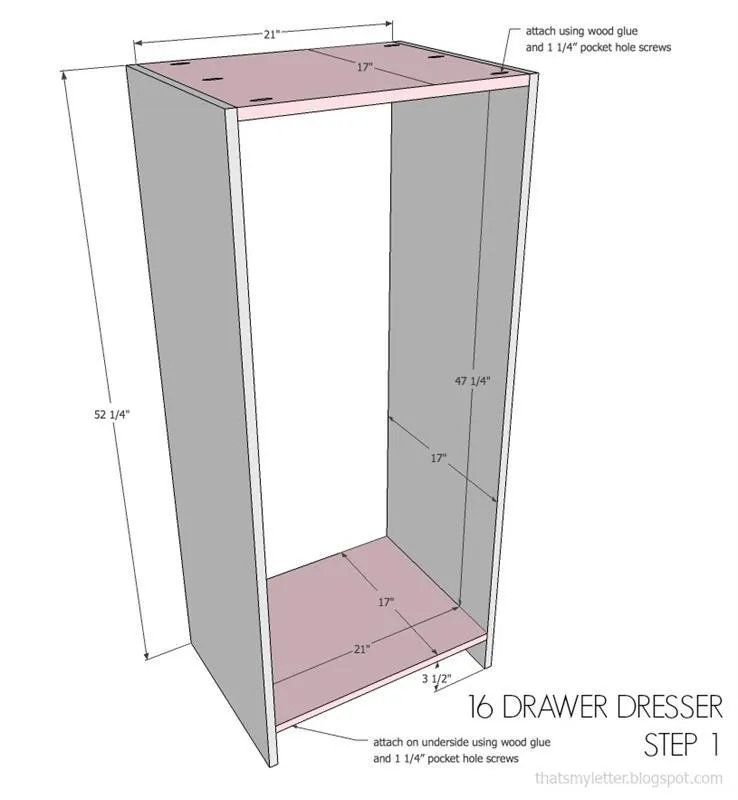
Attach top and bottom to sides using wood glue and 1 1/4" pocket hole screws.
3Step 2
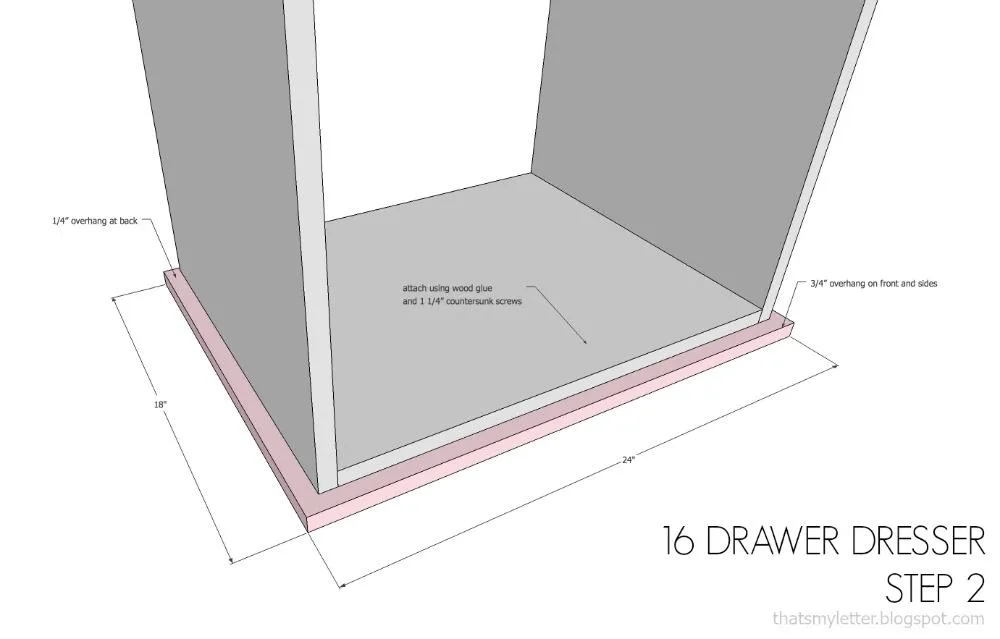
Attach top to top of carcass using wood glue and 1 1/4" countersunk screws.
4Step 3
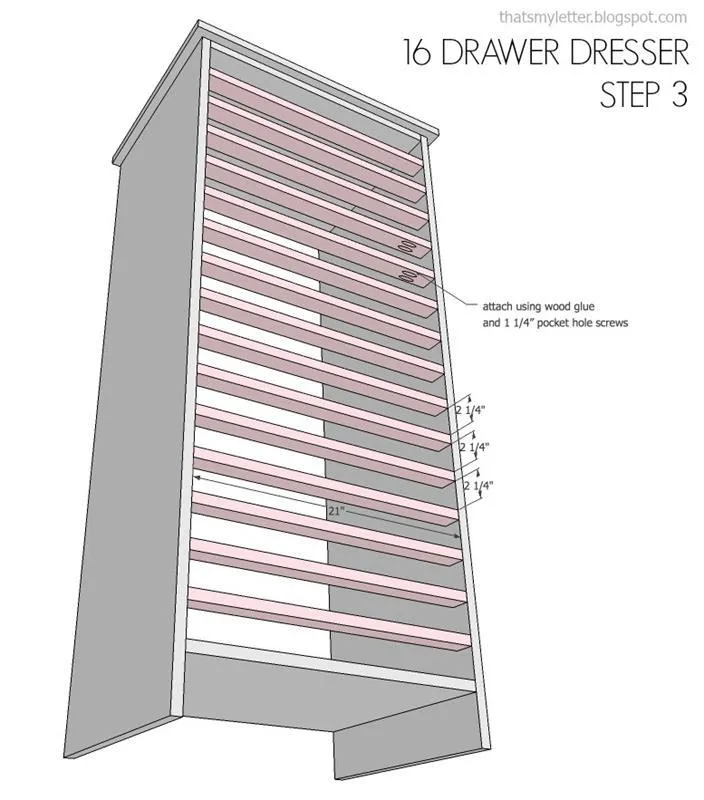
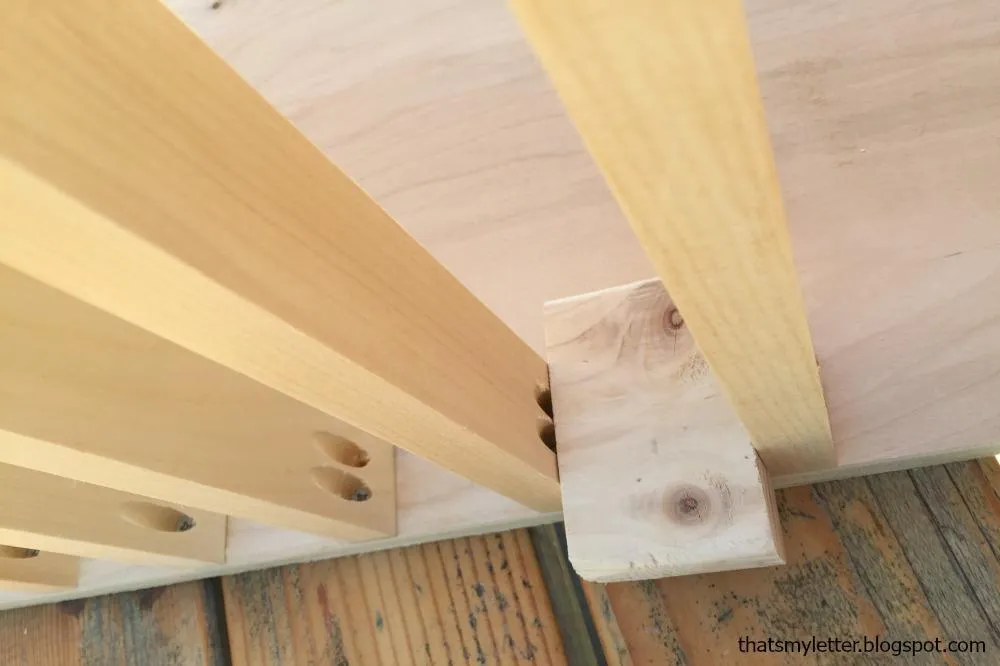
Create drawer dividers by attaching to sides of carcass using wood glue and 1 1/4" pocket hole screws. Start at the top and work down.
5Step 3 continued
Use a scrap wood spacer between drawer dividers to ensure accurate and even spacing.
6Step 4
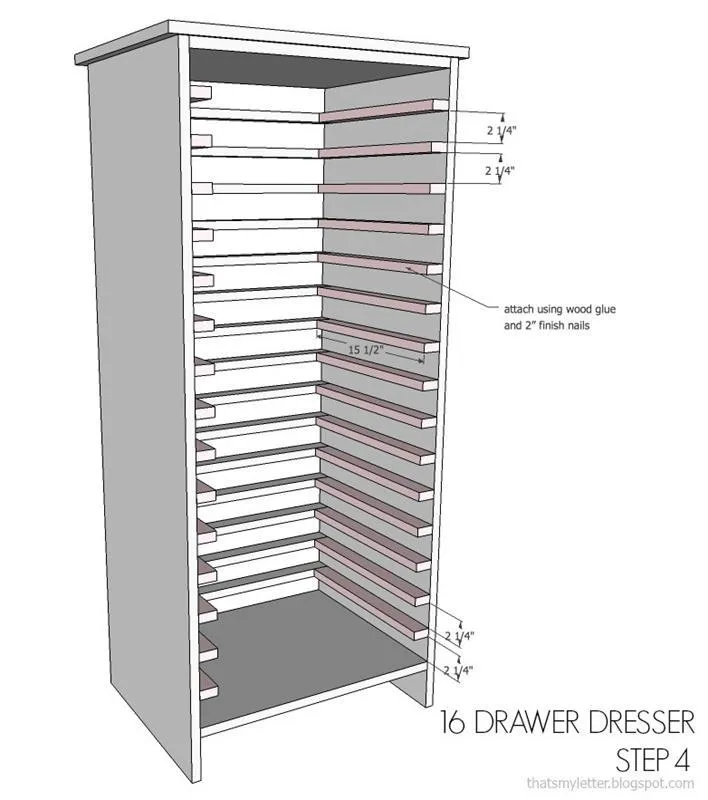
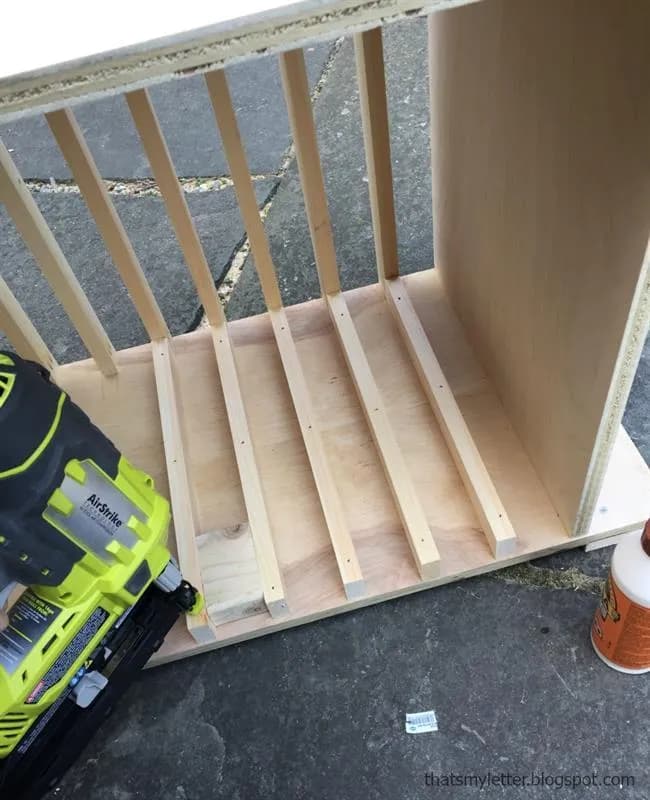
Attach drawer side supports to side of carcass using wood glue and 2" finish nails.
7Step 4 continued
Again use a scrap wood spacer for even and accurate spacing between supports.
8Step 5
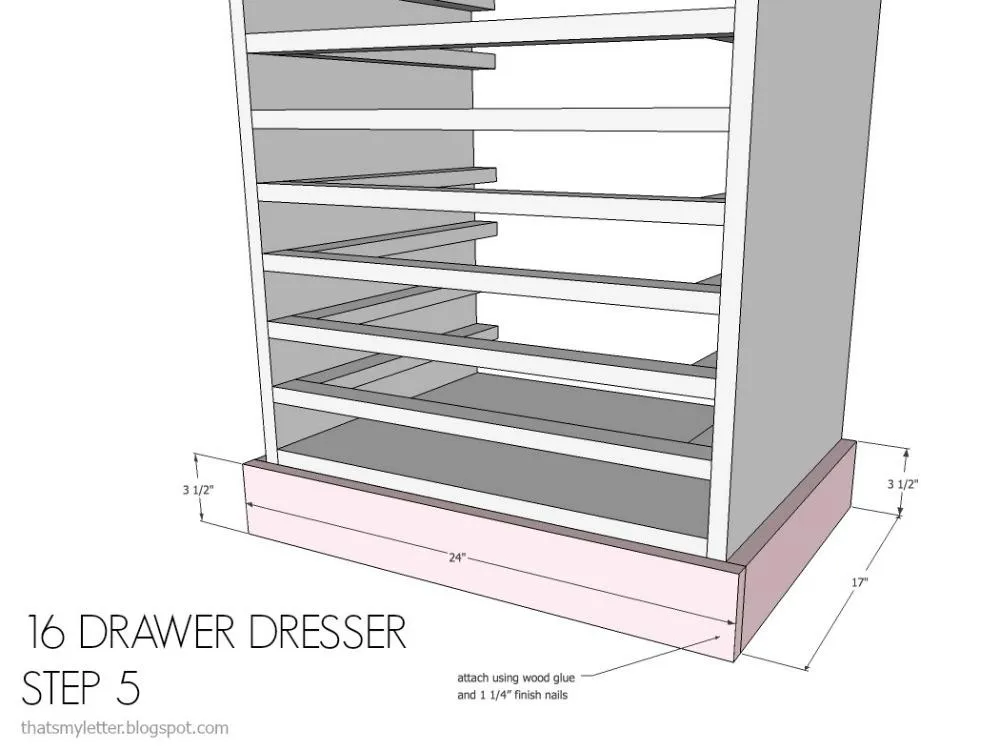
Attach base molding using wood glue and 1 1/4" finish nails.
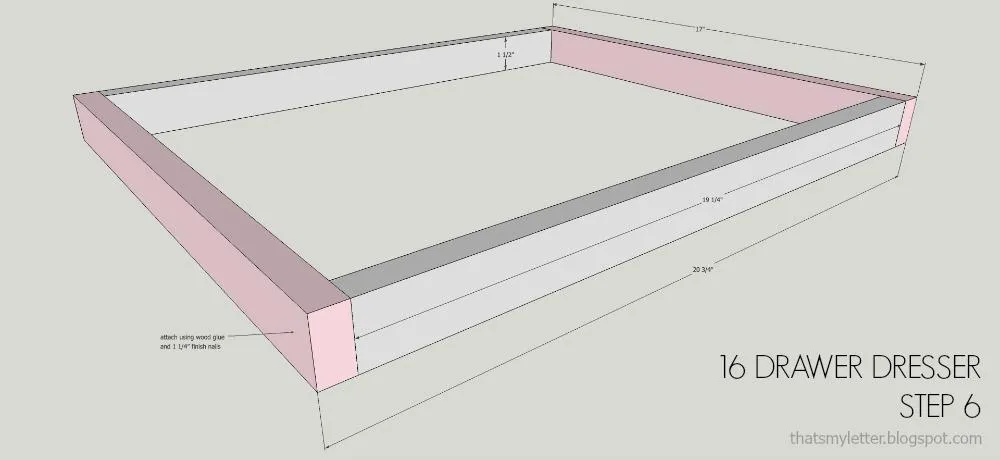
9Step 6
Make drawer box by attaching sides using wood glue and 1 1/4" finish nails.
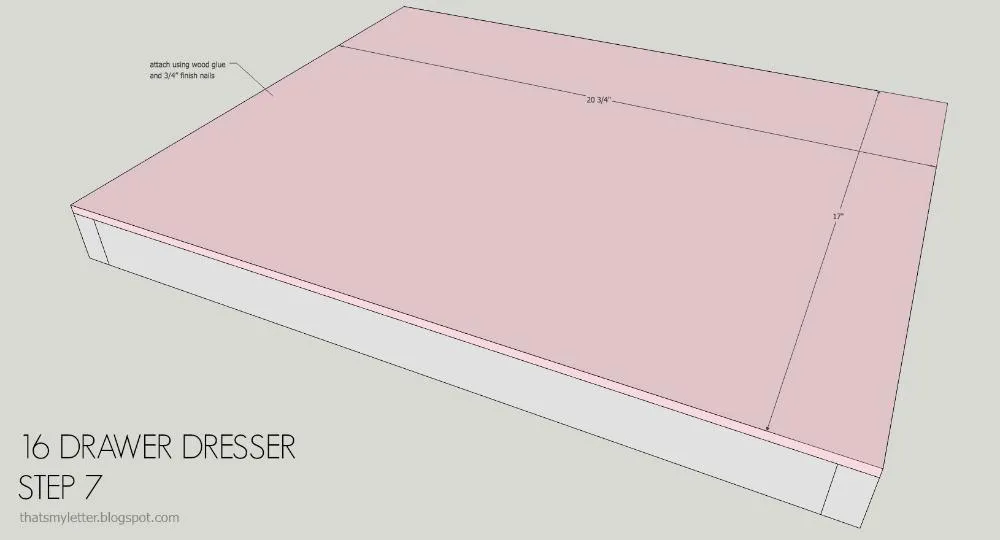
10Step 7
Attach drawer bottom to box using wood glue and 3/4" finish nails
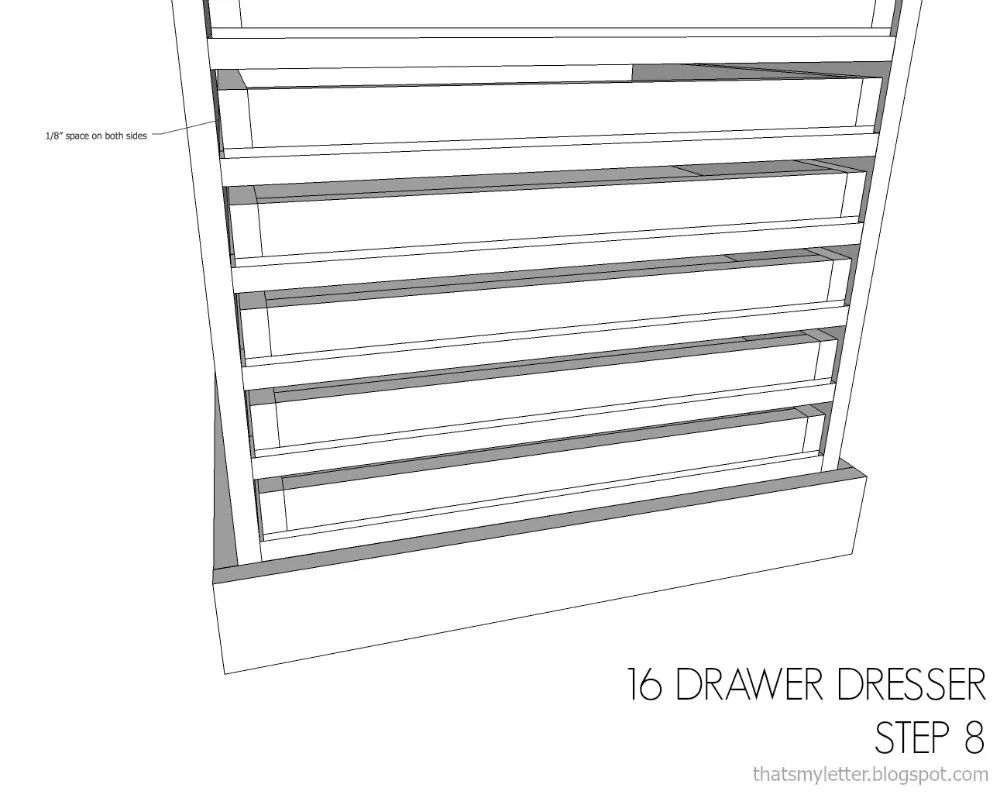
11Step 8
Insert drawers into shelves. There should be an 1/8" clearance on each side.
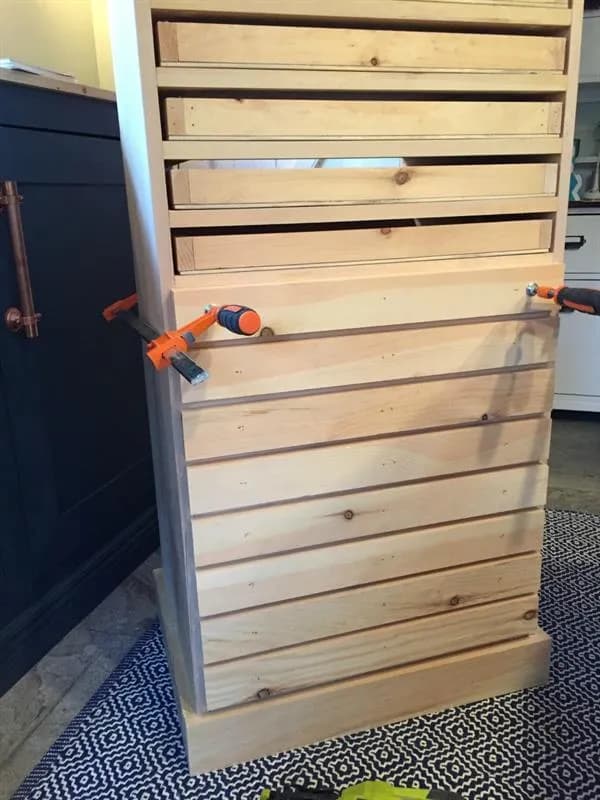
12Step 8 continued
Attach drawer faces to drawers using wood glue and 1 1/4" finish nails. Try to place nails where they will be hidden by hardware. Use clamps to hold face in place and push against drawer body from back while nailing in place.
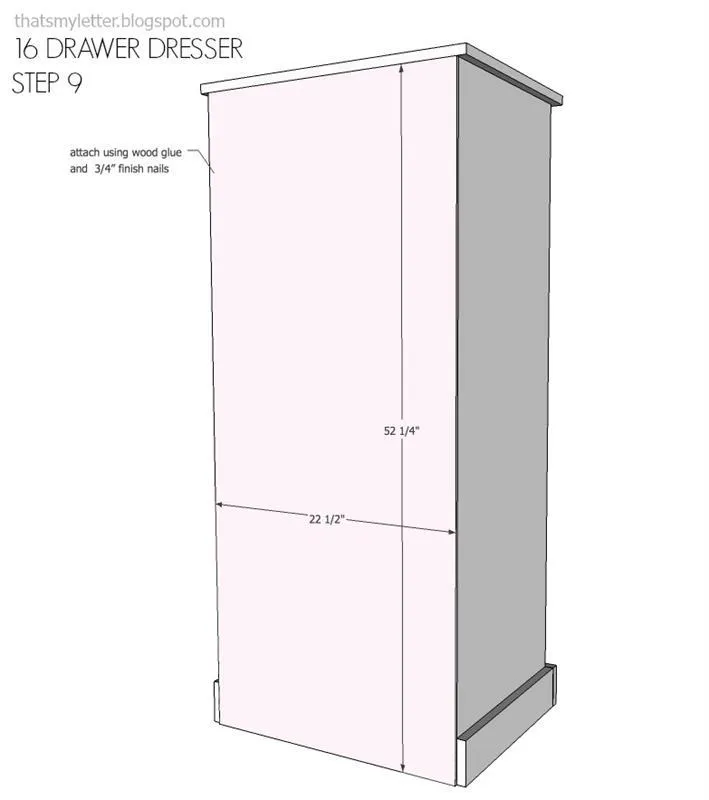
13Step 9
Attach backing using wood glue and 3/4" finish nails.
Tags
- Bedroom
- Advanced
Reviews & builds
No reviews yet
Sign in to review this plan or share your build.
No reviews yet. Be the first to build this.